
1. Киришүү
This manual provides instructions for the setup, operation, maintenance, and troubleshooting of the InFocus LP540 Multimedia Video Projector. The LP540 is designed for presenting visual content with an XGA 1024x768 native resolution and 1700 ANSI lumens brightness. It features a zoom lens with manual focus and zoom adjustment, and includes a 2-watt speaker for audio output.
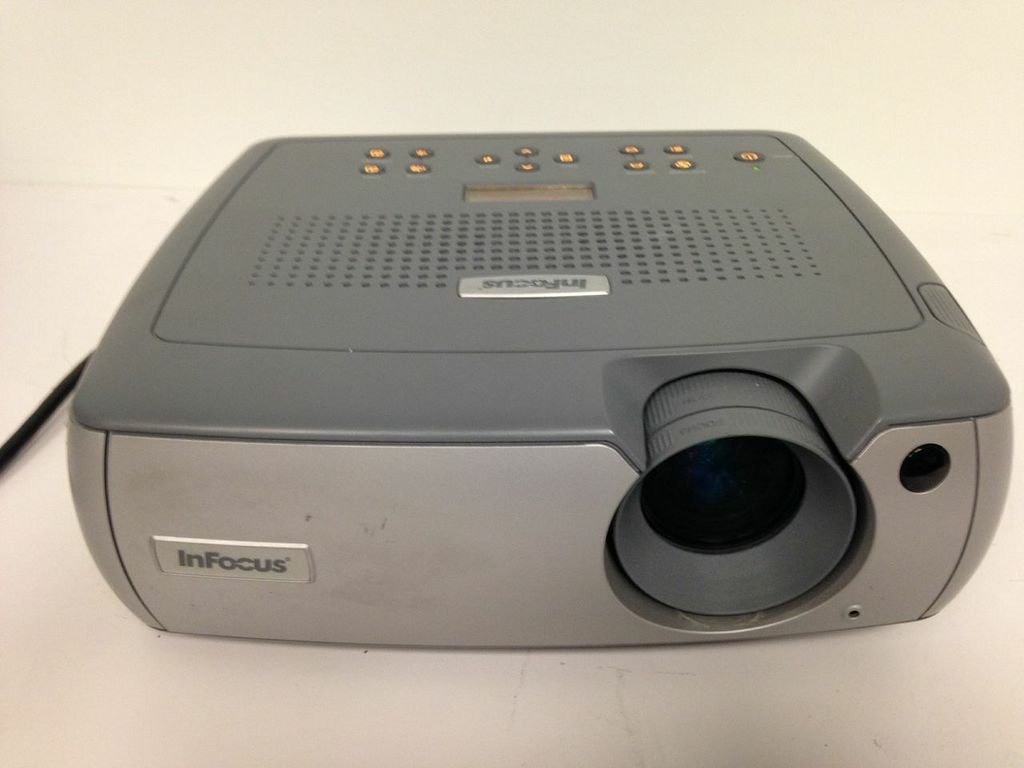
1-сүрөт: алдыңкы жагы view of the InFocus LP540 Projector, showing the lens and InFocus branding.
2. Орнотуу
2.1 Пакеттен чыгаруу жана мазмуну
Carefully unpack the projector and verify that all components are present:
- InFocus LP540 Projector
- Navigator remote control
- Электр зымы
- M1-A computer cable with USB mouse
- 3.5mm computer audio cable
- RCA аудио/видео кабели
- Түстүү коддуу кабелдик боолор
- Жумшак алып жүрүүчү куту
- User's guide and CD
2.2 Проекторду жайгаштыруу
The LP540 supports front, rear, and ceiling projection methods. For optimal image quality, place the projector on a stable, flat surface or mount it securely. Ensure adequate ventilation around the unit.
2.3 Кубатты туташтыруу
- Кубат шнурунун проектордун кубат розеткасына туташтырыңыз.
- Электр шнурунун экинчи учун жерге туташтырылган электр розеткасына сайыңыз.
2.4 Connecting Video and Audio Sources
The LP540 offers various input ports for video and audio connections. Refer to Figure 2 for port locations.

Figure 2: Rear panel of the InFocus LP540 Projector, displaying monitor out, computer in, audio in, video in, and serial control ports.
- Computer Input: Use the M1-A computer cable to connect your computer to the 'computer 1' or 'computer in' port. The M1-A cable also supports USB mouse functionality.
- Video Input: Connect video sources (e.g., DVD player, VCR) using the RCA audio/video cable to the 'video in' ports (yellow for video, red/white for audio).
- Аудио киргизүү: For separate audio input from a computer, use the 3.5mm computer audio cable to connect to the 'audio in' port.
- Serial Control: The 'serial control' port (RS-232) allows for external control of the projector.
- Монитор чыгып: The 'monitor out' port allows you to connect an external monitor to display the same image as the projector.
2.5 Сүрөттү тууралоо
After connecting and powering on, adjust the image:
- Фокус: Объективдеги фокус шакекти сүрөт так жана тунук болгонго чейин айлантыңыз.
- Чоңойтуу: Adjust the zoom ring on the lens to achieve the desired image size. The projector can display images from 40 inches to 300 inches diagonally.
3. Проекторду иштетүү
3.1 Күйгүзүү/өчүрүү
- Күйгүзүү үчүн: Press the power button on the projector's control panel or the remote control. The power indicator light will illuminate.
- Өчүрүү үчүн: Press the power button again. The projector will enter a cooling cycle before completely shutting down. Do not unplug the projector during the cooling cycle.
3.2 Алыстан башкарууну колдонуу
The included navigator remote control allows for convenient operation of the projector from a distance. It provides access to menu navigation, input selection, volume control, and other functions.
3.3 Киргизүү булагын тандоо
Use the 'Input' button on the projector's control panel or remote control to cycle through available input sources (e.g., Computer 1, Video). The projector will automatically detect active signals.
3.4 Экрандагы дисплей (OSD) менюсу
Press the 'Menu' button on the projector or remote to access the On-Screen Display. Use the arrow keys to navigate and 'Enter' to select options. The OSD allows adjustment of various settings:
- Сүрөт жөндөөлөрү: Жарыктыгын, контрастын, түсүн, өңүн жана курчтугун тууралаңыз.
- Дисплейдин жөндөөлөрү: Change aspect ratio, keystone correction, and projection method.
- Аудио жөндөөлөрү: Үндү башкаруу жана үнсүз кылуу.
- Өркүндөтүлгөн орнотуулар: Кирүү lamp timer, language, and other system options.
3.5 Аудио чыгаруу
The projector features a built-in 2-watt speaker. Adjust the volume using the remote control or the OSD menu. Ensure external audio sources are properly connected to the 'audio in' ports.
3.6 Wireless Connectivity (Optional)
The LP540 supports wireless connectivity with a LiteShow module (sold separately). Refer to the LiteShow module's documentation for installation and setup instructions.
4. Техникалык тейлөө
4.1 Лamp Кам көрүү жана алмаштыруу
Проектор лamp чектүү өмүрү бар. Качан лamp life is nearing its end, a warning message may appear, or the image brightness may decrease significantly. Replace the lamp with an authorized InFocus replacement lamp only. Refer to the full user manual on the included CD for detailed lamp алмаштыруу көрсөтмөлөрү.
4.2 Линзаны тазалоо
Use a soft, lint-free cloth specifically designed for optical lenses to gently clean the projector lens. Avoid using abrasive cleaners or excessive force, as this can scratch the lens surface.
4.3 Аба чыпкаларын тазалоо
Regularly clean the projector's air filters to ensure proper ventilation and prevent overheating. Dust and debris can accumulate, reducing cooling efficiency. Refer to the full user manual for filter location and cleaning procedures.
4.4 Жалпы тазалоо
Wipe the projector's exterior casing жумшак менен, гamp cloth. Do not use harsh chemicals or solvents. Ensure the projector is powered off and unplugged before cleaning.
5. Кыйынчылыктарды
This section addresses common issues you may encounter with the InFocus LP540 projector. For more detailed troubleshooting, consult the complete user manual.
- Кубат жок:
- Кубат шнуру проекторго да, иштеп жаткан электр розеткасына да бекем туташтырылганын текшериңиз.
- Check if the power indicator light is on. If not, try a different outlet.
- Экранда сүрөт жок:
- Verify that the correct input source is selected (e.g., Computer 1, Video).
- Check all video cables for secure connections.
- Ensure the computer or video source is powered on and outputting a signal.
- Adjust the projector's brightness and contrast settings via the OSD menu.
- Poor Image Quality (Blurry, Distorted, Incorrect Colors):
- Линзадагы фокус жана масштабдоо шакекчелерин тууралаңыз.
- Check the resolution settings on your computer to ensure they are compatible with the projector's native resolution (1024x768).
- Эгерде сүрөт трапеция формасында болсо, негизги ташты оңдоңуз.
- Adjust color, tint, and sharpness settings in the OSD menu.
- Үн жок:
- Ensure audio cables are securely connected to the 'audio in' port.
- Check the volume level on the projector and the audio source.
- Verify that the projector is not muted.
- Алыстан башкаруу иштебейт:
- Пульттун батареяларын текшерип, алмаштырыңыз.
- Пульт менен проектордун IR ресиверинин ортосунда эч кандай тоскоолдуктар жок экенин текшериңиз.
6. Техникалык шарттар
The following table details the technical specifications for the InFocus LP540 Multimedia Video Projector:
| Өзгөчөлүк | Спецификация |
|---|---|
| Бренд | InFocus |
| Модель аты | LP540 |
| Дисплей түрү | LCD |
| Native Resolution | 1024 x 768 (XGA) |
| Жарыктык | 1700 ANSI Lumens (max.) |
| Контраст катышы | 400:1 |
| Сүрөттүн өлчөмү (диагоналдык) | 40 дюймдан 300 дюймга чейин |
| Байланыш технологиясы | USB |
| Аппараттык байланыш | USB |
| Өзгөчө өзгөчөлүк | Камтылган динамиктер |
| Аудио чыгаруу | Эки 2 ватттык динамик |
| Lamp Ватtage | 170 Ватт |
| Ватtage (Жалпы) | 260 ватт |
| Башкаруу ыкмасы | Remote, Keypad, RS-232 |
| Форма фактору | Portable |
| Монтаж түрү | Столдун үстү |
| Элемент Салмагы | 14.6 фунт |
| Тышкы тестирлөөнүн сертификаты | UL |
| UPC | 797212604897 |
7. Кепилдик маалыматы
The InFocus LP540 Projector comes with a 2-year projector warranty. Please retain your proof of purchase for warranty claims. For specific terms and conditions, refer to the warranty documentation included with your product or contact InFocus customer support.
8. Колдоо
For further assistance, technical support, or service inquiries regarding your InFocus LP540 Multimedia Video Projector, please visit the official InFocus webсайтка же кардарларды тейлөө бөлүмүнө кайрылыңыз. Байланыш маалыматы, адатта, өндүрүүчүнүн сайтынан тапса болот website or in the full user manual provided on the included CD.