
1. Киришүү
This manual provides instructions for the installation, operation, maintenance, and troubleshooting of the Juniper EX3200-24T Layer 3 Switch. The EX3200-24T is a fixed-configuration switch designed for access-layer deployments in various network environments, offering comprehensive Layer 2 and Layer 3 switching capabilities.
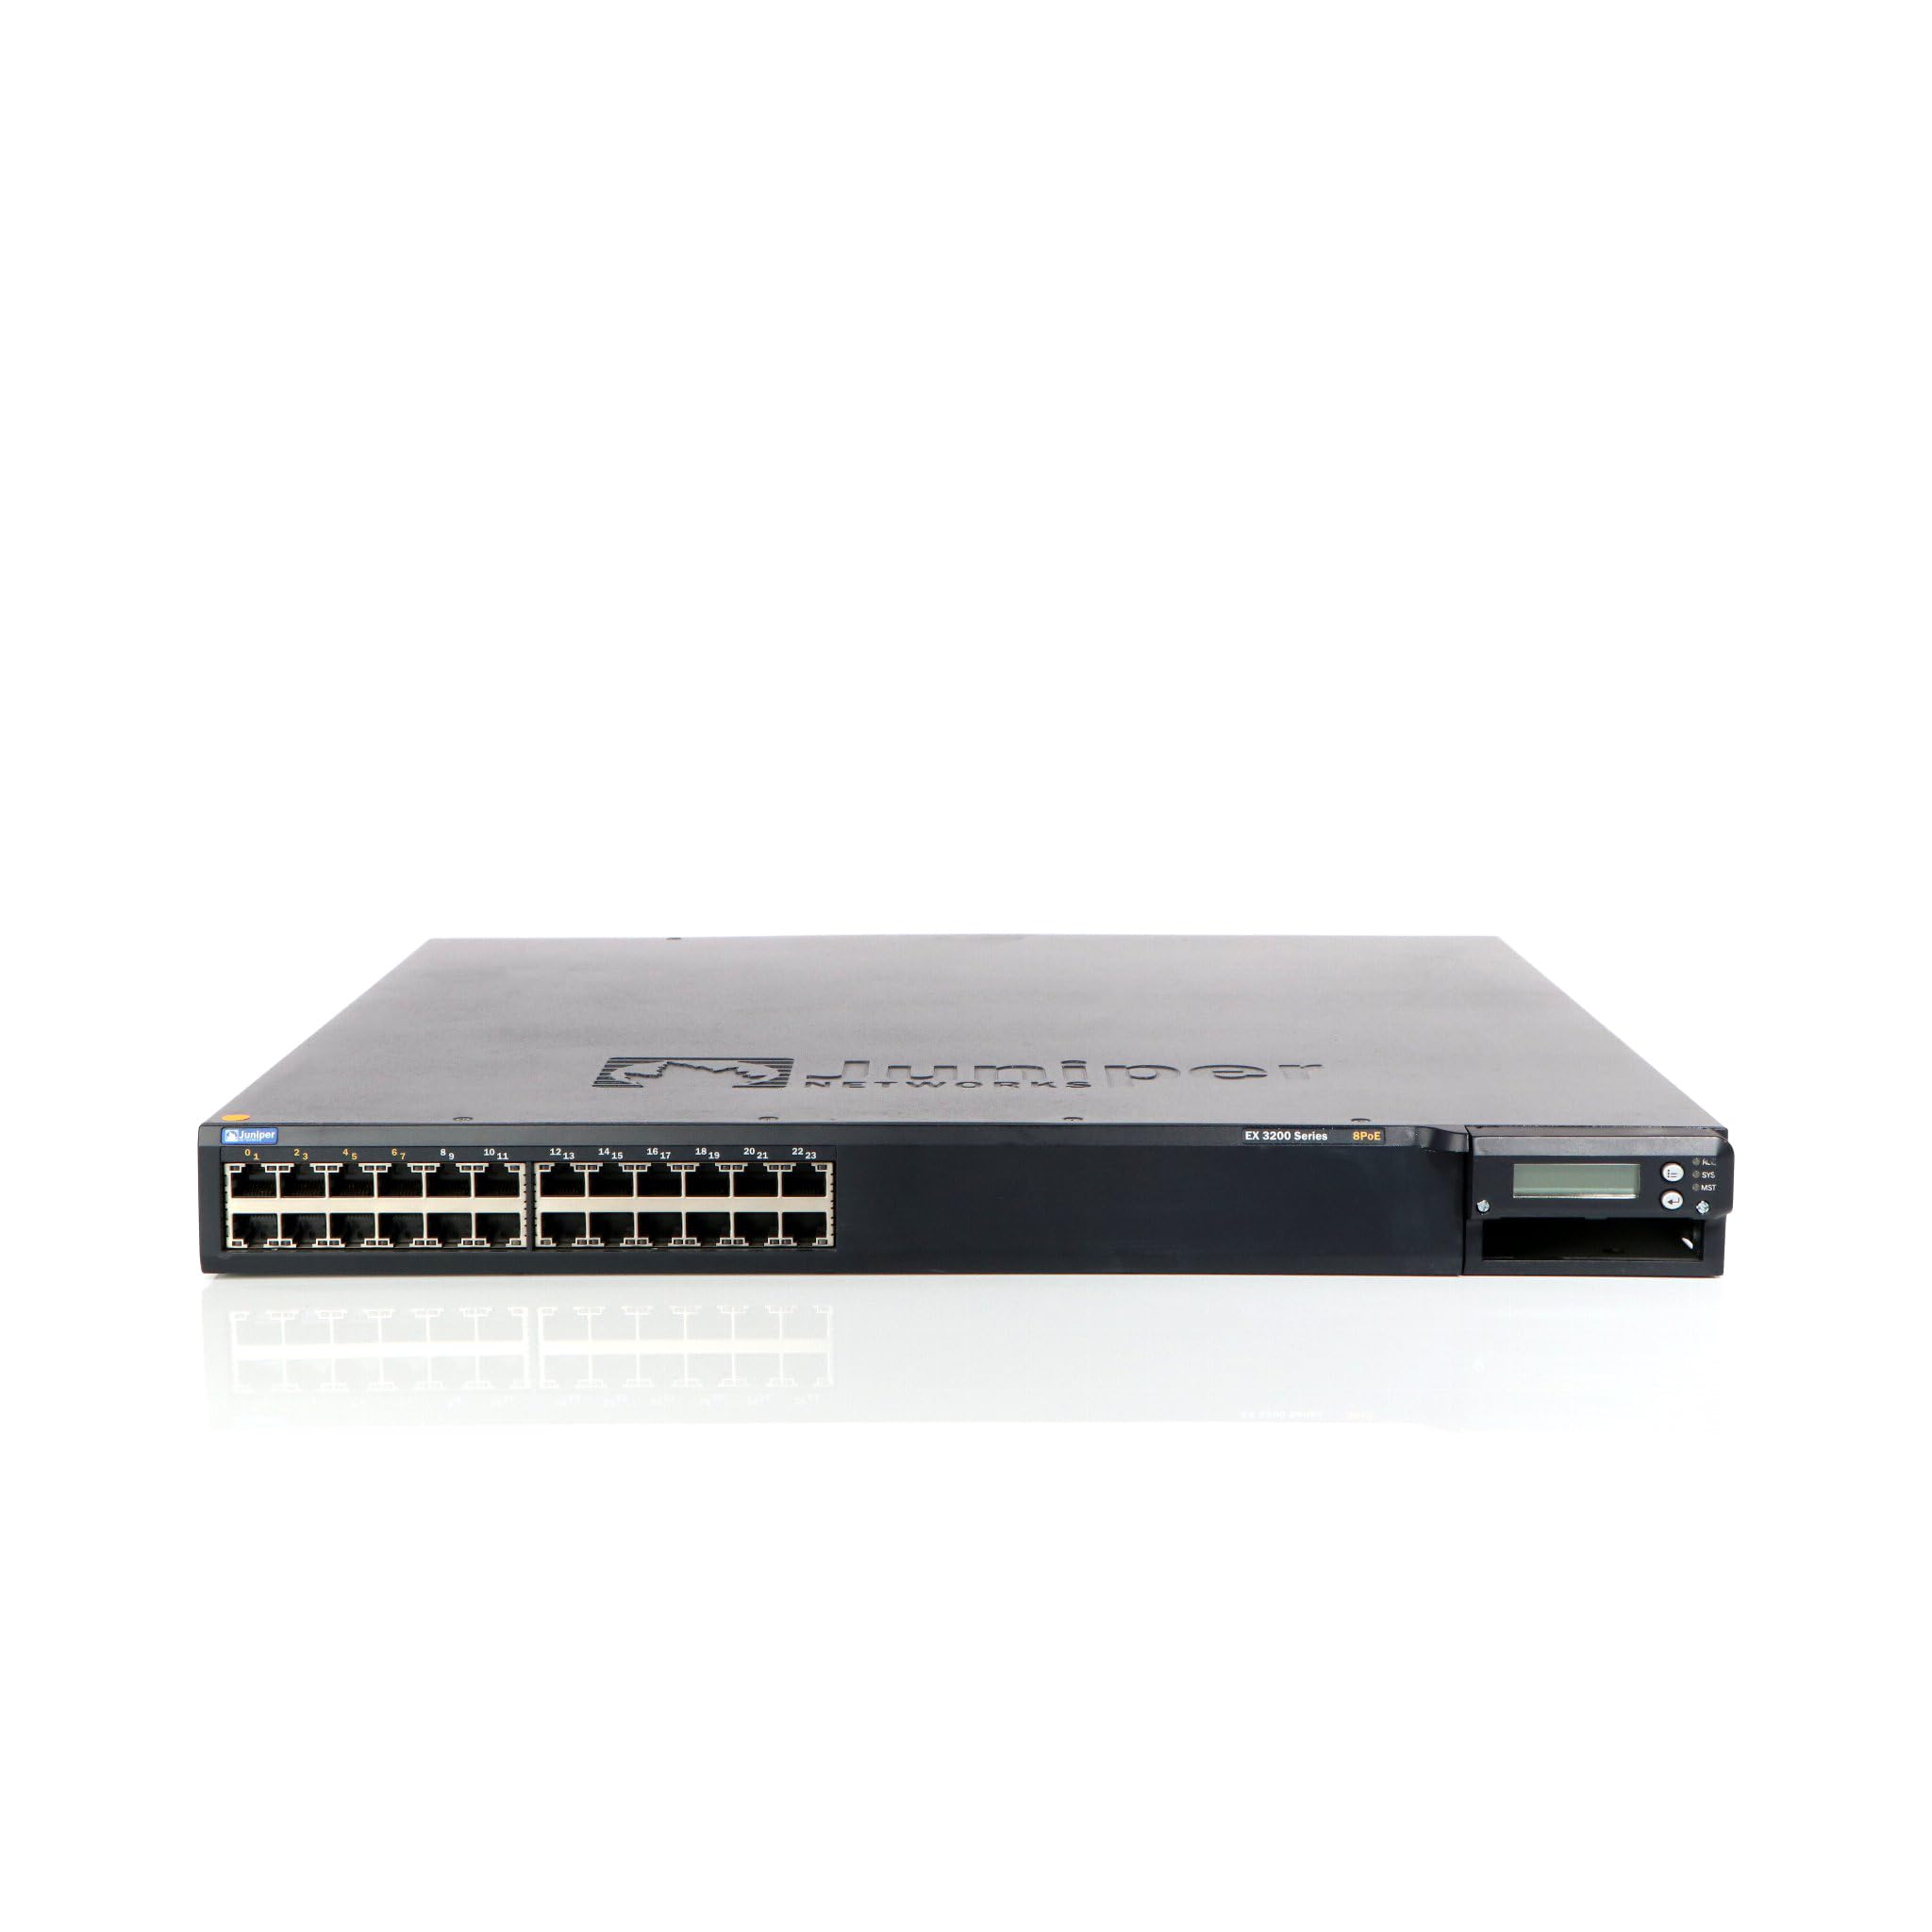
Сүрөт 1: Алдыңкы view of the Juniper EX3200-24T Layer 3 Switch. This image displays the 24 Ethernet ports, along with various status indicator lights and the Juniper Networks branding.
2. Орнотуу
Follow these steps to properly set up your Juniper EX3200-24T switch.
2.1 Таңгактан чыгаруу жана текшерүү
- Которгучту анын таңгагынан этияттык менен алып салыңыз.
- Inspect the switch for any signs of physical damage. If damage is found, contact your vendor immediately.
- Таңгактоо тизмесинде саналган бардык компоненттер бар экенин текшериңиз.
2.2 Стеллажды орнотуу (милдеттүү эмес)
The EX3200-24T can be mounted in a standard 19-inch equipment rack. Use the provided rack-mount kit and follow the instructions included with the kit for secure installation.
2.3 Кубатты туташтыруу
- Ensure the power switch on the rear panel of the switch is in the OFF position.
- Connect the provided AC power cord to the power inlet on the rear of the switch.
- Электр шнурунун экинчи учун жерге туташтырылган электр розеткасына сайыңыз.
2.4 Тармактык кабелдерди туташтыруу
Connect Ethernet cables from your network devices (computers, servers, other switches) to the 10/100/1000Base-T ports on the front panel of the EX3200-24T switch. Ensure cables are securely seated.
3. Иштөө нускамалары
This section outlines the basic operation of the Juniper EX3200-24T switch.
3.1 Которгучту күйгүзүү
After connecting the power cord, flip the power switch on the rear panel to the ON position. The system status LEDs on the front panel will illuminate during the boot process.
3.2 Understanding Status LEDs
Алдыңкы панелде коммутатордун жана анын портторунун иштөө абалын көрсөтүү үчүн ар кандай LED жарыктары бар:
- SYS LED: Indicates system status (e.g., green for normal operation, amber for warning, red for critical error).
- ALM LED: Ойготкучтун абалын көрсөтөт.
- PPM LED: Indicates power supply module status.
- Порт диоддору: Each port has LEDs indicating link status and activity (e.g., green for link, blinking green for activity).
3.3 Баштапкы конфигурация (Консолго кирүү)
Баштапкы конфигурациялоо үчүн, башкаруу жумуш станцияңыздан консоль кабелин (RJ-45тен DB-9га чейин) коммутатордун консоль портуна туташтырыңыз. Төмөнкү жөндөөлөр менен терминалдык эмуляция программасын (мисалы, PuTTY, Tera Term) колдонуңуз:
- Бод ылдамдыгы: 9600
- Маалымат биттери: 8
- Паритет: Жок
- Токтотуу биттери: 1
- Агымды башкаруу: Жок
Refer to the Juniper Networks documentation for detailed configuration procedures.
4. Техникалык тейлөө
Regular maintenance ensures optimal performance and longevity of your EX3200-24T switch.
4.1 Тазалоо
- Коммутатордун сыртын мезгил-мезгили менен жумшак, кургак, мамыксыз чүпүрөк менен тазалап туруңуз.
- Ensure ventilation openings are free from dust and obstructions to prevent overheating. Do not use liquid or aerosol cleaners directly on the switch.
4.2 Микропрограмма жаңыртуулары
Juniper Networks periodically releases firmware updates to improve performance, add features, and address security vulnerabilities. It is recommended to keep the switch firmware updated. Refer to the official Juniper Networks support webакыркы микропрограммалык камсыздоо жана жаңыртуу процедуралары үчүн сайт.
4.3 Айлана-чөйрөнү коргоо
Operate the switch within its specified environmental limits (temperature, humidity) to prevent damage and ensure reliable operation. Avoid exposing the switch to direct sunlight, excessive heat, or moisture.
5. Кыйынчылыктарды
This section provides solutions to common issues you might encounter with your EX3200-24T switch.
5.1 Күч жок
- Белги: No LEDs are illuminated, and the switch does not power on.
- Аракет:
- Кубат шнурунун өчүргүчкө да, розеткага да бекем туташтырылганын текшериңиз.
- Арткы панелдеги кубат которгучу ON абалында экенин текшериңиз.
- Check the electrical outlet with another device to confirm it is functional.
- If using a power strip or UPS, ensure it is powered on and functioning correctly.
5.2 Тармакка туташуу жок
- Белги: Devices connected to the switch cannot access the network.
- Аракет:
- Check the port LEDs on the switch for the connected device. A solid green LED indicates a link. If no link, try a different port or cable.
- Verify the network cable is securely connected at both ends (switch and device).
- Ensure the connected device's network adapter is enabled and configured correctly.
- If multiple devices are affected, check the uplink connection from the EX3200-24T to your core network.
- Consult the switch's configuration for VLANs, IP addressing, and other network settings.
5.3 System Alarm LED (ALM) is Amber/Red
- Белги: The ALM LED is illuminated amber or red.
- Аракет:
- Log in to the switch via the console or network management interface.
- Check system logs and alarm messages for details on the specific issue.
- Common causes include power supply issues, fan failures, or high temperature.
- Address the root cause as indicated by the logs.
6. Техникалык шарттар
Key technical specifications for the Juniper EX3200-24T Layer 3 Switch:
| Өзгөчөлүк | Спецификация |
|---|---|
| Бренд | Juniper Networks |
| Модель номери | EX3200-24T |
| Порттардын саны | 24 (16 x 10/100/1000Base-T, 8 x 10/100/1000Base-T) |
| Кеңейтүү оюгу | 1 x Expansion Slot |
| Маалыматтарды өткөрүү ылдамдыгы | Секундасына 1 Гигабит |
| Катмарды колдоо | 3-кабат |
| Элемент Салмагы | 14.9 фунт |
| Түс | Кара |
| Шайкеш түзмөктөр | Иш такта |
| UPC | 832938037793 |
7. Кепилдик жана колдоо
7.1 Продукциянын кепилдиги
The Juniper EX3200-24T Layer 3 Switch is covered by a standard manufacturer's warranty. For detailed information regarding warranty terms, duration, and coverage, please refer to the warranty card included with your product or visit the official Juniper Networks webсайт.
7.2 Техникалык колдоо
For technical assistance, troubleshooting beyond this manual, or to report issues, please contact Juniper Networks technical support. Support resources, including documentation, FAQs, and contact information, are available on the official Juniper Networks support portal: