
Introduction
This manual provides comprehensive instructions for the installation, operation, and maintenance of your Sunforce 50033 15 Watt Solar Battery Charging Kit. This kit is designed to provide clean, free power for 12-volt battery charging in various applications, including RVs, cabins, homes, boats, and remote power setups. Please read this manual thoroughly before using the product to ensure safe and efficient operation.
Негизги өзгөчөлүктөрү
- Designed for RVs, cabins, homes, boats, back-up, and remote power use.
- Completely weatherproof for enhanced durability in various conditions.
- Features a sturdy and durable aluminum frame for extended outdoor use.
- Amorphous solar panel technology ensures functionality in all daylight conditions, including cloudy days.
- Built-in discharge protection to safeguard your battery from over-discharge.
- Kit includes: one 15 Watt amorphous solar panel, a 7 Amp solar charge controller, battery clamps, charge controller wire adapter, and mounting hardware.
Пакеттин мазмуну
Төмөндө тизмеленген бардык компоненттер комплектиңизге киргизилгендигин текшериңиз:
- 15 Watt Amorphous Solar Panel
- 7 Amp Күн зарядын контролдоочу
- Батарея Clamps
- Charge Controller Wire Adapter
- Монтаждоочу жабдык

Сүрөт: бүттүview of the Sunforce 15 Watt Solar Battery Charging Kit components, showing the solar panel and the charge controller.
Орнотуу жана орнотуу
Follow these steps to properly set up your solar charging kit:
- Жайгашкан жерди тандаңыз: Select a location that receives optimal, unobstructed sunlight throughout the day. The panel can be mounted on a flat surface such as a roof (home or RV) or any other suitable area.
- Күн панелин орнотуу:
- Assemble the mounting frame using the provided hardware.
- Securely attach the mounting frame to your chosen surface. Ensure all screws are tightened to prevent movement.
- Carefully place the solar panel onto the mounted frame. Align the brackets under the panel with the mounting frame and secure them firmly.
- Ideally, tilt the panels to a 20-degree angle for optimal sun exposure.
- Wiring the Solar Panel:
- Access the electrical terminals located in the black box on the back of the solar panel. Remove the cover.
- Route the wiring through the allocated holes and secure them.
- Loosen the positive terminal screw with a Phillips screwdriver, then place the positive wire under the loosened screw and tighten. Repeat this process for the negative terminal and wire.
- After connecting the wires, use a voltmeter to test the connections. The panel should output approximately 14.5 volts in direct sunlight.
- If installing multiple panels, connect them in parallel as shown in the installation video.
- Replace the cover over the electrical box.
- Connecting the Charge Controller:
- Connect the positive and negative wires from the solar panel to the "Array Terminal" on the charge controller.
- The charge controller can be permanently mounted indoors or in a protected area.
- Батареяга туташуу:
- Attach the negative wire from the solar charge controller to the negative terminal of your 12-volt battery.
- Attach the positive wire from the solar charge controller to the positive terminal of your 12-volt battery.
- Бардык байланыштар коопсуз экенин текшериңиз.
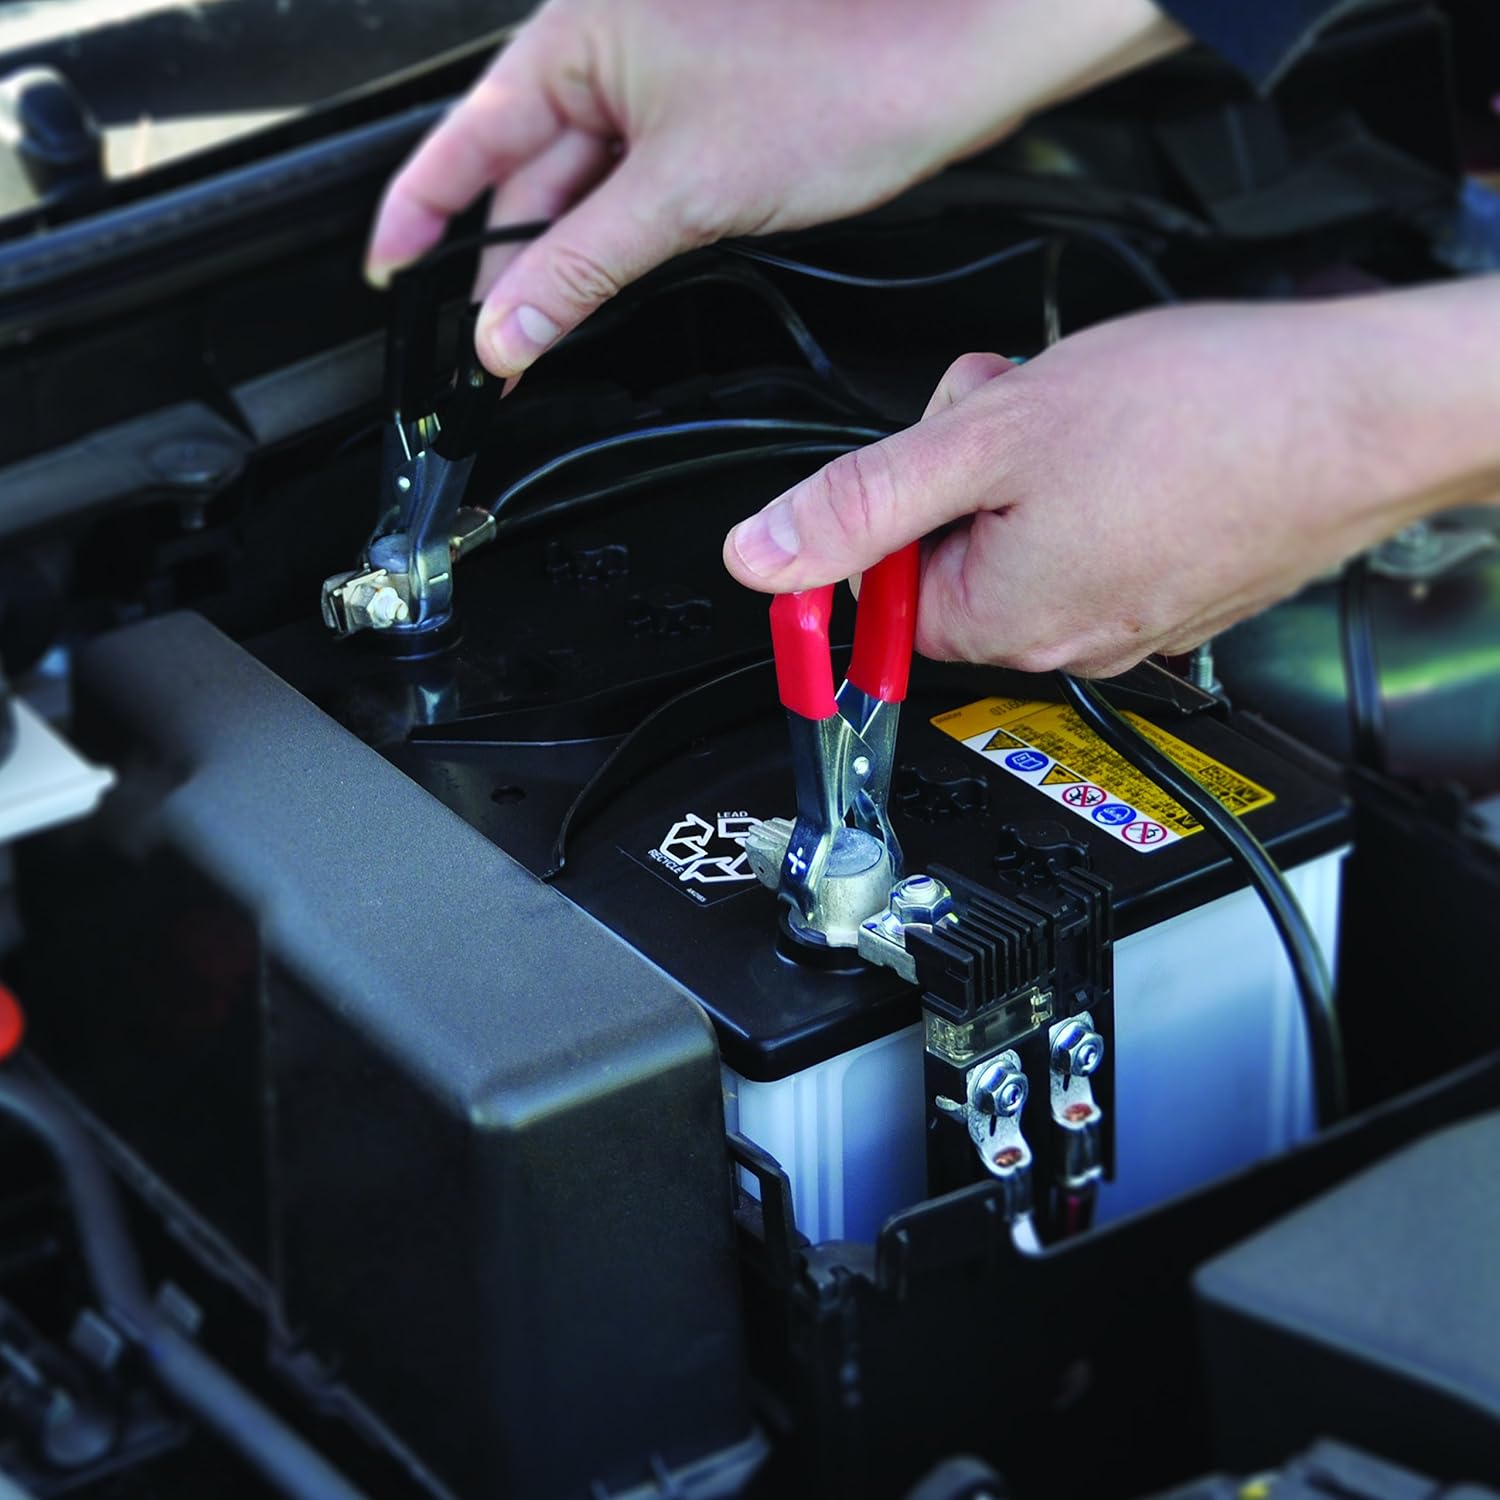
Image: Close-up of hands connecting battery clamps to the terminals of a car battery, illustrating the final connection step.
Орнотуу боюнча видео көрсөтмө
Video: A detailed guide on how to install a solar panel system, covering mounting, wiring, and connecting to a battery. This video demonstrates the entire setup process for the solar charging kit.
Операция
Once installed, the Sunforce 15 Watt Solar Battery Charging Kit operates automatically. The solar panel converts sunlight into electrical energy, which is then regulated by the 7 Amp charge controller before being supplied to your 12-volt battery. The charge controller prevents overcharging and protects against battery discharge at night.
- Ensure the solar panel is clean and free of obstructions for maximum efficiency.
- Monitor the charge controller's indicators (if available) to confirm proper charging status.
- The system is designed for continuous trickle charging and maintenance of 12-volt batteries.
Техникалык тейлөө
Regular maintenance ensures optimal performance and longevity of your solar charging kit:
- Панелди тазалоо: Күн панелинин бетин мезгил-мезгили менен жумшак, d менен тазалап туруңузamp чаңды, кирди жана калдыктарды тазалоо үчүн кездеме. Абразивдүү тазалагычтардан же катуу химиялык заттардан алыс болуңуз.
- Туташуу текшерүүлөрү: Annually inspect all electrical connections for tightness and corrosion. Tighten any loose connections and clean any corrosion with a wire brush if necessary.
- Кабелдик текшерүү: Check all cables for signs of wear, fraying, or damage. Replace damaged cables immediately.
- Батареянын ден соолугу: Regularly check the water levels in flooded lead-acid batteries and top up with distilled water if needed. For sealed batteries, ensure terminals are clean.
- Тоскоолдуктарды жоюу: Ensure no new obstructions (e.g., tree branches, leaves, snow) are blocking sunlight from reaching the panel.
Проблемаларды чечүү
| Көйгөй | Мүмкүн себеп | Чечим |
|---|---|---|
| No charge or low charge output |
|
|
| Батарея зарядды кармабайт |
|
|
| Charge controller not indicating charge |
|
|
Техникалык шарттар
| Атрибут | Нарк |
|---|---|
| Бренд | Санфорс |
| Модель номери | 50033 |
| Материал | Алюминий |
| AC адаптер агымы | 7 Amps |
| Максималдуу томtage | 12 вольт |
| Максималдуу күч | 15 Ватт |
| Элемент Салмагы | 8.58 фунт |
| Продукциянын өлчөмдөрү | 43 x 17 x 5 дюйм |
| UPC | 787769500339 |
Кепилдик жана колдоо
Кепилдик маалыматы же техникалык колдоо үчүн өндүрүүчүнүн расмий өкүлүнө кайрылыңыз webсайтка же түздөн-түз кардарларды тейлөөгө кайрылыңыз. Сатып алуу квитанциясын кепилдик дооматтары үчүн сатып алуунун далили катары сактаңыз.