
1. Продукт бүтүп калдыview
The HP ProCurve 3500-24-PoE Ethernet Switch is an intelligent edge switch designed for demanding network environments. It features a programmable ProVision ASIC, enabling advanced networking capabilities such as Quality of Service (QoS) and security. This switch offers a variety of Gigabit and 10/100 interfaces with integrated Power over Ethernet (PoE) functionality, providing flexibility and scalability for network deployments.
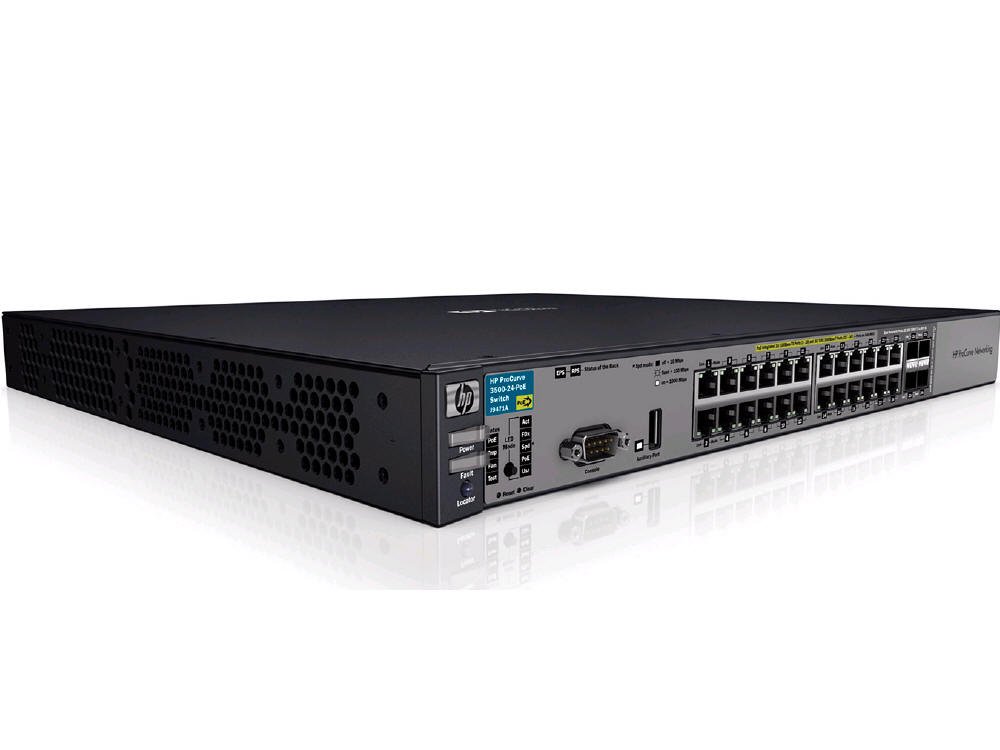
Сүрөт 1: Алдыңкы view of the HP ProCurve 3500-24-PoE Ethernet Switch, showing its network ports and status indicators.
2. Пакеттин мазмуну
Пакетте бардык буюмдар бар экенин текшериңиз:
- HP ProCurve 3500-24-PoE Ethernet Switch
- Accessories (e.g., power cord, rack-mount kit, console cable)
3. Орнотуу
3.1 Физикалык орнотуу
- Стойкага орнотуу: Securely mount the switch in a standard 19-inch equipment rack using the provided rack-mount kit. Ensure adequate ventilation around the switch.
- Кубат туташуу: Connect the power cord to the switch's power inlet and then to a grounded AC power outlet.
3.2 Тармактык байланыштар
- Uplink порттору: Connect the switch's uplink ports (Gigabit or SFP) to your core network or other switches using appropriate Ethernet cables or SFP transceivers.
- Device Ports: Connect network devices (computers, IP phones, wireless access points) to the 10/100 or Gigabit Ethernet ports. For PoE-enabled devices, ensure they are connected to PoE-capable ports.
3.3 Баштапкы конфигурация
The switch can be configured via a console port, web interface, or Telnet/SSH. Refer to the HP ProCurve documentation for detailed configuration steps.
- Консолго кирүү: Connect a console cable from your computer to the switch's console port. Use a terminal emulation program (e.g., PuTTY) with settings: 9600 baud, 8 data bits, no parity, 1 stop bit, no flow control.
- Web Интерфейс: If the switch has a default IP address, connect your computer to a switch port and configure your computer's IP address to be in the same subnet. Access the web аркылуу интерфейс web браузер.
4. Иштөө нускамалары
4.1 Күйгүзүү
After connecting the power cord, the switch will automatically power on. Observe the system LED indicators for boot-up status.
4.2 LED көрсөткүчтөрү
Monitor the front panel LEDs to understand the switch's operational status:
- Системалык LED: Indicates overall switch health (e.g., green for normal operation, amber for issues).
- Порт диоддору: Indicate link status and activity for each port (e.g., solid green for link, flashing green for activity).
- PoE диоддору: Indicate PoE status for ports providing power.
4.3 Башкаруу мүмкүнчүлүгү
Access the switch's management interface (web GUI or Command Line Interface) to configure VLANs, QoS, security settings, and monitor network traffic.
4.4 PoE функциясы
The switch provides Power over Ethernet on designated ports. Connect PoE-compatible devices (e.g., IP cameras, VoIP phones, wireless access points) to these ports to supply both data and power over a single Ethernet cable.
5. Техникалык тейлөө
5.1 Тазалоо
Periodically clean the exterior of the switch with a soft, dry cloth. Ensure ventilation openings are free from dust and obstructions to prevent overheating.
5.2 Микропрограмма жаңыртуулары
Дайыма өндүрүүчүнүн текшерүү website for firmware updates. Applying updates can improve performance, add new features, and address security vulnerabilities. Follow the provided instructions carefully when performing firmware upgrades.
5.3 Айлана-чөйрөнү коргоо
Ensure the switch operates within its specified temperature and humidity ranges. Avoid placing the switch in direct sunlight or near heat sources.
6. Кыйынчылыктарды
6.1 Күч жок
- Электр шнурунун өчүргүчкө да, розеткага да бекем туташтырылганын текшериңиз.
- Башка аспапка туташтыруу менен электр розеткасынын иштешин текшериңиз.
- Ensure the power supply unit (if external) is working correctly.
6.2 Тармакка туташуу жок
- Check the link/activity LEDs on the switch port and the connected device.
- Ethernet кабелдери туура туташтырылганын жана бузулбаганын текшериңиз.
- Verify network configuration (IP addresses, VLANs) on the switch and connected devices.
6.3 PoE маселелери
- Confirm the device connected is PoE-compatible and within the switch's PoE power budget.
- Check the PoE status LEDs for the specific port.
- Ensure PoE is enabled on the port via the switch's management interface.
6.4 Ишти аткаруу көйгөйлөрү
- Check for high CPU utilization or memory usage on the switch.
- Inspect for network loops or broadcast storms.
- Verify duplex settings on connected devices match the switch ports.
7. Техникалык шарттар
| Өзгөчөлүк | Description |
|---|---|
| Бренд | HEWLETT PACKARD |
| Модель номери | J9471A |
| Порттардын саны | 20 |
| Интерфейс | Poe |
| Шайкеш түзмөктөр | Иш такта |
| Элемент Салмагы | 13 фунт |
| UPC / GTIN | 884962106013, 884962105979, 884962106006 |
8. Кепилдик жана колдоо
8.1 Кепилдик маалыматы
This product typically comes with a 30-day warranty. Please refer to your purchase documentation or contact your vendor for specific warranty terms and conditions.
8.2 Техникалык колдоо
For technical assistance, troubleshooting beyond this manual, or to report issues, please contact HP customer support or your authorized reseller. Have your product model number (J9471A) and serial number ready when contacting support.