1. Киришүү
The D-Link DES-1210-52 is a 48-port Fast Ethernet Smart Switch designed for small to medium-sized businesses. It features 48 10/100Mbps ports, two 10/100/1000Mbps Gigabit ports, and two combo SFP Gigabit uplinks, providing flexible connectivity options. This switch offers advanced management functions, including VLANs, QoS, and security features, to enhance network performance and security. This manual provides essential information for the proper installation, configuration, and operation of your DES-1210-52 switch.
2. Пакеттин мазмуну
Verify the contents of your DES-1210-52 package. If any item is missing or damaged, please contact your local D-Link reseller for assistance.
- D-Link DES-1210-52 Smart Switch
- Электр кабели
- Rack Mount Kit (two brackets and screws)
- Резина буттары (иш столуна орнотуу үчүн)
- CD-ROM (containing documentation and utility software)
- Ыкчам орнотуу колдонмосу
3. Физикалык мүнөздөмө
The DES-1210-52 switch features a standard 1U rack-mountable design. Understanding the front and rear panel components is crucial for proper installation and operation.
3.1. Алдыңкы панель
The front panel includes all network ports, LED indicators, and a console port for management.
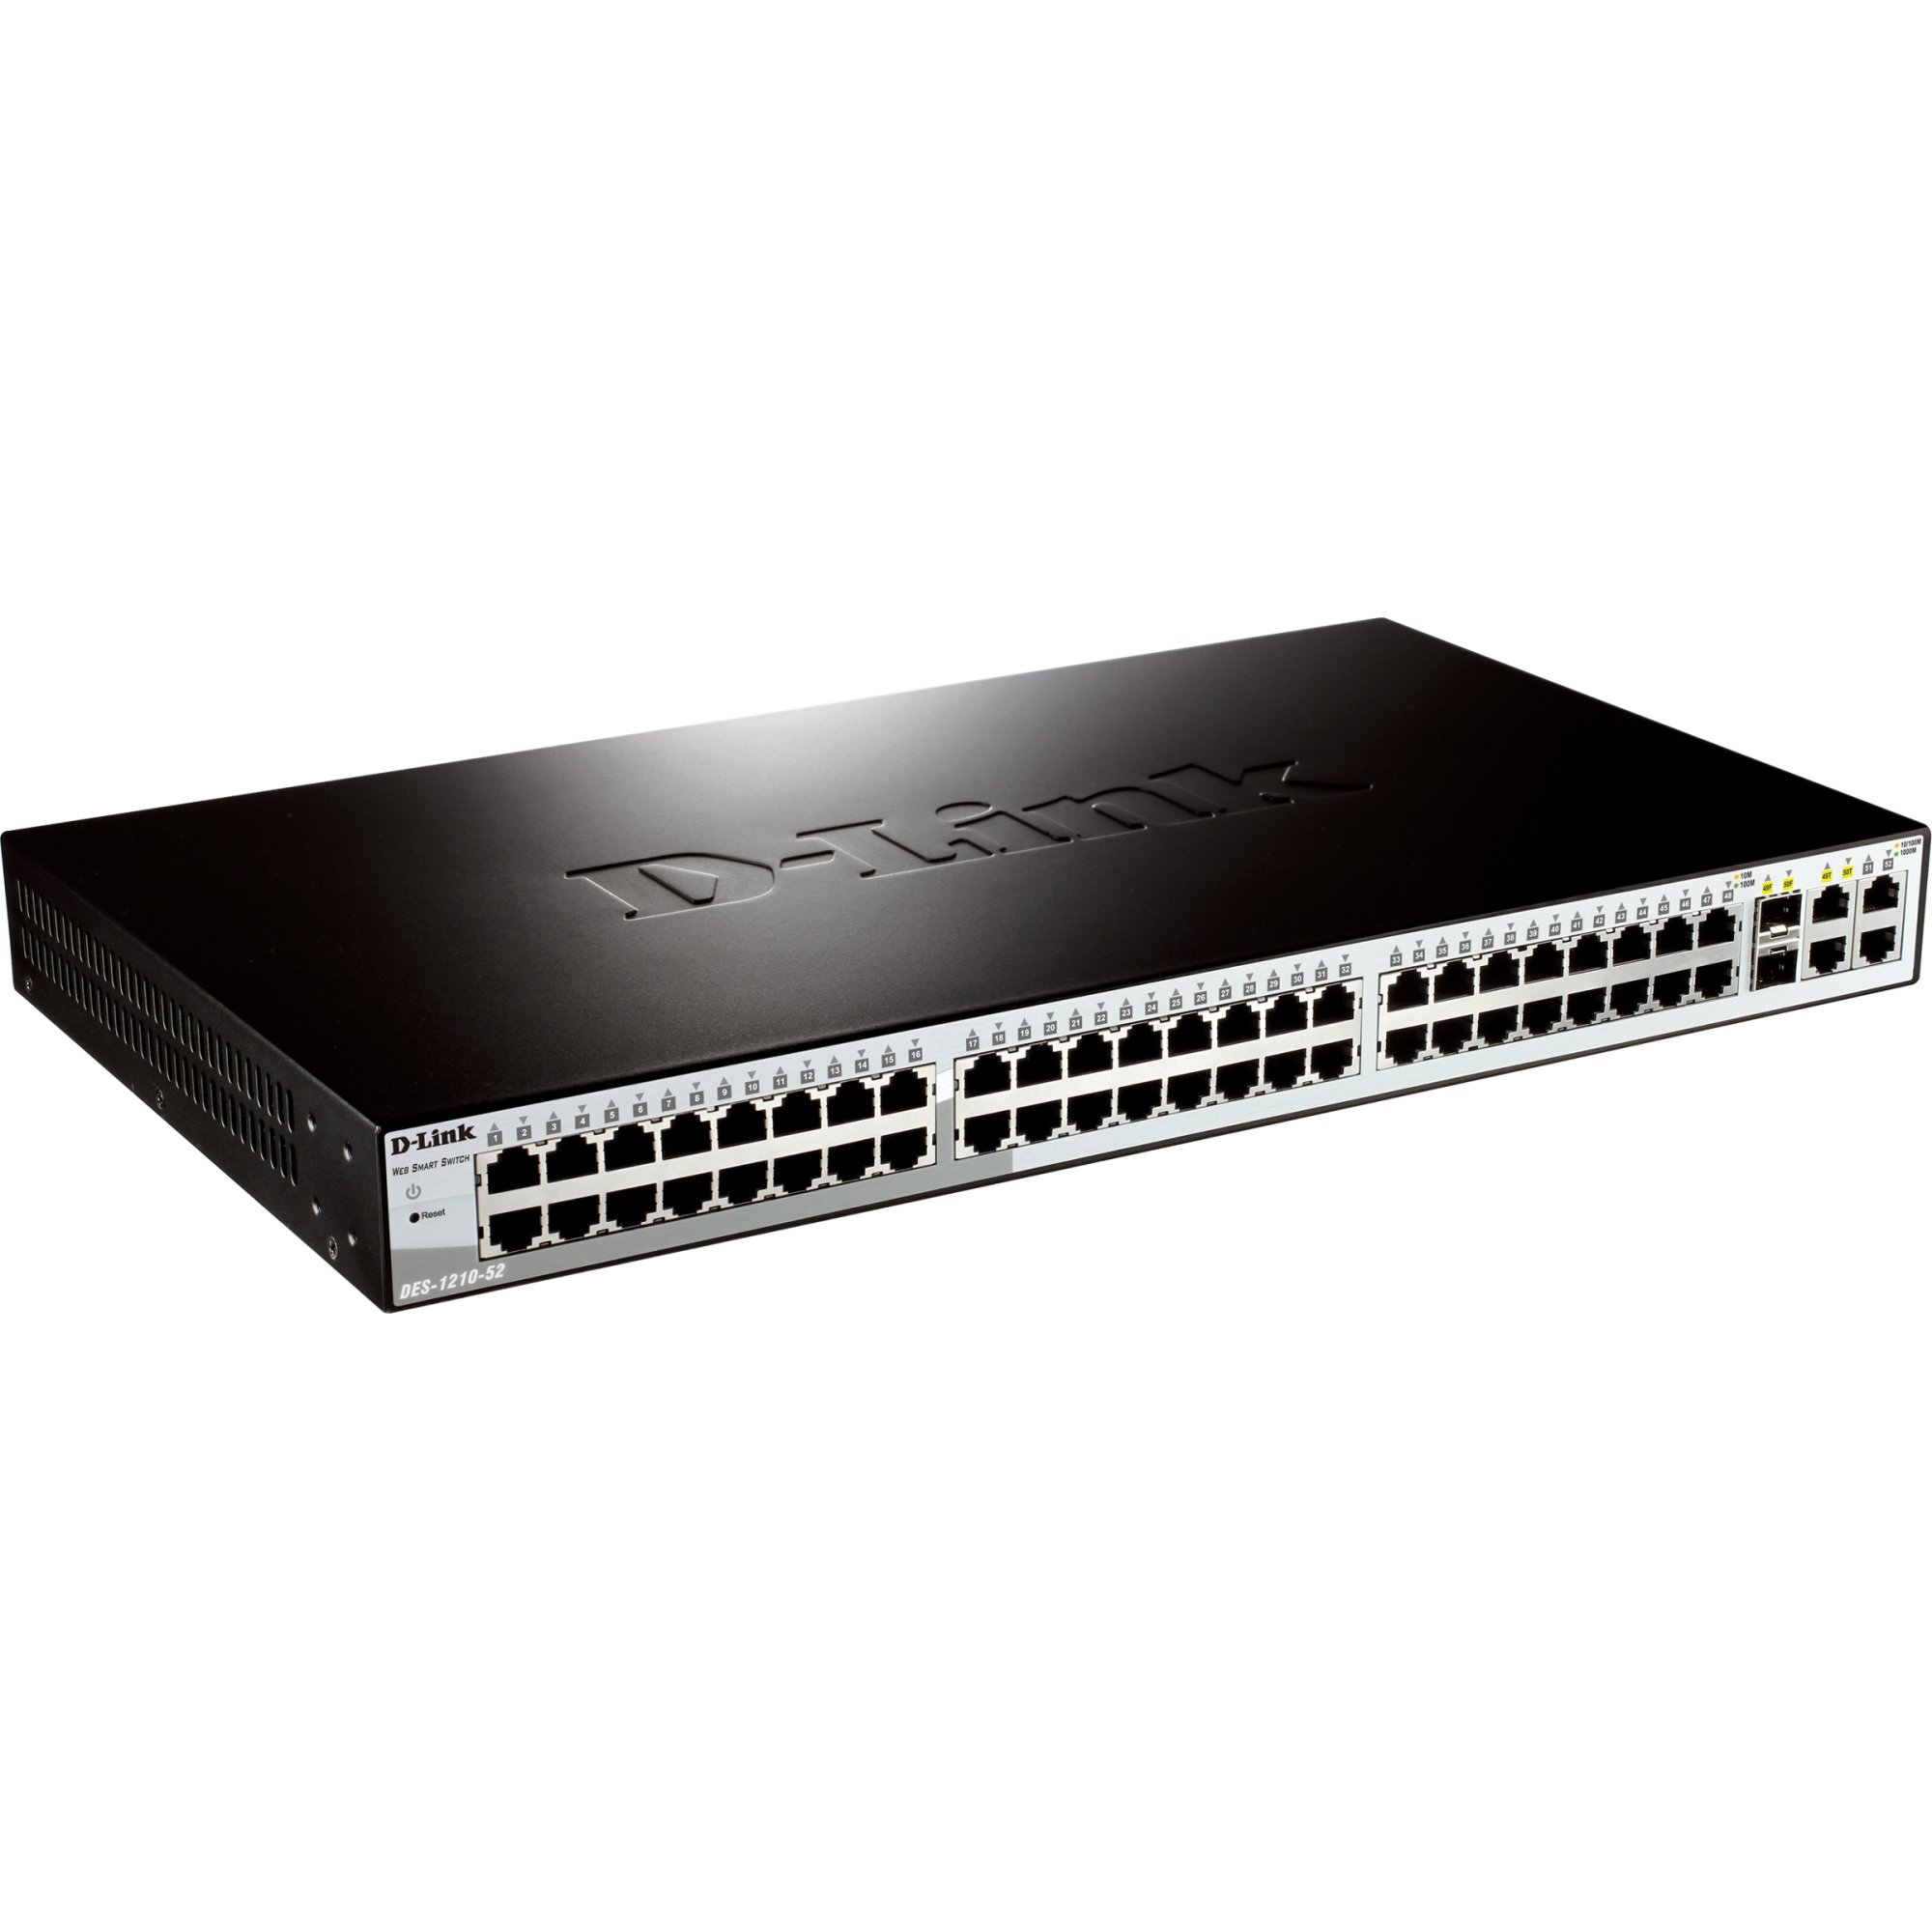
1-сүрөт: Фронт view of the D-Link DES-1210-52 Smart Switch, showing 48 Fast Ethernet ports, 2 Gigabit Ethernet ports, and 2 SFP combo ports, along with LED indicators for power, link/activity, and speed.
- LED көрсөткүчтөрү: Power, Link/Act (per port), Speed (per port).
- 10/100BASE-TX Ports (1-48): RJ-45 ports for Fast Ethernet connections.
- 10/100/1000BASE-T Ports (49-50): RJ-45 ports for Gigabit Ethernet connections.
- Combo SFP порттору (51-52): SFP slots that share bandwidth with Gigabit ports 49-50. When an SFP module is inserted, the corresponding Gigabit RJ-45 port is disabled.
- Консол порту: RJ-45 port for command-line interface (CLI) access.
3.2. Арткы панель
The rear panel contains the power input and grounding screw.
- AC электр розетка: Connects to the provided AC power cord.
- Жерге туташтыруу бурагы: Provides an optional connection for grounding the device.
4. Орнотуу
This section outlines the steps for physically installing and connecting your D-Link DES-1210-52 Smart Switch.
4.1. Сайтты даярдоо
- Ensure the installation site is well-ventilated and within the recommended operating temperature and humidity ranges.
- Place the switch on a sturdy, level surface or in a standard 19-inch equipment rack.
- Ensure a stable power source is available.
4.2. Иш такта орнотуу
For desktop use, attach the included rubber feet to the bottom of the switch to prevent scratching and provide stability.
4.3. Рак орнотуу
To install the switch in a standard 19-inch equipment rack:
- Берилген бурамалар аркылуу өчүргүчтүн капталдарына эки стойкага орнотулган кашааларды бекитиңиз.
- Secure the switch in the rack using the screws provided with the rack.
4.4. Кубатты туташтыруу
Connect the supplied AC power cord to the power receptacle on the rear panel of the switch and then to a suitable power outlet. The Power LED on the front panel will illuminate.
4.5. Тармак түзмөктөрүн туташтыруу
Connect network devices (e.g., computers, servers, other switches) to the 10/100BASE-TX or 10/100/1000BASE-T ports using standard Ethernet cables. For fiber optic connections, insert compatible SFP transceivers into the SFP slots and connect fiber optic cables.
5. Иштөө
The DES-1210-52 is a Smart Switch, offering various management options for configuration and monitoring.
5.1. Баштапкы мүмкүндүк
Коммутаторду төмөнкү аркылуу башкарууга болот Web-based GUI, a Command Line Interface (CLI) through the console port, or SNMP.
- Webнегизделген башкаруу: By default, the switch obtains an IP address via DHCP. If no DHCP server is present, it will use a default IP address (refer to the Quick Installation Guide or CD-ROM documentation for the specific default IP). Connect a computer to any switch port and configure its IP address to be in the same subnet as the switch. Open a web браузерден өтүп, которуштуруунун IP дарегин киргизиңиз.
- CLI башкаруу: Connect a console cable (RJ-45 to DB-9) from the switch's console port to a serial port on a computer. Use a terminal emulation program (e.g., PuTTY, Tera Term) with appropriate settings (e.g., 115200 baud, 8 data bits, no parity, 1 stop bit, no flow control).
5.2. Негизги конфигурация
Алгачкы кирүүдөн кийин, төмөнкүлөр сунушталат:
- Демейки администратор сырсөзүн өзгөртүңүз.
- Configure a static IP address for the switch if a DHCP server is not consistently available or preferred.
- Системанын убактысын жана күнүн орнотуңуз.
- Save the configuration to prevent loss upon reboot.
6. Техникалык тейлөө
Regular maintenance ensures optimal performance and longevity of your D-Link DES-1210-52 Smart Switch.
- Программалык камсыздоонун жаңыртуулары: Мезгил-мезгили менен D-Link колдоосун текшерип туруңуз website for the latest firmware versions. Updating firmware can provide new features, performance improvements, and security patches. Follow the instructions provided with the firmware update package carefully.
- Тазалоо: Keep the switch free from dust and debris. Use a soft, dry cloth to clean the exterior. Ensure ventilation openings are clear. Do not use liquid or aerosol cleaners directly on the switch.
- Конфигурациянын камдык көчүрмөсү: Regularly back up your switch configuration to an external device. This allows for quick restoration in case of a device failure or misconfiguration.
- Экологиялык мониторинг: Ensure the operating environment remains within specified temperature and humidity limits to prevent overheating or moisture damage.
7. Кыйынчылыктарды
This section provides solutions to common issues you might encounter with your DES-1210-52 Smart Switch.
7.1. Power LED is Off
- Электр шнурунун өчүргүчкө жана иштеген электр розеткасына бекем туташтырылганын текшериңиз.
- Verify the power outlet is supplying power by testing it with another device.
7.2. No Link/Activity LED on a Connected Port
- Check that the Ethernet cable is properly connected at both ends.
- Туташкан аппараттын күйгүзүлгөнүн жана туура иштегенин текшериңиз.
- Башка Ethernet кабелин колдонуп көрүңүз.
- Verify that the port on the connected device is active.
7.3. Кирүү мүмкүн эмес Web-негизделген башкаруу интерфейси
- Компьютериңиздин IP дареги которгучтун IP дареги менен бир ички тармакта экенин текшериңиз.
- Verify the switch's IP address. If unknown, you may need to reset the switch to factory defaults (refer to the full manual for instructions, as this will erase all configurations).
- Кедергилерди болтурбоо үчүн компьютериңиздеги кандайдыр бир брандмауэрди же антивирустук программаны убактылуу өчүрүңүз.
- Интерфейске башкасынан кирүүгө аракет кылыңыз web browser or computer.
8. Техникалык шарттар
| Өзгөчөлүк | Description |
|---|---|
| Модель номери | DES-1210-52 |
| Бренд | D-Link |
| Порттардын саны | 48 (10/100Mbps) + 2 (10/100/1000Mbps) + 2 (Combo SFP) |
| Interface Type | RJ-45, SFP |
| Маалыматтарды өткөрүү ылдамдыгы | 10/100 Mbps (Fast Ethernet), 1 Gbps (Gigabit Ethernet) |
| Элемент Салмагы | 4.08 килограмм |
| Шайкеш түзмөктөр | Иш такта (жана башка тармактык түзмөктөр) |
| Платформа | Өзгөчө машина эмес |
9. Кепилдик жана колдоо
D-Link provides a limited warranty for its products. The specific terms and conditions of the warranty may vary by region. Please refer to the warranty information included with your product or visit the official D-Link webкепилдик боюнча кеңири билдирүүлөрдү алуу үчүн сайтты караңыз.
For technical support, product documentation, firmware updates, and FAQs, please visit the D-Link support portal. You can typically find support resources by searching for your product model (DES-1210-52) on the D-Link webсайт.
D-Link колдоо Webсайт: www.dlink.com/support