Introduction
This instruction manual provides detailed guidance for the installation, operation, and maintenance of the Geberit 241.874.00.1 Push Rod Set. This set is specifically designed as an accessory for Geberit UP320 flush-mounted cisterns manufactured from 2008 onwards. Proper installation and care ensure reliable flushing functionality.

Geberit 241.874.00.1 Push Rod Set, showing the full length of the white plastic rod with a wider head at one end and a threaded shaft.
Коопсуздук маалыматы
- Always ensure the water supply to the cistern is turned off before beginning any installation or maintenance work.
- Use appropriate tools for installation to prevent damage to the product or cistern components.
- If you are unsure about any step of the installation process, consult a qualified plumber or Geberit technical support.
- Тумчугуп калуу коркунучун болтурбоо үчүн кичинекей бөлүктөрүн балдардан алыс кармаңыз.
Пакеттин мазмуну
Орнотууну улантуудан мурун бардык компоненттер бар экенин жана бузулбаганын текшериңиз.
- 1 x Geberit 241.874.00.1 Push Rod Set (consisting of multiple rods as required for the actuator plate)

Multiple Geberit push rods laid out, highlighting their design and material.
Орнотуу жана орнотуу
This section outlines the steps for installing the push rod set into your Geberit UP320 flush-mounted cistern.
- Цистернага кирүү: Carefully remove the actuator plate from the wall to expose the internal components of the UP320 cistern. Refer to your cistern's specific manual for detailed instructions on removing the actuator plate.
- Identify Existing Rods (if applicable): If replacing old push rods, gently detach them from the flush mechanism and the actuator plate. Note their orientation for reference.
- Insert New Push Rods: Position the new Geberit 241.874.00.1 push rods into the designated slots within the cistern's flush mechanism. Ensure they are correctly aligned.
- Connect to Actuator Plate: Attach the ends of the push rods to the corresponding connection points on the back of the actuator plate. The rods are designed for tool-free installation, typically clicking into place. Ensure a secure connection.
- Сыноо функциясы: Before re-securing the actuator plate, briefly turn on the water supply and test the flush mechanism by pressing the buttons on the actuator plate. Verify that both full and half flushes (if applicable) operate smoothly.
- Re-secure Actuator Plate: Once functionality is confirmed, carefully re-attach the actuator plate to the wall, ensuring it is level and securely fastened.

Жакын план view of the end of the Geberit push rod, showing the mechanism that connects to the actuator plate.
Иштөө нускамалары
The Geberit 241.874.00.1 Push Rod Set facilitates the operation of your flush-mounted cistern via the actuator plate. When a button on the actuator plate is pressed, the corresponding push rod engages the flush mechanism inside the cistern, initiating the water release for flushing. No specific operational steps are required for the push rods themselves beyond their correct installation.
Техникалык тейлөө
Regular maintenance ensures the longevity and optimal performance of your push rod set.
- Тазалоо: Periodically remove the actuator plate and gently wipe the push rods with a soft cloth dampened with mild soap and water. Avoid abrasive cleaners or harsh chemicals.
- Текшерүү: During cleaning, inspect the push rods for any signs of wear, cracks, or damage. Ensure they move freely and are securely attached to both the flush mechanism and the actuator plate.
- Алмаштыруу: If significant wear or damage is observed, replace the push rod set with genuine Geberit spare parts to maintain proper functionality.
Проблемаларды чечүү
Жалпы көйгөйлөр жана аларды чечүү жолдору үчүн төмөнкү таблицага кайрылыңыз.
| Көйгөй | Мүмкүн себеп | Чечим |
|---|---|---|
| Flush button feels loose or unresponsive. | Push rod not properly connected to actuator plate or flush mechanism. | Remove actuator plate and re-secure push rods. Ensure they click into place. |
| Суу агызуучу механизм иштетилбей жатат. | Push rod is bent, broken, or obstructed. | Inspect push rods for damage. Replace if necessary. Clear any obstructions. |
| Inconsistent flush. | Partial engagement of push rod or wear on the rod ends. | Check connections. If rods show significant wear, consider replacement. |
Техникалык шарттар
Key technical specifications for the Geberit 241.874.00.1 Push Rod Set.
- Модель номери: 241.874.00.1
- Шайкештик: Geberit UP320 Flush-Mounted Cisterns (from 2008 onwards)
- Материал: Aluminum or Engineering Plastic
- Түсү: Ак
- Продукциянын өлчөмдөрү: Approximately 1.08 inches (2.75 cm) in depth, total length approximately 6.7 inches (16 cm)
- Элемент Салмагы: 0.02 килограмм
- Колдун түрү: Lever (operates via actuator plate)
- Орнотуу: Easy to install, tool-free attachment to actuator plate
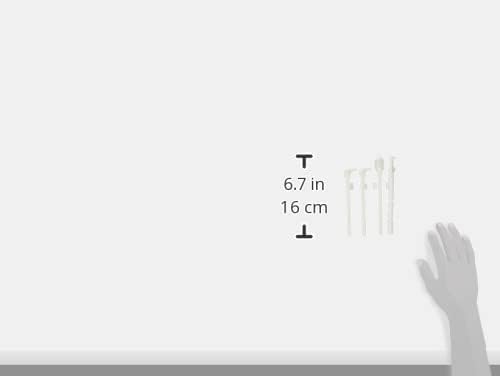
Diagram showing the approximate dimensions of the push rod, indicating a length of 6.7 inches (16 cm).
Кепилдик жана колдоо
For information regarding the warranty of your Geberit 241.874.00.1 Push Rod Set, please refer to the warranty documentation provided with your original Geberit cistern or actuator plate, or visit the official Geberit website. For technical assistance, spare parts, or further inquiries, please contact Geberit customer support directly through their official channels.


