
1. Киришүү
This manual provides comprehensive instructions for the installation, operation, and maintenance of the Supermicro X10SLM+-LN4F motherboard. Designed for server applications, this motherboard features an LGA1150 socket, Intel C224 PCH, DDR3 memory support, and multiple Gigabit Ethernet ports. Please read this manual thoroughly before proceeding with installation to ensure proper setup and optimal performance.
2. Продукт бүтүп калдыview
The Supermicro X10SLM+-LN4F is a microATX server motherboard built for reliability and performance. Key features include:
- LGA1150 Socket for Intel Xeon E3-1200 v3/v4 and 4th Gen Core i3 processors.
- Intel C224 PCH chipset.
- Four DDR3 DIMM slots supporting up to 64GB ECC/non-ECC UDIMM.
- Multiple SATA3 (6Gbps) ports.
- Integrated quad Gigabit Ethernet ports.
- USB 3.0 and USB 2.0 support.
- VGA output for integrated graphics.
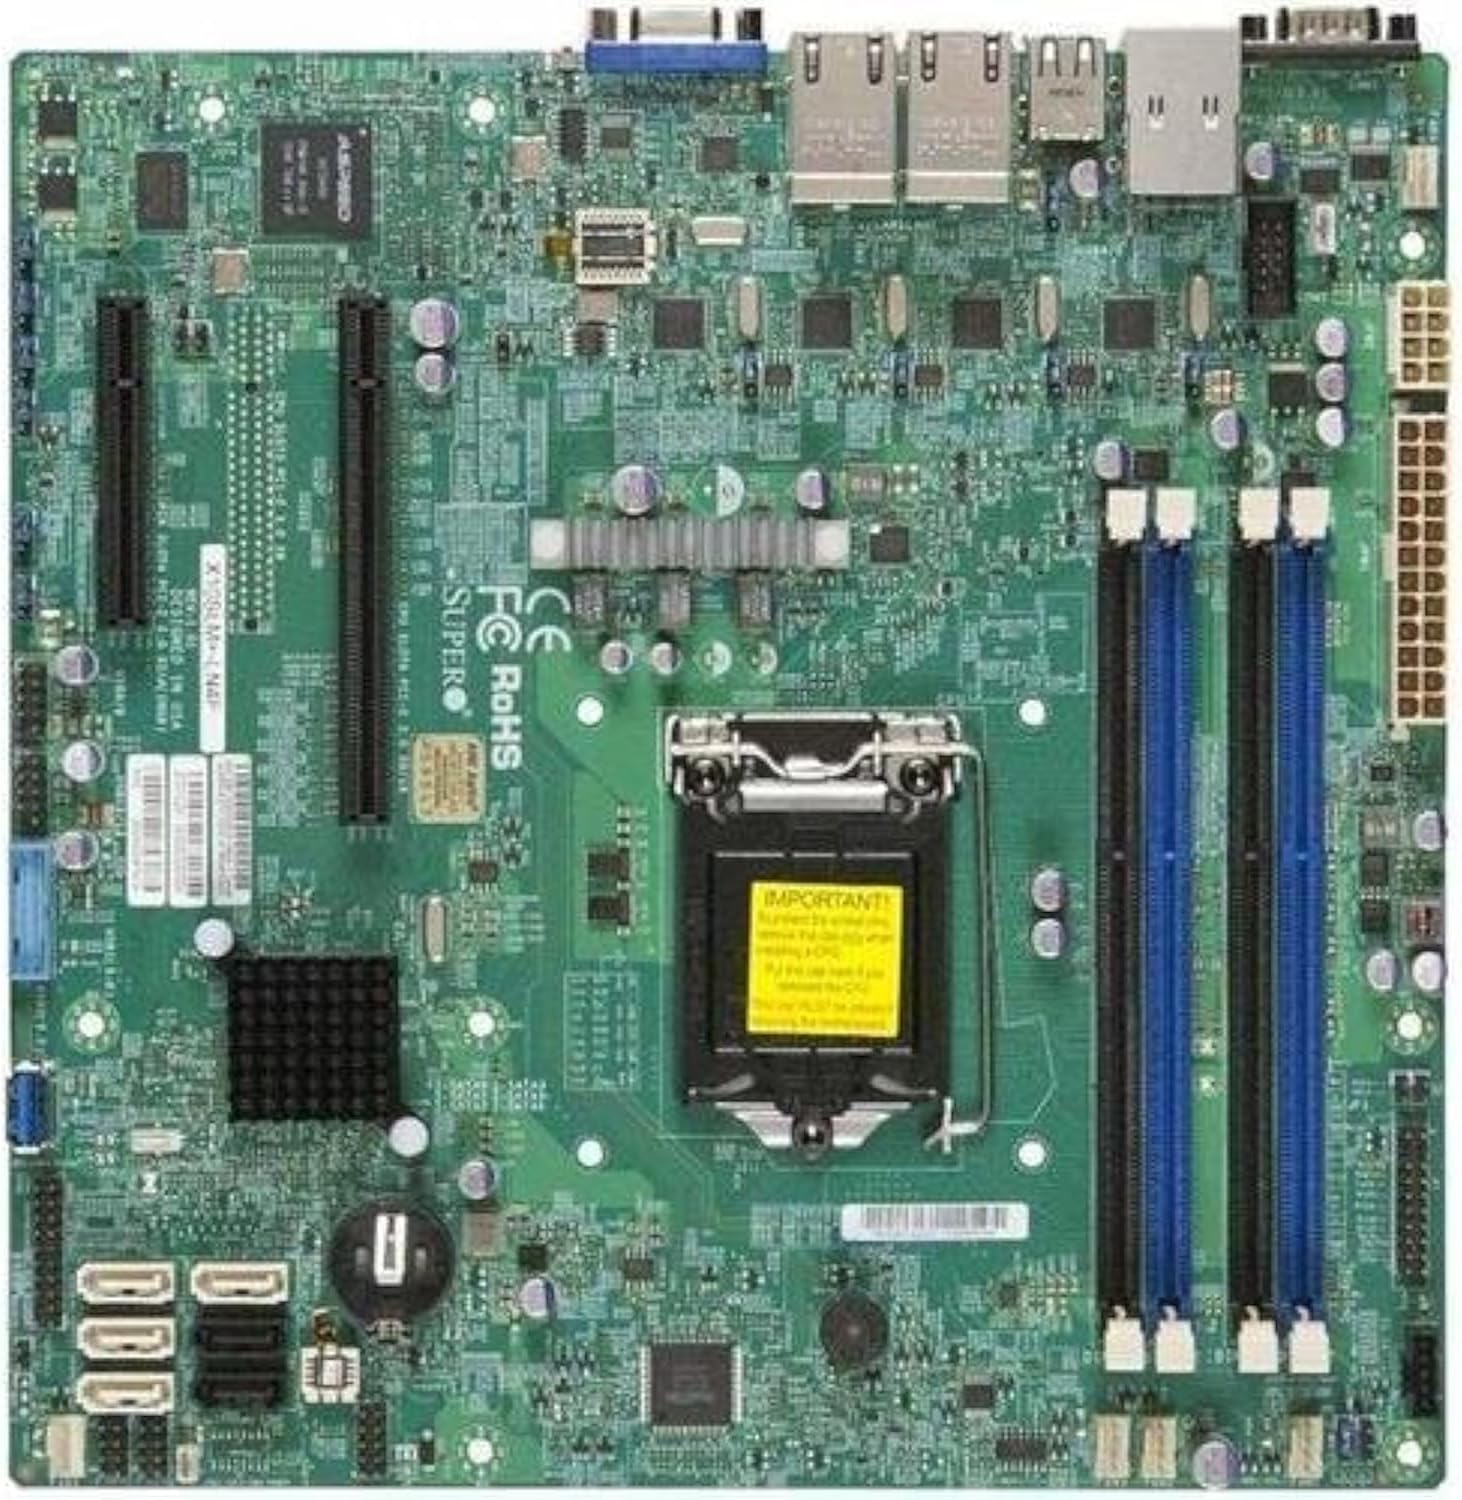
2.1-сүрөт: Жогорудан төмөн view of the Supermicro X10SLM+-LN4F motherboard, showing the CPU socket, DIMM slots, PCIe slots, and various connectors.

2.2-сүрөт: Бурчтуу view of the motherboard, highlighting the layout of components and expansion slots.
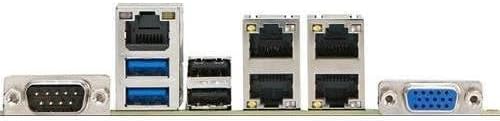
2.3-сүрөт: Rear I/O panel of the Supermicro X10SLM+-LN4F motherboard, featuring multiple LAN ports, USB ports, and serial ports.
3. Орнотуу жана орнотуу
Before beginning installation, ensure your system is powered off and disconnected from the power source. Wear an anti-static wrist strap to prevent electrostatic discharge (ESD) damage to components.
3.1. CPU орнотуу
- LGA1150 CPU розеткасын энелик платадан табыңыз.
- Жүктөө рычагын акырын ылдый түртүп, CPU розеткасынын кармагычын ачуу үчүн аны капталга тартыңыз.
- CPUдагы үч бурчтук белгини розеткадагы тиешелүү белги менен кылдаттык менен тууралаңыз.
- Процессорду мажбурлабастан розеткага салыңыз.
- Close the retention frame and secure it with the load lever.
- CPUнун интеграцияланган жылуулук чачкычына (IHS) термикалык пастанын жука, тегиз катмарын сүйкөңүз.
- CPU муздаткычын өндүрүүчүнүн көрсөтмөлөрүнө ылайык орнотуңуз.
3.2. Эстутум (RAM) орнотуу
- Locate the four DDR3 DIMM slots. For optimal performance, refer to the motherboard's specific memory population guidelines, typically starting with slots closest to the CPU or specific colored slots for dual-channel configurations.
- DIMM уячасынын эки учундагы бекитүүчү клиптерди ачыңыз.
- DDR3 эстутум модулундагы оюкту DIMM уячасындагы ачкыч менен тууралаңыз.
- Insert the memory module firmly into the slot until the retention clips snap into place.
- Ensure both clips are fully closed and the module is seated correctly.
3.3. Сактагыч түзмөктү орнотуу
Connect SATA storage devices (HDDs/SSDs) to the SATA ports on the motherboard using SATA data cables. Connect the power cables from your power supply unit (PSU) to the storage devices.
3.4. Кеңейтүү картасын орнотуу
This motherboard features PCI Express (PCIe) slots. To install an expansion card:
- Remove the corresponding slot cover from your chassis.
- Кеңейтүү картасын PCIe уячасына тууралаңыз.
- Карта толугу менен уячага отурганга чейин бекем басыңыз.
- Secure the card with a screw or retention clip from your chassis.
3.5. Электр байланыштары
- 24-пин ATX Power Connector: Connect the main 24-pin power cable from your PSU to the ATX power connector on the motherboard.
- 8-pin EPS/CPU Power Connector: Connect the 8-pin (or 4+4 pin) CPU power cable from your PSU to the EPS connector near the CPU socket.
3.6. Алдыңкы панель жана арткы киргизүү/чыгаруу туташуулары
- Алдыңкы панелдин туташтыргычтары: Connect the power switch, reset switch, power LED, and HDD activity LED cables from your chassis to the corresponding pins on the motherboard's front panel header. Refer to the motherboard's silkscreen labels for correct orientation.
- USB аталыштары: Connect front panel USB ports to the onboard USB headers.
- Audio Headers: Connect front panel audio jacks to the onboard audio header.
- Арткы I/O панели: Connect peripherals such as keyboard, mouse, monitor (via VGA), and network cables (to the Gigabit Ethernet ports) to the rear I/O panel.
4. Иштөө нускамалары
4.1. Initial Power On and BIOS/UEFI Setup
- After all components are installed and connected, connect the power cord to the PSU and turn on the power switch on the PSU.
- Шассидеги кубат баскычын басыңыз.
- Күйгүзүлгөндө өзүн-өзү текшерүү (POST) учурунда, баскычын кайра-кайра басыңыз DEL or F2 BIOS/UEFI орнотуу утилитасын киргизүү үчүн баскычты (же экранда көрсөтүлгөндөй) басыңыз.
- In the BIOS/UEFI, configure essential settings such as date and time, boot order, and enable/disable specific features as required for your operating system and hardware.
- Өзгөртүүлөрдү сактап, BIOS/UEFIден чыгыңыз. Система кайра жүктөлөт.
4.2. Операциялық системаны орнотуу
To install an operating system (e.g., Windows, Linux, VMware ESXi):
- Insert the operating system installation media (USB drive or DVD) into the system.
- Boot from the installation media (you may need to adjust the boot order in BIOS/UEFI).
- Follow the on-screen prompts to install the operating system on your chosen storage device.
- After installation, install all necessary drivers for the motherboard components (chipset, LAN, VGA, etc.) from the Supermicro website or the provided driver disc.
5. Техникалык тейлөө
Үзгүлтүксүз техникалык тейлөө энелик платаңыздын жана системаңыздын узак жана туруктуу иштешин камсыз кылууга жардам берет.
5.1. Тазалоо
- Мезгил-мезгили менен кысылган абаны колдонуп, энелик платадан жана система компоненттеринен чаңды тазалап туруңуз. Тазалоодон мурун системанын өчүрүлгөнүн жана розеткадан ажыратылганын текшериңиз.
- Суюк тазалагычтарды түздөн-түз компоненттерге колдонуудан алыс болуңуз.
- Ensure proper airflow within the chassis by keeping fan vents clear.
5.2. Микропрограмма жана драйвер жаңыртуулары
- Supermicro текшерүү website periodically for updated BIOS/UEFI firmware and drivers for your motherboard model.
- Follow the provided instructions carefully when updating firmware to avoid system instability.
5.3. Экологиялык эске алуулар
- Зыяндын алдын алуу үчүн энелик платаны сунушталган температура жана нымдуулук диапазондорунда иштетиңиз.
- Сервердин шассисинде адекваттуу вентиляцияны камсыз кылыңыз.
6. Кыйынчылыктарды
Бул бөлүмдө сиз кабылышы мүмкүн болгон жалпы маселелерди чечүү жолдору каралган.
6.1. Кубат жок / POST жок (Кубат күйгөндө өзүн-өзү текшерүү)
- Verify that the power supply unit (PSU) is connected correctly to the motherboard (24-pin ATX and 8-pin EPS connectors).
- Ensure the PSU is switched on and receiving power from the wall outlet.
- Алдыңкы панелдеги кубат которгучтун кабели энелик платанын колонкасына туура туташкандыгын текшериңиз.
- Reseat the CPU, RAM modules, and any expansion cards.
- Көйгөйдү чечүү үчүн, компьютерди бир гана маанилүү компоненттер (CPU, бир RAM флешкасы, CPU муздаткычы) менен жүктөөгө аракет кылыңыз.
- Listen for beep codes from the system speaker, which can indicate specific hardware failures. Refer to the Supermicro webбип коддорун чечмелөө үчүн сайт.
6.2. Маселелерди көрсөтүү
- Ensure the monitor is properly connected to the motherboard's VGA port.
- Монитордун күйгүзүлгөнүн жана туура киргизүү булагына коюлганын текшериңиз.
- If using a discrete graphics card, ensure it is properly seated and connected to power (if required).
6.3. Операциялык система жүктөлбөй жатат
- Check the boot order in the BIOS/UEFI to ensure the correct storage device is prioritized.
- Verify that the operating system is installed correctly on the storage device.
- Ensure SATA data and power cables are securely connected to the storage device and motherboard.
7. Техникалык шарттар
Below are the technical specifications for the Supermicro X10SLM+-LN4F motherboard:
| Өзгөчөлүк | Деталь |
|---|---|
| Бренд | Supermicro |
| Модель аты | X10SLM+-LN4F-B |
| CPU розетка | LGA1150 |
| Чипсет түрү | Intel C224 |
| RAM эс технологиясы | DDR3 SDRAM |
| Memory Speed | 1600 МГц |
| Эстутум сактоо сыйымдуулугу | 64 ГБ чейин |
| USB 2.0 порттордун саны | 2 (Арткы I/O) |
| Графикалык карта интерфейси | Integrated, PCI |
| Шайкеш түзмөктөр | Server |
| Платформа | Windows 10 |
| Элемент Салмагы | 5.8 фунт |
| Продукциянын өлчөмдөрү (LxWxH) | 10 x 10 x 2 дюйм |
| Дата биринчи жеткиликтүү | 4-июнь, 2013-жыл |
Note: Specifications are subject to change without notice. For the most current information, please refer to the official Supermicro product page.
8. Кепилдик жана колдоо
For detailed warranty information, please refer to the warranty card included with your product or visit the official Supermicro website. Technical support is available through Supermicro's customer service channels, including their support portal, email, and phone. Please have your product model number (X10SLM+-LN4F) and serial number ready when contacting support.
For the latest drivers, BIOS updates, and additional documentation, please visit: www.supermicro.com