1. Киришүү
Сатып алганыңыз үчүн рахматasing the Mastech MS8230B Digital Multimeter. This device is a compact, battery-operated, handheld digital multimeter designed for measuring DC and AC voltage, DC current, resistance, diode, and transistor (hFE) tests. It features a large LCD display for easy reading and is built to international safety standards.
Please read this instruction manual thoroughly before using the multimeter to ensure safe and proper operation. Keep this manual for future reference.
2. Коопсуздук маалыматы
This multimeter is designed according to IEC 1010-1 international safety standards for electronic measuring instruments. It complies with CAT III 600V and CAT II 1000V overvoltage categories. Always adhere to the following safety precautions:
- Never exceed the maximum input limits for any function.
- Do not use the meter if the case is damaged or open.
- Сыноо өткөргүчтөрү жакшы абалда, эч кандай изоляциясы бузулбаганын текшериңиз.
- Ар дайым чынжырдын кубатын өчүрүп, бардык жогорку вольттогу кубаттуулуктарды разряддаңызtage capacitors before measuring resistance, diodes, or hFE.
- Том менен иштөөдө өтө этият болуңузtag60V DC же 30V AC RMS жогору, анткени алар шок коркунучун жаратат.
- Remove test leads from the circuit before changing functions or ranges.
- Батареянын аз көрсөткүчү так көрсөткүчтөрдү камсыз кылуу үчүн дароо батареяны алмаштырыңыз.
- Эсептегичти жарылуучу газ, буу же чаңдуу чөйрөдө иштетпеңиз.
3. Пакеттин мазмуну
Verify that all items listed below are present and undamaged:
- Mastech MS8230B Digital Multimeter
- Сыноочу линзалар (бир жуп)
- 9V батарея (алдын ала орнотулган же өзүнчө кошулган)
- User Manual
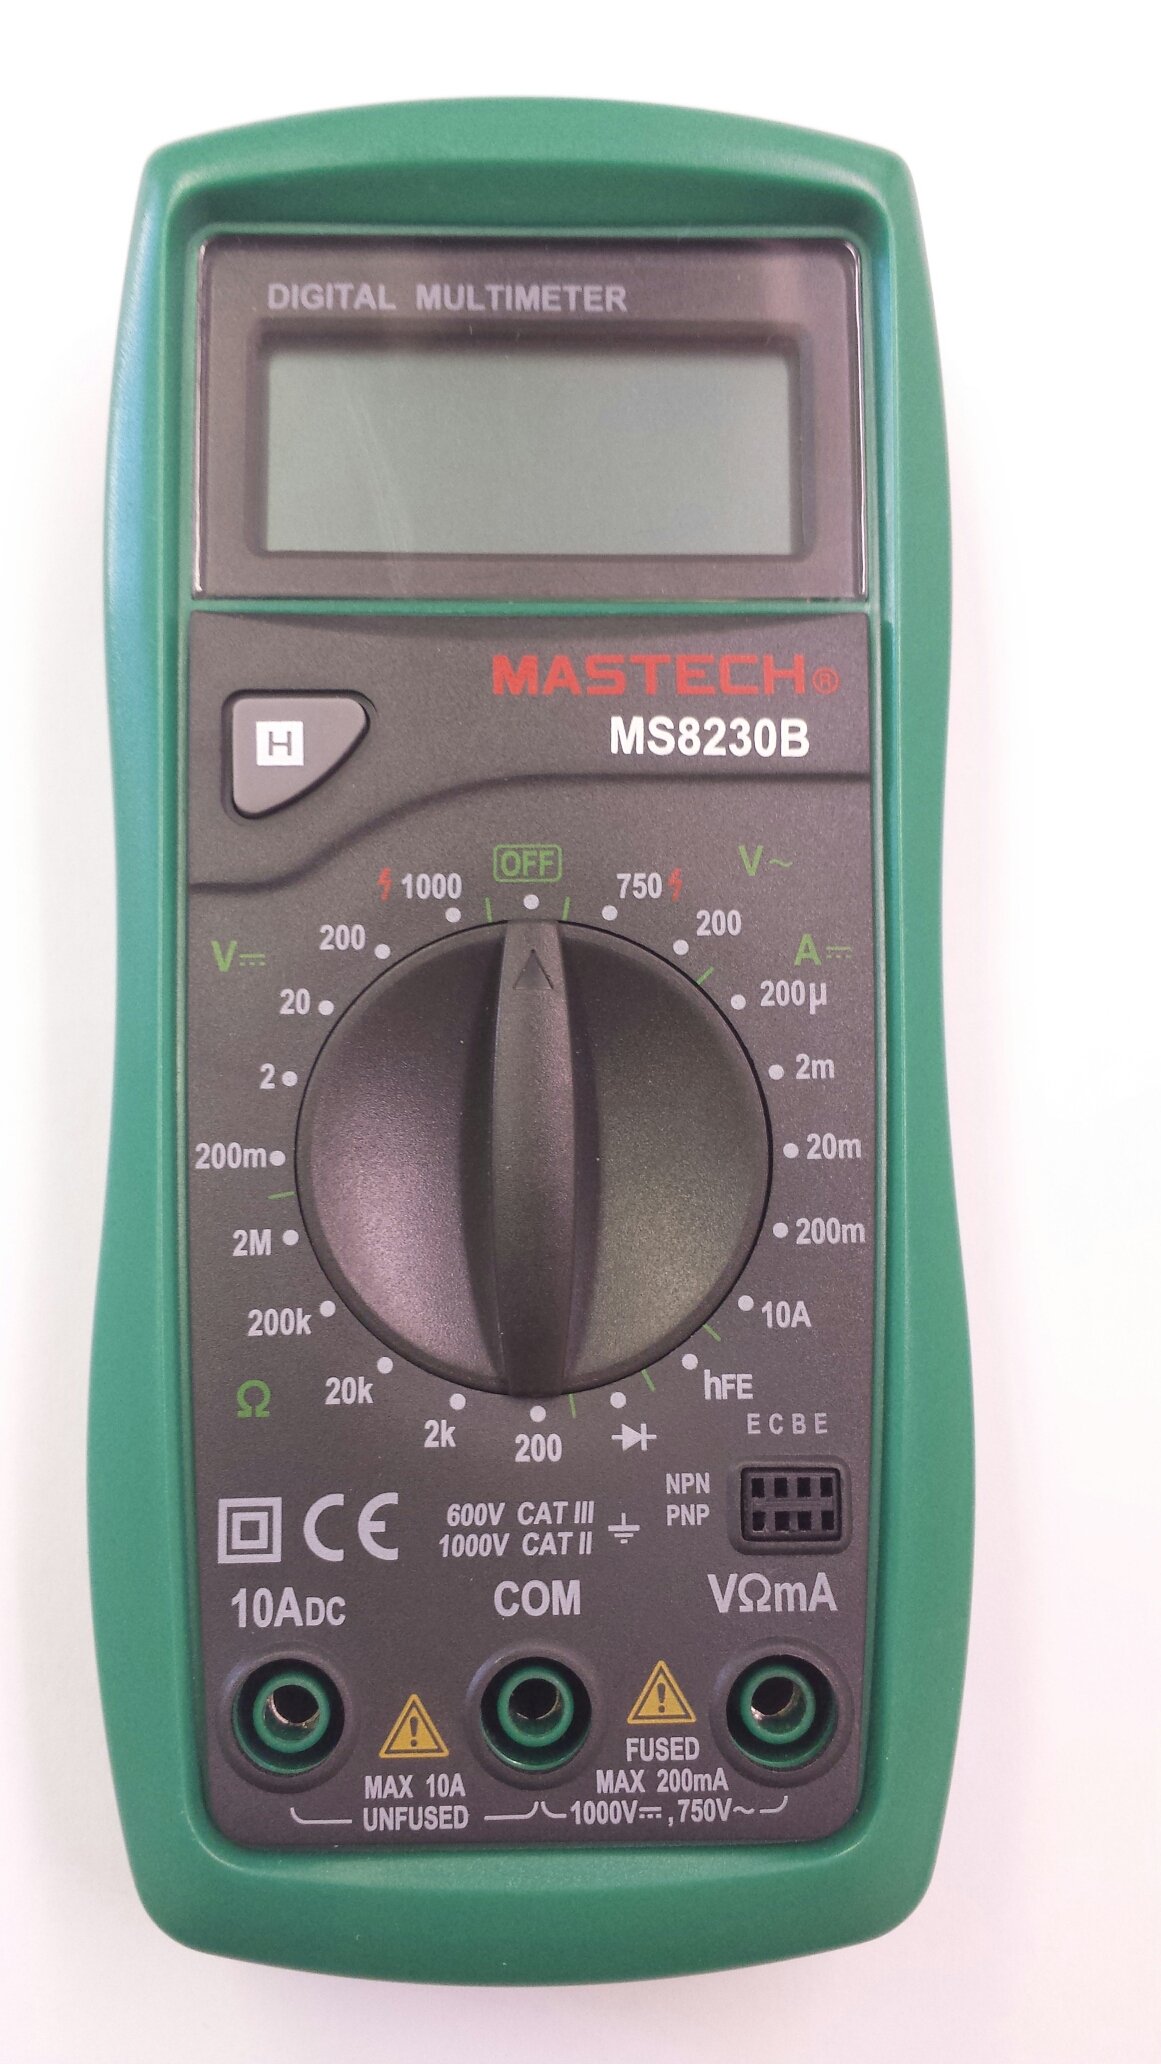
Image 1: Contents of the Mastech MS8230B package, including the multimeter, test leads, batteries, and user manual.
4. Орнотуу
4.1 Батареяны орнотуу
The MS8230B multimeter requires one 9V battery for operation. If the battery is not pre-installed or needs replacement:
- Мультиметрдин өчүк экенин текшерип, бардык сыноо өткөргүчтөрүн ажыратыңыз.
- Аппараттын артындагы батарея бөлүкчөсүнүн капкагын табыңыз.
- Loosen the screw(s) on the battery cover and remove the cover.
- Connect the 9V battery to the battery connector, observing correct polarity.
- Батареяны бөлүмгө салыңыз жана капкакты ордуна бурагыч(тар) менен бекитиңиз.
4.2 Сыноо өткөргүчтөрүн туташтыруу
Always connect the test leads correctly for the desired measurement:
- Кызыл сыноо өткөргүчтү том үчүн "VΩmA" уячасына салыңызtagд, каршылык, жана төмөнкү учурдагы өлчөө.
- Insert the red test lead into the "10ADC" jack for high DC current measurements (up to 10A).
- Always insert the black test lead into the "COM" (common) jack.
5. Иштөө нускамалары
Before taking any measurement, ensure the test leads are correctly connected and the function switch is set to the appropriate range.
5.1 DC Voltage Өлчөө (DCV)
- Кызыл сыноо зымын "VΩmA" уячасына, ал эми кара сыноо зымын "COM" уячасына туташтырыңыз.
- Set the rotary switch to the desired DCV range (e.g., 200mV, 2V, 20V, 200V, 1000V). If the voltage белгисиз, эң жогорку диапазондон баштап, зарылчылыкка жараша азайтыңыз.
- Сыноо өткөргүчтөрүн өлчөнө турган компонент же схема боюнча туташтырыңыз.
- Томду окуңузtage value on the LCD display. Observe the polarity indication.
5.2 AC томtage Өлчөө (ACV)
- Кызыл сыноо зымын "VΩmA" уячасына, ал эми кара сыноо зымын "COM" уячасына туташтырыңыз.
- Set the rotary switch to the desired ACV range (e.g., 200V, 750V). Start with the highest range if the voltagе белгисиз.
- Сыноо өткөргүчтөрүн өлчөнө турган компонент же схема боюнча туташтырыңыз.
- Томду окуңузtage дисплейдеги e мааниси.
5.3 Туруктуу токту өлчөө (ТТО)
Абайлаңыз: Эч качан чынжырдагы ток күчүн вольт менен өлчөөгө аракет кылбаңызtage present by connecting the meter in parallel. Always connect the meter in series with the load.
- Determine the expected current. For currents up to 200mA, connect the red lead to "VΩmA". For currents up to 10A, connect the red lead to "10ADC". The black lead always goes to "COM".
- Set the rotary switch to the appropriate DCA range (e.g., 200µA, 2mA, 20mA, 200mA, 10A).
- Turn off the power to the circuit. Open the circuit where the current is to be measured.
- Мультиметрди чынжыр менен катар туташтырыңыз.
- Схемага кубат бериңиз жана ЖК дисплейдеги учурдагы маанини окуңуз.
5.4 Каршылыкты өлчөө
Абайлаңыз: Ensure the circuit under test is completely de-energized and all capacitors are discharged before measuring resistance.
- Кызыл сыноо зымын "VΩmA" уячасына, ал эми кара сыноо зымын "COM" уячасына туташтырыңыз.
- Set the rotary switch to the desired Resistance (Ω) range (e.g., 200Ω, 2kΩ, 20kΩ, 200kΩ, 2MΩ).
- Сыноо өткөргүчтөрүн өлчөнө турган компонентке туташтырыңыз.
- ЖК дисплейдеги каршылыктын маанисин окуңуз.
5.5 Диоддун сыноосу
Абайлаңыз: Ensure the circuit under test is completely de-energized and all capacitors are discharged before performing a diode test.
- Кызыл сыноо зымын "VΩmA" уячасына, ал эми кара сыноо зымын "COM" уячасына туташтырыңыз.
- Set the rotary switch to the Diode symbol (→|).
- Connect the red test lead to the anode and the black test lead to the cathode of the diode. The display will show the forward voltage drop (typically 0.5V to 0.8V for silicon diodes).
- Reverse the test leads. The display should show "OL" (Open Loop) for a good diode. A reading in both directions or "0" indicates a shorted diode.
5.6 Транзистордун hFE сыноосу
Абайлаңыз: Ensure the transistor is not connected to a live circuit.
- Айланма которгучту "hFE" абалына коюңуз.
- Транзистор NPN же PNP экендигин аныктаңыз.
- Insert the transistor's emitter, base, and collector leads into the corresponding holes in the hFE socket on the multimeter.
- ЖК дисплейден hFE (туруктуу токтун күчөшү) маанисин окуңуз.
5.7 Маалыматты кармоо функциясы
Press the "H" button to hold the current reading on the display. Press it again to release the hold function and resume live readings.
6. Техникалык тейлөө
6.1 Тазалоо
Ишти жарнама менен сүртүңүзamp cloth and mild detergent. Do not use abrasives or solvents. Keep the jacks free of dust and debris.
6.2 Батареяны алмаштыруу
When the battery symbol appears on the LCD, the 9V battery needs to be replaced. Refer to section 4.1 for battery installation instructions.
6.3 Сактагычты алмаштыруу
The multimeter is protected by a fuse. If the current measurement function stops working, the fuse may need replacement. This should only be performed by qualified personnel. The fuse specifications are typically printed near the fuse holder or in the specifications section.
7. Кыйынчылыктарды
If the multimeter does not function correctly, check the following:
- Дисплей жок же дисплей алсыз: Батареяны текшериңиз. Керек болсо алмаштырыңыз.
- Туура эмес окуулар: Ensure the test leads are properly connected, the function switch is on the correct range, and the battery is not low.
- "OL" (Ашыкча жүктөө) көрсөтүлдү: Ченелген маани тандалган диапазондон ашып кетти. Жогорку диапазонго которулуңуз.
- Токту өлчөө иштебей жатат: Сақтандыргычты текшериңиз.
Эгер көйгөйлөр чечилбесе, кардарларды колдоо кызматына кайрылыңыз.
8. Техникалык шарттар
The Mastech MS8230B Digital Multimeter offers the following technical specifications:

Image 2: Detailed specifications for the Mastech MS8230B Multimeter, including display, range, and accuracy.
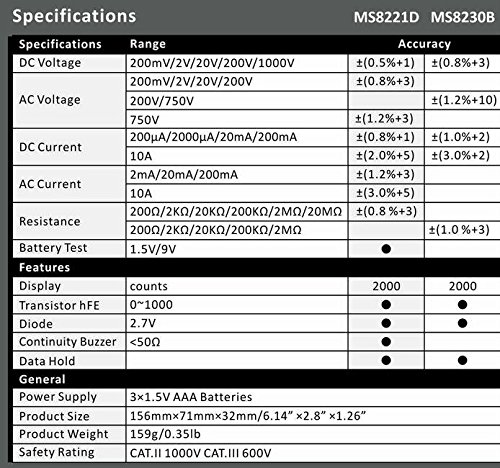
Image 3: Comparison table of specifications for Mastech MS8230B and MS8221D multimeters.
| Спецификация | Нарк |
|---|---|
| Дисплей | 1999 counts, 15mm digit height |
| DC Voltage (DCV) | 200mV, 2V, 20V, 200V, 1000V (Accuracy: 0.5% to 0.8%) |
| AC Voltage (ACV) | 200V, 750V (Accuracy: 1.2%) |
| Туруктуу ток (DCA) | 200µA, 2mA, 20mA, 200mA, 10A (Accuracy: 1.0% to 2.0%) |
| Каршылык көрсөтүү (Ω) | 200Ω, 2kΩ, 20kΩ, 200kΩ, 2MΩ (Accuracy: 0.8% to 1.0%) |
| Диод сыноо | Алга томtagд тамчы |
| Транзистор hFE сыноо | 1ден 1000га чейин |
| Маалыматтарды кармоо | Ооба |
| Батареянын төмөн көрсөткүчү | Ооба |
| Ашыкча жүктөн коргоо | Ооба |
| Power Source | 1 x 9V батарейка |
| Өлчөмдөрү (L x W x Y) | 15.2 x 7.6 x 2.5 см (болжол менен 6 x 3 x 1 дюйм) |
| Салмагы | Болжол менен 158.76 г (5.6 унция) |
| Коопсуздук рейтинги | IEC 1010-1 CAT III 600V, CAT II 1000V |
| Иштөө температурасы | 0°Cден 40°Cге чейин (32°F—104°F) |
| Сактоо температурасы | -10°Cден 50°Cге чейин (14°Fтен 122°Fге чейин) |
9. Кепилдик жана колдоо
Mastech products are designed for reliability and performance. For specific warranty details, please refer to the warranty card included with your product or contact your local Mastech distributor.
For technical support or service inquiries, please contact Mastech customer service through their official webсайт же сатып алуу документтери менен камсыз байланыш маалыматы.