1. Киришүү
This manual provides essential instructions for the safe and efficient operation of your SINGER Start 1306 Sewing Machine. Please read it thoroughly before using the machine to ensure proper setup, usage, and maintenance. The SINGER Start 1306 is designed for home sewing projects, featuring 6 built-in stitches, easy threading, and a 4-step buttonhole function.

Сүрөт 1.1: Алдыңкы view of the SINGER Start 1306 Sewing Machine.
2. Коопсуздук маалыматы
Өрт, электр шок же жаракат алуу коркунучун азайтуу үчүн электр шаймандарын колдонууда ар дайым негизги коопсуздук чараларын сактаңыз.
- Машинаны колдонуудан мурун бардык нускамаларды окуп чыгыңыз.
- Keep the machine away from water or wet surfaces.
- Unplug the machine from the electrical outlet when not in use, when servicing, or when changing accessories.
- Эгерде машинанын шнуру же сайгычы бузулган болсо, ал туура иштебей жатса, же түшүп кетсе же бузулуп калса, аны эч качан иштетпеңиз.
- Бармактарды кыймылдуу бөлүктөрдөн алыс кармаңыз. Тигүүчү машинанын ийнесинин айланасында өзгөчө кылдаттык талап кылынат.
- Өндүрүүчүлөр сунуштаган аксессуарларды гана колдонуңуз.
- Эч качан эч кандай тешикке эч кандай нерсени түшүрбөңүз же салбаңыз.
3. Орнотуу
3.1 Пакеттен чыгаруу жана мазмуну
Carefully remove the machine from its packaging. Retain all packaging materials for future transport or storage. Verify that all included components are present:
- Көп максаттуу бут
- Сыдырма буту
- Buttonhole Foot
- Төшөө пластина
- Ийнелердин топтому
- Bobbins
- Spool Pin Felts
- Ийнелүү плиталуу отвертка
- Тигиш жырткыч / Түктүү щетка
- Vinyl Dust Cover
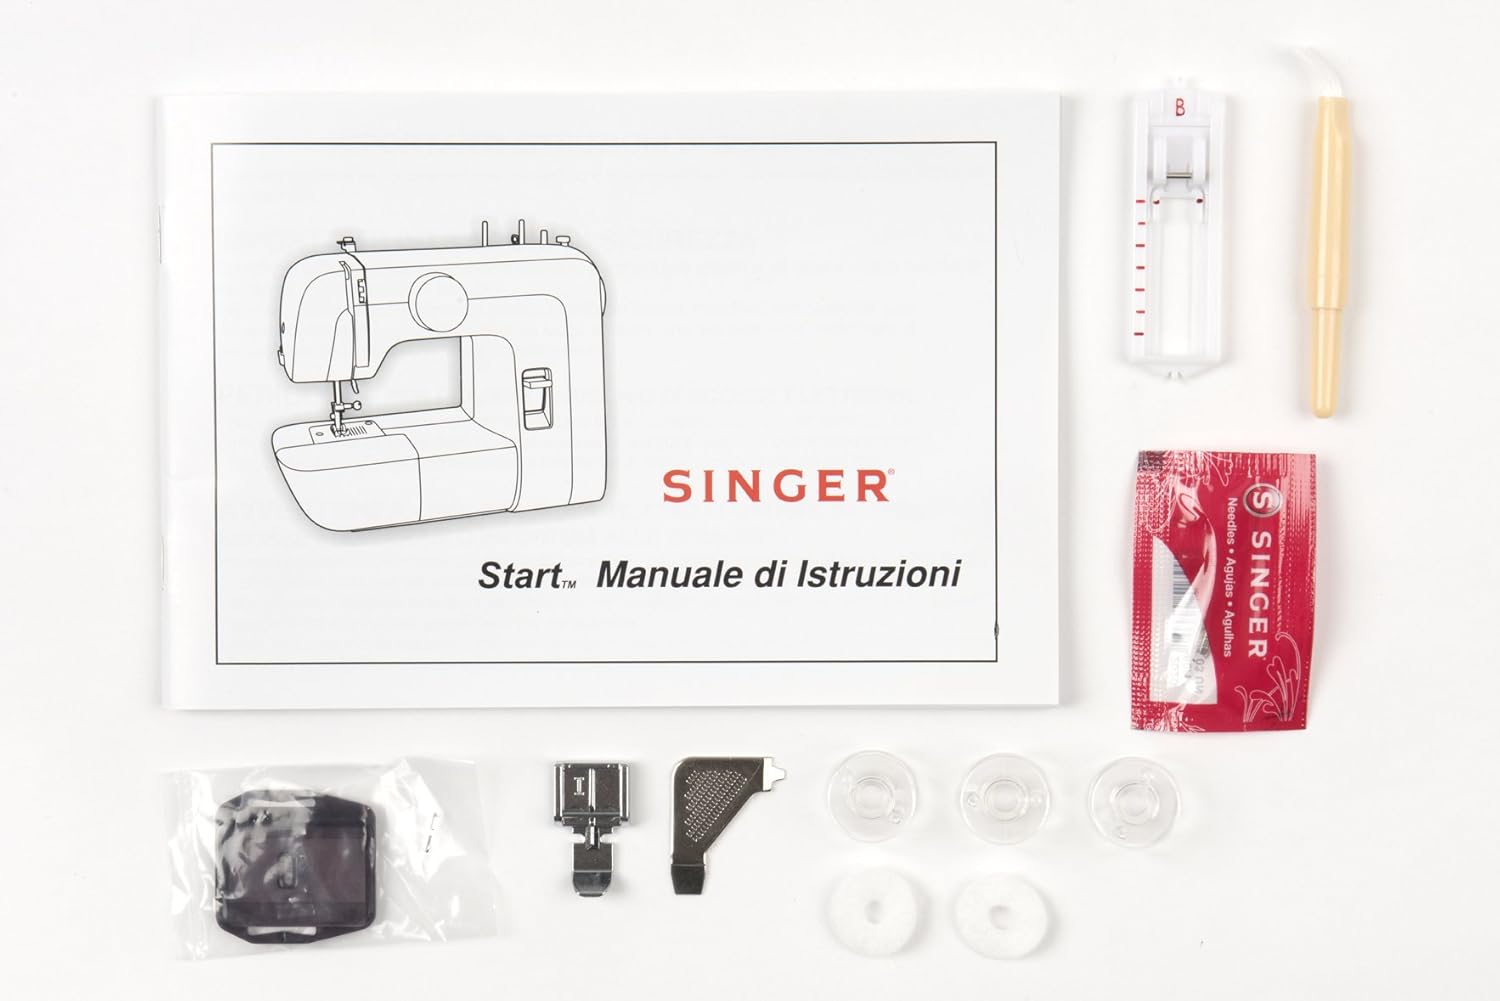
Image 3.1: Included accessories and instruction manual.
3.2 Кубат туташтыруу
Connect the power cord to the machine's power input socket and then plug it into a suitable electrical outlet (220V). Ensure the machine is switched off before connecting to power.

Сүрөт 3.2: Арткы view showing power input and foot pedal connection.
3.3 Машинага жип салуу
Тигиштин туура түзүлүшү үчүн жипти туура сайуу абдан маанилүү.
3.3.1 Бобинди ороо
- Спулдун төөнөгүчтүн үстүнө жиптин катушкасын коюңуз.
- Жипти үстүнкү жип жетектөөчүсү аркылуу өткөрүңүз.
- Wrap the thread clockwise around the bobbin winding tension disc.
- Жипти катушкадагы кичинекей тешик аркылуу ичинен сыртка киргизиңиз.
- Шпульканы шпульканын спиралына коюп, шпиндельди оңго түртүңүз.
- Hold the thread end and press the foot pedal. Wind a few turns, then trim the excess thread.
- Continue winding until the bobbin is full. The winder will stop automatically.
- Push the bobbin winder spindle to the left and remove the bobbin.
3.3.2 Бобинди салуу
- Бобин капкагын ачыңыз.
- Оролгон катушканы катушканын кутусуна жипти саат жебесине каршы багыт менен жазып салыңыз.
- Guide the thread into the tension spring slot and pull it firmly until it snaps into place.
- Бобин капкагын жабыңыз.
3.3.3 Үстүнкү жипти өткөрүү
- Кол дөңгөлөктүн жардамы менен ийнени эң бийик абалга көтөрүңүз.
- Басуучу бут көтөргүчтү көтөрүңүз.
- Спулдун төөнөгүчтүн үстүнө жиптин катушкасын коюңуз.
- Жипти үстүнкү жип жетектөөчүсү аркылуу өткөрүңүз.
- Bring the thread down through the right channel, then up through the left channel, ensuring it passes through the take-up lever.
- Ийнени алдыдан артка сайлаңыз.

Image 3.3: Illustration of the upper threading path.
3.4 Ийне орнотуу
To install or replace a needle:
- Кол дөңгөлөктү буруп, ийнени эң бийик абалга көтөрүңүз.
- Ийне клинасын бошотуңузamp бурама.
- Эски ийнени алып салыңыз.
- Жаңы ийнени жалпак тарабын машинанын артына каратып сайыңыз. Аны мүмкүн болушунча өйдө түртүңүз.
- Ийне clamp коопсуз бураңыз.

Image 3.4: Close-up of the needle and presser foot area.
4. Иштөө нускамалары
4.1 Тигүүнү тандоо
The SINGER Start 1306 offers 6 built-in stitch patterns. Turn the stitch selector dial to choose your desired stitch. The available stitches include 4 basic, 1 decorative, and 1 buttonhole stitch.

Image 4.1: Stitch selector dial with various stitch patterns.
4.2 Тигүү негиздери
4.2.1 Starting a Seam
- Кездемени басуучу буттун астына коюп, четин ийне пластинасындагы тигиш багыттоочу менен тегиздеңиз.
- Басуучу бутту түшүрүңүз.
- Turn the handwheel to lower the needle into the fabric at the starting point.
- Press the foot pedal gently to begin sewing.
4.2.2 Finishing a Seam
- Sew to the end of your seam.
- Press the reverse stitch lever to sew a few stitches backward to secure the seam.
- Ийнени эң бийик абалга көтөрүңүз.
- Басуучу бутту көтөрүңүз.
- Pull the fabric away from the machine, then cut the threads using the thread cutter on the machine.
4.3 4-Step Buttonhole Function
The machine features a 4-step buttonhole function for creating buttonholes. Refer to the markings on the stitch selector dial for each step (1, 2, 3, 4). Use the buttonhole foot for best results.
4.4 Zipper Insertion
Attach the zipper foot to the machine. This foot allows you to sew close to the zipper teeth, ensuring a neat finish. Follow standard zipper insertion techniques, adjusting the needle position as needed.
4.5 Free Arm Usage
The removable free arm provides access to difficult-to-reach areas such as collars, sleeves, cuffs, and pant hems. To use, slide off the accessory storage compartment to expose the free arm.
5. Техникалык тейлөө
5.1 Тазалоо
Regular cleaning helps maintain machine performance. Always unplug the machine before cleaning.
- Типти кетирүү: Use the provided lint brush to remove lint and dust from the bobbin area and feed dogs.
- Тышкы тазалоо: Сырткы беттерди жумшак, кургак чүпүрөк менен сүртүңүз. Катуу химиялык заттарды же абразивдүү тазалагычтарды колдонбоңуз.
5.2 Ийне алмаштыруу
Replace needles regularly, especially when sewing different fabric types or if the needle becomes bent or dull. A damaged needle can cause skipped stitches or fabric damage. Refer to section 3.4 for needle installation instructions.
6. Кыйынчылыктарды
Бул бөлүм сиз кабылышы мүмкүн болгон жалпы көйгөйлөрдү карайт. Бул жерде көрсөтүлбөгөн көйгөйлөр үчүн кардарларды колдоо бөлүмүнө кайрылыңыз.
| Көйгөй | Мүмкүн себеп | Чечим |
|---|---|---|
| Өткөрүлгөн тигүү | Туура эмес ийне, ийне ийилген, жип туура эмес өткөрүлгөн. | Ийнени алмаштырыңыз, машинаны кайра жиптеп өтүңүз, ийненин түрү кездемеге туура келерин текшериңиз. |
| Thread Breaking | Incorrect threading, tension too tight, damaged needle, poor quality thread. | Re-thread, adjust tension, replace needle, use good quality thread. |
| Катушка жибинин тыгылып калышы | Improperly wound bobbin, incorrect bobbin insertion, lint in bobbin case. | Шпульканы кайра ороп, шпульканы туура киргизип, шпульканын аймагын тазалаңыз. |
| Машина иштебей жатат | Power cord not connected, machine switched off, foot pedal not connected. | Check power connections, ensure switch is ON, connect foot pedal. |
7. Техникалык шарттар
| Өзгөчөлүк | Деталь |
|---|---|
| Бренд | ЫРЧЫ |
| Модель номери | Баштоо 1306 |
| Элемент Салмагы | 4.3 кг |
| Продукциянын өлчөмдөрү (LxWxH) | 35 x 18 x 29 см |
| Тtage | 220V |
| Ватtage | 70 Ватт |
| Камтылган тигүү | 6 (4 basic, 1 decorative, 1 buttonhole) |
| Топчу тешик түрү | 4-step automatic |
| Frame Material | Хэви-метал |
| Камтылган компоненттер | All Purpose Foot, Zipper Foot, Buttonhole Foot, Darning Plate, Pack of Needles, Bobbins, Spool Pin Felts, Needle Plate Screwdriver, Seam Ripper / Lint Brush, Vinyl Dust Cover |

Image 7.1: Product dimensions of the SINGER Start 1306 Sewing Machine.
8. Кепилдик жана колдоо
Your SINGER Start 1306 Sewing Machine comes with a manufacturer's warranty. Please refer to the warranty card included with your product for specific terms, conditions, and duration. For technical assistance, service, or to inquire about replacement parts, please contact SINGER customer support through their official webсайтты же кепилдик документтериңизде көрсөтүлгөн байланыш маалыматын.