
1. Киришүү
This instruction manual provides detailed guidance for the safe and efficient operation of your Juki HZL-353ZR-C Sewing Machine. Please read this manual thoroughly before using the machine to ensure proper setup, operation, and maintenance. Retain this manual for future reference.
The Juki HZL-353ZR-C is designed for home sewing projects, offering 21 built-in sewing patterns, an automatic needle threader, automatic one-step buttonholing, presser foot pressure adjustment, and bright LED lighting for enhanced visibility.
2. Маанилүү коопсуздук нускамалары
- Always unplug the sewing machine from the electrical outlet immediately after using, before cleaning, or when making any user servicing adjustments mentioned in this manual.
- Бармактарды кыймылдуу бөлүктөрдөн алыс кармаңыз. Тигүүчү машинанын ийнесинин айланасында өзгөчө кылдаттык талап кылынат.
- Туура ийне пластинасын колдонуңуз. Туура эмес пластина ийненин сынып кетишине алып келиши мүмкүн.
- Тигүү учурунда кездемени тартпаңыз же түртпөңүз. Бул ийненин кыйшайып, сынышына алып келиши мүмкүн.
- Ийненин аймагына кандайдыр бир өзгөртүүлөрдү киргизгенде, мисалы, ийнени жип менен өткөрүүдө, ийнени алмаштырууда, катушканы жип менен өткөрүүдө же басмактын бутунун алмаштыруусунда тигүүчү машинаны өчүрүңүз.
- Тигүүчү машинаны эч качан аба тешиктери тосулган абалда иштетпеңиз. Тигүүчү машинанын жана бут көзөмөлдөгүчтүн желдетүүчү тешиктерин жүндөн, чаңдан жана кенен кездемеден сактаңыз.
- Аэрозоль (спрей) продуктулары колдонулган же кычкылтек берилип жаткан жерде иштебеңиз.
- Бул шайман физикалык, сезүү же акыл-эс жөндөмү начар же тажрыйбасы жана билими жок адамдар (анын ичинде балдар) үчүн, эгерде алардын коопсуздугуна жооптуу адам тарабынан көзөмөлсүз же шайманды колдонуу боюнча көрсөтмө болбосо, колдонууга арналбайт.
3. Бөлүктөрдү идентификациялоо
Familiarize yourself with the main components of your Juki HZL-353ZR-C sewing machine.

3.1-сүрөт: Фронт view of the Juki HZL-353ZR-C Sewing Machine, showing the main body, needle area, and control dials.

3.2-сүрөт: The sewing machine with its removable accessory tray detached, revealing the free arm for circular sewing.
3.1 Needle Area and Presser Foot

3.3-сүрөт: Деталдаштырылган view of the needle, presser foot, and needle plate. This area is crucial for fabric feeding and stitch formation.
3.2 Stitch Selection Dial

3.4-сүрөт: The stitch selection dial, displaying various stitch patterns (A-T) available on the machine.
3.3 Bobbin Area

3.5-сүрөт: The top-loading bobbin area with a clear cover, allowing easy monitoring of bobbin thread supply.
3.4 Кошумча жабдуулар
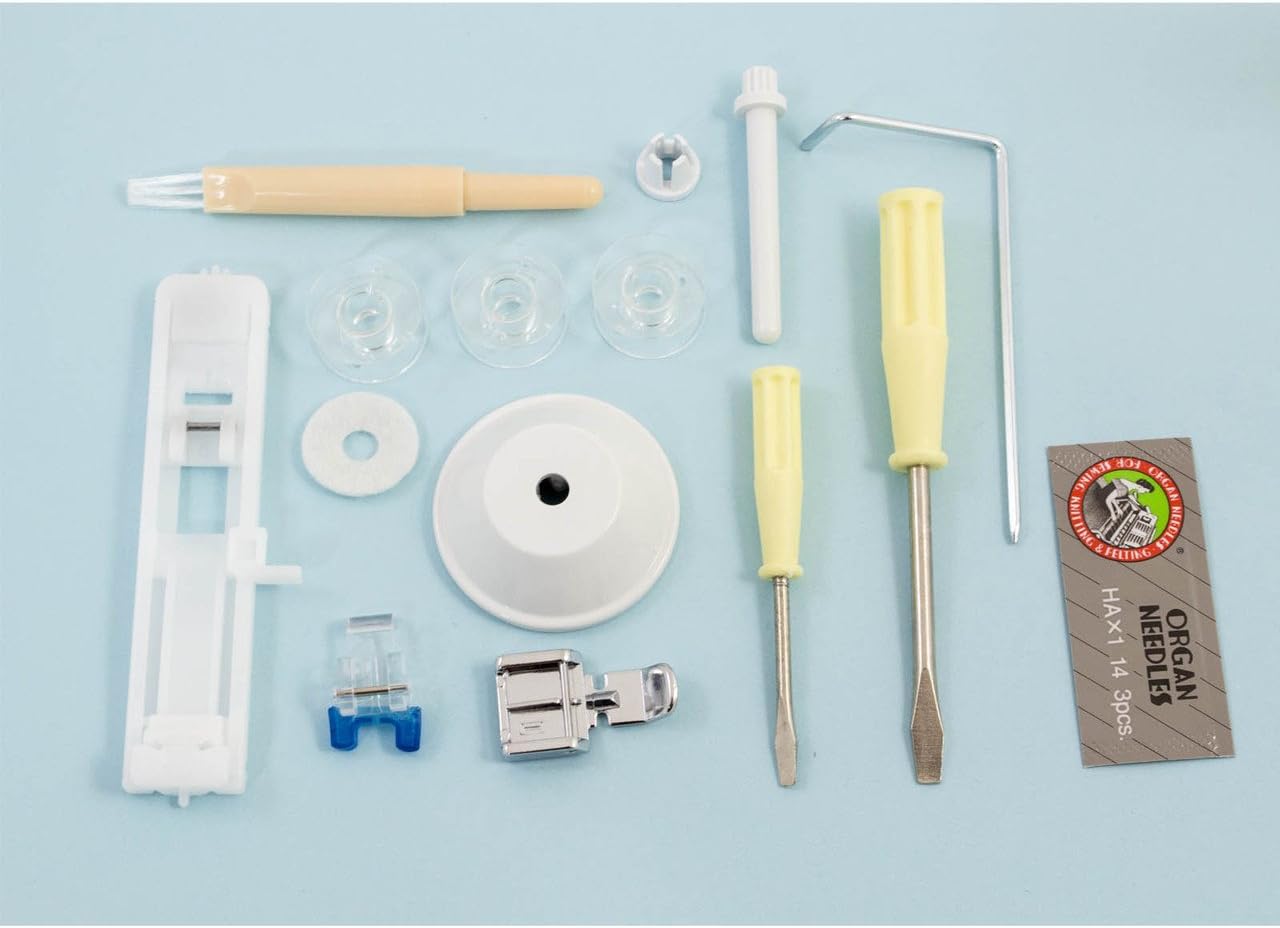
3.6-сүрөт: A collection of standard accessories included with the machine, such as bobbins, needles, screwdrivers, and various presser feet.
3.5 Instruction DVD
3.7-сүрөт: The included instruction DVD for the HZL-350Z series, providing visual guidance for machine setup and operation.
4. Орнотуу
4.1 Пакеттен чыгаруу жана жайгаштыруу
- Машинаны таңгагынан кылдаттык менен чыгарыңыз.
- Машинаны туруктуу, тегиз бетке коюңуз.
- Ensure adequate lighting and space for comfortable operation.
4.2 Кубат туташтыруу
- Бутту башкаруучу сайгычты машинанын розеткасына туташтырыңыз.
- Электр шнурын ылайыктуу электр розеткасына сайыңыз.
- Адатта машинанын капталында жайгашкан кубат которгучун күйгүзүңүз.
4.3 Бобинди ороо
- Спулдун төөнөгүчтүн үстүнө жиптин катушкасын коюңуз.
- Жипти орогучтун чыңалуу диски аркылуу өткөрүңүз.
- Бобин орогучтун шпинделине бош бобинди коюңуз.
- Жипти катушканын айланасына кол менен бир нече жолу ороп коюңуз.
- Орап оруучу шпиндельди оңго түртүңүз.
- Ороону баштоо үчүн бут башкаруучусун басыңыз. Катушка толгондо машина автоматтык түрдө токтойт.
- Жипти кесип, ийнени солго кайтарыңыз.
4.4 Үстүнкү жипти жип салуу
- Кол дөңгөлөктүн жардамы менен ийнени эң бийик абалга көтөрүңүз.
- Басуу бутунун рычагын көтөрүңүз.
- Жиптин спулун катушка төөнөгүчкө коюңуз.
- Follow the numbered threading path indicated on the machine, guiding the thread through the thread guides and tension discs.
- Жиптин кармоочу рычаг аркылуу өтүшүн камсыз кылыңыз.
- Thread the needle from front to back. Use the automatic needle threader if desired.
4.5 Бобинди салуу
- Бобин капкагын ачыңыз.
- Жиптин туура багытта (көбүнчө саат жебесине каршы) жайылышын камсыз кылуу менен, оролгон бобинди бобин кутусуна киргизиңиз.
- Guide the bobbin thread through the tension spring slot.
- Бобин капкагын жабыңыз.
- Hold the upper thread lightly and turn the handwheel towards you to bring up the bobbin thread.
- Эки жипти тең басуучу буттун астына жана машинанын артына тартыңыз.
5. Иштөө нускамалары
5.1 Тигүү үлгүсүн тандоо
- Turn the stitch selection dial to choose one of the 21 available patterns (A-T). Refer to the stitch chart on the machine body.
- The selected stitch will be indicated by the dial position.
5.2 Тигиштин узундугун жана туурасын тууралоо
- The stitch length and width are typically adjusted via dedicated dials or levers. Consult the machine's markings for specific settings for each stitch.
- For most utility stitches, a length of 2.5mm is standard.
5.3 Жиптин тартылышын жөндөө
- The upper thread tension dial controls the tightness of the upper thread.
- Adjust the tension as needed to achieve balanced stitches (where upper and lower threads meet evenly between fabric layers).
- A common starting point is usually around '4' or '5' on the dial.
5.4 Тигүү негиздери
- Place the fabric under the presser foot, aligning the edge with a seam guide.
- Басуу бутунун рычагын түшүрүңүз.
- Turn the handwheel to lower the needle into the fabric at the starting point.
- Press the foot controller gently to begin sewing. Control speed by varying pressure on the foot controller.
- Тескери тигүү үчүн (тигиштерди бекитүү үчүн), тескери тигүү рычагын/баскычын басып, кармап туруңуз.
- When finished, raise the needle to its highest position, raise the presser foot, and pull the fabric away from the machine. Cut threads using the thread cutter.
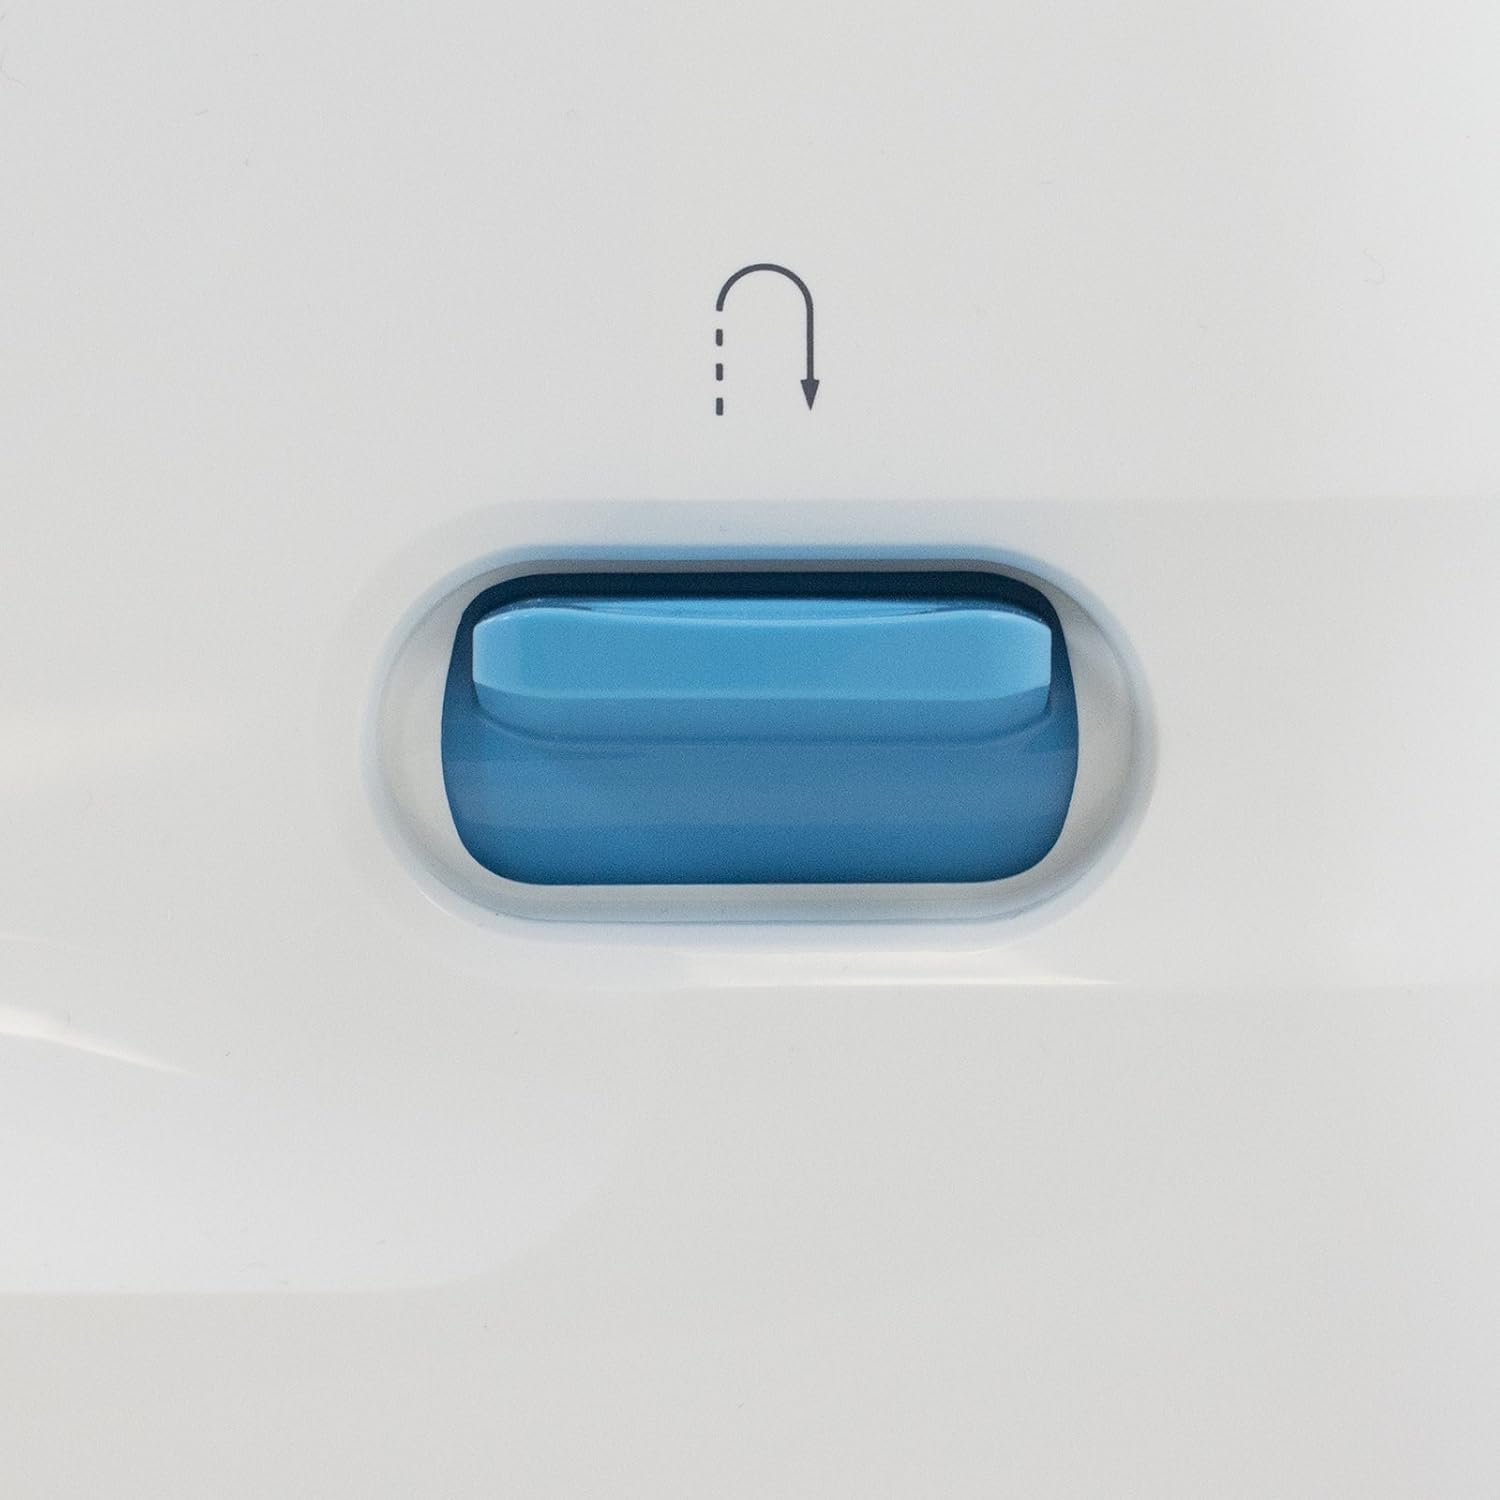
5.1-сүрөт: Close-up of the reverse stitch lever, used to sew backwards and secure stitches at the beginning and end of a seam.
5.5 Автоматтык ийне жип өткөргүч
- Ensure the needle is in its highest position.
- Lower the needle threader lever.
- Guide the thread as instructed by the markings near the needle threader.
- Release the lever, and the thread will be pulled through the needle eye.
5.6 Automatic One-Step Buttonholing
- Attach the buttonhole presser foot.
- Колдонгуңуз келген баскычты топчу тешигинин бутунун кармагычына салыңыз.
- Select the buttonhole stitch pattern.
- Илгич рычагын төмөндөтүңүз.
- Begin sewing; the machine will automatically create a buttonhole sized to your button.
6. Техникалык тейлөө
6.1 Машинаны тазалоо
- Тазалоодон мурун ар дайым машинаны розеткадан ажыратыңыз.
- Ийнени, басуучу бутту жана ийне пластинасын алып салыңыз.
- Use the small brush provided (or a soft brush) to remove lint and dust from the bobbin case area and feed dogs.
- Машинанын сыртын жумшак, кургак чүпүрөк менен сүртүңүз. Суюк тазалоочу каражаттарды колдонбоңуз.
6.2 Ийне алмаштыруу
- Машинаны өчүрүп, розеткадан ажыратыңыз.
- Ийне клинасын бошотуңузamp бурама.
- Эски ийнени алып салыңыз.
- Жаңы ийнени жалпак тарабын машинанын артына каратып, мүмкүн болушунча өйдө түртүңүз.
- Ийне clamp коопсуз бураңыз.
7. Кыйынчылыктарды
| Көйгөй | Мүмкүн себеп | Чечим |
|---|---|---|
| Өткөрүлгөн тигүү | Туура эмес ийне, ийилген ийне, жип туура эмес өткөрүлгөн, кездеменин ийне өлчөмү туура эмес. | Replace needle with correct type/size, re-thread machine, ensure needle is fully inserted. |
| Жиптин үзүлүшү (үстүнкү) | Improper threading, tension too tight, burr on needle/thread path, poor quality thread. | Re-thread machine, adjust tension, check for burrs, use quality thread. |
| Жиптин үзүлүшү (катуу) | Improper bobbin winding, bobbin inserted incorrectly, lint in bobbin case. | Шпульканы кайра ороп, шпульканы кайра туура киргизиңиз, шпульканын кутусун тазалаңыз. |
| Тегиз эмес тигүү | Incorrect thread tension, incorrect presser foot pressure. | Adjust upper thread tension, adjust presser foot pressure. |
| Машина иштебей жатат | Power cord not plugged in, power switch off, foot controller not connected. | Check all power connections, ensure power switch is ON. |
8. Техникалык шарттар
| Өзгөчөлүк | Деталь |
|---|---|
| Модель номери | HZL-353ZR-C |
| Өлчөмдөр (Продукт) | 20 x 8 x 16 дюйм (болжол менен) |
| Элемент Салмагы | 21.4 фунт |
| Built-in Stitch Patterns | 21 |
| Ийне сайгыч | Автоматтык |
| Buttonholing | Automatic One-Step |
| Жарыктандыруу | Жарык LED |
| Басуучу буттун басымы | Жөнгө салынуучу |
| UPC | 189624000570, 708038730004 |
9. Кепилдик жана колдоо
For warranty information and customer support, please refer to the documentation included with your purchase or contact Juki customer service directly. Details regarding specific warranty periods and terms are typically provided at the time of purchase.
Additional support resources, including FAQs and service center locations, may be available on the official Juki webсайт.