1. Киришүү
This manual provides instructions for the installation, operation, and maintenance of the Westek In-Wall Programmable Digital Timer, Model ATW-T24. This device is designed to add automated programming functionality to various electrical devices such as lights, heaters, and fans. It features an LCD display for easy programming and a rechargeable battery backup to retain settings during power interruptions.
The timer supports up to 7 weekly programs and includes a random option for enhanced security.
2. Коопсуздук маалыматы
ЭСКЕРТҮҮ: To avoid fire, shock, or death; turn off power at the circuit breaker or fuse box and test that the power is off before wiring. All wiring should be performed by a qualified electrician or in accordance with local electrical codes. This device is for indoor use only. Do not exceed the specified electrical ratings.
- Орнотуудан же тейлөөдөн мурун ар дайым электр кубатынан ажыратыңыз.
- Бардык байланыштар коопсуз жана туура изоляцияланганын текшериңиз.
- нымдуу же г колдонбоңузamp жерлер.
- Балдар жетпеген жерде сактаңыз.
3. Пакеттин мазмуну
The package for the Westek In-Wall Programmable Digital Timer (Model ATW-T24) includes:
- One (1) Westek In-Wall Programmable Digital Timer, 120 V, 1 HP
- One (1) Lithium Ion battery (pre-installed)
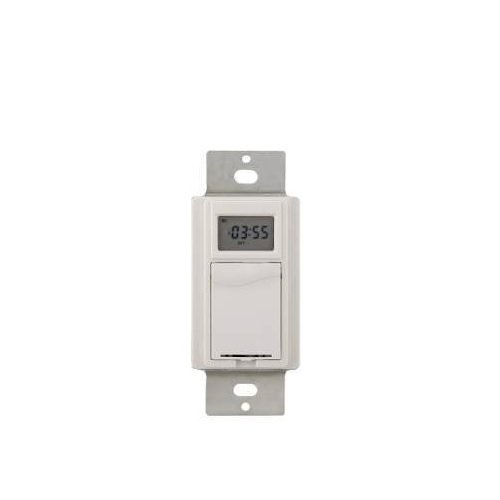
Сүрөт 1: Алдыңкы view of the Westek In-Wall Programmable Digital Timer. The timer features a white faceplate with a digital display and control buttons.
4. Орнотуу
Installation of this in-wall timer requires electrical wiring knowledge. If you are unsure about any part of the installation process, consult a qualified electrician.
- Кубатты өчүрүү: Locate the circuit breaker or fuse that supplies power to the switch box where the timer will be installed. Turn off the power completely. Verify power is off using a voltage сыноочу.
- Учурдагы которгучту алып салуу: Дубалдагы пластинаны этияттык менен алып салыңыз жана дубал кутучасынан бар болгон өчүргүчтү бурап чыгарыңыз. Эски өчүргүчтөн зымдарды ажыратыңыз.
- Таймерди туташтырыңыз: Connect the wires to the Westek timer according to the wiring diagram provided with the product packaging. Typically, this involves connecting line (hot), load, and ground wires. Ensure all connections are tight and secure.
- Таймерди орнотуу: Зымдуу таймерди дубал кутучасына акырын түртүңүз. Аны берилген бурамалар менен бекитиңиз.
- Дубал плитасын орнотуу: Жаңы же бар дубал пластинасын таймердин үстүнө бекитиңиз.
- Күчтү калыбына келтирүү: Электрди өчүргүчтөн же сактагыч кутудан кайра күйгүзүңүз.

Image 2: The Westek In-Wall Programmable Digital Timer shown with its internal components and wiring connections. This image illustrates the back of the timer where electrical connections are made.
5. Иштөө нускамалары
The Westek In-Wall Programmable Digital Timer allows for flexible scheduling of connected devices. The LCD display and control buttons facilitate programming.
5.1 Баштапкы орнотуу жана убакытты орнотуу
- Баштапкы күйгүзүлгөндө же узакка созулган кубаттан кийинtage, the display may show a default time or require setting.
- Use the designated buttons (e.g., "SET," "HOUR," "MINUTE," "DAY") to adjust the current time and day of the week. Refer to the specific button labels on your device for precise controls.
- Confirm the settings to save the current time.
5.2 Программалоону күйгүзүү/өчүрүү циклдери
The timer supports up to 7 custom weekly programs.
- Press the "PROG" or "PROGRAM" button to enter programming mode.
- The display will typically show "PROG 1 ON" or similar. Use the "HOUR," "MINUTE," and "DAY" buttons to set the desired ON time and days for the first program.
- Press "PROG" again to set the "PROG 1 OFF" time and days.
- Repeat for up to 7 programs as needed.
- Exit programming mode by pressing a dedicated "RUN" or "CLOCK" button, or by allowing the timer to time out.
5.3 Random Option
To deter intruders, the timer includes a random ON/OFF feature. When activated, the timer will randomly vary the programmed ON/OFF times by a small interval (e.g., +/- 30 minutes) to simulate occupancy.
- Locate the "RANDOM" or "RND" button.
- Press it to activate or deactivate the random function. An indicator on the LCD may confirm its status.
5.4 Кол менен жокко чыгаруу
Most digital timers allow for a temporary manual override of the current program without erasing it.
- Press the "MANUAL" or "ON/OFF" button to toggle the connected device on or off, overriding the current program until the next programmed event.
5.5 Батареянын камдык көчүрмөсү
The integrated rechargeable Lithium Ion battery maintains the time and programmed settings during power outages. The battery recharges automatically when main power is restored.
6. Техникалык тейлөө
The Westek In-Wall Programmable Digital Timer requires minimal maintenance.
- Тазалоо: To clean the timer, wipe the surface with a soft, dry cloth. Do not use abrasive cleaners, solvents, or spray directly onto the unit.
- Батарея: The internal rechargeable battery is designed for long-term use and typically does not require replacement. If the timer consistently loses settings during power outages, the battery may need servicing by a qualified technician.
7. Кыйынчылыктарды
| Көйгөй | Мүмкүн себеп | Чечим |
|---|---|---|
| Таймер күйбөй жатат. | No power to the switch box; incorrect wiring. | Автоматтык өчүргүчтү/сактагычты текшериңиз. Зымдардын туташууларынын туура жана бекем экенин текшериңиз. |
| Түзмөк программалангандай күйбөйт/өчпөйт. | Incorrect program settings; manual override active. | Review and re-enter program settings. Check if manual override is active and deactivate if necessary. |
| LCD display is difficult to read. | Poor lighting conditions; display angle. | Ensure adequate ambient lighting. Adjust viewing angle if possible. |
| Таймер электр энергиясын өчүргөндөн кийин жөндөөлөрүн жогототtage. | Rechargeable battery backup not functioning. | Allow time for the battery to recharge. If problem persists, contact customer support. |
| Difficulty programming the timer. | Программалоо кадамдары менен тааныш эместик. | Carefully follow the operating instructions in Section 5. Practice programming without a connected load if possible. |
8. Техникалык шарттар
- Бренд: Westek
- Модель номери: ATW-T24
- Бөлүмдүн номери: TMDW30CC
- Тtage: 120 V
- Ат күчү (HP): 1 HP
- Материал: Пластик
- Түсү: Ак
- Элемент Салмагы: 5.9 унция
- Продукциянын өлчөмдөрү: 1.25 x 1.75 x 3 дюйм
- Батареялар: 1 литий-иондук батарейка (кошулган)
- Которуу стили: Которуу
- UPC: 700814916251, 889932723870, 070686506066, 696746170994
- Биринчи жеткиликтүү: 26-июль, 2005-жыл
9. Кепилдик жана колдоо
Кепилдиктин сүрөттөлүшү: The manufacturer states "Not applicable" for warranty information. Please refer to your retailer's return policy for details on returns or exchanges.
For technical assistance or further inquiries, please contact Westek customer support through their official webпродукт сатылып алынган сайт же сатуучу.