
1. Киришүү
The Pro'sKit BX-4123 Round Hole Bread Board is a solderless prototyping tool designed for temporary circuit building and experimentation. It is ideal for students, hobbyists, and professionals in research and development. This breadboard features 1580 tie points, allowing for quick and easy assembly and modification of electronic circuits without the need for soldering.
This manual provides essential information for the proper use, maintenance, and understanding of your BX-4123 breadboard.
2. Өзгөчөлүктөрү
The Pro'sKit BX-4123 breadboard offers the following key features:
- 1580 Tie Points: камсыз кылат ample space for complex circuit designs.
- Round Hole Design: Engineered for easy insertion and removal of component leads, ensuring secure connections.
- Кеңейтүүчү: Multiple BX-4123 boards can be combined to create larger prototyping areas as needed.
- Туруктуу курулуш: Made from wear-resistant ABS plastic and phosphor bronze contacts for good flexibility and electrical conductivity.
- Integrated Power Rails: Dedicated power and ground rails simplify power distribution to components.
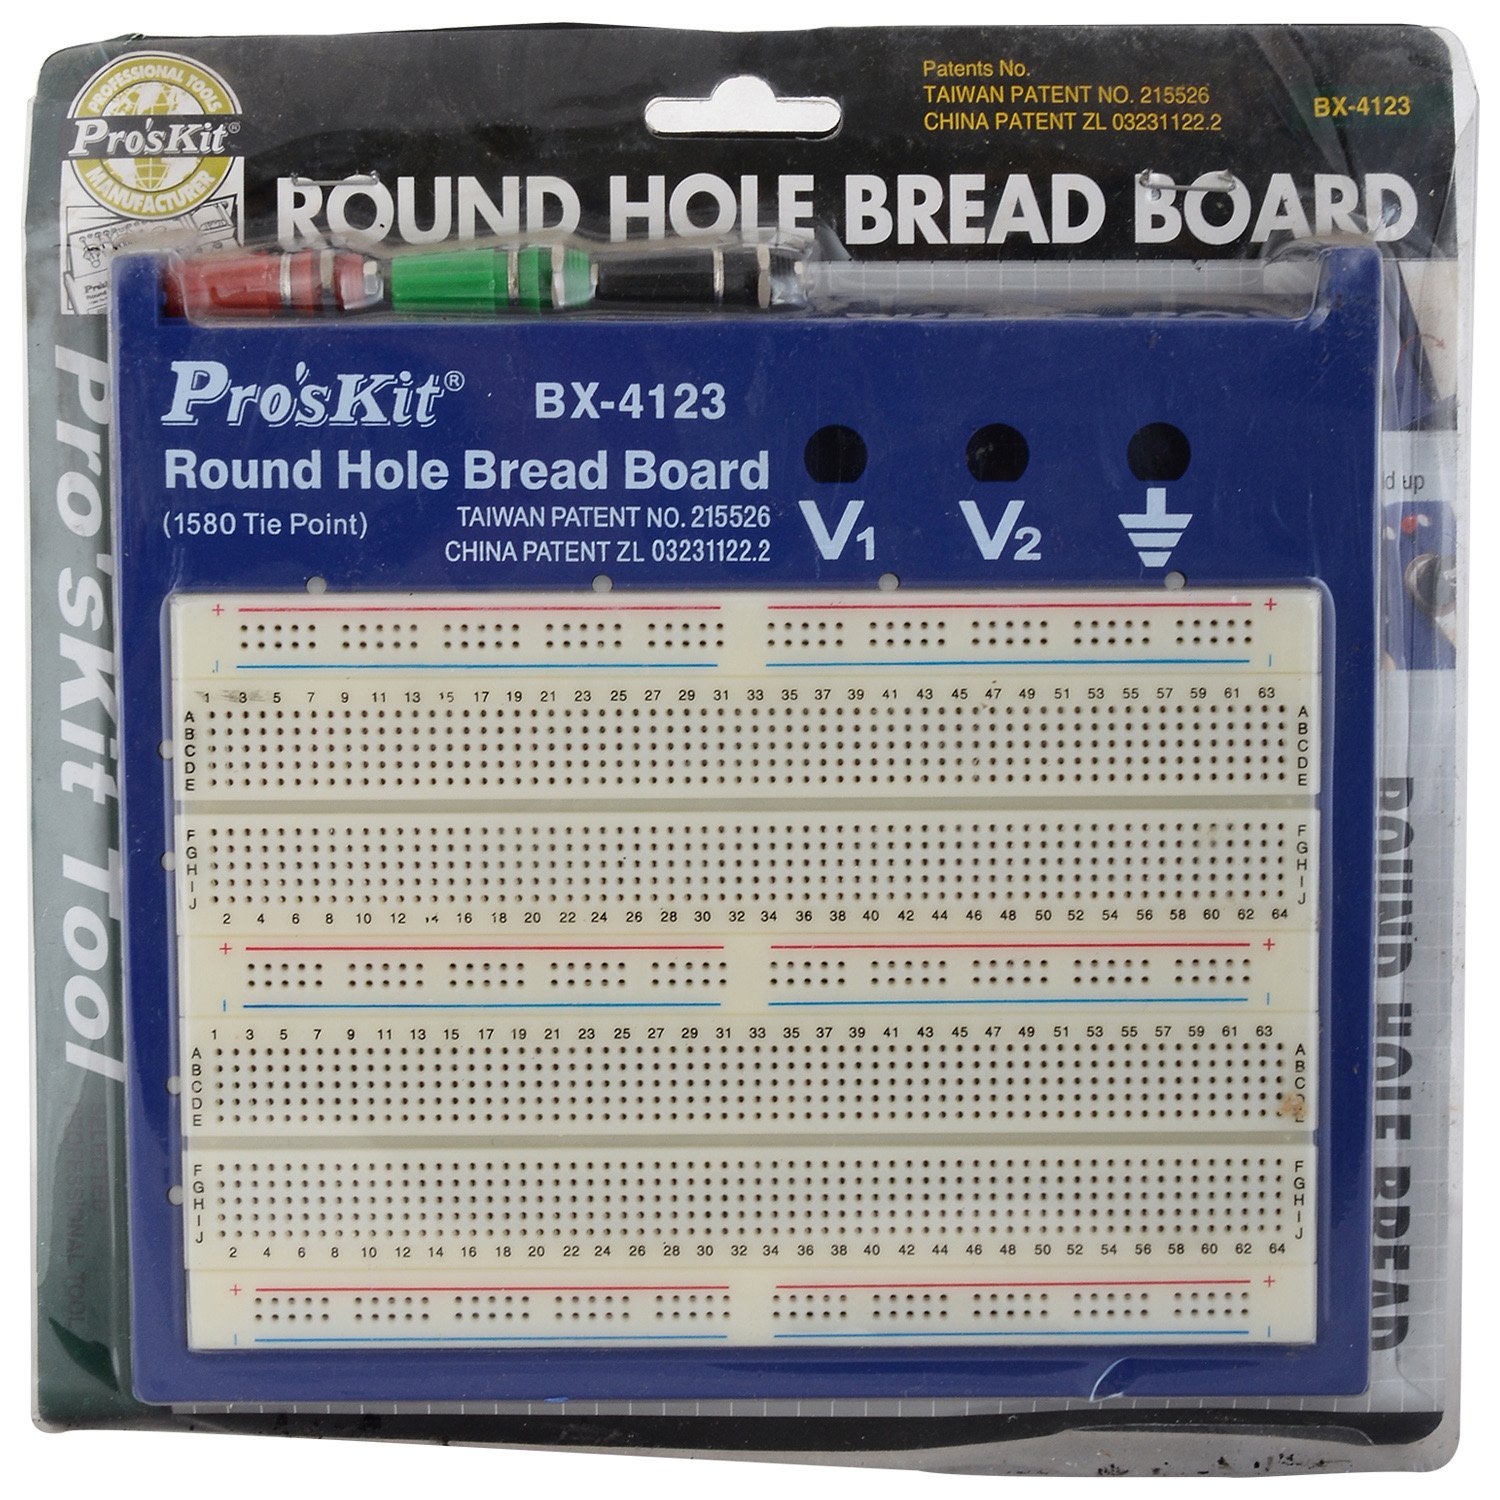
Figure 1: Pro'sKit BX-4123 Round Hole Bread Board in its original packaging, highlighting key features and dimensions.
3. Орнотуу
Setting up your Pro'sKit BX-4123 breadboard is straightforward. No assembly is required for the board itself.
- Unpack the Breadboard: Carefully remove the breadboard from its packaging.
- Компоненттерди аныктоо: Familiarize yourself with the layout. The main area consists of rows of interconnected holes for components, while the side rails are typically used for power supply connections (V1, V2, and Ground).
- Жайгашкан жери: Place the breadboard on a stable, flat, and non-conductive surface.

2-сүрөт: Детальдуу view of the Pro'sKit BX-4123 breadboard, showing the arrangement of 1580 tie points and power rails (V1, V2, Ground).
4. Иштөө нускамалары
Follow these guidelines for effective use of your breadboard:
- Компонентти киргизүү: Gently push the leads of electronic components (resistors, capacitors, ICs, etc.) into the desired holes. Ensure the leads are straight to avoid bending or damaging the internal contacts.
- Understanding Connections:
- Main Area: Holes in the main prototyping area are typically connected horizontally in groups of five. For example, holes A1, B1, C1, D1, E1 are connected.
- Power Rails: The long strips along the sides (marked with '+' and '-' or V1, V2, Ground) are usually connected vertically. These are used to distribute power and ground to your circuit.
- Туташтыруучу зымдар: Use jumper wires to connect different sections of your circuit. Ensure wires are fully inserted for reliable contact.
- Электр камсыздоо: Connect your external power supply to the designated power rails (V1, V2, Ground) using appropriate jumper wires. Always double-check polarity before applying power.
- Expanding the Board: If more space is required, align and connect additional BX-4123 breadboards side-by-side. They are designed to interlock for a stable larger platform.
Caution: Always disconnect power before making changes to your circuit. Incorrect wiring or short circuits can damage components or the power supply.
5. Техникалык тейлөө
Proper care will extend the lifespan of your breadboard:
- Тазалоо: If dust or debris accumulates, gently clean the surface with a soft, dry cloth. For stubborn dirt, a slightly damp cloth with mild soap can be used, ensuring the board is completely dry before use. Avoid harsh chemicals.
- Сактагыч: Store the breadboard in a clean, dry environment, away from direct sunlight and extreme temperatures. Keep it covered to prevent dust accumulation.
- Component Leads: Ensure component leads are clean and straight before insertion to prevent damage to the breadboard's internal contacts.
6. Кыйынчылыктарды
If your circuit is not functioning as expected, consider the following common issues:
- Кубат жок:
- Verify that your power supply is connected correctly to the breadboard's power rails and is switched on.
- Check all power and ground connections for continuity.
- Бошоң байланыштар:
- Ensure all component leads and jumper wires are fully inserted into the breadboard holes.
- Wiggle components gently to check for intermittent contact.
- Туура эмес зымдар:
- Double-check your circuit diagram against the physical connections on the breadboard.
- Pay close attention to component orientation (e.g., polarity of diodes, electrolytic capacitors, ICs).
- Бузулган компоненттер:
- Test individual components off the breadboard if possible, or substitute with known working parts.
- Кыска туташуулар:
- Visually inspect the board for any accidental connections between adjacent rows or columns, especially with bare wires.
7. Техникалык шарттар
| Модель номери | BX-4123 |
| Tie Points | 1580 |
| Материал | ABS Plastic, Phosphor Bronze Contacts |
| Өлчөмдөрү (L x W x Y) | 12.1 x 11.5 x 6.3 см (болжол менен) |
| Элемент Салмагы | 60 г |
| Түс | Multicolor (typically blue base with white prototyping area) |
| Өзгөчөлүктөр | Expandable, Round Hole Design |
Эскертүү: Өлчөмдөрү болжолдуу жана бир аз айырмаланышы мүмкүн.
8. Кепилдик жана колдоо
For warranty information, technical support, or service inquiries regarding your Pro'sKit BX-4123 Round Hole Bread Board, please refer to the documentation provided at the point of purchase or contact your retailer. Pro'sKit products typically come with a manufacturer's warranty against defects in materials and workmanship.
You may also visit the official Pro'sKit webкошумча ресурстар жана байланыш маалыматы үчүн сайт.