
1. Киришүү
This manual provides detailed instructions for installing, configuring, and maintaining your GIGABYTE GA-B150M-D3H Micro ATX motherboard. The GA-B150M-D3H is designed to support 6th Generation Intel Core Processors and features Dual Channel DDR4 memory, PCIe Gen3 x4 M.2 connector, SATA Express, and 8-channel HD audio with Audio Noise Guard.
Please read this manual thoroughly before beginning installation to ensure proper setup and operation.
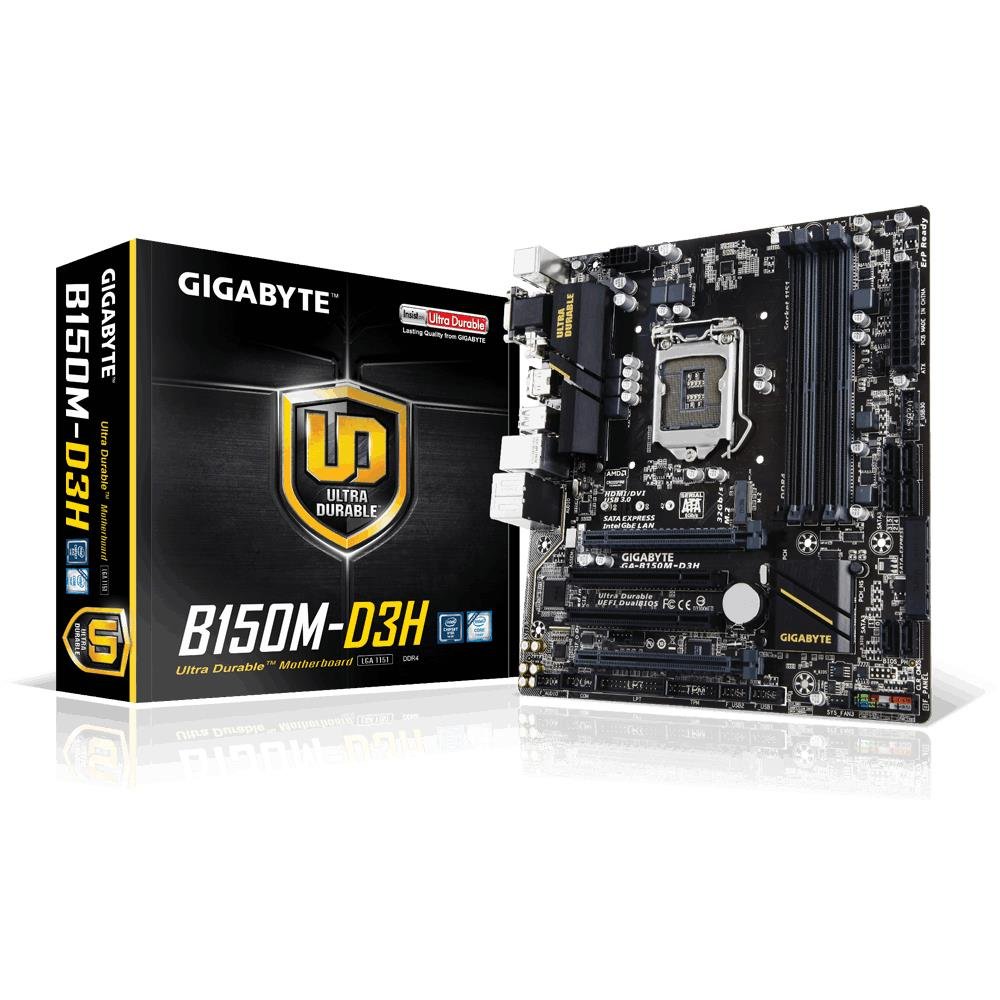
Image 1.1: GIGABYTE GA-B150M-D3H Micro ATX Motherboard. This image displays the overall layout of the motherboard, highlighting its compact Micro ATX form factor and various component slots.
2. Коопсуздук маалыматы
Монетардык платага зыян келтирбөө жана өзүңүзгө зыян келтирбөө үчүн төмөнкү коопсуздук чараларын сактаңыз:
- Компоненттерге тийүүдөн мурун ар дайым кубат шнурын розеткадан ажыратыңыз.
- Статикалык электр энергиясын чыгаруу үчүн антистатикалык билек боону тагыңыз же жерге туташтырылган металл нерсеге тез-тез тийип туруңуз.
- Сезимтал компоненттерге тийбеш үчүн, энелик платаны четтеринен кармаңыз.
- Motherboard'ду нымдуулуктан жана экстремалдык температурадан алыс кармаңыз.
- Ашыкча ысып кетүүнүн алдын алуу үчүн компьютердин корпусунун ичинде туура желдетүүнү камсыз кылыңыз.
3. Пакеттин мазмуну
Бардык элементтер сиздин энелик плата пакетиңизде бар экенин текшериңиз:
- GIGABYTE GA-B150M-D3H Motherboard
- User Manual
- I / O Shield
- SATA кабелдери
- Драйвер CD/DVD
Note: Contents may vary slightly depending on region or revision.
4. Motherboard Layout
Familiarize yourself with the various components and connectors on the GA-B150M-D3H motherboard.
Image 4.1: GIGABYTE GA-B150M-D3H Motherboard Layout. This image provides a visual reference for the location of key components such as the CPU socket, DIMM slots, PCIe slots, SATA ports, and M.2 connector.
Негизги компоненттер:
- LGA 1151 CPU розеткасы: For 6th Generation Intel Core Processors.
- DDR4 DIMM уячалары (4): Supports Dual Channel DDR4 memory up to 2133 MHz.
- PCIe Slots: Includes PCIe Gen3 x16 for graphics cards and PCIe x1 slots for expansion.
- M.2 туташтыргычы: Supports PCIe NVMe & SATA SSDs with up to 32Gb/s data transfer.
- SATA Express Connector: For up to 16Gb/s data transfer.
- SATA 6Gb/s порттору: салттуу SATA сактагыч түзмөктөрдү туташтыруу үчүн.
- 24-пин ATX Power Connector: Негизги кубат киргизүү.
- 8-Pin ATX 12V Power Connector: CPU power input.
- Алдыңкы панелдин аталыштары: For power button, reset button, LED indicators, and USB ports.
- Аудио туташтыргычтар: 8-channel HD Audio with high quality capacitors and Audio Noise Guard.
5. Орнотуу жана орнотуу
Motherboard жана компоненттерди туура орнотуу үчүн бул кадамдарды аткарыңыз.
5.1. CPU орнотуу
- Locate the LGA 1151 CPU socket.
- CPU розеткасынын рычагын ачып, жүктөө пластинасын көтөрүңүз.
- CPUдагы алтын үч бурчтук розеткадагы үч бурчтукка дал келишин камсыз кылып, CPU менен розеткага кылдат тууралаңыз. Процессорду розеткага күчтөп салбаңыз.
- Жүктөө пластинасын түшүрүп, аны рычаг менен бекитиңиз.
5.2. Installing the CPU Cooler
Refer to your CPU cooler's instruction manual for specific installation steps. Ensure thermal paste is applied correctly between the CPU and cooler base.
5.3. Эстутумду орнотуу (RAM)
- DDR4 DIMM уячаларынын эки учундагы клиптерди ачыңыз.
- Модулдагы оюк уячадагы ачкычка дал келишин камсыз кылып, эстутум модулун уячага тууралаңыз.
- Эстутум модулунун эки учуна кысылганчалар орнотулганга чейин катуу басыңыз.
- For dual-channel performance, install memory modules in matching colored slots (e.g., DIMM1 and DIMM2).
5.4. Installing Expansion Cards
- Компьютериңиздин корпусундагы керектүү PCIe слотунан металл кашааны алып салыңыз.
- Align the expansion card with the PCIe slot and press down firmly until it is seated correctly.
- Картаны компьютердин корпусуна бурама менен бекитиңиз.
5.5. Connecting Storage Devices
- SATA түзмөктөрү: Connect one end of the SATA data cable to a SATA 6Gb/s port on the motherboard and the other end to your hard drive or SSD. Connect the SATA power cable from your power supply to the device.
- M.2 SSD: M.2 SSDди M.2 уячасына бурч менен киргизип, андан соң акырын ылдый түртүп, берилген буроо менен бекитиңиз.
- SATA Express: If using a SATA Express device, connect it to the designated SATA Express connector.
5.6. Алдыңкы панелдин туташтыргычтарын туташтыруу
Connect the cables from your computer case's front panel (power button, reset button, HDD LED, power LED, front USB, front audio) to the corresponding headers on the motherboard. Refer to the motherboard layout diagram for exact locations and pin assignments.
5.7. Электр булагы
- Connect the 24-pin ATX main power connector from your power supply to the 24-pin power socket on the motherboard.
- Connect the 8-pin ATX 12V CPU power connector to the 8-pin socket near the CPU.
- Бардык кубат туташуулары коопсуз экенин текшериңиз.
6. Иштөө нускамалары
6.1. Биринчи жүктөө
After assembling all components, connect your monitor, keyboard, and mouse. Power on the system. The system should display the GIGABYTE splash screen and then enter the BIOS/UEFI setup or attempt to boot from a connected storage device.
6.2. BIOS/UEFI Орнотуу
BIOS/UEFI жөндөөсүнө кирүү үчүн, басыңыз DEL key repeatedly during the boot process when the GIGABYTE logo appears. Here you can configure system settings, boot order, and monitor hardware status. The GA-B150M-D3H features GIGABYTE UEFI Dual BIOS for enhanced reliability.
6.3. Драйверди орнотуу
After installing your operating system, install the necessary drivers for the motherboard components. These can be found on the included driver CD/DVD or downloaded from the official GIGABYTE website. Key drivers include chipset, audio (Realtek ALC892 codec), LAN, and any integrated graphics drivers.
6.4. Операциялық системаны орнотуу
Insert your operating system installation media (USB drive or DVD) and configure the boot order in the BIOS/UEFI to boot from it. Follow the on-screen instructions to install your preferred operating system (e.g., Windows 8.1, Windows 10).
7. Техникалык тейлөө
7.1. Тазалоо
Regularly clean the interior of your computer case to prevent dust buildup, which can lead to overheating. Use compressed air to remove dust from fans, heatsinks, and motherboard components. Ensure the system is powered off and unplugged before cleaning.
7.2. BIOS жаңыртуулары
GIGABYTE системанын туруктуулугун, шайкештигин жана иштешин жакшыртуу үчүн мезгил-мезгили менен BIOS жаңыртууларын чыгарып турат. Расмий GIGABYTE сайтына кириңиз. website for your motherboard model (GA-B150M-D3H) to check for the latest BIOS version and follow the provided instructions for updating. Exercise caution during BIOS updates, as an interruption can render the motherboard inoperable.
8. Кыйынчылыктарды
Бул бөлүм сиз кабылышы мүмкүн болгон жалпы көйгөйлөрдү карайт.
8.1. Кубат жок / Система күйбөйт
- Check if the power supply is connected correctly to the motherboard (24-pin and 8-pin connectors).
- Кубат менен камсыз кылуу которгучу ON абалында экенин текшериңиз.
- Verify that the front panel power button cable is correctly connected to the motherboard header.
- Башка система же электр менен жабдууну сыноочу менен кубат менен камсыздоону текшериңиз.
8.2. Дисплейдин чыгышы жок
- Ensure the monitor is connected to the correct graphics output (either integrated graphics on the motherboard or a dedicated graphics card).
- Графикалык картаны жана эстутум модулдарын кайра орнотуңуз.
- Try booting with only one memory module installed.
- Монитор күйгүзүлгөнүн жана туура киргизүү булагына коюлганын текшериңиз.
8.3. Системанын туруксуздугу / кыйроолор
- Процессордун жана GPU температурасынын коопсуз иштөө чегинде экенин текшериңиз.
- Verify that all drivers are installed and up to date.
- RAM бузулганын текшерүү үчүн эстутум диагностикалык куралдарын иштетиңиз.
- Электр менен камсыздоонун бардык компоненттерге жетиштүү жана туруктуу электр энергиясын берээрин текшериңиз.
9. Техникалык шарттар
Detailed technical specifications for the GIGABYTE GA-B150M-D3H motherboard:
| Өзгөчөлүк | Спецификация |
|---|---|
| Модель аты | GA-B150M-D3H |
| Форма фактору | Micro ATX (24.4 см x 22.5 см) |
| CPU розетка | LGA 1151 |
| Шайкеш процессорлор | 6-муун Intel Core процессорлору |
| Чипсет | Intel B150 Express чипсети |
| Эс тутум технологиясы | DDR4 |
| Memory Slots | 4 x DDR4 DIMM sockets (Dual Channel) |
| Эс тутумдун максималдуу сыйымдуулугу | 16 ГБ |
| Memory Clock Speed | 2133 МГц |
| картриджа Slots | 1 x PCI Express x16, 1 x Total PCIe Ports |
| Сактагыч интерфейстери | PCIe Gen3 x4 M.2, SATA Express, SATA 6Gb/s |
| Аудио кодек | Realtek ALC892 codec, 8-channel HD Audio |
| USB порттору | Total 8 USB Ports (including USB 2.0) |
| Негизги Power Connector | 24-пин ATX |
| CPU Power Connector | 8-Pin ATX 12V |
| Уникалдуу өзгөчөлүктөрү | GIGABYTE UEFI Dual BIOS, Audio Noise Guard with LED Trace Path Lighting, App Center (Easy Tune, Cloud Station) |
10. Кепилдик жана колдоо
For warranty information, please refer to the warranty card included in your product package or visit the official GIGABYTE webсайт. Кепилдиктин шарттары жана шарттары аймакка жараша өзгөрүшү мүмкүн.
For technical support, driver downloads, BIOS updates, and further product information, please visit the GIGABYTE official support webсайт:
https://www.gigabyte.com/Support
When contacting support, please have your motherboard model (GA-B150M-D3H) and serial number ready.