1. Киришүү
This manual provides comprehensive instructions for the installation, operation, and maintenance of your Supermicro X11SSZ-F-O Micro ATX Motherboard. Please read this manual thoroughly before beginning installation to ensure proper setup and to maximize the performance and longevity of your system.
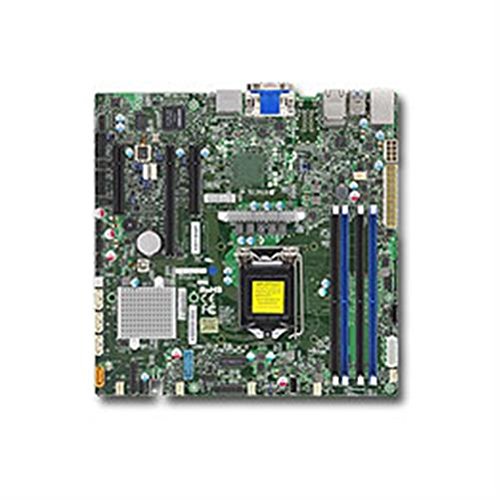
Figure 1: Supermicro X11SSZ-F-O Micro ATX Motherboard. This image displays the motherboard with its various components, including the CPU socket, DIMM slots, and expansion slots.
2. Коопсуздук маалыматы
Монетардык платага зыян келтирбөө жана өзүңүзгө зыян келтирбөө үчүн ар дайым төмөнкү коопсуздук чараларын сактаңыз:
- Компоненттерди орнотуудан же алып салуудан мурун кубат шнурын розеткадан ажыратыңыз.
- Сезимтал компоненттерге электростатикалык разряддын (ЭСЗ) зыян келтирбеши үчүн, антистатикалык билек боосун тагынып, антистатикалык килемченин үстүндө иштеңиз.
- Handle the motherboard by its edges to avoid touching components or circuits.
- Ensure proper ventilation in your system chassis to prevent overheating.
- Motherboard'ду нымдуулуктан жана экстремалдык температурадан алыс кармаңыз.
3. Пакеттин мазмуну
Verify that all items are present in your motherboard package. Typical contents include:
- Supermicro X11SSZ-F-O Motherboard
- I / O Shield
- SATA кабелдери
- Driver CD/DVD or USB drive
- Quick Installation Guide or User Manual
Эгерде кандайдыр бир буюмдар жок же бузулуп калса, дароо сатуучуга кайрылыңыз.
4. Орнотуу жана орнотуу
4.1. Орнотууга чейинки текшерүү тизмеси
- Ensure your power supply is compatible with the motherboard's power connectors (24-pin ATX and 8-pin EPS).
- Prepare your CPU, CPU cooler, DDR4 memory modules, and storage devices.
- Филлипс баштуу бурагычты даярдаңыз.
4.2. CPU орнотуу (LGA 1151)
- LGA 1151 розеткасын энелик платадан табыңыз.
- Процессордун кармоочу алкагын ачуу үчүн жүктөө рычагын акырын басып, аны розеткадан тартыңыз.
- CPUдагы алтын үч бурчтук розеткадагы үч бурчтукка дал келишин камсыз кылып, CPU менен розеткага кылдат тууралаңыз. Процессорду розеткага күчтөп салбаңыз.
- Lower the retention frame over the CPU and push the load lever back into place until it clicks.
- CPU муздаткычын өндүрүүчүнүн көрсөтмөлөрүнө ылайык орнотуңуз.
4.3. Эстутумду орнотуу (DDR4)
- Төрт DDR4 DIMM уячасын табыңыз.
- DIMM уячасынын эки учундагы клиптерди ачыңыз.
- Модулдагы оюк уячадагы ачкычка дал келишин камсыз кылып, эстутум модулун уячага тууралаңыз.
- Эстутум модулунун эки учуна кысылганчалар орнотулганга чейин катуу басыңыз.
4.4. Кеңейтүү картасын орнотуу
- Identify the desired PCI Express slot (1x PCI-E 3.0 x16, 2x PCI-E 3.0 x8).
- Remove the corresponding metal slot cover from your chassis.
- Кеңейтүү картасын уяча менен тегиздеп, ал бекем орнотулганга чейин бекем басыңыз.
- Картаны бурамалар же бекитүүчү клип менен бекитиңиз.
4.5. Сактоо түзмөгүн орнотуу (SATA)
- Connect one end of a SATA data cable to one of the four SATA3 ports on the motherboard.
- SATA маалымат кабелинин экинчи учун сактоо түзмөгүңүзгө (HDD/SSD) туташтырыңыз.
- SATA кубат кабелин кубат булагыңыздан сактагыч түзмөгүнө туташтырыңыз.
4.6. Перифериялык түзүлүштөрдү туташтыруу
- Кубат туташтыргычтары: Connect the 24-pin ATX and 8-pin EPS power cables from your power supply to the motherboard.
- Алдыңкы панелдин туташтыргычтары: Connect the power switch, reset switch, HDD LED, and power LED cables from your chassis to the corresponding pins on the motherboard's front panel header. Refer to the motherboard diagram for pin assignments.
- USB аталыштары: Connect front panel USB ports to the onboard USB headers.
- Audio Headers: Connect front panel audio jacks to the onboard audio header.
5. Иштөө нускамалары
5.1. Биринчи жүктөө жана BIOS/UEFI орнотуу
- Системаны чогулткандан кийин, мониторду, клавиатураны жана чычканды туташтырыңыз.
- Power on the system. During the Power-On Self-Test (POST), press the designated key (usually DEL or F2) BIOS/UEFI орнотуунун утилитасына кирүү үчүн.
- Configure essential settings such as date and time, boot order, and enable/disable integrated peripherals as needed.
- Өзгөртүүлөрдү сактап, BIOS/UEFIден чыгыңыз. Система кайра жүктөлөт.
5.2. Операция системасы жана драйверди орнотуу
- Иштетүү системаңызды орнотуу медиасын (USB диск же DVD) салыңыз.
- Иштетүү системаңызды орнотуу үчүн экрандагы көрсөтмөлөрдү аткарыңыз.
- Once the operating system is installed, install the necessary drivers from the provided driver CD/DVD/USB or download the latest drivers from the Supermicro website. Key drivers include chipset, audio, and LAN drivers.
6. Техникалык тейлөө
- Тазалоо: Мезгил-мезгили менен кысылган абаны колдонуу менен компьютериңиздин ичиндеги чаңды, өзгөчө желдеткичтер менен радиаторлордун чаңын тазалаңыз. Тазалоодон мурун системанын өчүрүлгөнүн жана розеткадан ажыратылганын текшериңиз.
- BIOS/UEFI жаңыртуулары: Supermicro текшерүү webBIOS/UEFI жаңыртуулары үчүн сайт. Жаңыртуулар туруктуулукту, шайкештикти жана иштин натыйжалуулугун жакшырта алат. Энелик платага зыян келтирбөө үчүн жаңыртуу боюнча көрсөтмөлөрдү кылдаттык менен аткарыңыз.
- Драйвер жаңыртуулары: Оптималдуу иштешин жана жаңы программалык камсыздоо жана жабдык менен шайкештигин камсыз кылуу үчүн тутумуңуздун драйверлерин жаңыртып туруңуз.
7. Кыйынчылыктарды
Бул бөлүм сиз кабылышы мүмкүн болгон жалпы көйгөйлөрдү карайт:
- Кубат жок: Ensure all power cables (24-pin ATX, 8-pin EPS, CPU fan) are securely connected. Check the power supply unit (PSU) and wall outlet.
- Дисплей жок: Verify that the monitor is connected and powered on. Reseat the graphics card (if applicable) and memory modules. Try booting with only one memory module.
- Системалык сигналдар: Beep codes often indicate specific hardware issues. Consult the Supermicro website or the motherboard's full manual for a list of beep codes and their meanings. Common issues include memory errors or graphics card problems.
- Иштетүү системасы жүктөлбөй жатат: Check the boot order in BIOS/UEFI. Ensure the storage drive with the operating system is detected and set as the primary boot device.
- Системанын туруксуздугу/бузуулар: This can be caused by overheating, faulty memory, or outdated drivers. Monitor temperatures, run memory diagnostic tools, and update drivers.
8. Техникалык шарттар
| Өзгөчөлүк | Спецификация |
|---|---|
| Модель аты | X11SSZ-F-O |
| Форма фактору | Micro ATX |
| CPU розетка | LGA 1151 |
| Чипсет | Intel C236 |
| Memory Slots | 4x 288-pin DDR4 DIMM |
| Memory Type | DDR4-2133/1866/1600 ECC/Non-ECC Unbuffered |
| Эс тутумдун максималдуу сыйымдуулугу | 64 ГБ |
| PCI-Express Slots | 1x PCI-E 3.0 x16, 2x PCI-E 3.0 x8 (run at x4) |
| SATA порттору | 4x SATA3 (6Gb/s) with RAID 0, 1, 5, 10 support |
| Аудио | Realtek ALC888S High Definition Audio CODEC |
| LAN | Dual Gigabit Ethernet |
| USB порттору | Total 8 (includes 2x USB 2.0) |
| Шайкеш процессорлор | Intel Core i3/i5/i7 (6th/7th Gen), Xeon E3-1200 v5/v6 series |
9. Кепилдик жана колдоо
Supermicro provides a limited warranty for its products. For detailed warranty terms and conditions, please refer to the warranty card included with your product or visit the official Supermicro website. For technical support, driver downloads, and further assistance, please visit the Supermicro support portal:
When contacting support, please have your motherboard model number (X11SSZ-F-O) and serial number ready.