Air-Con 24000 BTU Ductless Mini Split System User Manual
Model: 24ACZ
1. Продукт бүтүп калдыview
This manual provides comprehensive instructions for the installation, operation, and maintenance of your Air-Con 24000 BTU 21 SEER Ductless Mini Split DC Inverter Air Conditioner Heat Pump System. This system is designed to provide efficient heating and cooling for residential and light commercial applications.

Figure 1.1: Complete Air-Con Mini Split System including indoor unit, outdoor unit, refrigerant lines, and remote control.
2. Коопсуздук маалыматы
WARNING: Please read all safety warnings and instructions carefully before installing or operating this appliance. Failure to follow these instructions may result in electric shock, fire, property damage, or personal injury.
- Ensure the unit is installed by a qualified HVAC technician in accordance with all local and national electrical and building codes.
- Кандайдыр бир тейлөөнү же тейлөөнү аткаруудан мурун, ар дайым блокту электр кубатынан ажыратыңыз.
- Манжаларды же нерселерди аба кирүүчү/чыгаруучу тешиктерине киргизбеңиз.
- Тез күйүүчү материалдарды аппараттан алыс кармаңыз.
- Бул шайман физикалык, сезүү же акыл-эс жөндөмү начар же тажрыйбасы жана билими жок адамдар (анын ичинде балдар) үчүн, эгерде алардын коопсуздугуна жооптуу адам тарабынан көзөмөлсүз же шайманды колдонуу боюнча көрсөтмө болбосо, колдонууга арналбайт.
3. Компоненттер жана тетиктер
Your Air-Con Mini Split System includes the following main components:
- Indoor Unit (Evaporator): Mounted inside the conditioned space.
- Тышкы блок (конденсатор): Mounted outside the building.
- Алыстан башкаруу: For operating the unit.
- Муздаткыч линиялары: Pre-charged 15ft kit for connecting indoor and outdoor units.
- Дренаждык шланг: Конденсатты кетирүү үчүн.
- Электр зымдары: For power and communication.

3.1-сүрөт: Арткы view of the indoor unit, illustrating the mounting bracket and connection points for refrigerant lines and electrical wiring.
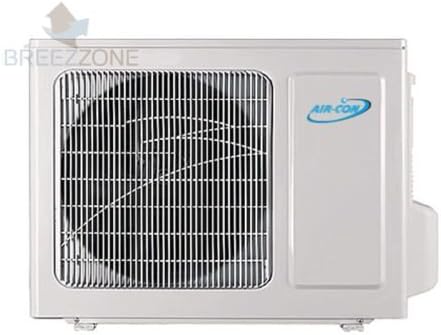
Сүрөт 3.2: Алдыңкы view of the outdoor unit, showing the protective grille for the fan and coil.

3.3-сүрөт: жогорудан ылдыйга view of the outdoor unit, highlighting the coil fins for heat exchange.
4. Орнотуу боюнча колдонмо
Installation of this mini split system requires specialized tools and knowledge. It is highly recommended that installation be performed by a certified HVAC professional.
4.1 Сайтты тандоо
- Ички блок: Choose a location that allows for proper air circulation, is away from direct sunlight or heat sources, and has sufficient space for maintenance. Ensure the wall can support the unit's weight.
- Сырткы блок: Select a location with good airflow, minimal exposure to direct sunlight, and away from noise-sensitive areas. Maintain adequate clearance around the unit for proper operation and service.
4.2 Ички блокту орнотуу
- Орнотуучу пластинаны дубалга бекитиңиз, анын тегиз жана бекем бекитилгенин текшериңиз.
- Drill a hole (approximately 2.5-3 inches in diameter) through the wall for the refrigerant lines, drain hose, and electrical wiring. Ensure a slight downward slope towards the outside for proper drainage.
- Connect the refrigerant lines, drain hose, and electrical wiring to the indoor unit.
- Ички блокту орнотуучу пластинага орнотуңуз.
4.3 Тышкы блокту орнотуу
- Place the outdoor unit on a level, stable surface or a dedicated mounting pad/bracket.
- Connect the refrigerant lines from the indoor unit to the outdoor unit. Ensure connections are tight to prevent leaks.
- Connect the electrical wiring between the indoor and outdoor units, and to the main power supply (208-230 Volt).
- Perform a vacuum test on the refrigerant lines to remove any air and moisture.
- Open the service valves to release the pre-charged refrigerant into the system.
Note: Proper vacuuming and leak testing are crucial for system efficiency and longevity. Consult a professional if you are unsure about these steps.
5. Иштөө нускамалары
Your Air-Con Mini Split System is operated primarily via the wireless remote control.

Figure 5.1: Air-Con Mini Split System Remote Control layout.
5.1 Алыстан башкаруу функциялары
- КҮЙГҮЗҮҮ/ӨЧҮРҮҮ: Аппаратты күйгүзөт же өчүрөт.
- РЕЖИМ: Иштөө режимдери боюнча циклдик циклдер: Автоматтык, Муздатуу, Кургатуу, Жылуулук, Вентилятор.
- Күйөрман: Adjusts fan speed (Auto, Low, Med, High).
- САЛКУУ: Тик жалюзи селкинчекти башкарат.
- УЙКУ: Тынч иштөө жана энергияны үнөмдөө үчүн уйку режимин иштетет.
- SUPER: Engages rapid cooling or heating for quick temperature changes.
- АКЫЛДУУ: Бөлмө температурасына жараша оптималдуу иштөө режимин автоматтык түрдө тандайт.
- мен сезип жатам: Activates the temperature sensor in the remote control for more precise temperature regulation at your location.
- ДИММЕР: Turns the indoor unit's display light on or off.
- ТАЙМЕР КҮЙГҮЗҮҮ/ӨЧҮРҮҮ: Бирдиктин автоматтык түрдө күйүп же өчүрүлүшү үчүн таймерди орнотот.
- СААТ: Sets the current time on the remote.
- 8° HEAT: Maintains a minimum temperature of 8°C (46°F) to prevent freezing in unoccupied rooms during winter.
- Температура баскычтары (▲/▼): Каалаган температураны тууралайт.
5.2 Негизги операция
- басыңыз КҮЙГҮЗҮҮ/ӨЧҮРҮҮ баскычын басуу менен
- басыңыз РЕЖИМ button to select your desired operating mode (e.g., Cool for cooling, Heat for heating).
- колдонуу Temperature Buttons (▲/▼) to set your desired room temperature.
- Желдеткичтин ылдамдыгын колдонуп жөндөңүз КҮЙӨРМАН керек болсо баскыч.
6. Техникалык тейлөө
Regular maintenance ensures optimal performance and extends the lifespan of your Air-Con Mini Split System.
6.1 Аба чыпкасын тазалоо
- Ички блоктун аба чыпкаларын колдонуунун жана абанын сапатына жараша эки жумада бир же андан тез-тез тазалап туруу керек.
- Ички блоктун алдыңкы панелин ачып, аба чыпкаларын алып салыңыз.
- Wash the filters with lukewarm water and a mild detergent. Rinse thoroughly and allow them to dry completely before reinserting.
6.2 Тышкы блокту тазалоо
- Periodically clear any debris (leaves, dirt, etc.) from around the outdoor unit.
- Gently clean the outdoor coil fins with a soft brush or water hose. Be careful not to bend the fins.
6.3 Кесиптик тейлөө
It is recommended to have a qualified HVAC technician inspect and service your system annually. This includes checking refrigerant levels, cleaning coils, inspecting electrical connections, and verifying proper operation.
7. Кыйынчылыктарды
Кардарларды колдоо кызматына кайрылуудан мурун, төмөнкү жалпы көйгөйлөрдү жана аларды чечүү жолдорун караңыз:
| Көйгөй | Мүмкүн себеп | Чечим |
|---|---|---|
| Түзмөк күйбөйт. | Электр кубаты жок, пульттун батарейкалары өчүп, өчүргүч өчүрүлгөн. | Электр менен камсыздоону текшериңиз, алыскы батареяларды алмаштырыңыз, өчүргүчтү баштапкы абалга келтириңиз. |
| Жетишсиз муздатуу/жылытуу. | Dirty air filters, blocked outdoor unit, low refrigerant, wrong mode selected. | Clean air filters, clear obstructions from outdoor unit, check mode, contact technician for refrigerant check. |
| Ички блоктон суу агып жатат. | Дренаждык түтүк бүтөлүп калган, туура эмес орнотуу бурчу. | Clear drain hose, ensure proper slope of drain line. Contact technician if issue persists. |
| Адаттан тышкаркы ызы -чуу. | Бош бөлүктөрү, желдеткич тоскоолдук, компрессор маселеси. | Check for loose parts or obstructions. If noise persists or is loud, contact a technician. |
8. Техникалык шарттар
Key technical specifications for the Air-Con 24000 BTU Mini Split System (Model: 24ACZ):

Figure 8.1: Energy Guide for Air-Con Mini Split System, highlighting SEER and HSPF ratings.

Figure 8.2: Comprehensive technical specifications table for various Air-Con Mini Split System models, including the 24ACZ.
| Спецификация | Нарк |
|---|---|
| Бренд | Air-Con |
| Модель номери | 24ACZ |
| Кубаттуулугу | 11 800 BTU (2 тонна) |
| SEER (сезондук энергия натыйжалуулугунун коэффициенти) | 21.0 |
| Тtage | 208-230 Вольт |
| Ызы-чуу деңгээли (сырткы блок) | 56 дБ |
| Муздаткыч | R 410A |
| Элемент Салмагы | 255 фунт |
| Өзгөчөлүктөр | Ductless, Remote Control |
9. Кепилдик жана колдоо
For warranty information and technical support, please refer to the documentation provided with your purchase or contact Air-Con customer service directly. It is important to note that self-installation may void the warranty. Professional installation is highly recommended to ensure warranty validity and proper system operation.
For further assistance, please visit the official Air-Con webсайтка же кардарларды колдоо линиясына кайрылыңыз.