1. Киришүү
The RoadKing RKCBCLASSIC is a robust 40-channel CB radio designed for reliable communication. This unit features a large digital display, an illuminated SWR/RF meter, and essential controls for optimal performance. This manual provides detailed instructions to ensure proper setup, operation, and maintenance of your CB radio.
2. Негизги өзгөчөлүктөрү
- 40 AM Channels: Provides access to all standard CB communication channels.
- Чоң санарип дисплей: Clear and easy-to-read channel indication.
- Illuminated SWR/RF Meter: Allows for precise monitoring of antenna system performance and signal strength.
- ANL Filter (Automatic Noise Limiter): Reduces vehicle interference for clearer reception.
- Noise Blanker: Further reduces pulse-type noise interference.
- SWR Calibration: Essential for tuning your antenna system for maximum performance and radio protection.
- RF пайда көзөмөлдөө: Adjusts receiver sensitivity to optimize signal reception.
- PA Capability: Public Address function for external broadcasting.
- Instant Access to Emergency Channel 9: Quick access to emergency communication.
- Front Panel 4-pin Mic Connector: Convenient microphone connection.
3. Пакеттин мазмуну
Your RoadKing RKCBCLASSIC package should include the following items:
- RoadKing RKCBCLASSIC CB Radio Unit
- Dynamic 4-pin Microphone with 9' Cord
- Монтаждык кашаа жана жабдуу
- DC Power Cord
- Колдонуучунун Колдонмосу (бул документ)
4. Орнотуу жана орнотуу
4.1. Mounting the Radio
Select a secure and accessible location for your CB radio, typically under the dashboard or on the center console. Use the provided mounting bracket and hardware to firmly attach the radio, ensuring it does not obstruct driving or airbag deployment.

Сүрөт 1: Алдыңкы view of the RoadKing RKCBCLASSIC CB radio with microphone.
4.2. Power Connection
Connect the DC power cord to the radio's power input. The red wire connects to a positive (+) 12V DC source (e.g., vehicle battery or fuse box), and the black wire connects to a negative (-) ground point (e.g., vehicle chassis). Ensure a secure connection to prevent power fluctuations.

2-сүрөт: Арткы view of the CB radio, showing antenna connector and power input.
4.3. Антенна туташтыруу
Connect your CB antenna cable to the SO-239 connector located on the rear of the radio. For optimal performance, use a high-quality CB antenna properly installed and tuned for your vehicle.
4.4. Микрофонду туташтыруу
Plug the 4-pin microphone connector into the corresponding jack on the front panel of the radio. Ensure it clicks securely into place.
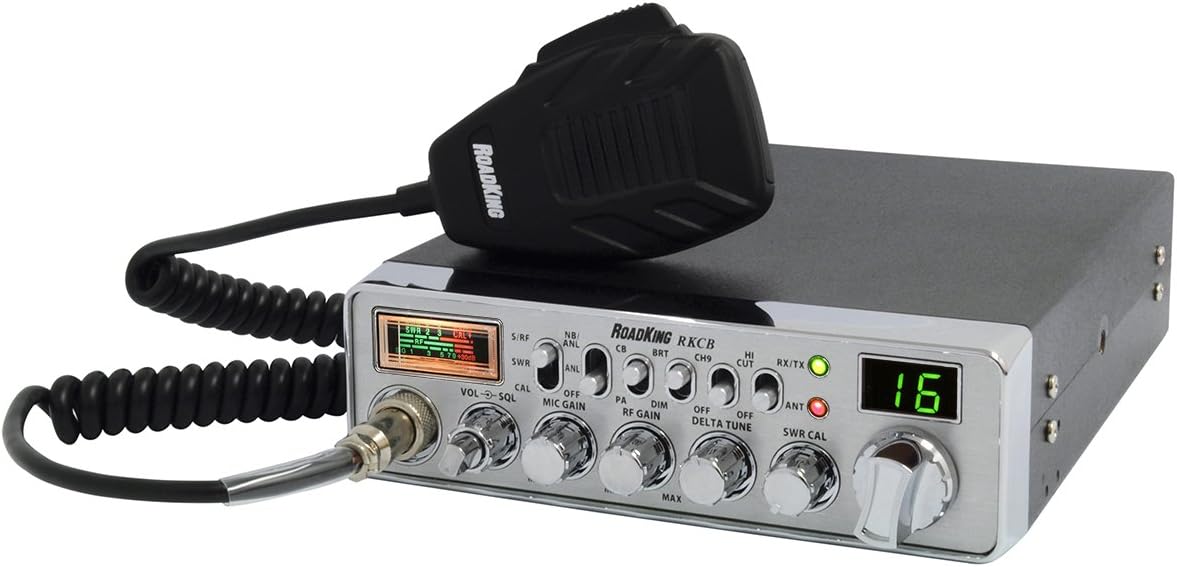
Figure 3: Close-up of the dynamic 4-pin microphone with the RoadKing logo.
5. Иштөө нускамалары
5.1. Күйгүзүү/өчүрүү жана Көлөмү
бургула VOL/SQL knob clockwise to power on the radio and adjust the listening volume. Continue turning to increase volume.
5.2. Squelch Control (SQL)
With the radio on, turn the VOL/SQL knob further clockwise past the audible static to set the squelch. This eliminates background noise when no signal is present. Adjust it to the point where background static is just silenced.
5.3. Канал тандоо
колдонуу КАНАЛ selector knob to choose one of the 40 available CB channels. The selected channel number will be displayed on the large digital display.
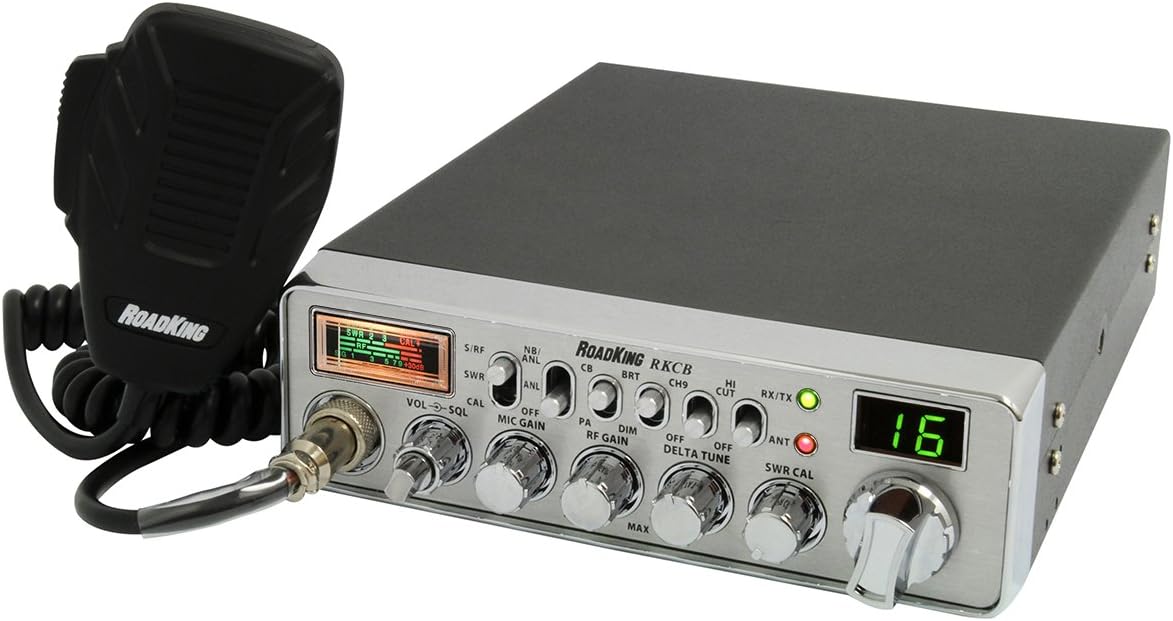
4-сүрөт: Бурчтуу view of the CB radio, highlighting the front panel controls and large digital display.
5.4. RF Gain Control
The RF GAIN knob adjusts the sensitivity of the receiver. Turn it clockwise for maximum sensitivity to receive weaker signals, or counter-clockwise to reduce sensitivity and minimize interference from strong local signals.
5.5. ANL (Automatic Noise Limiter) and Noise Blanker (NB)
The NB/ANL switch activates the Noise Blanker and Automatic Noise Limiter. These features help reduce various types of electrical interference, such as ignition noise from vehicles. Use them to improve clarity in noisy environments.
5.6. SWR Calibration
Proper SWR (Standing Wave Ratio) calibration is crucial for efficient transmission and to prevent damage to your radio. Refer to your antenna's instructions for initial tuning. To calibrate SWR on the radio:
- коюңуз SWR/RF өтүү КАЛ.
- Press and hold the microphone's PTT (Push-To-Talk) button.
- тууралаңыз SWR КАЛ knob until the meter needle aligns with the "CAL" mark.
- PTT баскычын коё бериңиз.
- коюңуз SWR/RF өтүү SWR.
- Press and hold the PTT button again. The meter will now display your SWR reading. An SWR of 1.5:1 or lower is generally good. If it's higher, adjust your antenna.
- PTT баскычын коё бериңиз.
5.7. PA (Public Address) Function
To use the PA function, connect an external PA speaker to the PA jack on the rear of the radio. Set the CB/PA өтүү PA. Your voice through the microphone will now be broadcast through the external speaker.
5.8. Emergency Channel 9
The CH9 switch provides instant access to Channel 9, the designated emergency channel for CB radio. Flip this switch to quickly monitor or transmit on Channel 9.
6. Техникалык тейлөө
- Тазалоо: жумшак колдонуу, damp cloth to clean the exterior of the radio. Avoid abrasive cleaners or solvents.
- Байланыштары: Periodically check all connections (power, antenna, microphone) for tightness and corrosion.
- Антенна: Ensure your antenna is in good condition and properly tuned. A damaged or poorly tuned antenna can affect performance and potentially damage the radio.
- Сактагычты алмаштыруу: If the radio does not power on, check the inline fuse on the DC power cord. Replace it with a fuse of the same type and rating if blown.
7. Кыйынчылыктарды
| Көйгөй | Мүмкүн себеп | Чечим |
|---|---|---|
| Күч жок | Электр туташуусу бошоп калган, сактагыч күйүп кеткен, унаанын кубат көйгөйү. | Check power cord connections. Replace fuse if blown. Verify vehicle's 12V power supply. |
| No Reception / Poor Reception | Squelch set too high, antenna not connected/damaged, RF gain too low, local interference. | Adjust squelch. Check antenna connection and condition. Increase RF gain. Activate ANL/NB. |
| Өткөрүүгө болбойт | Microphone not connected, PTT button faulty, high SWR. | Ensure microphone is securely connected. Test PTT button. Check SWR calibration and adjust antenna if needed. |
| Ашыкча ызы-чуу | ANL/NB off, strong local interference, vehicle electrical noise. | Activate ANL/NB. Adjust RF gain. Check vehicle's electrical system for noise sources. |
8. Техникалык шарттар
- Бренд: RoadKing
- Модел: RKCBCLASSIC
- Каналдардын саны: 40 AM
- Жыштык диапазону: 26.965 МГц - 27.405 МГц
- RF кубаттуулугу: 4 Watts (Maximum FCC Allowable)
- Тtage: 12 вольт (ток)
- Элемент Салмагы: 5.15 фунт
- Продукциянын өлчөмдөрү: 12.75 x 36 x 3.5 inches (Note: The 36" dimension seems unusually large for a CB radio and might refer to packaging or an included accessory's length. Please verify actual unit dimensions.)
- Өзгөчөлүктөр: ANL filter, SWR calibration, RF gain control, Instant Access to Emergency Channel 9, Front panel 4-pin mic connector, Large digital display.
- Сууга туруктуулук деңгээли: Сууга чыдамдуу
9. Кепилдик жана колдоо
For warranty information, technical support, or service inquiries regarding your RoadKing RKCBCLASSIC CB Radio, please refer to the warranty card included with your product or visit the official RoadKing webсайт. Кепилдик дооматтар үчүн сатып алганыңыздын далилин сактаңыз.