
1. Киришүү
This manual provides essential instructions for the safe and efficient use of your Luxor 12-Capacity Secure Tablet Charging Box. This unit is designed to securely store, charge, and organize up to 12 tablets or Chromebooks, making it ideal for educational, office, or home environments. Please read this manual thoroughly before installation and operation.
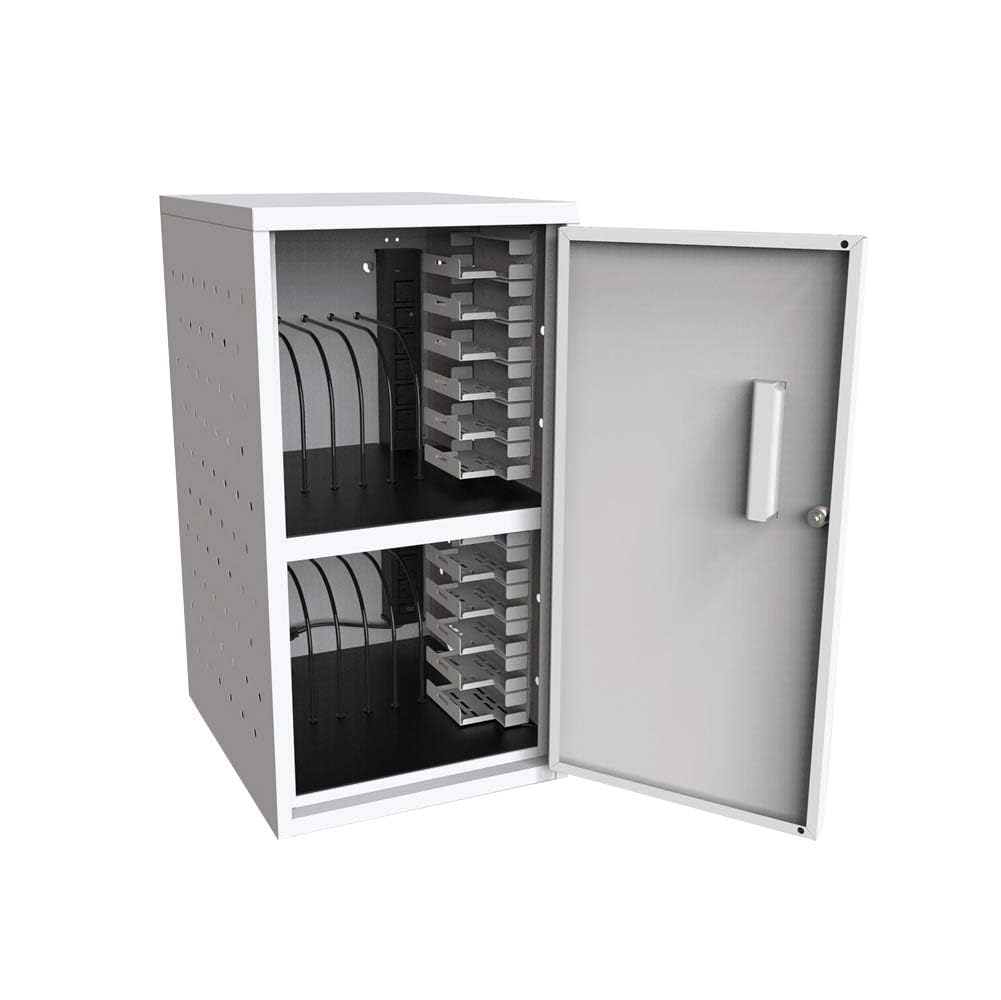
An image showing the front of the Luxor 12-Capacity Secure Tablet Charging Box, highlighting its compact design and secure door.
2. Коопсуздук маалыматы
Коопсуз иштөөнү камсыз кылуу жана зыяндын алдын алуу үчүн төмөнкүлөрдү сактаңыз:
- Ensure the cabinet is securely mounted or placed on a stable, flat surface.
- Do not overload the cabinet beyond its maximum weight capacity of 25 lbs (evenly distributed).
- Regularly check for any signs of wear or damage, especially around the key-lock, hinges, and power cords.
- Ensure adequate ventilation around the unit to prevent overheating. The cabinet features ventilated sides for constant airflow.
- Use only UL-Listed power strips and chargers.
3. Пакеттин мазмуну
Таңгактан чыгарууда бардык компоненттер бар экенин текшериңиз:
- Luxor 12-Capacity Secure Tablet Charging Box (fully assembled)
- Drywall-mounting hardware
- Two keys for the secure key-lock
- Two UL-Listed 6-outlet 120V/15A vertical electrical power strips
4. Орнотуу жана орнотуу
4.1 Пакеттен чыгаруу
The Luxor 12-Capacity Secure Tablet Charging Box arrives fully assembled. Carefully remove it from its packaging.
4.2 Жайгаштыруу параметрлери
The charging box offers versatile placement:
- Desk/Flat Surface Placement: Simply place the unit on any stable, flat surface. Ensure it is not near heat sources or in direct sunlight.
- Дубалга орнотуу: Use the included drywall-mounting hardware to secure the unit to a wall. Ensure the wall can support the weight of the cabinet and its contents (maximum 25 lbs evenly distributed). Refer to the detailed instructions provided with the mounting hardware for proper installation.

An image illustrating the height, width, and depth measurements of the charging box for placement reference.
4.3 Кубат туташтыруу
Connect the power cords from the two internal UL-Listed 6-outlet power strips to a grounded electrical outlet. Ensure the outlet is easily accessible.

An image showing a hand connecting a device's power adapter to one of the outlets on the internal power strip.

A view of the power strip inside the charging box, with several charging cables plugged in and routed for device connection.
5. Иштөө нускамалары
5.1 Loading Devices
Open the secure door using the provided key. The cabinet features two shelves, each designed to hold up to 6 tablets or Chromebooks, totaling 12 devices. The padded interior and rubber-coated dividers protect devices from damage. Carefully slide each device into an available slot.

The charging box with its door open, revealing two internal shelves designed to hold multiple devices.

A close-up of the charging box interior, showing devices neatly stored in slots and connected to the internal power strip for charging.
5.2 Заряддоо түзүлүштөрү
Connect each device's charging cable to the internal power strips. The rubber-coated dividers assist in cable management, reducing clutter and ensuring efficient charging.
5.3 Коопсуздук
Once all devices are loaded and connected, close the door and secure it using the key-lock. This all-steel construction provides a secure environment for your valuable electronics.
6. Техникалык тейлөө
- Тазалоо: Сырткы жана ички беттерин жумшак, гamp кездеме. Абразивдүү тазалагычтардан алыс болуңуз.
- Текшерүү: Periodically inspect the unit for any loose screws, damaged components, or frayed power cords. Address any issues promptly to maintain safety and functionality.
- Вентиляция: Ensure the ventilated sides remain unobstructed to allow constant airflow and prevent overheating.
7. Кыйынчылыктарды
- Кубатталбаган түзмөктөр: Check if the power strips are properly plugged into a live outlet. Verify that device chargers are securely connected to both the power strip and the devices. Ensure the power strips' circuit breakers have not tripped.
- Эшик кулпуланбайт: Ensure the door is fully closed and aligned with the locking mechanism. Check if the key is inserted correctly and turned completely.
- Ашыкча ысып кетүү: Confirm that the ventilation holes on the sides of the cabinet are not blocked. Avoid placing the unit in enclosed spaces without sufficient air circulation.
8. Техникалык шарттар
| Өзгөчөлүк | Деталь |
|---|---|
| Бренд | Луксор |
| Модель номери | LLTMWV12-G |
| Кубаттуулугу | 12 Tablets or Chromebooks (6 per shelf) |
| Материал | All-steel construction (Alloy Steel) |
| Түс | Боз |
| Өлчөмдөрү (W x D x H) | 13"W x 15.8"D x 24.4"H |
| Элемент Салмагы | 20 фунт |
| Максималдуу Салмак сыйымдуулугу | 25 фунт (текшерилген) |
| Power тилкелери | Two UL-Listed 6-outlet 120V/15A vertical electrical power strips |
| Коопсуздук | Secure key-lock (includes two keys) |
| Өзгөчөлүктөрү | Padded interior, rubber-coated dividers, ventilated sides, drywall-mounting hardware included |
| Ассамблея | Чогулуп келет |
| Стандарттар | Meets ANSI/BIFMA standards |
9. Визуалдык колдонмо
9.1 Продукциянын сүрөттөрү
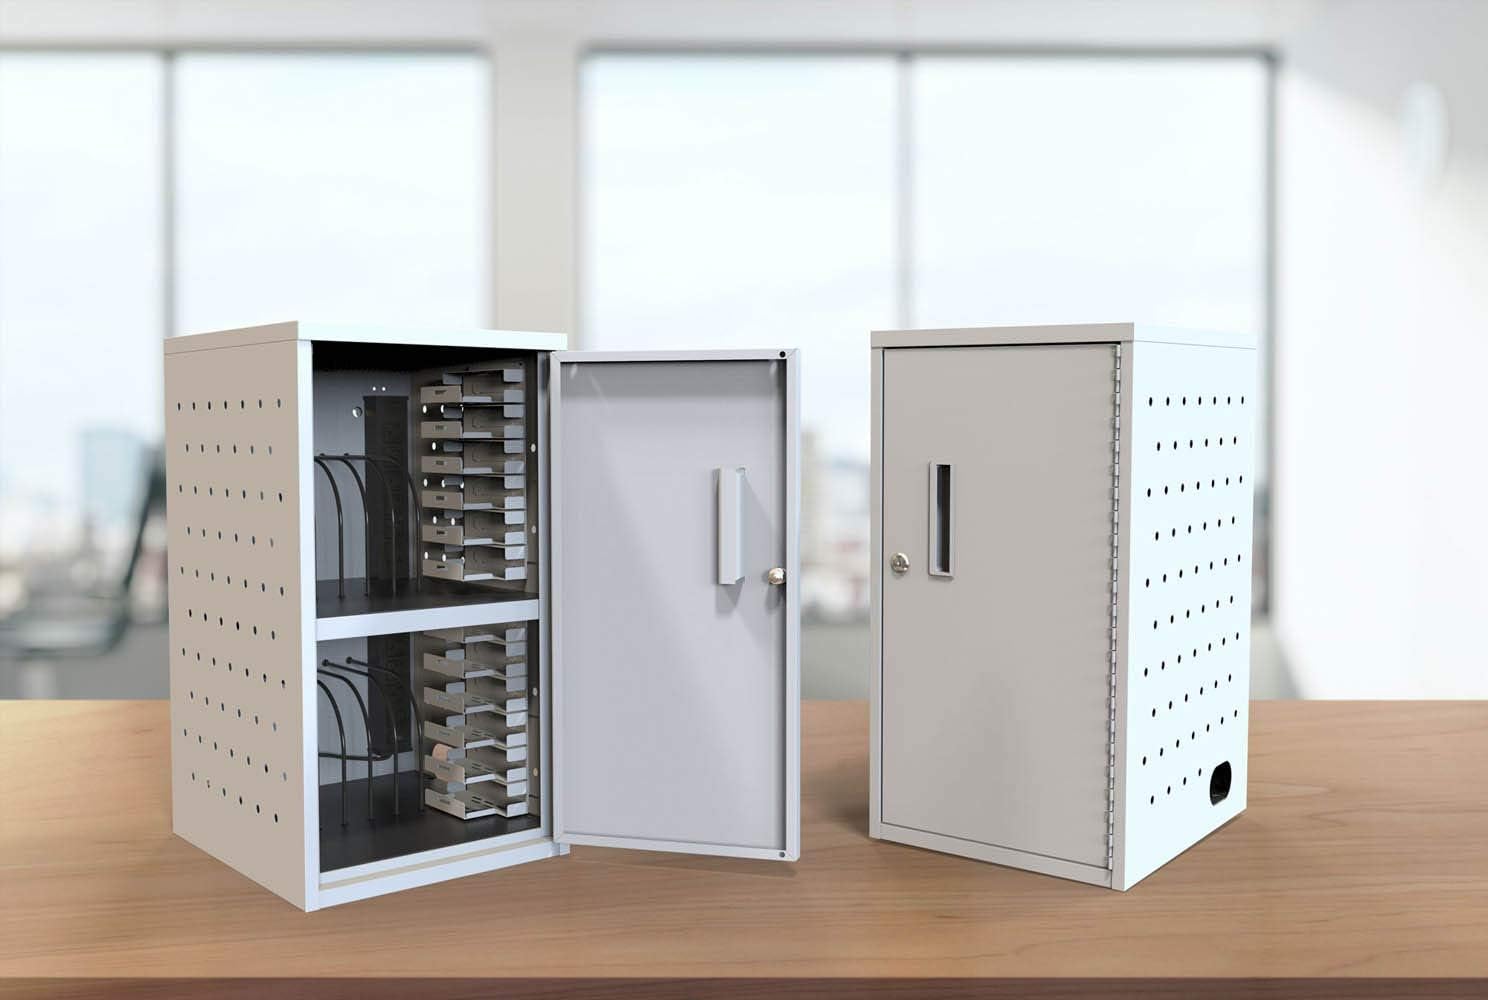
Two charging boxes side-by-side, one with its door open to display the internal layout, and the other closed to show its secure state.
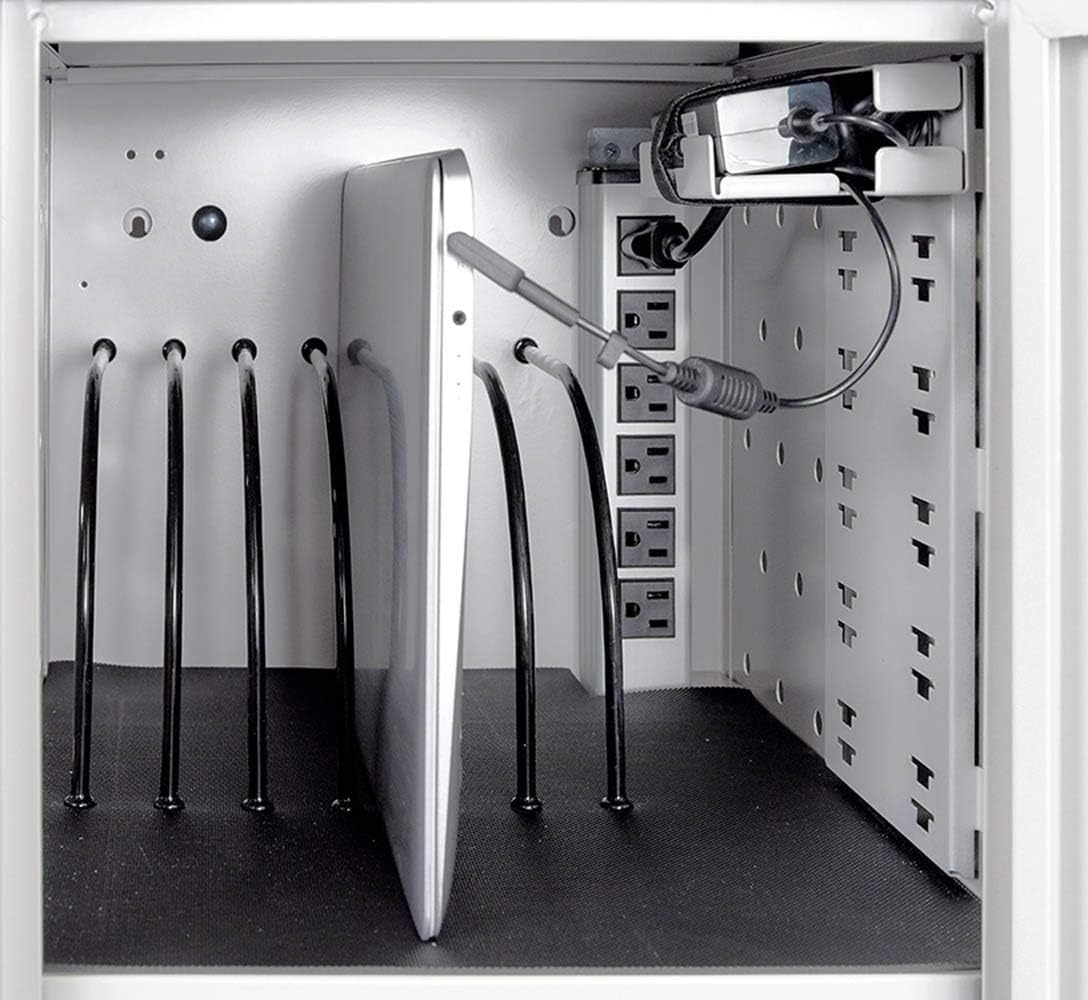
А деталдуу view of a tablet placed in a slot, with its charging cable connected to the power strip, demonstrating the charging process.
9.2 Расмий продукт Videos
Official product video demonstrating the features and usage of the Luxor 12-Capacity Secure Tablet Charging Box.
A video highlighting key features of a similar tablet charging station, including assembly, locking mechanisms, cable management, and device capacity.
Instructions on how to adjust or remove dividers within a charging cart for customized device storage.