1. Киришүү
This manual provides detailed instructions for the setup, operation, and maintenance of your ELECROW 7 Inch 1024x600 IPS Capacitive Touchscreen Monitor. This display is designed for broad compatibility with devices such as Raspberry Pi (5/4/3B+/3B/2B+), BB Black, Banana Pi, Jetson Nano, and Windows 11/10/8/7 systems.
Негизги өзгөчөлүктөрү:
- HD көрүнүштөрү: 7-inch IPS screen with 1024x600 resolution and 170° wide viewing angle for consistent colors and clear viewing.
- Capacitive Touch: Supports up to 5-point touch functionality without requiring driver installation for most compatible systems.
- Plug and Play: Simple connectivity via HD (HDMI) and Micro USB ports for immediate use.
- Ар тараптуу колдонмо: Suitable for use as a Raspberry Pi display, mini PC monitor, gaming console screen, or a computer temperature monitor.
2. Кутуда эмне бар
Сураныч, орнотууну улантуудан мурун бардык компоненттер бар экенин текшериңиз.
- 7 Inch Capacitive Display x 1
- HD кабели x 1
- USB кабели x 1
- Micro HD Adapter x 1
- Copper Screws Pack (4pcs) x 1
- DVD x 1 (Contains drivers and documentation)
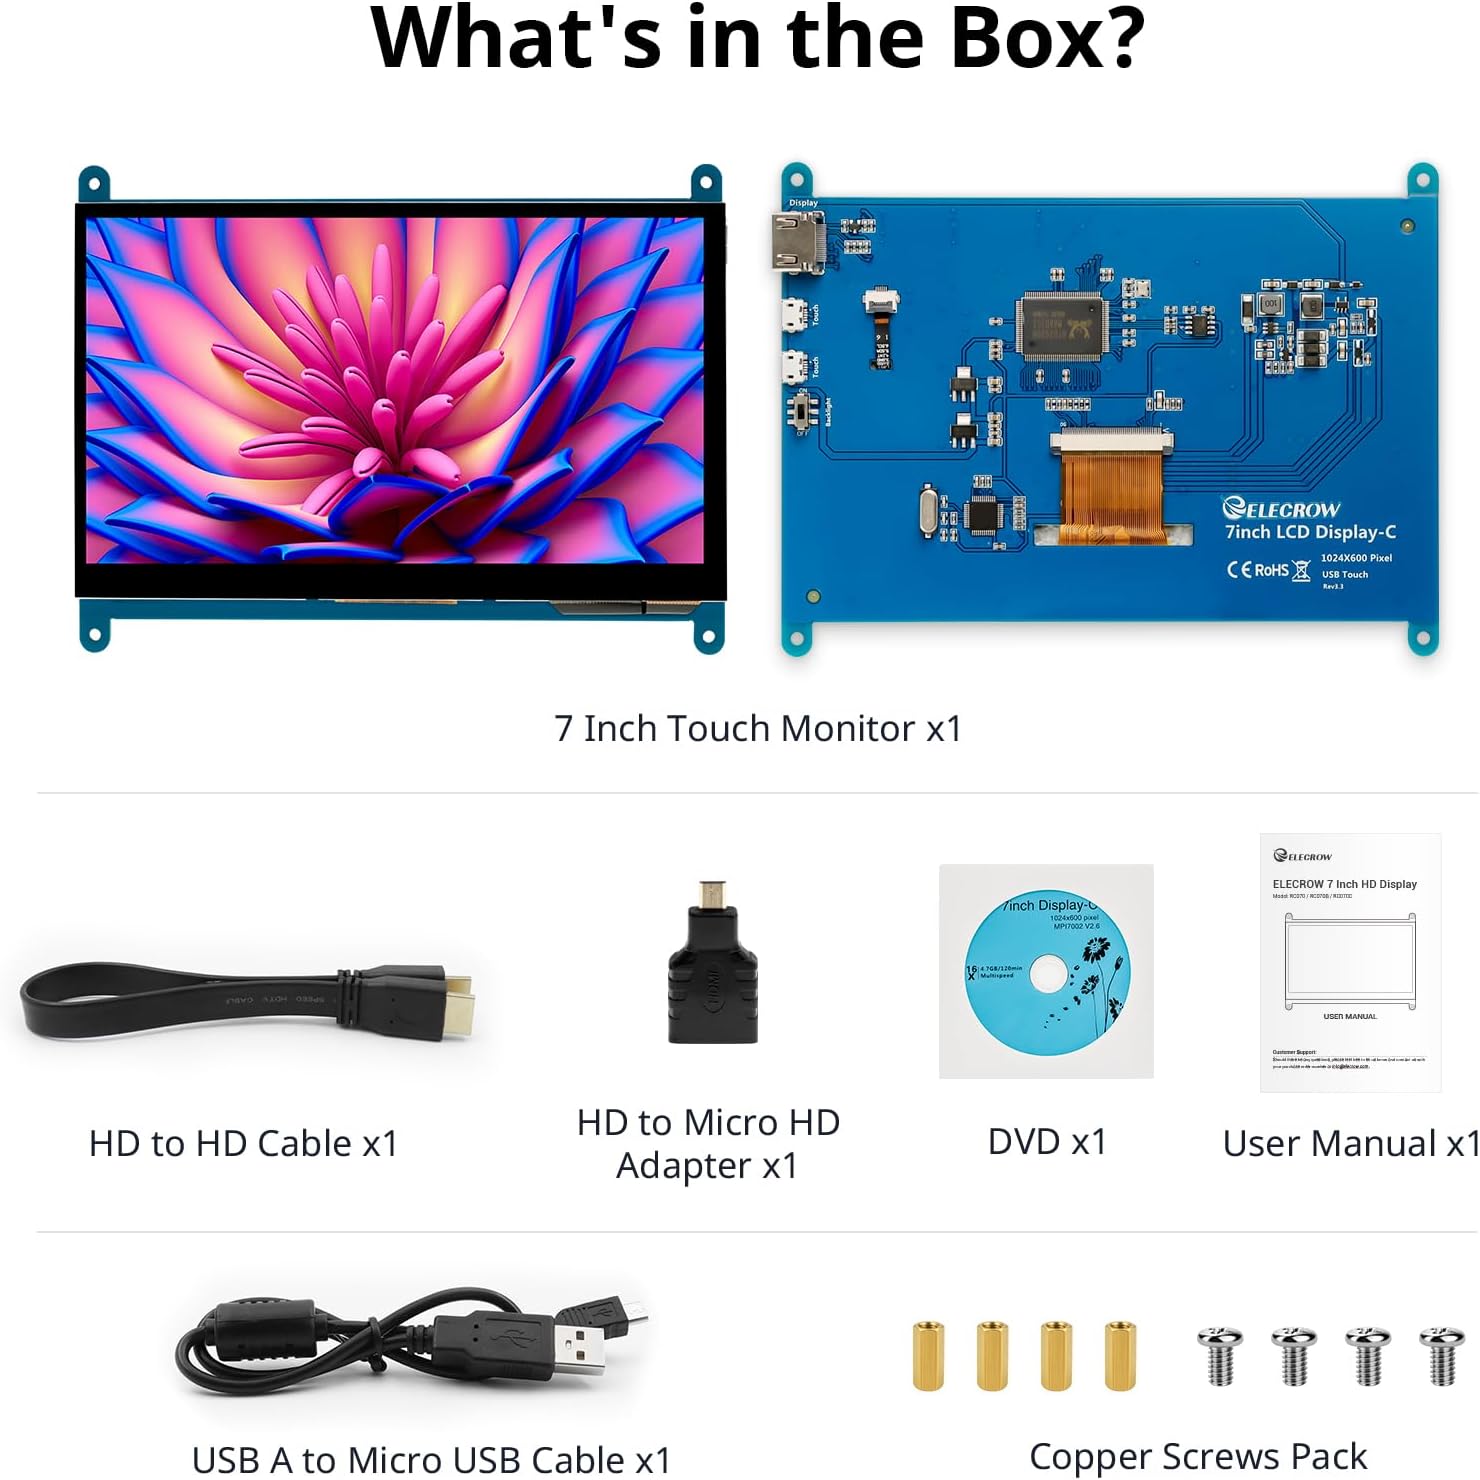
Сүрөт: Продукциянын таңгагына кирген бардык компоненттер.
3. Орнотуу жана байланыштар
Follow these steps to connect your ELECROW 7 Inch Touchscreen Monitor to your device.
3.1 Аппараттык камсыздоо бүттүview

Сүрөт: Арткы view of the monitor highlighting the Standard HD Port, Micro USB Port for touch and power, and Backlight switch.
- Standard HD Port: For video data transfer.
- Микро USB порту: For touch functionality and power supply.
- Арткы жарыкты которуштуруу: To turn the display backlight on or off.
3.2 Connecting to Raspberry Pi
To connect the monitor to a Raspberry Pi, you will need both the HD cable for video and the USB cable for touch and power.
- Connect one end of the HD cable to the Standard HD Port on the monitor and the other end to the HDMI port on your Raspberry Pi. Use the Micro HD adapter if necessary for your Raspberry Pi model.
- Connect the Micro USB cable to the Micro USB Port on the monitor. Connect the other end of the USB cable to a USB port on your Raspberry Pi for power and touch data.
- Ensure the backlight switch on the monitor is in the 'On' position.
- Power on your Raspberry Pi. The display should automatically detect and show the output.
For touch functionality with Raspberry Pi, power can be supplied via the Raspberry Pi's USB port. If using an external power source for the Raspberry Pi, ensure it is sufficient. For optimal performance, especially with older Raspberry Pi models, an external power supply for the monitor might be beneficial if the Pi cannot provide enough current.
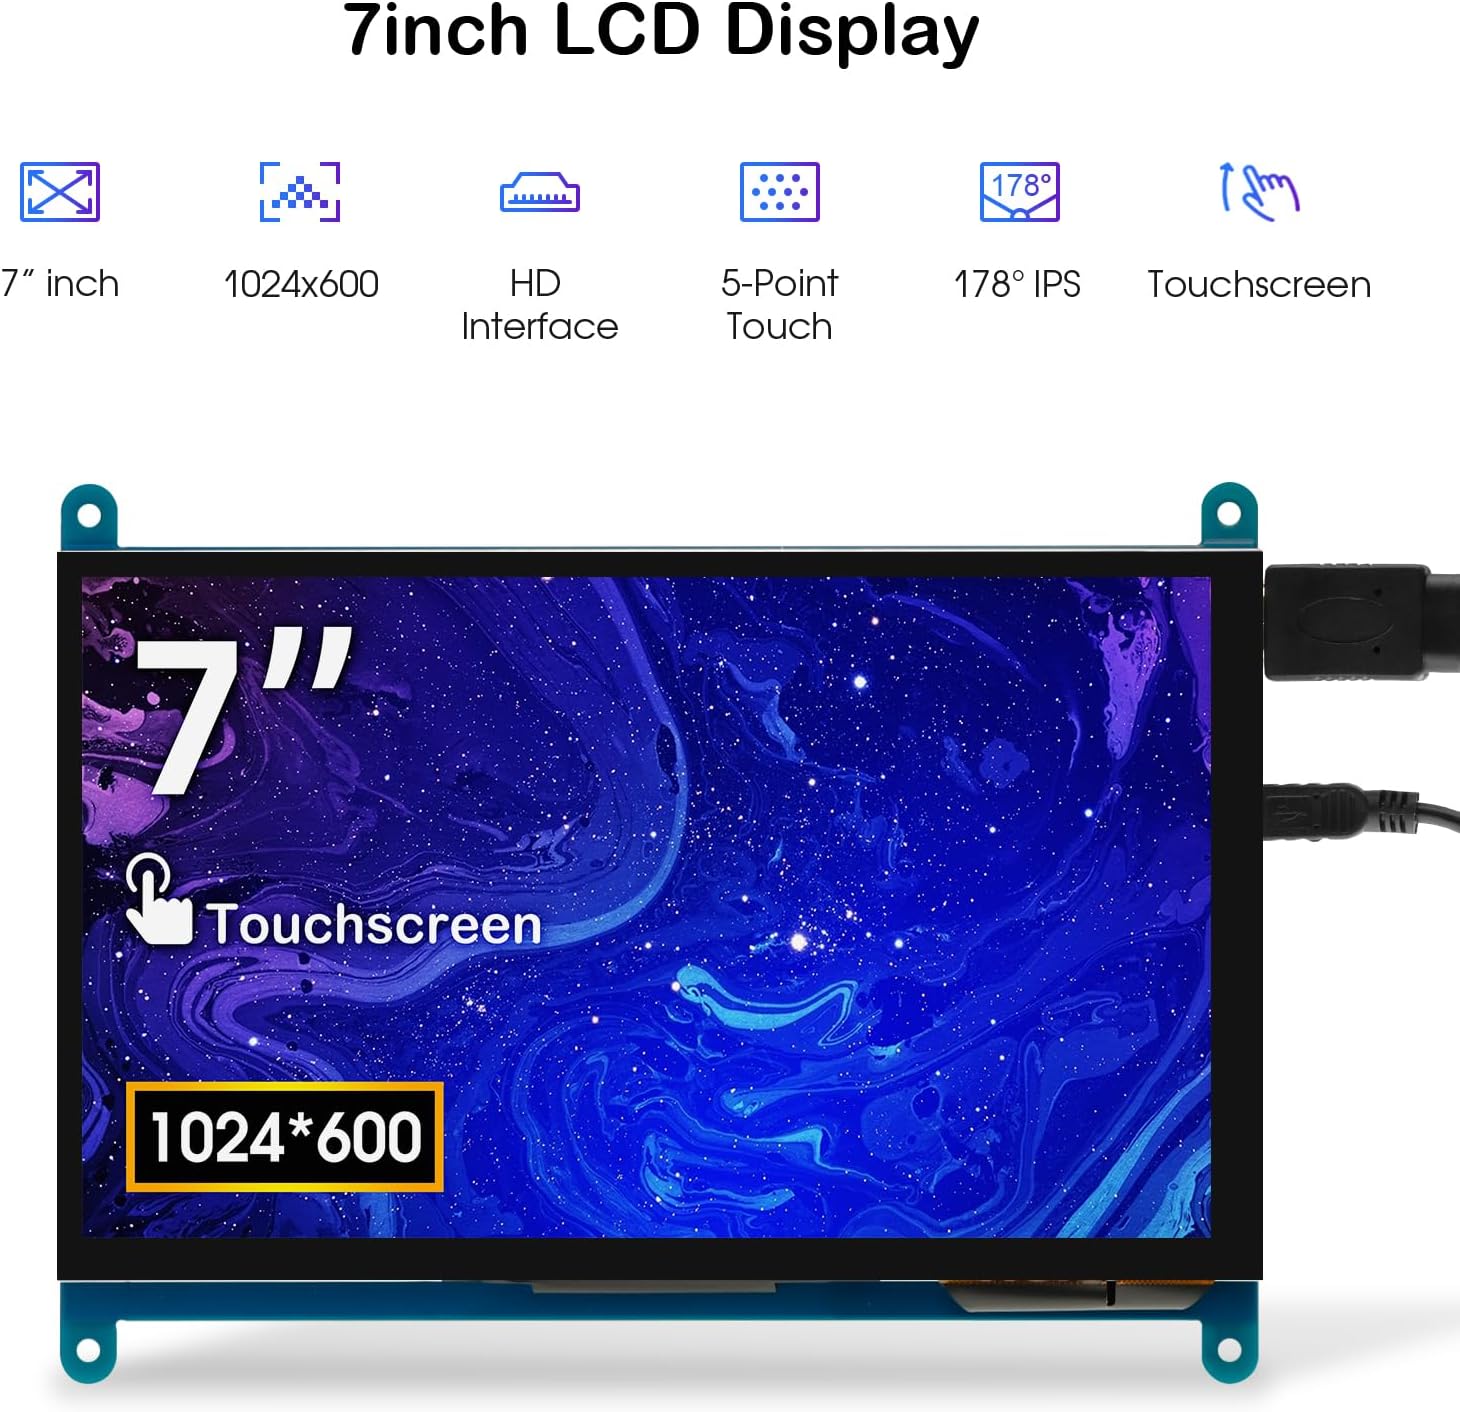
Image: The 7-inch touchscreen connected to a Raspberry Pi board, displaying a graphical user interface.
3.3 Connecting to Windows PC/Laptop
For Windows systems, the monitor functions as a plug-and-play display and touchscreen.
- Connect the HD cable from the monitor's Standard HD Port to an HDMI port on your PC or laptop.
- Connect the Micro USB cable from the monitor's Micro USB Port to a USB-A port on your PC or laptop. This provides power and enables touch functionality.
- Ensure the backlight switch is 'On'.
- Your Windows system should automatically detect the display and touchscreen. No additional drivers are typically required for Windows 7/8/10/11 for basic display and 5-point touch.

Image: The 7-inch touchscreen connected to a laptop, demonstrating seamless connectivity with various operating systems including Windows.
4. Иштөө нускамалары
4.1 Сенсордук функция
The monitor supports 5-point capacitive touch, allowing for various gestures.
- таптаңыз: Single touch for selection or activation.
- Пресс: Sustained touch for context menus or drag operations.
- Чоңойтуу/кичирейтүү: Pinch gestures with two fingers.
- Mouse Click: A single tap typically registers as a left-click.
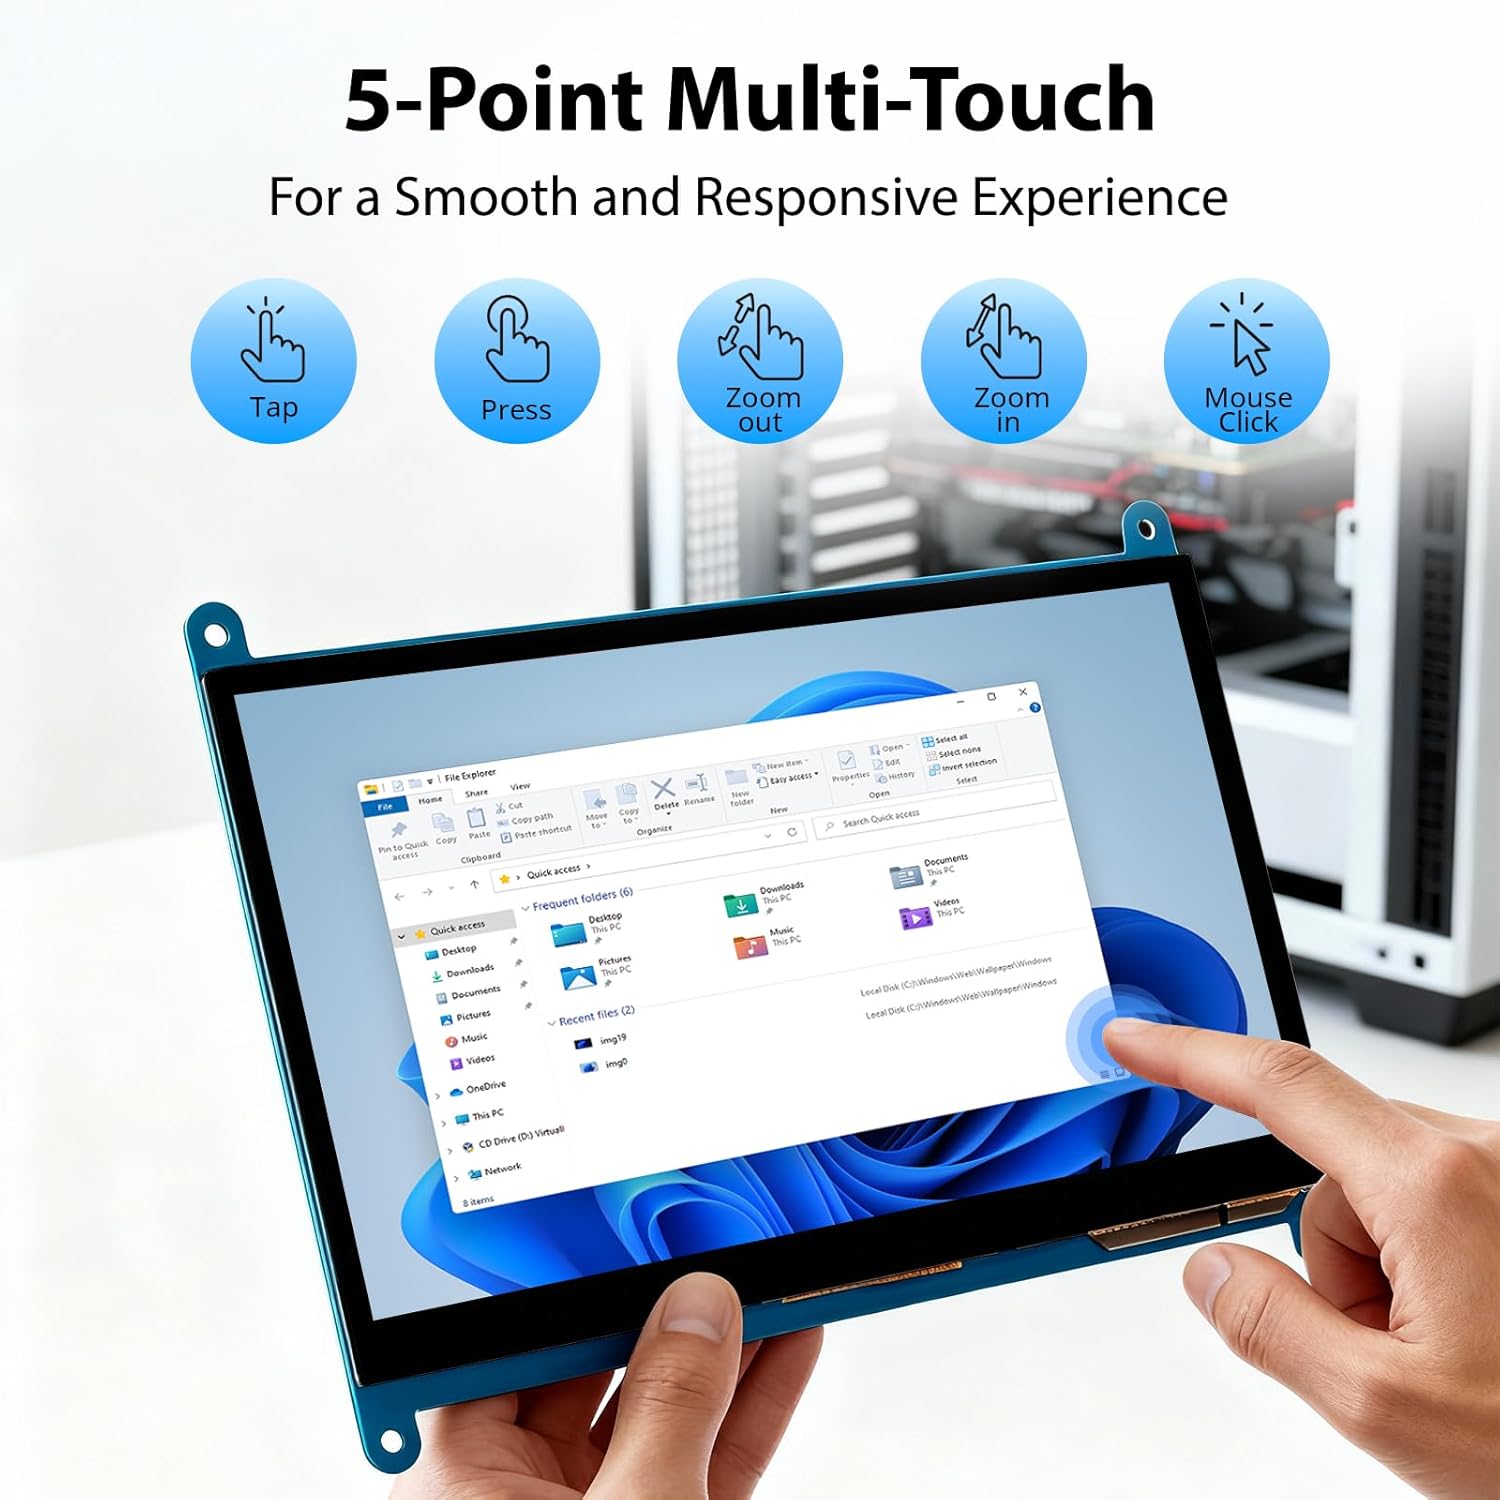
Image: Visual guide to the 5-point multi-touch capabilities of the screen, showing common gestures.
4.2 Көрсөтүү режимдери
When connected to a computer, the monitor can operate in several display modes:
- Кайталануу режими: The monitor mirrors the content of your primary display.
- Узартуу режими: The monitor acts as an extension of your primary display, providing additional screen space.
- Экинчи экран режими: The monitor functions as the sole display, with the primary display turned off.
Бул режимдерди, адатта, операциялык системаңыздын дисплей жөндөөлөрү аркылуу конфигурациялоого болот.

Image: Illustrations demonstrating the three display modes: Duplicate, Extend, and Second Screen, showing how the monitor can be used with a laptop.
4.3 Жарыкты башкаруу
The monitor features a physical switch to control the backlight. This allows you to turn the display illumination on or off without disconnecting power. Note that there is no granular brightness control; it is an on/off function only.
Video: This video demonstrates the backlight control switch on the ELECROW 7 Inch Touchscreen, showing how to turn the display illumination on and off.
5. Техникалык тейлөө
Туура тейлөө мониторуңуздун узак мөөнөттүү жана оптималдуу иштешин камсыз кылат.
- Экранды тазалоо: Бир аз жумшак, түксүз кездемени колдонуңуз dampened with water or a screen-cleaning solution. Avoid harsh chemicals or abrasive materials that could damage the screen surface.
- Жалпы кам көрүү: Keep the monitor in a clean, dry environment. Avoid exposing it to extreme temperatures, direct sunlight, or high humidity.
- Колдонуу: Handle the monitor by its edges. Avoid applying excessive pressure to the screen.
6. Кыйынчылыктарды
Мониторуңузда көйгөйлөргө туш болсоңуз, төмөнкү жалпы көйгөйлөрдү жана чечимдерди караңыз.
| Көйгөй | Мүмкүн себеп | Чечим |
|---|---|---|
| Дисплей жок/Кара экран |
|
|
| Сенсордук экран жооп бербей жатат |
|
|
| Display resolution incorrect |
|
|
| Жарыктыкты көзөмөлдөө жок | The monitor only has an on/off switch for the backlight, not adjustable brightness. | This is expected behavior. The monitor does not support adjustable brightness. |
7. Техникалык шарттар
Detailed technical specifications for the ELECROW 7 Inch Touchscreen Monitor.
| Өзгөчөлүк | Деталь |
|---|---|
| Бренд | ЭЛЕКРО |
| Модель аты | RC070 |
| Screen Size | 7 дюйм |
| Дисплейдин максималдуу чечилиши | 1024 x 600 |
| Native Resolution | 1024x600 |
| Дисплей түрү | LCD |
| Дисплей технологиясы | IPS |
| Аспект катышы | 1.71:1 |
| Жаңыртуу ылдамдыгы | 60 Гц |
| Жооп убактысы | 8 Миллисекунд |
| Контраст катышы | 800:1 |
| Жарыктык | 300 лм |
| Viewбурч | 170 градус |
| Screen Surface Description | Жылтырак |
| Байланыш технологиясы | HDMI |
| Аппараттык байланыш | HDMI, USB |
| HDMI портторунун жалпы саны | 1 |
| Жалпы USB порттору | 2 (Micro USB for power/touch, USB-A for power/touch) |
| Энергияны керектөө | 12.5 Ватт |
| Тtage | 5 вольт |
| Элементтин өлчөмдөрү (D x W x Y) | 0.3"D x 6.1"W x 4.8"H |
| Элемент Салмагы | 7.36 унция |
| Шайкеш түзмөктөр | Raspberry Pi, BB Black, Banana Pi, Jetson Nano, Computers, Laptops, Gaming Consoles |
8. Кепилдик жана колдоо
Your ELECROW 7 Inch Touchscreen Monitor comes with a manufacturer's warranty.
- Кепилдик түрү: 1 жылдык Өндүрүүчүнүн Кепилдиги
- Кепилдиктин сүрөттөлүшү: 1 жылдык өндүрүүчүсү
For technical support or warranty claims, please contact ELECROW customer service through their official webпродукт сатылып алынган сайт же платформа.