
1. Киришүү
The Rain Bird XC-801I-E is an advanced indoor electric irrigation programmer designed for efficient residential watering systems. This unit provides simple, reliable control for up to 8 irrigation stations. It features three independent programs, each capable of four daily start times, offering flexible scheduling options. The XC-801I-E is engineered for compatibility with the intelligent Solar Sync sensor, allowing for automatic adjustments to irrigation schedules based on local climate conditions, thereby optimizing water usage. Additionally, it supports connection with other sensors for enhanced control. This manual provides essential information for the installation, operation, and maintenance of your irrigation programmer.
2. Коопсуздук маалыматы
Please read all safety instructions before installing or operating the Rain Bird XC-801I-E irrigation programmer. Failure to follow these instructions may result in electric shock, fire, or damage to the product.
- Электр коопсуздугу: This device operates on 24 Volts. Ensure the power supply is disconnected before performing any wiring or maintenance. Only use the provided external transformer. Do not expose the unit to water or extreme moisture.
- Орнотуу: Install the programmer indoors, away from direct sunlight, rain, or excessive humidity. Ensure proper ventilation around the unit.
- Балдар: Аппаратты балдар жетпеген жерде сактаңыз.
- Тейлөө: Refer to the maintenance section for cleaning and care instructions. Do not attempt to repair the unit yourself; contact qualified service personnel.
3. Пакеттин мазмуну
Пакетте бардык компоненттер бар экенин текшериңиз:
- Rain Bird XC-801I-E Indoor Irrigation Programmer
- External Transformer (Power Supply)
- Колдонуучунун Колдонмосу (бул документ)
- Монтаждоочу жабдуулар (буроолор, анкерлер)
4. Орнотуу жана орнотуу
Follow these steps for proper installation of your irrigation programmer.
4.1 Контроллерди орнотуу
- Choose an indoor location near a standard electrical outlet, protected from extreme temperatures and moisture.
- Use the provided mounting hardware to securely attach the controller to a wall. Ensure it is at a convenient height for programming and viewing.
4.2 Клапандарды туташтыруу
The XC-801I-E supports up to 8 irrigation zones and operates with 24V solenoid valves.
- Кубатты өчүрүү: Ensure the external transformer is unplugged from the electrical outlet.
- Жалпы зымды туташтыруу: Connect one common wire from all your solenoid valves to the 'COMMON' terminal on the controller.
- Зона зымдарын туташтыруу: Connect the individual control wire from each solenoid valve to its corresponding station terminal (e.g., Station 1, Station 2, etc.) on the controller.
4.3 Sensor Connection (Optional)
The controller allows for the installation of a sensor, such as the Rain Bird Solar Sync or other compatible sensors.
- Refer to your sensor's instruction manual for specific wiring details.
- Connect the sensor wires to the designated sensor terminals on the XC-801I-E controller.
4.4 Кубат туташтыруу
- Plug the external transformer into a standard 230V AC electrical outlet.
- Connect the transformer's output cable to the power input port on the XC-801I-E controller.
- The controller display should illuminate, indicating power is supplied.
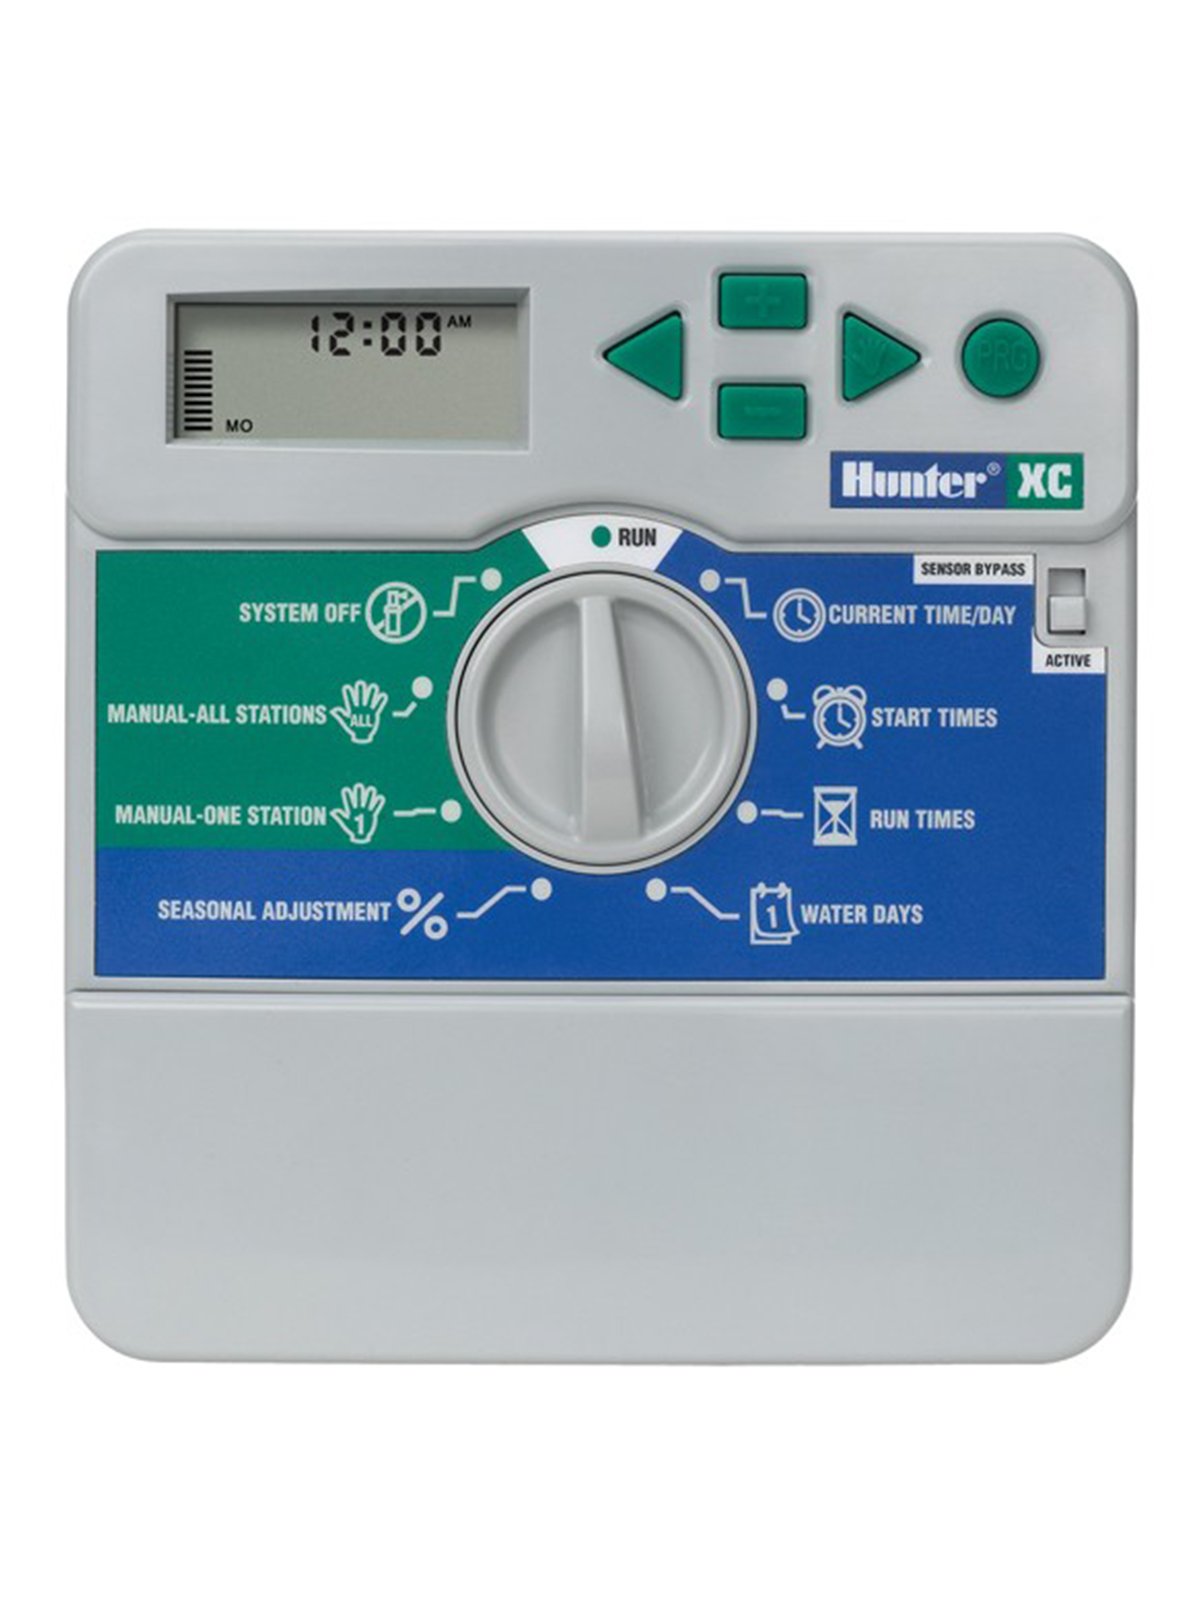
1-сүрөт: Фронт view of the Rain Bird XC-801I-E Indoor Electric Irrigation Programmer. This image shows the display, programming buttons, and the dial for mode selection.
5. Иштөө нускамалары
The XC-801I-E features a user-friendly interface for programming your irrigation schedules.
5.1 Учурдагы убакытты жана датаны коюу
- Turn the dial to the 'SET TIME/DATE' position.
- Use the arrow buttons to adjust the current time and date.
- Press the 'NEXT' button to move between settings (hour, minute, day, month, year).
5.2 Сугаруу графигин программалоо
The controller offers three independent programs (A, B, C) and four start times per program.
- Программаны тандоо: Turn the dial to 'PROGRAMS'. Use the 'PROGRAM' button to select Program A, B, or C.
- Баштоо убакыттарын коюу: For the selected program, use the arrow buttons to set up to four start times. Each start time initiates the watering sequence for all zones assigned to that program.
- Зонаны иштетүү убакыттарын коюңуз: Turn the dial to 'RUN TIMES'. Select the desired program and then use the arrow buttons to set the watering duration for each individual station (zone).
- Сугаруу күндөрүн белгилеңиз: Turn the dial to 'WATER DAYS'. Select the desired program and then choose the specific days of the week for irrigation, or select an interval schedule (e.g., every 2 days).
5.3 Кол менен иштетүү
Бир станцияны же бардык станцияларды кол менен башкаруу үчүн:
- Single Station: Turn the dial to 'MANUAL SINGLE STATION'. Use the arrow buttons to select the station and set its run time. Press 'START'.
- Бардык станциялар: Turn the dial to 'MANUAL ALL STATIONS'. Set the run time for each station sequentially. Press 'START'.
5.4 System Off / Rain Delay
To temporarily suspend irrigation:
- Система өчүк: Turn the dial to 'SYSTEM OFF' to halt all automatic irrigation.
- Жаан кечигүү: Turn the dial to 'RAIN DELAY'. Use the arrow buttons to set the number of days for the delay. Irrigation will resume automatically after the set period.
6. Техникалык тейлөө
Regular maintenance ensures the longevity and optimal performance of your irrigation programmer.
- Тазалоо: Контроллердин сыртын жумшак менен сүртүңүз, гamp кездеме. Абразивдүү тазалагычтарды же эриткичтерди колдонбоңуз.
- Байланыштары: Мезгил-мезгили менен бардык зымдарды байланыштарды текшерип туруңуз, алар бекем жана коррозиядан таза.
- Кыштоо: In regions with freezing temperatures, it is recommended to disconnect the controller and store it indoors during winter months to prevent damage. Drain all water from the irrigation system.
- Батарея (эгер бар болсо): If your model includes a backup battery for settings retention during power outages, check and replace it as recommended by the manufacturer (typically every 1-2 years).
7. Кыйынчылыктарды
If you encounter issues with your Rain Bird XC-801I-E, refer to the following common problems and solutions:
| Көйгөй | Мүмкүн себеп | Чечим |
|---|---|---|
| Контроллердин дисплейи бош | No power; faulty transformer; internal fuse (if applicable) | Check power outlet; ensure transformer is securely connected; test transformer output; consult a technician if fuse is suspected. |
| Сугарылбаган зоналар | Rain delay active; system off; faulty wiring; valve issues; low water pressure | Check rain delay/system off settings; inspect wiring connections; manually test valves; check water supply. |
| Incorrect watering times | Incorrect programming; sensor interference | Review program start times, run times, and water days; check sensor operation and settings. |
| Ката билдирүү дисплейде | Wiring fault; sensor fault; internal error | Note the error code and refer to the full product manual or contact support. Check wiring for shorts. |
Бул чечимдерди колдонуу аракетинен кийин көйгөй чечилбесе, кардарларды колдоо кызматына кайрылыңыз.
8. Техникалык шарттар
| Өзгөчөлүк | Спецификация |
|---|---|
| Модел | XC-801I-E |
| Бренд | Hunter |
| Өндүрүүчү | Rain Bird |
| Зоналардын саны | 8 |
| Программалар | 3 (A, B, C) |
| Ар бир программанын башталыш убактысы | 4 |
| Operating Voltage | 24 Вольт |
| Материал | Пластик |
| Түс | Боз |
| Элемент Салмагы | 1.57 килограмм |
| Иштөө температурасы | 20 градус |
| Smart Home шайкештиги | Compatible with smart home systems (via sensor integration) |
9. Кепилдик жана колдоо
For warranty information, technical support, or service inquiries, please contact your authorized dealer or the manufacturer directly. Keep your purchase receipt as proof of purchase.
Өндүрүүчү: Rain Bird
Бренд: Hunter
For further assistance, visit the official Rain Bird webсайтына кириңиз же жергиликтүү дистрибьюторуңузга кайрылыңыз.