
1. Киришүү
Сатып алганыңыз үчүн рахматasing the JUKI HZL-DX7 Electronic Sewing Machine. This manual provides essential information for the safe and effective use of your new sewing machine. Please read these instructions carefully before operating the machine and keep this manual for future reference.

Image 1.1: The JUKI HZL-DX7 Electronic Sewing Machine, shown with its extension table attached, ready for use.
2. Коопсуздук нускамалары
Коопсуз иштөөнү камсыз кылуу үчүн, ар дайым төмөнкү негизги коопсуздук чараларын сактаңыз:
- Always unplug the machine from the electrical outlet immediately after use, before cleaning, or when making any user servicing adjustments.
- Do not operate the machine with a damaged cord or plug. If the machine is not working properly, has been dropped, damaged, or dropped into water, return it to an authorized service center for examination and repair.
- Бармактарды кыймылдуу бөлүктөрдөн алыс кармаңыз. Тигүүчү машинанын ийнесинин айланасында өзгөчө кылдаттык талап кылынат.
- Туура ийне пластинасын колдонуңуз. Туура эмес пластина ийненин сынып кетишине алып келиши мүмкүн.
- Тигүү учурунда кездемени тартпаңыз же түртпөңүз. Бул ийненин кыйшайып, сынышына алып келиши мүмкүн.
- Эч качан эч кандай тешикке эч кандай нерсени түшүрбөңүз же салбаңыз.
- Сыртта колдонбоңуз.
3. Продукт бүтүп калдыview жана өзгөчөлүктөрү
The JUKI HZL-DX7 is an advanced electronic sewing machine designed for precision and ease of use. Key features include:
- Presser Foot Pivot Function: Allows for easy sewing of corners and pivoting. When you stop sewing, the needle stops in the down position, and the presser foot automatically lifts to facilitate fabric movement.
- Free Motion Sewing: Easily switch between straight and zigzag stitches for free motion quilting and embroidery by dropping the feed dogs. The presser foot height can be adjusted for smoother movement.
- Straight Stitch Slide Plate: A simple lever allows you to switch to a single needle hole plate, preventing fabrics from being pushed into the needle hole during straight stitching, ensuring precision.
- Жипти автоматтык түрдө кыркуу: Trim both upper and bobbin threads automatically with the press of a button.
- High Sewing Speed: Up to 1050 stitches per minute (SPM).
- Versatile Stitch Options: 287 stitch types available, including 4 alphanumeric character sets.
- Adjustable Stitch Dimensions: Maximum Zig Zag Width of 7mm and Maximum Stitch Length of 5mm.
- Ийне түрү: Compatible with 130R / 705H needles.

Сүрөт 3.1: Жакын план view of the JUKI HZL-DX7 machine head, highlighting the needle area and presser foot.

Image 3.2: The control panel and LCD display of the JUKI HZL-DX7, showing stitch selection and settings.

3.3-сүрөт: Иллюстрациялык көрсөтүүasing the wide variety of stitch patterns, including decorative stitches and alphanumeric characters, available on the JUKI HZL-DX7.
4. Орнотуу
4.1 Пакеттен чыгаруу жана жайгаштыруу
- Машинаны таңгагынан кылдаттык менен чыгарыңыз.
- Машинаны туруктуу, тегиз бетке коюңуз.
- Ensure adequate lighting and space for comfortable operation.
- Кубат шнурун машинага, андан кийин тиешелүү электр розеткасына туташтырыңыз.
4.2 Кеңейтүү үстөлүн бекитүү
The extension table provides a larger work area, especially useful for quilting or larger projects. Align the table with the free arm of the machine and slide it into place until it clicks securely.
4.3 Машинага жип салуу
Refer to the threading diagrams on the machine or the detailed instructions in the full manual for proper upper thread and bobbin winding/insertion. Correct threading is crucial for optimal stitch quality.
5. Иштөө нускамалары
5.1 Негизги тигүү
- Кубат которгучун күйгүзүңүз.
- Select your desired stitch using the control panel.
- Place fabric under the presser foot and lower the foot.
- Begin sewing using the foot pedal or start/stop button.
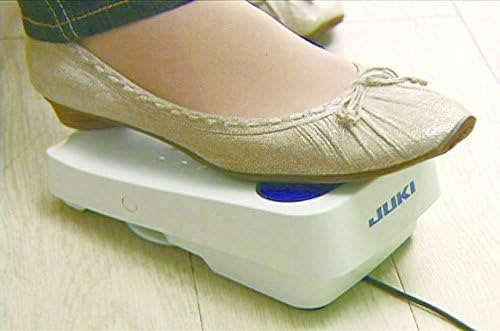
Image 5.1: The foot pedal accessory for controlling the sewing speed of the JUKI HZL-DX7.
5.2 Using the Presser Foot Pivot Function
Activate this function via the machine's settings. When enabled, the presser foot will automatically lift slightly when the machine stops with the needle in the down position, allowing you to easily pivot your fabric for precise corners and curves.
5.3 Engaging Free Motion Sewing
To engage free motion, lower the feed dogs using the lever located on the back or side of the machine. Attach a free motion quilting foot. Adjust the presser foot height if necessary for optimal fabric movement. This allows you to move the fabric freely to create custom designs.

Image 5.2: The JUKI HZL-DX7 performing free motion quilting on a piece of fabric, demonstrating its capability for intricate designs.
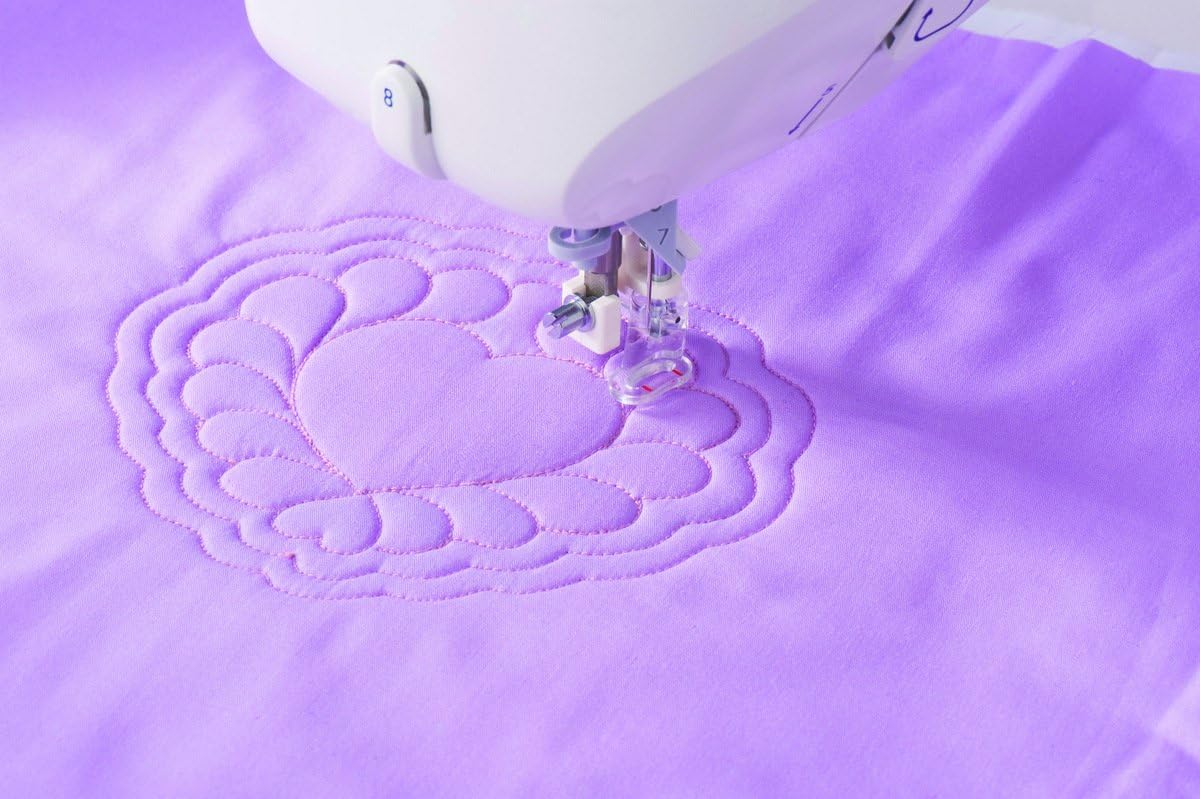
Сүрөт 5.3: деталдуу view of a quilted pattern being created by the JUKI HZL-DX7, showcasing stitch precision.
5.4 Using the Straight Stitch Slide Plate
For precise straight stitching, especially on delicate fabrics, slide the front lever to activate the single needle hole plate. This minimizes fabric puckering and ensures a clean, straight seam.

Image 5.4: A close-up of the presser foot and feed dogs area, illustrating the mechanism for fabric feeding and stitch formation.
5.5 Automatic Thread Trimming
After completing a seam, press the automatic thread trimming button. The machine will automatically cut both the upper and bobbin threads, saving time and effort.
6. Техникалык тейлөө
Үзгүлтүксүз тейлөө тигүүчү машинаңыздын узак иштөөсүн жана оптималдуу иштешин камсыз кылат.
- Тазалоо: Regularly clean lint and dust from the bobbin case area, feed dogs, and tension discs using a small brush. Always unplug the machine before cleaning.
- Ийне алмаштыруу: Replace the needle frequently, especially after 8-10 hours of sewing or if it becomes bent or dull. Use only the recommended needle type (130R / 705H).
- Майлоо: Refer to the full instruction manual for specific oiling points and frequency, if applicable.
- Сактагыч: Колдонулбай турган учурда, машинаны чаңдан коргоо үчүн үстүн жаап, кургак жерде сактаңыз.
7. Кыйынчылыктарды
This section addresses common issues you might encounter. For more detailed troubleshooting, consult the comprehensive manual.
| Көйгөй | Мүмкүн себеп | Чечим |
|---|---|---|
| Өткөрүлгөн тигүү | Туура эмес ийне, ийилген ийне, жип туура эмес өткөрүлгөн, кездеменин ийне өлчөмү туура эмес. | Replace needle, re-thread machine, use appropriate needle for fabric type. |
| Thread Breakage | Improper threading, incorrect tension, poor quality thread, burr on needle plate. | Re-thread, adjust tension, use good quality thread, check for burrs. |
| Тегиз эмес тигүү | Incorrect tension, inconsistent fabric feeding. | Adjust tension, ensure even fabric feeding without pulling or pushing. |
| Машина иштебей жатат | Power cord not plugged in, power switch off, bobbin winder engaged. | Check power connections, turn on switch, disengage bobbin winder. |
8. Техникалык шарттар
| Өзгөчөлүк | Спецификация |
|---|---|
| Бренд | Чыгып |
| Модел | HZL-DX7 |
| Түс | Ак |
| Материал | Металл |
| Продукциянын өлчөмдөрү | 51 x 25.7 x 30.5 см |
| Элемент Салмагы | 9.7 килограмм |
| Power Source | Электр зымдары |
| Тигүү ылдамдыгы | 1050 SPM (мүнөтүнө тигиштер) |
| Ийне түрү | 130R / 705H |
| Number of Stitch Types | 287 |
| Символдордун саны | 4 Alphanumeric Character Sets |
| Max. Zig Zag Width | 7мм |
| Макс. Тигүү узундугу | 5мм |
| ЕБнын запастык бөлүктөрүнүн болушу | 5 жыл |
| Дүйнөлүк соода идентификациялык номери | 04946973007416 |
9. Кепилдик жана колдоо
For warranty information, technical support, or service inquiries, please refer to the documentation provided with your purchase or contact JUKI customer service directly. Keep your proof of purchase for warranty claims.