
1. Киришүү
Thank you for choosing the FERM BCM1021 Battery Charger. This manual provides essential information for the safe and efficient operation, maintenance, and troubleshooting of your new battery charger. Please read this manual thoroughly before first use and keep it for future reference.
The FERM BCM1021 is designed for charging 6V and 12V lead-acid batteries. It features automatic overcharge, short-circuit, and reverse polarity protection, ensuring safe charging. The integrated ampere meter allows for easy monitoring of the charging process.
2. Коопсуздук нускамалары
Электр шокунун, өрттүн же жаракаттын алдын алуу үчүн ар дайым төмөнкү коопсуздук чараларын сактаңыз:
- Заряддоочу түзүлүштү колдонуудан мурун бардык көрсөтмөлөрдү окуп чыгыңыз.
- Use the charger only in a well-ventilated area.
- Заряддагычты жамгырга же нымдуу шарттарга чыгарбаңыз.
- Ensure the charger is disconnected from the mains power before making or breaking connections to the battery.
- Батареяны туташтырыңыз clamps to the correct terminals: red to positive (+), black to negative (-). Reverse polarity will blow the fuse.
- Avoid sparks or flames near the battery, as batteries can produce explosive gases.
- Батареялар менен иштөөдө көздү коргоо жана кол кап кийиңиз.
- Балдар жетпеген жерде сактаңыз.
- Кайра заряддалбаган батарейкаларды заряддоого аракет кылбаңыз.
3. Пакеттин мазмуну
Пакетти ачканда бардык буюмдар бар экенин жана бузулбаганын текшериңиз:
- FERM BCM1021 Battery Charger
- Set of Battery Clamps (Кызыл жана Кара)
4. Продукт бүтүп калдыview
Familiarize yourself with the components of your FERM BCM1021 Battery Charger:

4.1-сүрөт: Жалпысынан view of the FERM BCM1021 Battery Charger with connected battery clamps. The charger features a robust blue and black casing with ventilation slots.

Figure 4.2: Top panel of the charger showing the fuse holder, 6V/12V selector switch, and the ampere meter. The model number and manufacturer details are also visible.

4.3-сүрөт: Детальдуу view of the 10A fuse and the white rocker switch for selecting between 6V and 12V charging modes. A warning about fuse breaking due to reverse polarity or short circuit is printed nearby.

Figure 4.4: Close-up of the analog ampere meter, which displays the current flowing into the battery during charging. The scale ranges from 0 to 10 Amperes.
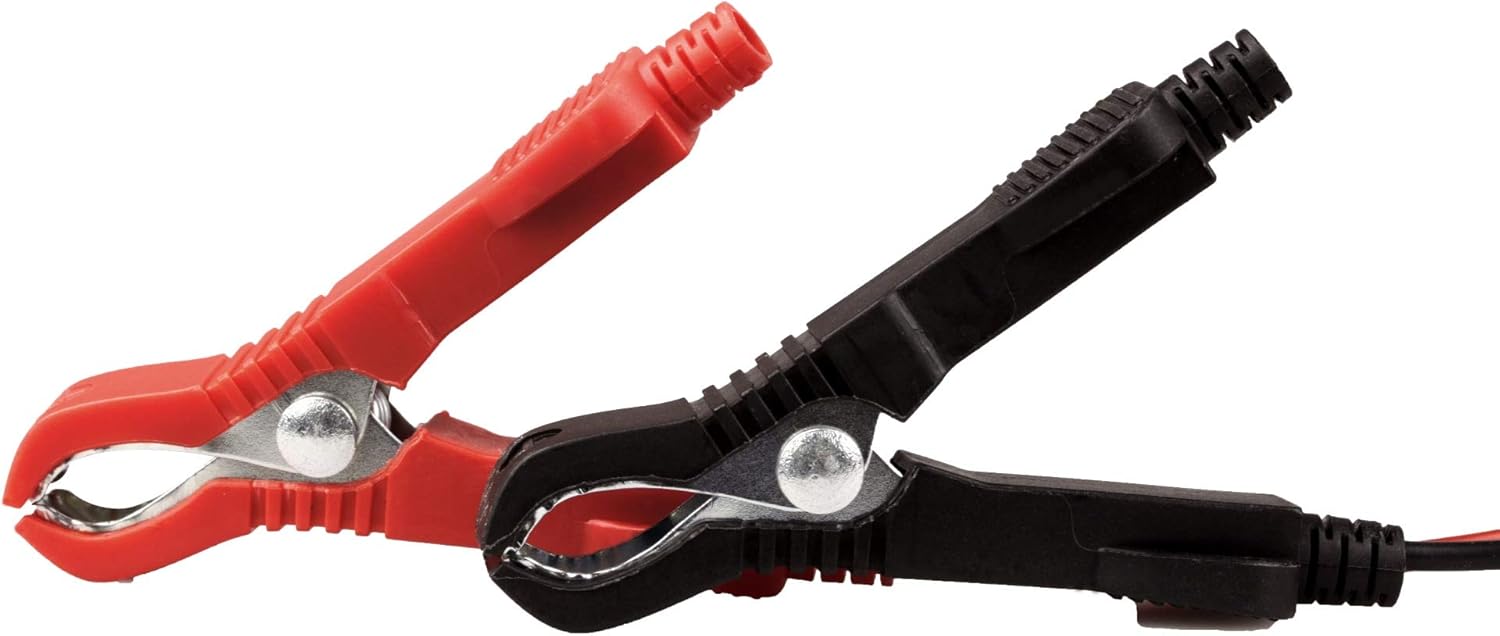
Figure 4.5: The included red (positive) and black (negative) battery clamps, designed for secure connection to battery terminals.
5. Орнотуу
- Даярдоо: Ensure the battery is in a well-ventilated area. Clean the battery terminals if necessary to ensure good contact.
- Тtage Тандоо: Before connecting to the battery, use the 6V/12V switch on the charger to select the correct voltage (6V or 12V) matching your battery.
- Батареяга туташуу:
- туташтыруу кызыл positive (+) battery clamp батареянын оң (+) терминалына.
- туташтыруу кара negative (-) battery clamp батареянын терс (-) терминалына.
- Туташуулардын коопсуз экенин текшериңиз.
- Электр кубатына туташуу: Кубаттоочу түзүлүштүн кубат шнурун стандарттуу 230 В AC электр розеткасына сайыңыз.
6. Иштөө нускамалары
- Заряддоону баштоо: Once connected to both the battery and mains power, the charging process will begin automatically.
- Монитор заряддоо: Байкоо ampere meter on the charger. The needle will indicate the charging current. As the battery charges, the current will gradually decrease.
- Заряддоо аяктады: Charging is complete when the ampere meter shows a very low current or drops to zero, indicating the battery is fully charged. The charger's automatic overcharge protection will prevent damage to the battery.
- Ажыратууда:
- First, unplug the charger from the mains power outlet.
- Then, disconnect the black negative (-) battery clamp батареядан.
- Finally, disconnect the red positive (+) battery clamp батареядан.
Коопсуздук өзгөчөлүктөрү:
- Ашыкча кубаттан коргоо: Батарея толгондо, ашыкча заряддоонун алдын алуу үчүн заряддоочу түзүлүш автоматтык түрдө заряддоону токтотот.
- Кыска туташуулардан коргоо: Protects the charger and battery in case of a short circuit.
- Полярдуулукту кайтаруу: Эгерде батарея clamps are connected incorrectly, the internal fuse will blow to protect the unit.
7. Техникалык тейлөө
- Тазалоо: Clean the charger's exterior with a soft, dry cloth. Do not use abrasive cleaners or solvents. Ensure ventilation slots are free from dust and debris.
- Сактагыч: Заряддоо түзүлүштү кургак, салкын жерде, түз күн нуру жана ным тийбеген жерде, колдонбогондо сактаңыз.
- Сактагычты алмаштыруу: If the charger stops working due to reverse polarity or a short circuit, the internal 10A fuse may have blown. To replace, disconnect the charger from all power sources, open the fuse compartment (refer to Figure 4.3 for location), and replace with a fuse of the same type and rating (10A).
8. Кыйынчылыктарды
| Көйгөй | Мүмкүн себеп | Чечим |
|---|---|---|
| Charger not turning on / No current shown on ampметр. |
|
|
| Ampere meter shows very low or no current after initial connection. | Батарея толук заряддалган. | No action required. The charger's overcharge protection is active. |
| Заряддагыч иштөө учурунда ысып кетет. | Кадимки иштөө. | Ensure adequate ventilation around the charger. This is normal during charging. |
9. Техникалык шарттар
| Модель номери | BCM1021 |
| Бренд | FERM |
| Киргизүү көлөмүtage | 230 вольт AC |
| Output Voltage | 6V / 12V DC |
| Энергияны керектөө | 12 Ватт |
| Өлчөмдөрү (L x W x Y) | 26 x 17 x 10 см |
| Салмагы | 3.67 килограмм |
| Түс | Көк / Кара |
| Камтылган аксессуарлар | Set of Battery Clamps |
10. Кепилдик жана колдоо
FERM products are manufactured to high quality standards. In the unlikely event of a defect, please contact your retailer or the FERM customer service for assistance. Keep your proof of purchase for warranty claims.
For further support, technical questions, or to find service centers, please visit the official FERM website or contact their customer support line. Contact details can typically be found on the product packaging or the official brand webсайт.
Note: Specific warranty terms and conditions may vary by region. Please refer to the warranty card included with your product or the manufacturer's webтолук маалымат алуу үчүн сайт.