1. Продукт бүтүп калдыview
The Thermaltake The Tower 900 is a full tower PC case designed for high-end PC enthusiasts and modders. Developed in collaboration with Watermod France, this chassis emphasizes a unique vertical installation layout and features durable 5mm tempered glass panels to showcase internal components. It supports extensive liquid cooling configurations and offers ample space for various hardware components.

Сүрөт 1: Алдыңкы view of the Thermaltake The Tower 900 showcasing internal components and custom liquid cooling setup.
Key features include a spacious interior for custom liquid cooling loops, support for XL ATX motherboards, and multiple drive bays for storage. The design prioritizes both aesthetic display and functional cooling performance.
2. Орнотуу жана орнотуу
This section provides general guidelines for assembling your PC components within The Tower 900 chassis. Due to its modular design, many parts can be disassembled for easier installation.
2.1 Кутудан чыгаруу жана алгачкы текшерүү
Carefully remove the chassis from its packaging. Inspect for any damage that may have occurred during transit. Keep all packaging materials for future transport or warranty claims.

2-сүрөт: жарылган view illustrating the modular components of The Tower 900 for easier assembly.
2.2 Каптал панелдерди алып салуу
The tempered glass side panels are secured with thumbscrews. Unscrew these to remove the panels, providing full access to the interior for component installation.
2.3 Motherboard орнотуу
- Install the necessary motherboard standoffs onto the motherboard tray according to your motherboard's form factor (XL ATX, ATX, microATX).
- Этияттык менен энелик платаңызды буроо тешикчелерин тегиздеп, стендтерге жайгаштырыңыз.
- Аналык платаны бурамалар менен бекитиңиз.
2.4 Электр менен камсыздоо блогун (PSU) орнотуу
The PSU is mounted at the rear of the chassis. Ensure proper orientation and secure it with screws. Route cables through the designated cutouts for clean management.

3-сүрөт: View of the power supply unit mounting area at the rear of the chassis.
2.5 Сактоочу дискти орнотуу
The case features multiple drive bays for 3.5-inch HDDs and 2.5-inch SSDs. Utilize the removable drive trays for easy installation. The case supports up to six 3.5-inch drives or twelve 2.5-inch drives.
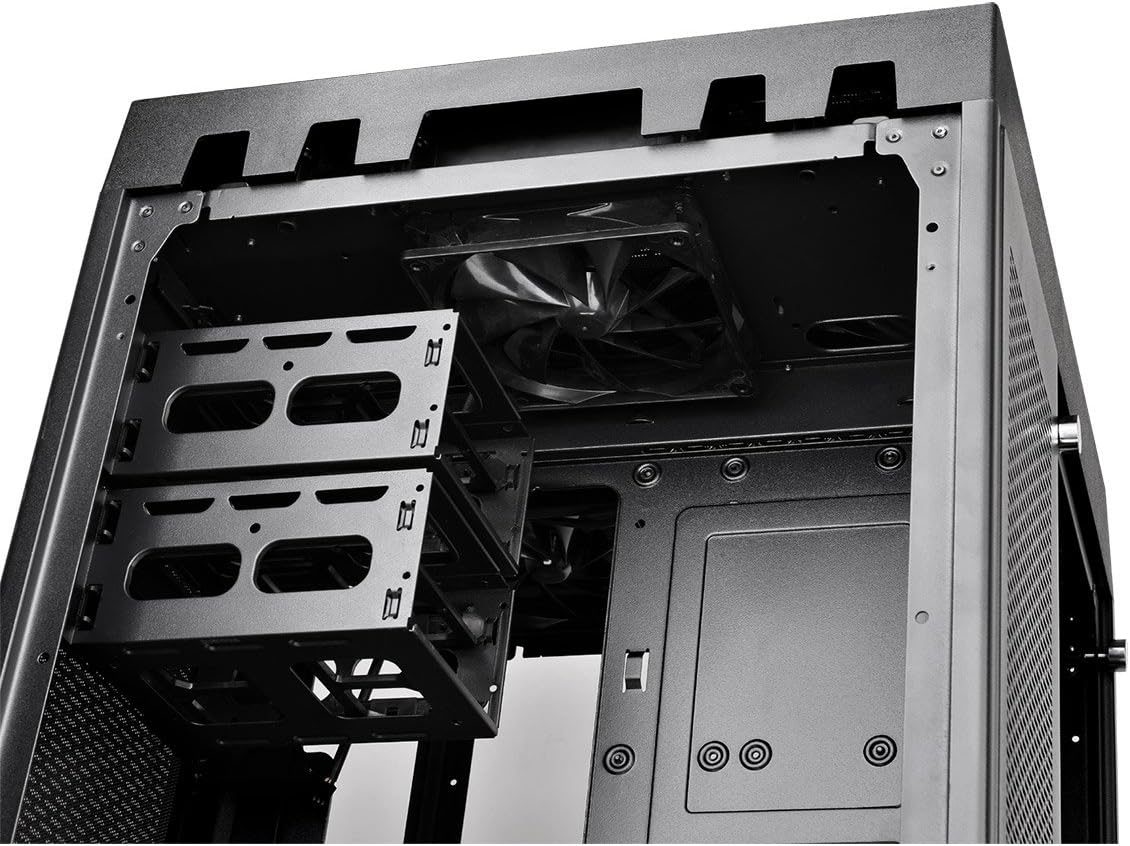
Figure 4: Removable drive trays for 3.5-inch and 2.5-inch storage devices.
2.6 Cooling System Installation (Fans/Radiators)
The Tower 900 is optimized for liquid cooling, supporting up to two 560mm radiators. Install fans and radiators in the designated areas, ensuring proper airflow direction. The case comes with two pre-installed 140mm fans at the top.

5-сүрөт: Каптал view showing fan mounting locations, ideal for radiator installation.
For custom liquid cooling, the case provides dedicated space for pumps and reservoirs. Note that pump brackets are designed for Thermaltake D5 pumps; other pump models may require custom mounting solutions.
2.7 Кабелди башкаруу
Utilize the numerous cable routing holes and tie-down points behind the motherboard tray to ensure a clean build and optimal airflow. Long SATA and PSU cables are recommended for this large chassis.
3. Иштөө нускамалары
Once all components are installed and secured, and the side panels are reattached, connect your peripherals and power cable.
3.1 Алдыңкы I/O панели
The top front panel provides convenient access to essential ports and controls:
- Кубат баскычы: Системаны күйгүзүү/өчүрүү үчүн.
- Калыбына келтирүү баскычы: Системаны кайра иштетүү үчүн.
- USB 3.0 порттору (x4): жогорку ылдамдыктагы маалыматтарды берүү үчүн.
- Audio Jacks (Headphone/Microphone): Аудио киргизүү/чыгаруу үчүн.

Figure 6: Close-up of the top I/O panel featuring USB 3.0 ports, audio jacks, and power/reset buttons.
3.2 Системаны иштетүү
Press the power button on the front I/O panel to start your system. Ensure all cables are securely connected before powering on.
4. Техникалык тейлөө
Үзгүлтүксүз тейлөө сиздин PC компоненттеринин оптималдуу иштешин жана узак иштөөсүн камсыз кылууга жардам берет.
4.1 Чаң чыпкасын тазалоо
The Tower 900 is equipped with magnetic dust filters on various intake points. These filters should be cleaned regularly (e.g., monthly in a living area) to prevent dust buildup inside the chassis, which can impede airflow and cooling efficiency.

Figure 7: Various magnetic dust filters included with the chassis for easy removal and cleaning.
- Gently remove the magnetic dust filters from their respective locations.
- Чыпкаларды кысылган аба менен же суу менен чайкап тазалаңыз. Кайра орнотуудан мурун алардын толугу менен кургак экенин текшериңиз.
4.2 Tempered Glass Panel Care
Clean the tempered glass panels with a soft, lint-free cloth and a glass cleaner. Avoid abrasive materials that could scratch the surface.
4.3 Ички тазалоо
Periodically, use compressed air to remove dust from internal components such as fans, heatsinks, and graphics cards. Ensure the system is powered off and unplugged before performing internal cleaning.
5. Кыйынчылыктарды
This section addresses common issues that may arise during or after PC assembly.
5.1 Система күйбөйт
- Кубат кабели PSUга да, розеткага да бекем туташтырылганын текшериңиз.
- Ensure the PSU's power switch is in the "ON" position.
- Бардык ички кубат туташууларын, айрыкча энелик платага туташкан 24-пиндүү ATX жана 8-пиндүү CPU кубат кабелдерин текшериңиз.
- Confirm that the front panel power switch cable is correctly connected to the motherboard's header.
5.2 Ашыкча ызы-чуу
- Ызы-чуунун булагын аныктаңыз (мисалы, желдеткич, HDD).
- Ensure all fans are securely mounted and free from obstructions.
- Check for loose cables or components that might be vibrating against the chassis.
- If using HDDs, ensure they are properly secured in their drive bays to minimize vibration.
5.3 Poor Cooling Performance
- Бардык чаң чыпкаларын жана ички компоненттерди "Техникалык тейлөө" бөлүмүндө сүрөттөлгөндөй тазалаңыз.
- Verify that all fans are spinning and oriented correctly for optimal airflow (intake/exhaust).
- Ensure radiators are not obstructed and have adequate airflow.
- For liquid cooling systems, check pump operation and coolant levels.
6. Техникалык шарттар
| Өзгөчөлүк | Деталь |
|---|---|
| Бренд | Thermaltake |
| Модель аты | Мунара 900 |
| Иштин түрү | Толук мунара |
| Motherboard шайкештиги | XL ATX, ATX, Micro ATX |
| Материал | Болот, чыңдалган айнек |
| Түс | Кара |
| Өлчөмдөр (D x W x H) | 48.3P x 42.6l x 75.2H см (19.02 x 16.77 x 29.61 дюйм) |
| Салмагы | 24.5 кг (54 фунт) |
| Drive Bays | 6 x 3.5" or 12 x 2.5" (internal) |
| Кеңейтүү уячалары | 7 |
| Алдыңкы I / O порттору | 4 x USB 3.0, HD Audio |
| Муздатуу ыкмасы | Air, Liquid (supports up to 2x 560mm radiators) |
| Алдын ала орнотулган күйөрмандар | 2 x 140mm (top) |
| Электр булагы түрү | Standard PS2 PSU (rear mount) |
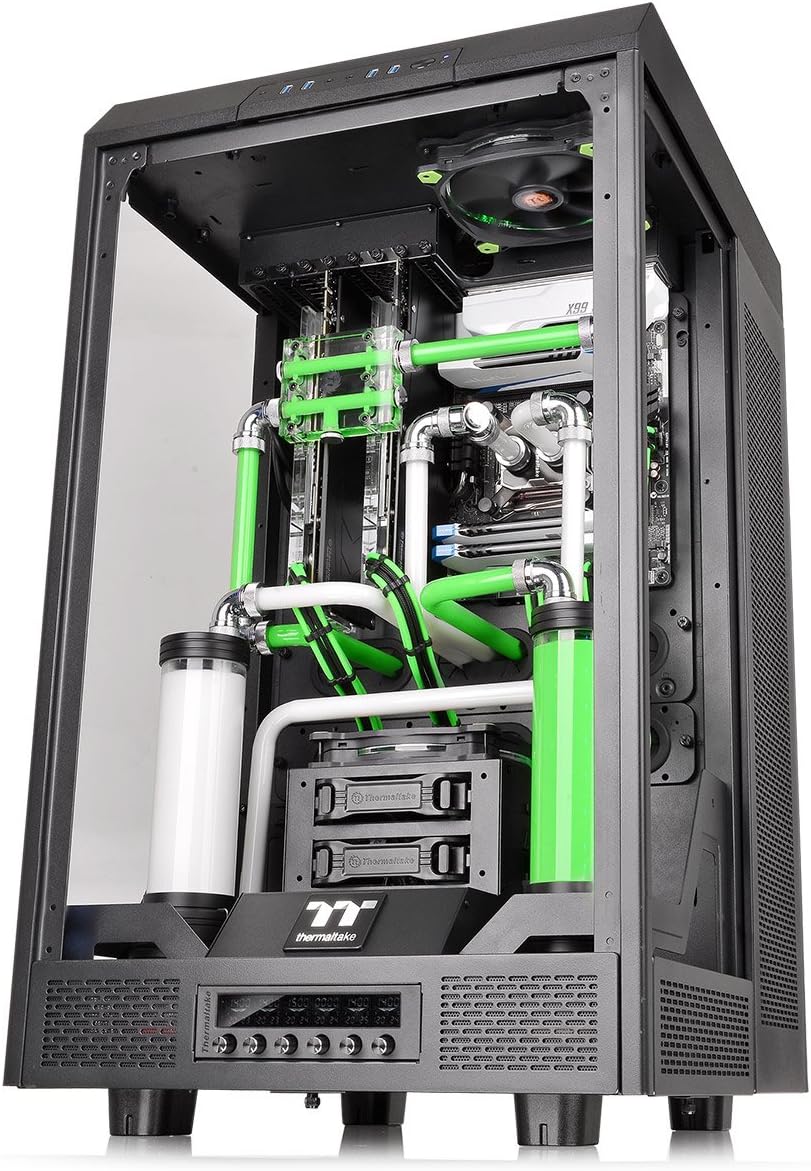
Figure 8: Diagram illustrating the dimensions of The Tower 900 chassis.
7. Кепилдик жана колдоо
7.1 Кепилдик маалыматы
The Thermaltake The Tower 900 comes with a 2 жылдык өндүрүүчүнүн кепилдиги. Кепилдик дооматтары үчүн сатып алганыңыздын далилин сактап коюңуз. Кепилдик нормалдуу колдонуудагы материалдардагы жана жасалгадагы кемчиликтерди камтыйт.
7.2 Кардарларды колдоо
For technical assistance, troubleshooting, or warranty inquiries, please contact Thermaltake customer support. Refer to the official Thermaltake webэң заманбап байланыш маалыматы жана колдоо булактары үчүн сайт.
- Онлайн колдоо: Visit the Thermaltake official website for FAQs, driver downloads, and support tickets.
- Байланыш маалыматы: Specific regional contact details can be found on the support section of the Thermaltake webсайт.
Thermaltake is committed to providing excellent support and innovative products, driven by a passion for DIY and PC modding.