
1. Киришүү
Thank you for choosing the Lenco PDR-030 DAB+/FM Portable Digital Radio. This manual provides essential information for setting up, operating, and maintaining your device. The PDR-030 offers high-quality digital radio reception (DAB+) and traditional FM radio, along with features such as an integrated rechargeable battery for portability, an RDS display, station memory, and an alarm clock function.
Камтылган компоненттер:
- Lenco PDR-030 Digital Radio
- AC Power Adapter (220 Volt)
- User Manual
2. Коопсуздук боюнча маанилүү маалымат
- Өрт же электр тогуна урунуп калбаш үчүн аппаратты жамгырга же нымдуулукка дуушар кылбаңыз.
- Кубат адаптерин камсыз кылыңызtage сиздин жергиликтүү электр камсыздооңузга дал келет.
- в ачпагылаasinг. Бардык тейлөөлөрдү квалификациялуу кызматкерлерге тапшырыңыз.
- Аппаратты жылуулук булактарынын жанына же тике күн нуруна коюудан алыс болуңуз.
- Handle the integrated battery with care. Do not attempt to replace it yourself.
- Аппаратты күчтүү магнит талаасынан алыс кармаңыз.
3. Продукт бүтүп калдыview
Familiarize yourself with the main components and controls of your Lenco PDR-030 radio.
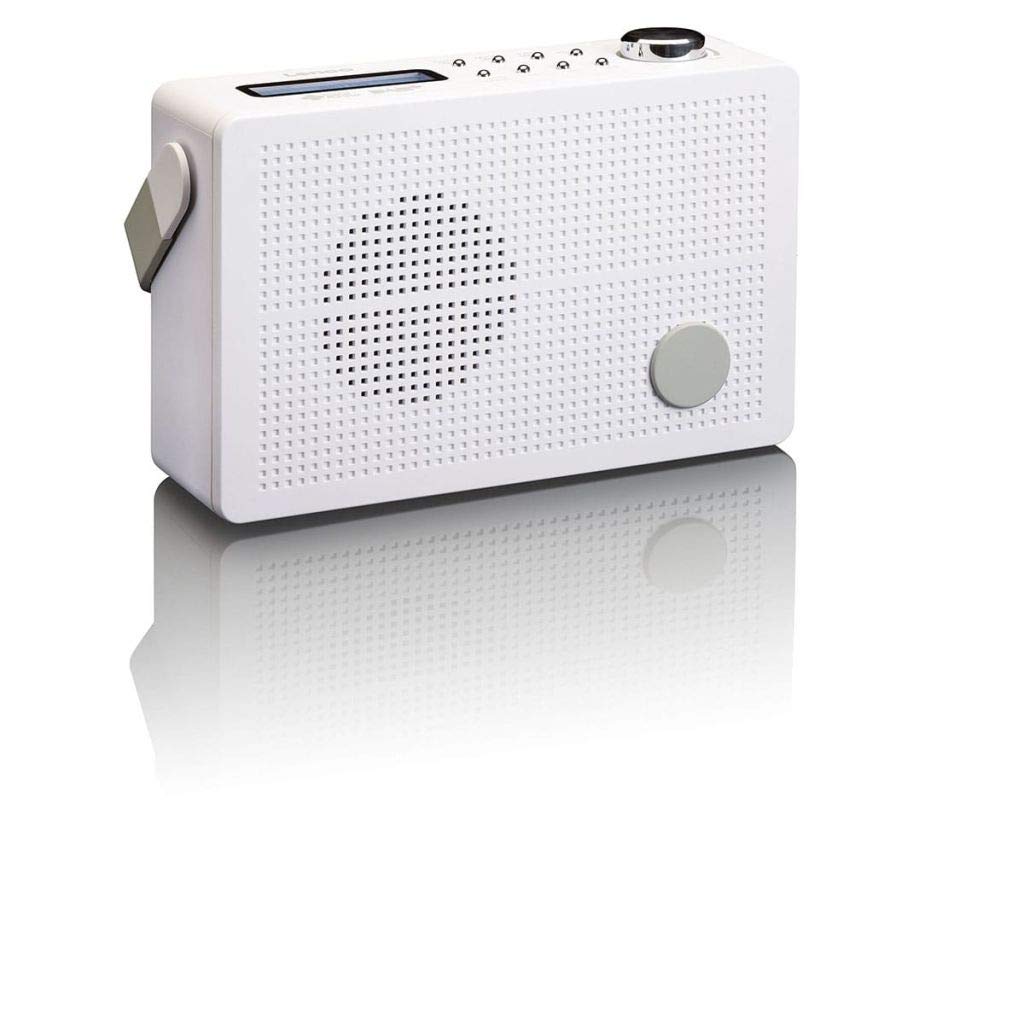
3.1-сүрөт: Front Panel of Lenco PDR-030 Radio. Features include a blue backlit LCD display, power/source button, alarm, sleep, info/menu, preset buttons, select/snooze, scan, previous, next buttons, and a rotary volume knob.
Негизги башкаруу элементтери жана функциялары:
- Дисплей: Two-line illuminated LCD for time, date, station name, and information.
- Кубат/Булак баскычы: Turns the radio on/off and switches between DAB+ and FM modes.
- Үн баскычы: Аудио чыгаруу деңгээлин тууралайт.
- Телескопиялык антенна: For optimal radio signal reception.
- Наушник уячасы (3.5 мм): Жеке угуу үчүн.
- Alarm/Sleep/Info/Menu/Preset Buttons: For various functions including setting alarms, sleep timer, accessing information, menu navigation, and managing station presets.
- Select/Snooze/Scan/Prev/Next Buttons: For station tuning, menu selection, and snooze function.
4. Орнотуу
4.1 Радиону кубаттоо
The PDR-030 can be powered by the included AC adapter or its integrated rechargeable battery.
- AC кубаттуулугу: Connect the supplied 220V AC power adapter to the DC input jack on the radio and then to a wall outlet. The radio will automatically begin charging the internal battery.
- Батарея кубаттуулугу: The integrated Lithium-ion battery allows for portable use. Ensure the battery is sufficiently charged before use without the AC adapter.
4.2 Антеннаны орнотуу
Extend the telescopic antenna fully for optimal reception of both DAB+ and FM signals. Adjust its position for the best signal quality.
4.3 Initial Power On and Station Scan
- басыңыз Кубат / Булак радиону күйгүзүү үчүн баскыч.
- Upon first use, the radio will automatically enter DAB+ mode and perform a full scan for available digital radio stations. This may take a few minutes.
- Скандоо аяктагандан кийин, радио биринчи жеткиликтүү станцияга туураланат.
5. Иштөө нускамалары
5.1 Күйгүзүү/өчүрүү
басыңыз Кубат / Булак радиону күйгүзүү же өчүрүү үчүн баскыч.
5.2 Mode Selection (DAB+/FM)
басыңыз Булак button repeatedly to switch between DAB+ and FM radio modes.
5.3 Тюнинг станциялары
- DAB+ режими:
- Баштапкы сканерлөөдөн кийин, колдонуңуз Мурунку жана Кийинки buttons to navigate through the list of available DAB+ stations.
- To perform a new full scan, press the Меню button, navigate to "Full Scan" using Мурунку/Кийинки, жана басыңыз Тандоо.
- FM режими:
- басыңыз Скандоо Кийинки жеткиликтүү FM станциясын автоматтык түрдө издөө үчүн баскычты басыңыз.
- Кол менен жөндөө үчүн, баскычын басып кармап туруңуз Мурунку or Кийинки жыштыгын тактоо үчүн баскычтар.
5.4 Алдын ала коюлган станцияларды сактоо жана кайра чакырып алуу
The radio allows you to store up to 10 DAB+ and 10 FM preset stations.
- Алдын ала орнотууну сактоо үчүн:
- Каалаган станцияга коюңуз.
- басып, кармап туруңуз Алдын ала коюлган button until "Preset Store" appears on the display.
- колдонуу Мурунку/Кийинки алдын ала коюлган санды (1-10) тандоо үчүн баскычтар.
- Басыңыз Тандоо станцияны ырастоо жана сактоо үчүн.
- Алдын ала орнотууну кайра чакырып алуу үчүн:
- басыңыз Алдын ала коюлган баскычын кыскача.
- колдонуу Мурунку/Кийинки каалаган алдын ала коюлган номерди тандоо үчүн баскычтар.
- Басыңыз Тандоо to tune to the preset station.
5.5 Үндү башкаруу
айлантыңыз Көлөм баскычы үндү көбөйтүү үчүн саат жебеси боюнча жана азайтуу үчүн саат жебесине каршы.
5.6 RDS Functionality (FM Mode)
In FM mode, the RDS (Radio Data System) function displays information such as station name, program type, and other broadcast data on the two-line LCD display.
5.7 Ойготкуч саат функциясы
The PDR-030 can be used as an alarm clock with two separate alarm times.
- Ойготкуч коюу:
- басыңыз Ойготкуч баскычы.
- Колдонуу Мурунку/Кийинки to select Alarm 1 or Alarm 2, then press Тандоо.
- Follow the on-screen prompts to set the alarm time, duration, source (Buzzer or Radio), frequency (Daily, Once, Weekdays, Weekends), and volume.
- Ensure the alarm is set to "On" and press Тандоо сактоо үчүн.
- Чырым Function: Ойготкуч басылганда, басыңыз Тындыр баскычын басыңыз.
- Уйку таймери: басыңыз Уйку button repeatedly to set a sleep timer (e.g., 15, 30, 45, 60 minutes) after which the radio will automatically turn off.
5.8 Гарнитураны туташтыруу
Connect 3.5mm stereo headphones to the headphone jack for private listening. The internal speaker will be muted automatically.
6. Техникалык тейлөө
6.1 Тазалоо
Wipe the radio's exterior with a soft, dry cloth. Do not use abrasive cleaners, waxes, or solvents as they may damage the finish. Ensure no liquids enter the device.
6.2 Батареяга кам көрүү
The integrated Lithium-ion battery is designed for long life. To maximize battery lifespan:
- Батареяны бат-баттан толук кубаттап калуудан алыс болуңуз.
- If storing the radio for an extended period, charge the battery to approximately 50% and store in a cool, dry place.
- Do not attempt to replace the battery yourself. Contact qualified service personnel if battery issues arise.
7. Кыйынчылыктарды
| Көйгөй | Мүмкүн себеп | Чечим |
|---|---|---|
| Күч жок | AC adapter not connected or faulty; battery discharged. | Check AC adapter connection. Charge the battery. |
| DAB+/FM кабыл алуу начар | Антенна узартылган эмес; начар сигнал аймак; кийлигишүү. | Fully extend and adjust the telescopic antenna. Move the radio to a location with better signal. Avoid placing near other electronic devices. |
| Үн жок | Үн өтө төмөн; наушник туташтырылган; үнсүз иштетилген. | Increase volume. Disconnect headphones. Check if mute is active (if applicable). |
| Сигнал чыкпай жатат | Alarm not activated; alarm volume too low; incorrect time setting. | Ensure alarm is set to "On". Check alarm volume. Verify current time and alarm time settings. |
8. Техникалык шарттар
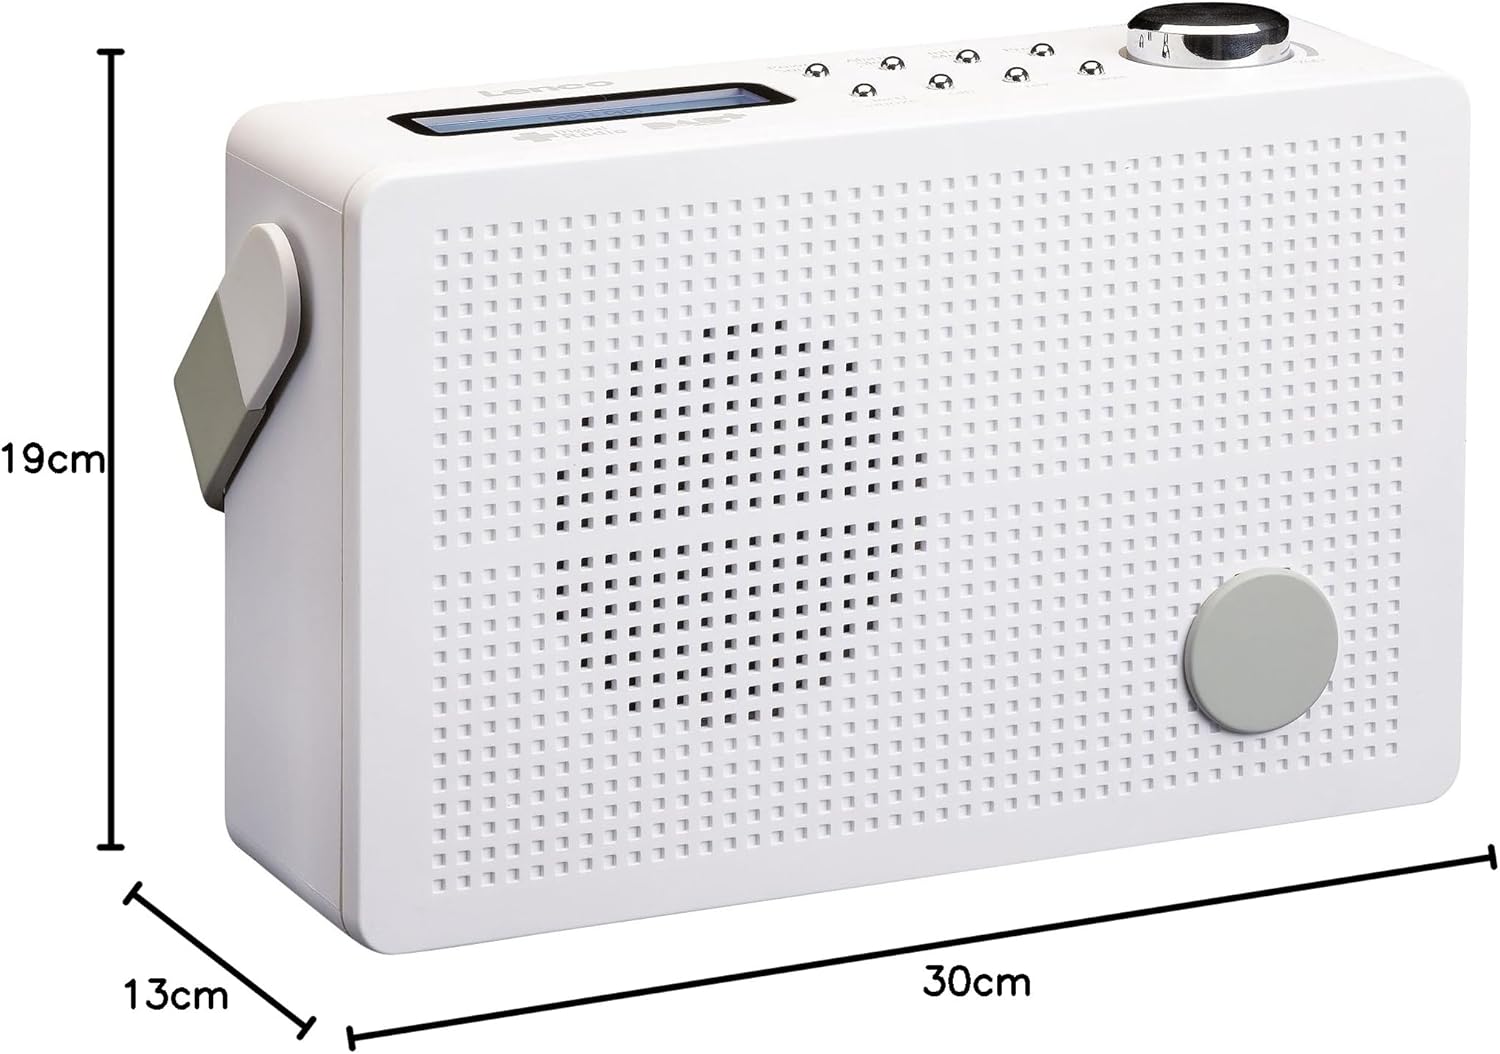
8.1-сүрөт: Lenco PDR-030 Dimensions.
| Өзгөчөлүк | Деталь |
|---|---|
| Модель номери | ПДР-030 |
| Tuner Technology | DAB+, FM (Ukw) |
| Power Source | Battery-Powered (Integrated Lithium-ion), AC Adapter |
| AC Voltage | 220 вольт |
| Продукт өлчөмдөрү (W x D x H) | 21.4 x 6.5 x 13.8 cm (approx. 22.5 x 8.5 x 15 cm as per another spec) |
| Элемент Салмагы | 9 g (Note: This seems incorrect, likely 670g from description) |
| Материалдын түрү | Пластик |
| Аппараттык интерфейс | 3.5 mm Audio (Headphone Jack) |
| Өзгөчөлүктөр | Portable, RDS Display, Alarm Clock, Station Memory (10 DAB+, 10 FM) |
Note: Some dimensions and weight specifications provided by the manufacturer may vary slightly. The description states 670 grams for weight, while specifications list 9g. Please refer to the product packaging for the most accurate information.
9. Кепилдик жана колдоо
Lenco products are designed for reliability and performance. This product typically comes with a 24-month manufacturer's warranty from the date of purchase, covering defects in materials and workmanship. Please retain your proof of purchase for warranty claims.
For technical support, service, or warranty inquiries, please refer to the contact information provided on the Lenco official website or your local retailer. Do not attempt to repair the device yourself.
Көбүрөөк маалымат алуу үчүн, сиз иш сапары менен болот Lenco Store on Amazon.