
1. Киришүү
This manual provides essential information for the safe and efficient operation of your Atomos Sumo 19 HDR High Bright Monitor. Please read this manual thoroughly before using the device to ensure proper setup, operation, and maintenance. Retain this manual for future reference.
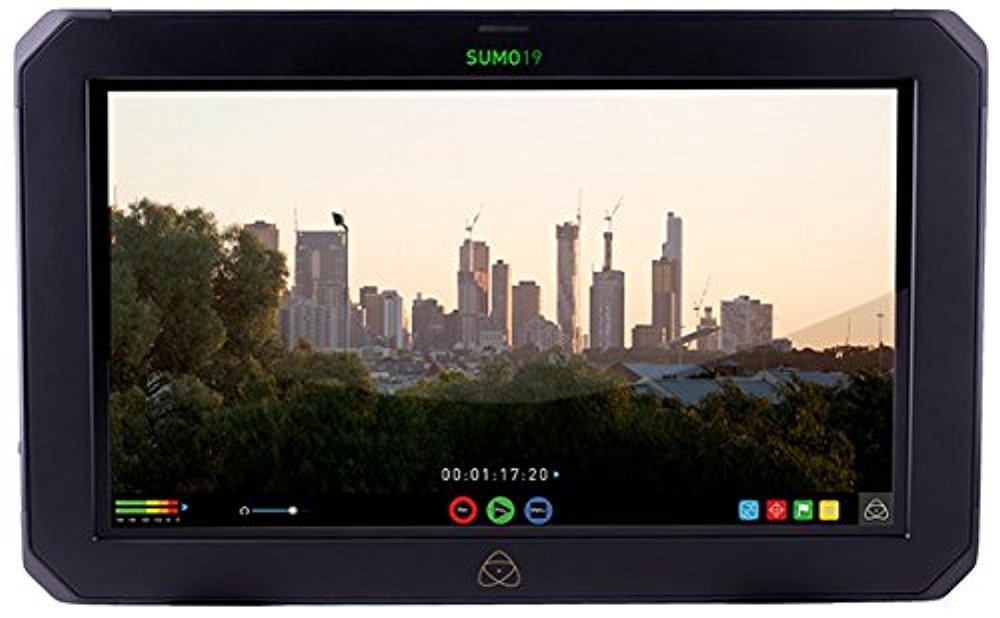
1.1-сүрөт: Фронт view of the Atomos Sumo 19 HDR High Bright Monitor, showcasing its large display and robust casing.
2. Коопсуздук маалыматы
Түзмөккө зыян келтирбөө жана колдонуучунун коопсуздугун камсыз кылуу үчүн төмөнкү коопсуздук чараларын сактаңыз:
- Кубат булагы: Use only the specified power adapter. Incorrect voltagал түзмөккө зыян келтириши мүмкүн.
- Вентиляция: Do not block ventilation openings. Ensure adequate airflow to prevent overheating.
- Суу жана ным: Түзмөктү суудан, жамгырдан жана жогорку нымдуулуктан алыс кармаңыз. Нымдуу кол менен иштетпеңиз.
- Таасири: Аппаратты түшүрүүдөн же катуу таасирлерден сактаныңыз.
- Тазалоо: Тазалоодон мурун электр кубатынан ажыратыңыз. Жумшак, кургак чүпүрөктү колдонуңуз. Суюк же аэрозольдук тазалагычтарды колдонбоңуз.
- Тейлөө: Аппаратты өзүңүз тейлөөгө аракет кылбаңыз. Бардык тейлөөлөрдү квалификациялуу кызматкерлерге тапшырыңыз.
- Сунуш 65 Эскертүү: Бул өнүмдүн курамында Калифорния штаты ракка жана тубаса кемтиктерге же башка репродуктивдик зыяндарга алып келүүчү химиялык заттар болушу мүмкүн.
3. Орнотуу
3.1. Пакеттин мазмуну
Пакетте бардык буюмдар бар экенин текшериңиз:
- Atomos Sumo 19 HDR High Bright Monitor
- AC кубат адаптери
- Quick Start Guide
- SSD/HDD Caddy (for recording media)
3.2. Мониторду орнотуу
The Sumo 19 can be mounted using standard VESA mounts or a dedicated C-stand mounting bracket (sold separately). Ensure the mounting solution is robust enough to support the monitor's weight (approximately 11.99 pounds).
- Attach the appropriate mounting plate to the rear of the monitor using the provided screws.
- Secure the monitor to your desired stand or rig.
3.1-сүрөт: Illustration of the rear panel with VESA mounting points. Ensure secure attachment to a compatible mount.
3.3. Кубатты туташтыруу
Connect the AC power adapter to the DC input port on the monitor and then to a suitable power outlet.
- Locate the DC input port on the side or rear of the monitor.
- Plug the power adapter into the monitor, then into a wall socket.
3.4. Connecting Video Inputs
The Sumo 19 accepts video signals via HDMI or SDI. It features dual 12/6/3G-SDI inputs and HDMI input.
- HDMI: Connect an HDMI cable from your source device to the HDMI input port on the monitor.
- SDI: Connect SDI cables from your source devices to the SDI input ports. The monitor supports up to 4Kp60 or HDp240 over SDI.
3.2-сүрөт: Diagram illustrating the location of HDMI and SDI input/output ports for video signal connection.
3.5. Жаздыруу каражаттарын киргизүү
To enable recording, insert a compatible SSD or HDD into the provided caddy, then slide the caddy into the monitor's media slot.
- Open the SSD/HDD caddy and securely place your recording media inside.
- Slide the loaded caddy into the designated slot on the monitor until it clicks into place.
4. Мониторду иштетүү
4.1. Күйгүзүү / Өчүрүү
Press and hold the power button located on the monitor's frame until the screen illuminates or shuts down.
4.2. Колдонуучу интерфейсинде навигация
The Sumo 19 features a touchscreen interface for menu navigation and control.
- таптаңыз: Опцияны тандаңыз же функцияны иштетиңиз.
- Серпүү: Navigate through menus or adjust parameters.
- Pinch/Zoom: (If supported) Magnify parts of the image.
4.1-сүрөт: Example of the touchscreen user interface, showing main menu options and monitoring tools.
4.3. Киргизүүнү тандоо
To switch between connected video sources:
- Tap the 'Input' icon on the screen.
- Select the desired HDMI or SDI input from the list.
4.4. HDR and SDR Monitoring
The Sumo 19 supports both HDR (High Dynamic Range) and SDR (Standard Dynamic Range) monitoring. It provides real-time exposure tools for Log footage.
- Access the 'Display' settings from the main menu.
- Select 'HDR' or 'SDR' mode based on your workflow.
- Adjust HDR settings such as brightness and contrast as needed.
4.5. Loading Custom LUTs
You can load custom Look Up Tables (LUTs) onto the Sumo 19 via the HDD/SSD slot to preview different looks on set.
- .cube LUT файлыңызды сактаңыз files to the root directory of your recording media (SSD/HDD).
- Insert the media into the monitor.
- Navigate to the 'LUT' section in the monitor's menu.
- Select 'Load LUT' and choose your desired LUT from the list.
4.6. Жаздыруу функциялары
The Sumo 19 is capable of recording video directly to SSD/HDD media.
- Ensure recording media is properly inserted and formatted.
- Select your desired recording codec and resolution in the 'Record' menu.
- Press the 'Record' button on the touchscreen to start and stop recording.
5. Техникалык тейлөө
5.1. Мониторду тазалоо
Оптималдуу аткарууну жана көрүнүштү сактоо үчүн:
- Always power off and disconnect the monitor from power before cleaning.
- Экранды жана корпусту акырын сүртүү үчүн жумшак, мамыксыз чүпүрөктү колдонуңуз.
- өжөр белгилери үчүн, бир аз гampчүпүрөктү суу менен. Катуу химиялык заттардан же абразивдүү материалдардан алыс болуңуз.
5.2. Микропрограмманы жаңыртуу
Atomos periodically releases firmware updates to improve performance and add features. Check the official Atomos website for the latest firmware for your Sumo 19.
- Микропрограмманы жүктөп алыңыз file to a formatted SSD/HDD.
- Insert the media into the monitor.
- Navigate to the 'Settings' menu and select 'Firmware Update'.
- Follow the on-screen instructions to complete the update. Do not power off the monitor during this process.
5.3. Сактоо
When not in use, store the monitor in a cool, dry place, protected from dust and extreme temperatures. Use a protective case for transport.
6. Кыйынчылыктарды
If you encounter issues with your Atomos Sumo 19, refer to the following common problems and solutions:
| Көйгөй | Мүмкүн себеп | Чечим |
|---|---|---|
| Монитор күйбөйт. | No power, faulty power adapter, loose connection. | Check power cable connections. Ensure power adapter is functional and plugged into a live outlet. |
| No video signal displayed. | Incorrect input selected, faulty cable, source device off/incorrect output. | Verify correct input is selected on the monitor. Check video cables for damage and ensure they are securely connected. Confirm source device is outputting a signal. |
| Экран өтө караңгы же өтө жарык. | Display settings are incorrect. | Adjust brightness, contrast, and HDR/SDR settings in the 'Display' menu. |
| Жаздыруу башталбай жатат. | No media, unformatted media, media full, incorrect recording settings. | Ensure SSD/HDD is inserted, formatted, and has sufficient space. Check recording codec and resolution settings. |
If the problem persists, please contact Atomos customer support.
7. Техникалык шарттар
| Өзгөчөлүк | Деталь |
|---|---|
| Модель номери | ATOMSUMO19 |
| Дисплей өлчөмү | 19 дюйм |
| Резолюция | 1920x1200 |
| Аспект катышы | 16:9 native |
| Жарыктык | 1200 nit (High Bright) |
| Түс тереңдиги | 10-bit HDR |
| Video Inputs | HDMI, Dual 12/6/3G-SDI |
| Max Input Resolution/Framerate | 4Kp60 (HDMI/SDI), HDp240 (SDI) |
| Жазуу медиасы | SSD/HDD via caddy |
| Продукциянын өлчөмдөрү | 14.96 x 12.99 x 19.84 дюйм |
| Элемент Салмагы | 11.99 фунт |
| Өндүрүүчү | Atomos |
8. Кепилдик маалыматы
The Atomos Sumo 19 HDR High Bright Monitor comes with a 1 жылдык өндүрүүчүнүн чектелген кепилдиги. This warranty covers defects in materials and workmanship under normal use. For full terms and conditions, please refer to the warranty card included with your product or visit the official Atomos webсайт.
Кепилдик дооматтар үчүн сатып алганыңыздын далилин сактаңыз.
9. Кардарларды колдоо кызматы
For technical assistance, product inquiries, or warranty claims, please visit the official Atomos support webсайт:
You may also find FAQs, firmware downloads, and additional resources on their webсайт.