Introduction
The Gear Pro HypeCam GDV485SL.01 is a compact and powerful 4K Ultra HD sports action camera designed to capture high-quality video and photos in various environments. Featuring Wi-Fi connectivity for smartphone control, a waterproof case, and a 2.0-inch LCD display, this camera is ideal for recording your adventures. This manual provides detailed instructions for setup, operation, maintenance, and troubleshooting to ensure optimal performance of your device.
Кутуда эмне бар
Please verify that all items are present before proceeding with setup.
- Hype 4K Cam
- Суу өткөрбөйт
- Data Transfer/Charging Cable
- Рул монтажы
- Универсалдуу негиздер
- Бекитүү боону
Продукт бүттүview
Компоненттер жана башкаруу элементтери
Familiarize yourself with the camera's main components and controls.
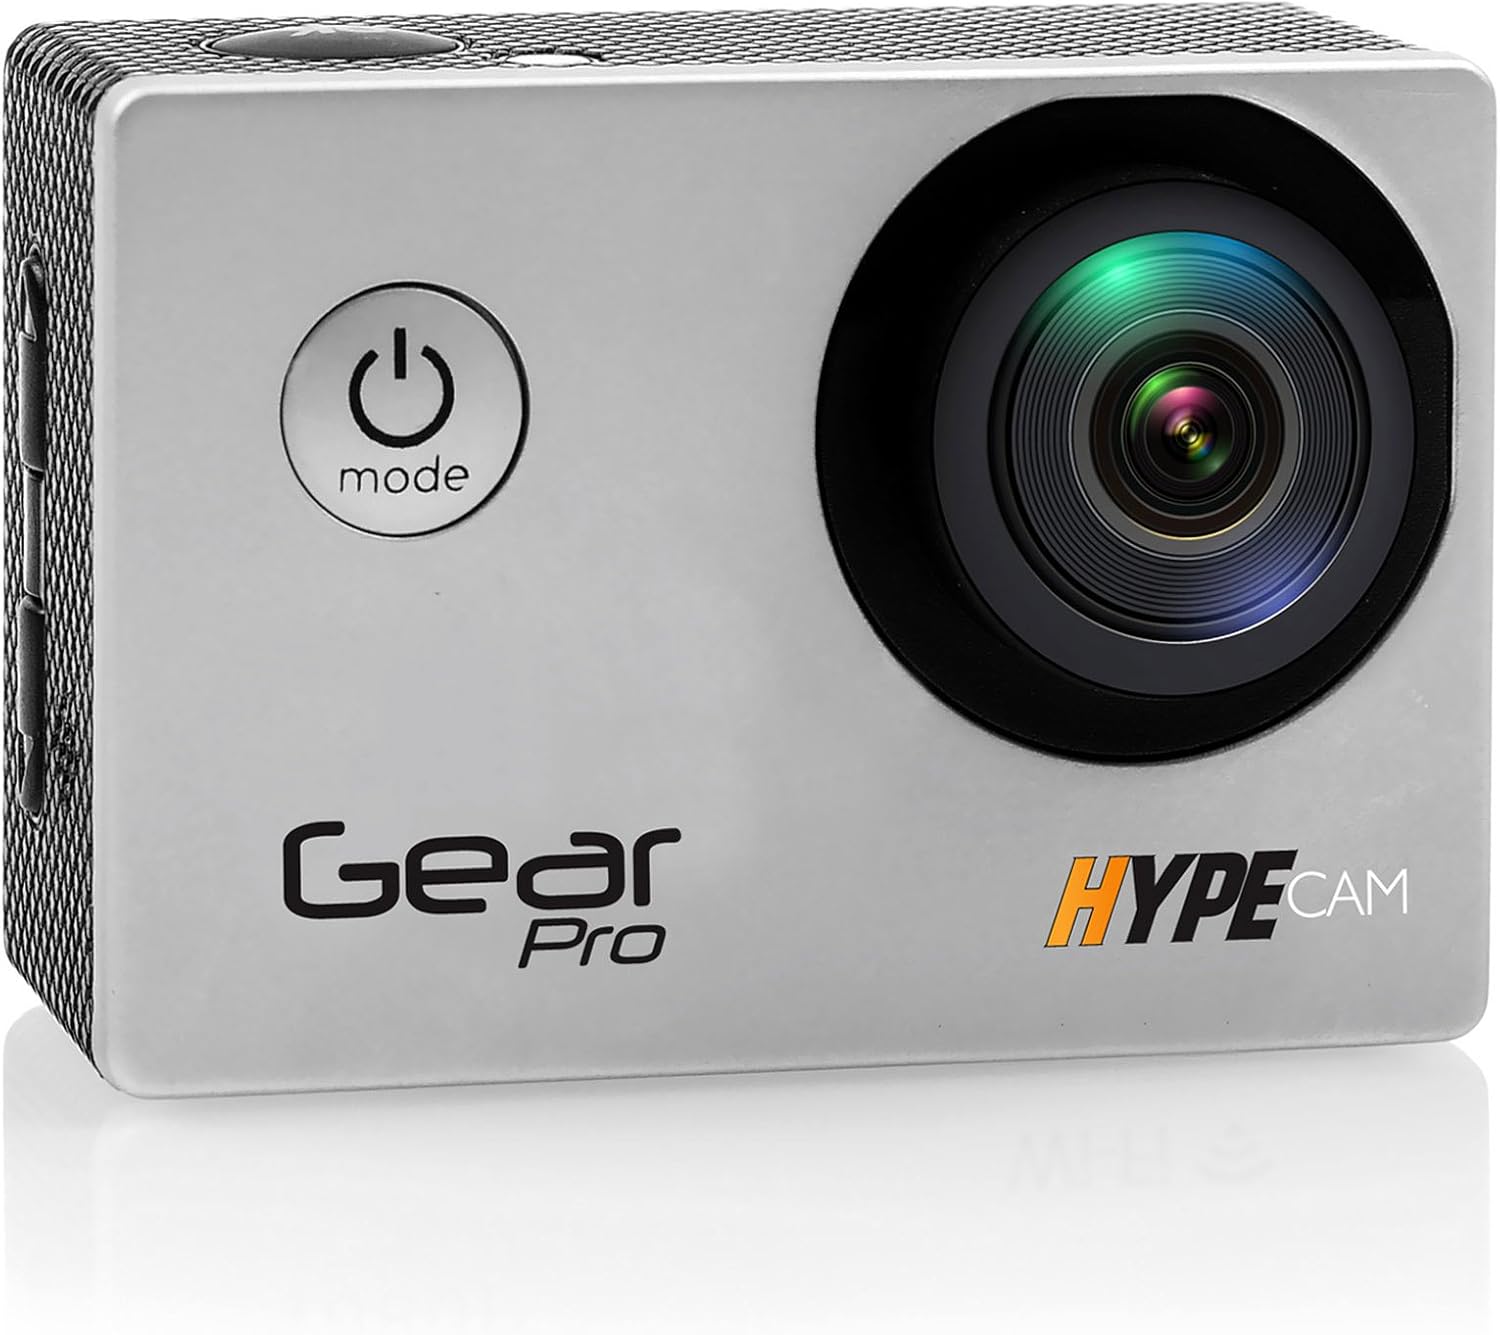
Сүрөт: алдыңкы view of the Gear Pro HypeCam GDV485SL.01, highlighting the lens and power/mode button.
| Component/Control | Description |
|---|---|
| Кубат/Режим баскычы | Press and hold to power on/off. Press briefly to switch between video, photo, and playback modes. |
| Жапкыч/ОК баскычы | Press to start/stop recording video or take a photo. In menu, confirms selection. |
| Өйдө / ылдый баскычтар | Меню параметрлерин чабыттоо. |
| Микро SD карта уячасы | Insert Micro SD card for storage. Supports up to 32GB (Class 10 or higher recommended). |
| Микро USB порт | For charging the battery and transferring data to a computer. |
| Micro HDMI порт | Connect to an HDTV for viewмазмуну. |
| 2.0" ЖК дисплей | View жаша фооtage, playback, and navigate menus. |
| Объектив | Captures video and photo input. |
| Микрофон | Аудио жаздырат. |
Жайгашуу
Батарея орнотуу
- Камеранын ылдый жагындагы батарея уясынын капкагын ачыңыз.
- Insert the included rechargeable battery, ensuring the correct polarity.
- Батарея уясынын капкагын бекем жабыңыз.
- Connect the camera to a USB power source using the provided data transfer/charging cable to fully charge the battery before first use. The charging indicator light will turn off when charging is complete.
Micro SD картасын орнотуу
- Камераңыздын капталынан Micro SD карта уячасын табыңыз.
- Insert a Class 10 or higher Micro SD card (up to 32GB) with the contacts facing the back of the camera until it clicks into place.
- Алып салуу үчүн, картаны чыкылдаган үн чыкканча акырын түртүп, андан кийин чыгаруу үчүн коё бериңиз.
Attaching the Waterproof Case
The included waterproof case allows the camera to be fully submerged, making it suitable for water sports and adverse weather conditions.
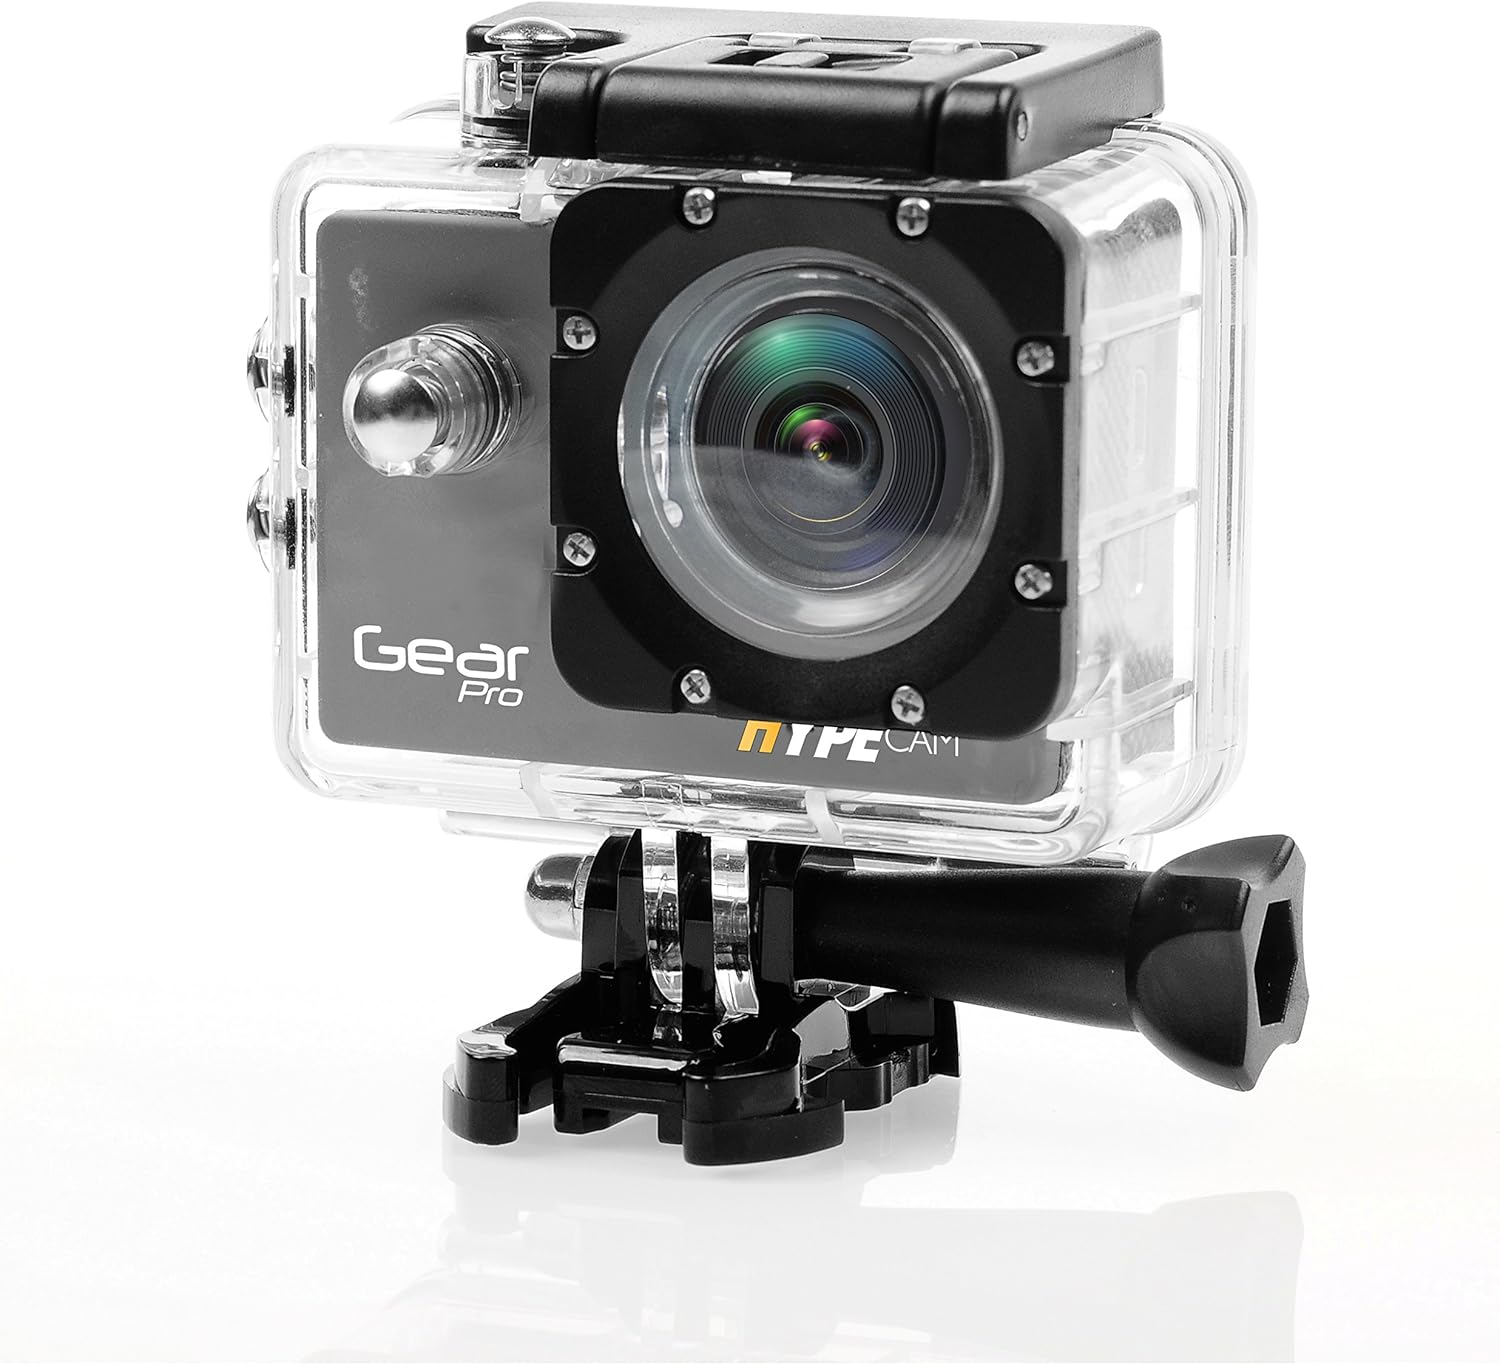
Image: The camera securely housed within its transparent waterproof case, ready for mounting.
- Суу өткөрбөгөн корпустун үстүнкү жагындагы кулпуну ачыңыз.
- Камераны корпустун ичине этияттык менен салып, анын бекем туура келгенин текшериңиз.
- Close the latch firmly until it clicks, ensuring a watertight seal.
- Сууда биринчи жолу колдонуудан мурун, бош кутучаны 30 мүнөткө сууга салып, агып кетүүсүн текшериңиз.
Монтаждоо параметрлери
Utilize the various mounts provided to attach your camera to helmets, handlebars, or other surfaces.

Image: The camera being used in diverse outdoor activities, demonstrating its versatility with different mounting options.
- Attach the waterproof case to the desired mount (e.g., handlebar mount, base mount) using the provided screws and fastening strap.
- Ensure all connections are secure before engaging in activity.
Иштеп жатат
Күйгүзүү/өчүрүү
- To power on: Press and hold the Power/Mode button for 3 seconds. The LCD screen will light up.
- To power off: Press and hold the Power/Mode button for 3 seconds. The LCD screen will turn off.
Режим тандоо
After powering on, press the Power/Mode button briefly to cycle through the main modes:
- Видео жаздыруу режими: Indicated by a video camera icon.
- Photo Capture Mode: Indicated by a camera icon.
- Ойнотуу режими: Indicated by a play icon.
- Орнотуулар режими: Indicated by a gear icon.
Видео жаздыруу
- Switch to Video Recording Mode.
- Press the Shutter/OK button to start recording. A red dot or recording timer will appear on the screen.
- Press the Shutter/OK button again to stop recording. The recording timer will disappear.
Сүрөт тартуу
- Switch to Photo Capture Mode.
- Сүрөтүңүздү LCD дисплейди колдонуп кадрга алыңыз.
- Сүрөткө тартуу үчүн Жабдуу/ОК баскычын басыңыз.
Wi-Fi туташуусу
The built-in Wi-Fi allows you to connect your HypeCam to a smartphone for remote control and file өткөрүп берүү.
- Download the official Gear Pro HypeCam app from your smartphone's app store.
- On the camera, navigate to Settings Mode and enable Wi-Fi. The Wi-Fi indicator will appear on the screen.
- On your smartphone, go to Wi-Fi settings and connect to the HypeCam's Wi-Fi network (e.g., "HypeCam_XXXX"). The default password is usually "1234567890" or similar, check the camera screen for details.
- Open the HypeCam app on your smartphone. You can now view жаша фооtage, control recording, and access camera settings remotely.
Slow-Motion Recording
The HypeCam supports slow-motion video capture at specific resolutions and frame rates.

Image: Visual representation of the camera's slow-motion feature, detailing supported resolutions and frame rates.
- Access the video settings menu on the camera.
- Select a resolution that supports higher frame rates for slow-motion, such as 1080p @ 60fps or 720p @ 120fps.
- Record as usual. The footage will play back in slow motion.
Техникалык тейлөө
- Линзаны тазалоо: Камера линзалары үчүн атайын иштелип чыккан жумшак, мамыксыз чүпүрөктү колдонуңуз. Абразивдүү материалдардан же катуу химиялык заттардан алыс болуңуз.
- Камеранын корпусун тазалоо: жумшак менен сүртүп, гamp кездеме. эриткичтерди колдонбоңуз.
- Суу өткөрбөй турган корпуска кам көрүү: After use in saltwater, rinse the case with fresh water and allow it to air dry. Inspect the O-ring seal regularly for debris or damage.
- Батареяга кам көрүү: Store the battery in a cool, dry place. If not used for extended periods, charge and discharge the battery periodically to maintain its health.
- Сактагыч: Store the camera and accessories in a dry, dust-free environment away from direct sunlight and extreme temperatures.
Проблемаларды чечүү
| Көйгөй | Мүмкүн чечим |
|---|---|
| Камера күйбөйт. | Ensure the battery is fully charged and correctly inserted. Try charging the camera for at least 2 hours. |
| Видео жаздыруу/сүрөткө тартуу мүмкүн эмес. | Check if a Micro SD card is inserted and has sufficient free space. Ensure the card is Class 10 or higher. Format the SD card if necessary (this will erase all data). |
| Wi-Fi туташуусу ишке ашпай калды. | Ensure Wi-Fi is enabled on the camera. Restart both the camera and your smartphone. Verify the Wi-Fi password. |
| Видео/сүрөттүн сапаты начар. | Clean the camera lens. Ensure sufficient lighting. Check resolution settings; higher resolutions provide better quality. |
| Камера катып калат же жооп бербей калат. | Катуу баштапкы абалга келтирүү үчүн батареяны чыгарып, кайра салыңыз. |
| Water inside waterproof case. | Immediately remove the camera. Inspect the O-ring seal for dirt, hair, or damage. Ensure the latch is fully closed. Do not use the case if the seal is compromised. |
Техникалык шарттар
| Өзгөчөлүк | Деталь |
|---|---|
| Модель номери | GDV485SL.01 |
| Продукциянын өлчөмдөрү | 0.97 x 2.33 x 1.62 дюйм |
| Элемент Салмагы | 1.1 фунт |
| Фото сенсор технологиясы | CMOS |
| Видео тартуунун резолюциясы | 4K Ultra HD, 2.7K, 1080p, 720p |
| Максималдуу фокус узундугу | 30 |
| Максималдуу диафрагма | 2 миллиметр |
| Flash эс тутум түрү | Micro SD (32 ГБ чейин) |
| Видео тартуу форматы | MP4 |
| Колдоого алынган аудио формат | MP3 |
| Screen Size | 2 дюйм |
| Байланыш технологиясы | Built-in WiFi, Micro HDMI Port, USB Type 2.0 |
| Өндүрүүчү | Sound Around |
Кепилдик жана колдоо
For warranty information and technical support, please refer to the official ProGear webсайтка же кардарларды тейлөөгө кайрылыңыз. Сатып алуу квитанциясын кепилдик дооматтары үчүн сатып алуунун далили катары сактаңыз.