1. Киришүү
This manual provides essential information for the safe and efficient operation of your Xerox AltaLink C8030 Multifunction Printer. Please read these instructions carefully before using the device and retain them for future reference. This device integrates printing, scanning, copying, and faxing capabilities to support various office tasks.
2. Коопсуздук маалыматы
Always follow basic safety precautions to reduce the risk of fire, electric shock, and injury. Ensure the device is connected to a grounded power outlet. Do not block ventilation openings. Keep the device away from water and excessive humidity. Refer to the safety labels on the product for specific warnings.
3. Продукт бүтүп калдыview
The Xerox AltaLink C8030 is a color multifunction printer designed for high-volume office environments. It features a 10-inch touchscreen for intuitive navigation and control. Key capabilities include:
- Print Speed: Up to 30 pages per minute (ppm) for both color and monochrome.
- Copy Resolution: 600 x 600 DPI.
- Memory: 8 GB RAM, 1 GB RAM, 250 GB HDD.
- Connectivity: NFC, Wireless, USB.
- Paper Supply: Multiple trays including 2 x 520-sheet trays, a 2,000-sheet high-capacity tandem tray, and a 100-sheet bypass tray.
- Features: Single Pass DADF, Data Security, Job Accounting, PostScript Kit, Network Scanning, Server Fax, iFax, Standard Output Tray, Office Finisher LX.
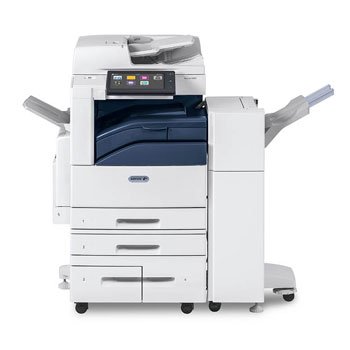
Сүрөт: алдыңкы view of the Xerox AltaLink C8030 multifunction printer, showing its various paper trays and the integrated touchscreen control panel.
4. Орнотуу
4.1 Пакеттен чыгаруу жана жайгаштыруу
- Принтерди таңгагынан этияттык менен чыгарыңыз.
- Принтерди вентиляциясы бар туруктуу, тегиз жерге коюңуз.
- Ensure sufficient space around the printer for maintenance and paper loading.
4.2 Кубат туташтыруу
- Электр шнурду принтерге, анан жерге туташтырылган электр розеткасына туташтырыңыз.
- Аппаратты күйгүзүү үчүн кубат баскычын басыңыз.
4.3 Кагазды жүктөө
- Open the desired paper tray (e.g., Tray 1, Tray 2, or Bypass Tray).
- Кагаз багыттоолорун кагаз өлчөмүнө ылайыкташтырыңыз.
- Load the paper stack, ensuring it does not exceed the maximum fill line.
- Кагаз салгычты коопсуз жабыңыз.
4.4 Тармак жана USB туташуусу
- Тармак: Connect an Ethernet cable to the printer's network port and to your network router/switch. Configure network settings via the touchscreen if necessary.
- Зымсыз: Access the network settings on the touchscreen, select your Wi-Fi network, and enter the password.
- USB: Connect a USB cable from your computer to the printer's USB port for direct connection.
5. Иштөө нускамалары
5.1 Басып чыгаруу
- Компьютериңизден же мобилдик түзмөгүңүздөн басып чыгаргыңыз келген документти ачыңыз.
- Колдонмонун менюсунан "Басып чыгарууну" тандаңыз.
- Choose the Xerox AltaLink C8030 as your printer.
- Adjust print settings (e.g., number of copies, color/monochrome, paper size) as needed.
- "Басып чыгаруу" баскычын чыкылдатыңыз.
5.2 Скандоо
- Place your document face-down on the scanner glass or face-up in the Automatic Document Feeder (ADF).
- On the printer's touchscreen, select the 'Scan' function.
- Choose your scan destination (e.g., email, network folder, USB drive).
- Configure scan settings (e.g., resolution, file format, color mode).
- Скандоону баштоо үчүн "Баштоо" баскычын басыңыз.
5.3 Көчүрүү
- Документиңизди сканер айнегине же ADFке коюңуз.
- On the touchscreen, select the 'Copy' function.
- Enter the desired number of copies.
- Adjust copy settings (e.g., enlargement/reduction, 2-sided, color/monochrome).
- Көчүрүүнү баштоо үчүн "Баштоо" баскычын басыңыз.
5.4 Факс
- Документиңизди сканер айнегине же ADFке коюңуз.
- On the touchscreen, select the 'Fax' function.
- Алуучунун факс номерин киргизиңиз.
- Configure fax settings (e.g., resolution, delayed send).
- Факсты жөнөтүү үчүн "Баштоо" баскычын басыңыз.
6. Техникалык тейлөө
6.1 Тонер картридждерин алмаштыруу
- Принтердин алдыңкы капкагын ачыңыз.
- Identify the empty toner cartridge.
- Grasp the handle and pull the cartridge out.
- Unpack the new toner cartridge and shake it gently.
- Insert the new cartridge until it clicks into place.
- алдыңкы капкакты жабыңыз.
6.2 Сканер айнегин тазалоо
- Принтерди өчүрүп, электр шнурын сууруп алыңыз.
- Сканердин капкагын ачыңыз.
- Сканердин айнегин жумшак, мамыксыз чүпүрөк менен сүртүңүз dampened with a mild glass cleaner.
- Ensure the glass is dry before closing the cover and restoring power.
7. Кыйынчылыктарды
7.1 Кагаз тыгындары
- Follow the on-screen instructions to locate and clear the paper jam.
- Open all accessible covers and trays to check for jammed paper.
- Gently pull the paper in the direction of the paper path.
7.2 Басма сапаты маселелери
- Check toner levels and replace cartridges if low.
- Perform a print head cleaning or calibration from the printer's maintenance menu.
- Ensure you are using appropriate paper types for your print job.
7.3 Байланыш көйгөйлөрү
- Verify all cables (Ethernet, USB) are securely connected.
- For wireless connections, check Wi-Fi signal strength and network settings.
- Restart the printer, router, and computer/device.
8. Техникалык шарттар
| Өзгөчөлүк | Спецификация |
|---|---|
| Бренд | Xerox |
| Модель аты | AltaLink C8030 |
| Басма технологиясы | Лазер |
| Принтердин чыгышы | Түс |
| Макс басып чыгаруу ылдамдыгы (монохромдуу) | 30 промилле |
| Максималдуу көчүрүү ылдамдыгы (кара жана ак) | 30 промилле |
| Байланыш технологиясы | NFC, Wireless |
| Элемент Салмагы | 349 фунт |
| Башкаруу ыкмасы | Алыстан башкаруу, тийүү |
| Шайкеш түзмөктөр | PC |
| GTIN / UPC | 095205880151 |
9. Кепилдик жана колдоо
For warranty information, please refer to the documentation included with your product or visit the official Xerox website. For technical support, driver downloads, or service requests, please contact Xerox customer support through their official channels. Keep your product's serial number and purchase date readily available when contacting support.
Онлайн ресурстар: Xerox Official Webсайт