
1. Киришүү
The Flashpoint R2 TTL Wireless Flash Receiver for Sony (model R2, also known as Godox X1R-S) is designed to provide reliable wireless triggering and control for Flashpoint R2 system flashes with Sony mirrorless cameras. This receiver enables advanced flash functions such as TTL (Through-The-Lens) automatic exposure and HSS (High-Speed Sync) up to 1/8000s, offering photographers greater flexibility and creative control over their lighting setups. This manual provides detailed instructions for setup, operation, maintenance, and troubleshooting to ensure optimal performance of your R2 receiver.
2. Продукт бүтүп калдыview
2.1. Компоненттер камтылган
- Flashpoint R2 TTL Receiver for Sony
- 2 Sony camera cables
- 2.5mm Sync cord
2.2. Негизги өзгөчөлүктөрү
- Reliable Triggering: Utilizes a stable 2.4 GHz radio frequency for consistent flash firing.
- Кеңейтилген диапазон: Operates effectively within a 100-200 foot range.
- Ар тараптуу шайкештик: Specifically designed for Sony cameras, integrating with Sony's TTL system.
- Жогорку ылдамдыктагы синхрондоштуруу (HSS): Supports sync speeds up to 1/8000s.
- Көп каналдуу башкаруу: Offers 32 channels and 5 groups for precise flash management.
- Туруктуу курулуш: Compact and lightweight (4.0 oz, 2.75 x 2.5 x 1.75 inches).
- Кубат булагы: Requires 2xAA batteries.
- Микропрограмманы жаңыртуу: Equipped with a Micro USB port for future firmware updates.
2.3. Башкаруу каражаттары жана көрсөткүчтөр
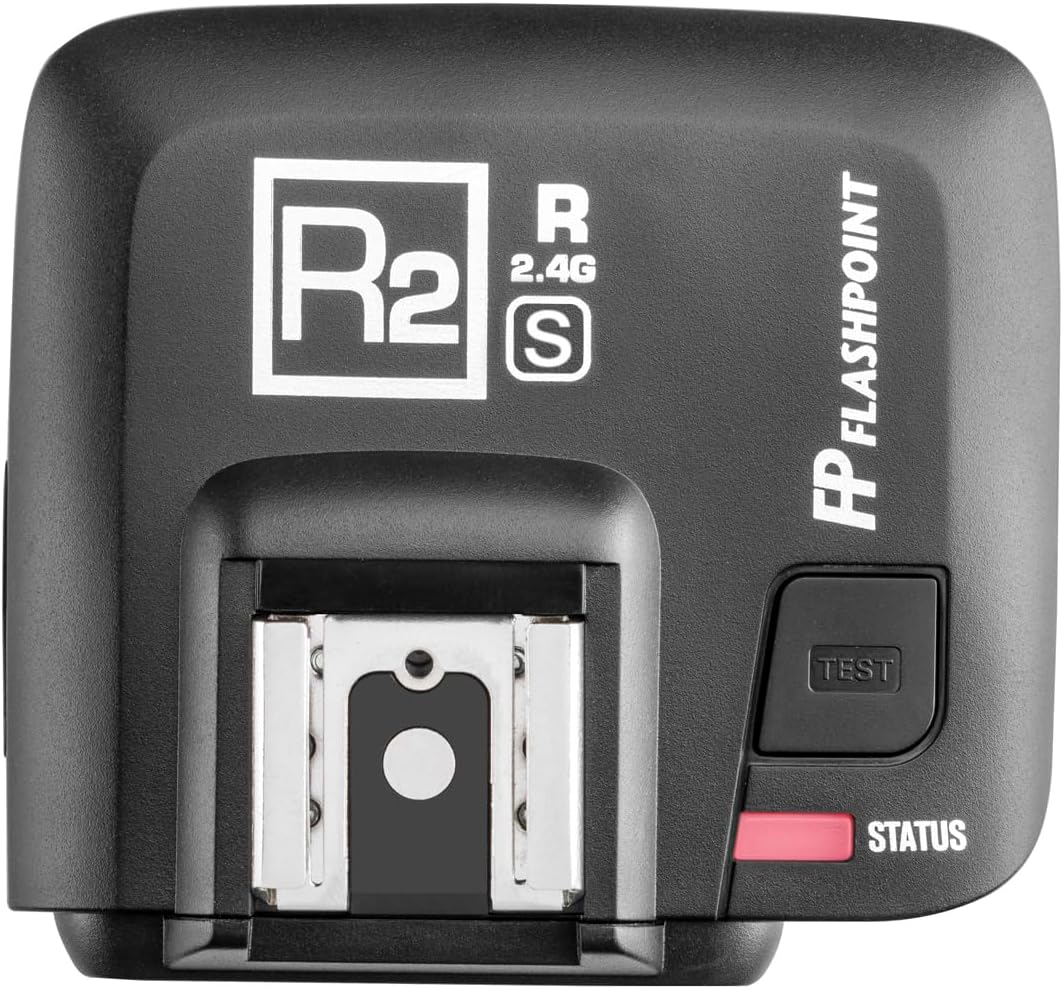


- LCD дисплей: Shows current Channel (CH) and Group (GR) settings.
- CH баскычы: Used to select and adjust the operating channel.
- GR баскычы: Used to select and adjust the operating group.
- TEST баскычы: Manually fires the connected flash for testing purposes.
- STATUS Light: Indicates the receiver's operational status (e.g., ready, firing).
- Ысык бут кийим орнотуу: For mounting the receiver onto a camera's hot shoe.
- Микро USB порту: For connecting to a computer to perform firmware updates.
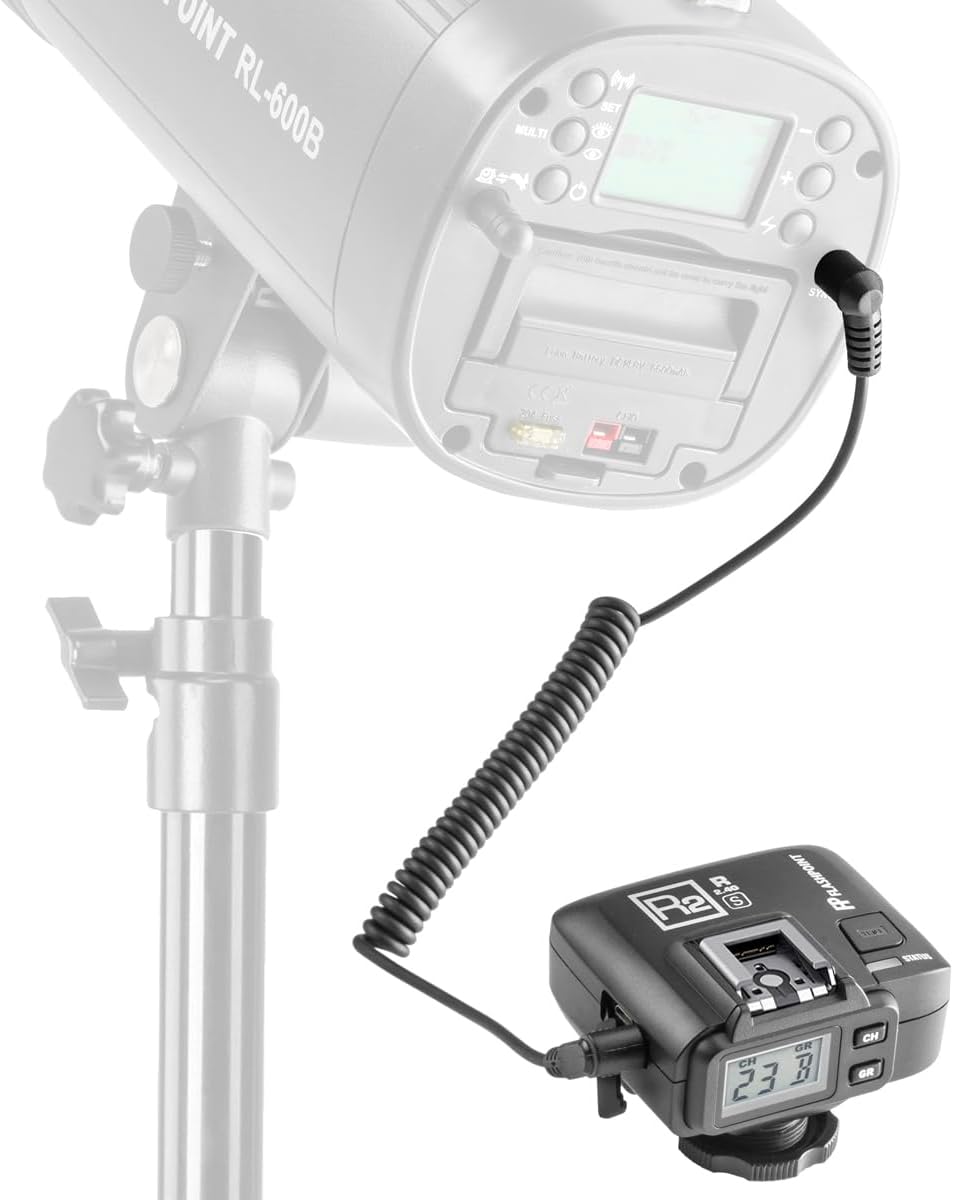
- 2.5mm Sync Port: For wired connection to flashes or strobes that do not have a built-in R2 radio receiver.
- Батарея бөлүмү: Located on the underside, for two AA batteries.
- Кубат которгучу: Typically integrated with the backlight control or a dedicated switch.
3. Орнотуу
3.1. Батареяны орнотуу
- Locate the battery compartment cover on the underside of the R2 receiver.
- Капкакты жылдырыңыз.
- Бөлүмдүн ичинде көрсөтүлгөндөй туура полярдуулукту (+/-) камсыз кылып, эки АА батарейканы салыңыз.
- Батарея уясынын капкагын бекем жабыңыз.
3.2. Камерага орнотуу
- Ensure your Sony camera is powered off.
- Slide the R2 receiver's hot shoe mount into your camera's hot shoe.
- Tighten the locking ring or lever on the receiver to secure it firmly to the camera.
3.3. Connecting to External Flashes (Wired)
For strobes or flashes without a built-in R2 radio receiver, use the provided 2.5mm sync cord to connect the R2 receiver to the flash's sync port.
3.4. Микропрограмманы жаңыртуу
The R2 receiver features a Micro USB port for firmware updates. It is recommended to periodically check the Flashpoint website for the latest firmware versions to ensure optimal compatibility and performance, especially for use with manual flashes and sync cord connections (Firmware Version 04 or later may be required).
4. Иштөө нускамалары
4.1. Күйгүзүү/өчүрүү
Locate the power switch (often combined with the backlight control) and slide it to the 'ON' position to power on the receiver. The LCD display will illuminate. To power off, slide the switch to 'OFF'.
4.2. Channel (CH) Selection
Press the 'CH' button to cycle through the available 32 channels. Ensure the channel on your R2 receiver matches the channel set on your Flashpoint R2 transmitter (e.g., XPro-S, X2T-S) and any other R2 system flashes you intend to trigger.
4.3. Group (GR) Selection
Press the 'GR' button to cycle through the available 5 groups (A, B, C, D, E). Assign your flashes to different groups to control them independently from your transmitter.
4.4. Test Fire
Press the 'TEST' button on the receiver to manually fire the connected flash. The STATUS light will illuminate briefly to confirm the flash has fired.
4.5. TTL and HSS Operation
When mounted on a compatible Sony camera and paired with an R2 system transmitter, the R2 receiver will automatically support TTL and HSS functions. Ensure your camera and flash settings are configured for these modes. The receiver acts as a bridge, translating the camera's signals to the R2 system flashes.
4.6. Compatibility with Flashpoint R2 System
The R2 receiver is fully compatible with the Flashpoint R2 Speedlights, Monolights, and Strobe lights that have built-in R2 TTL radio transceivers. For older Flashpoint Streaklights and speedlights without an R2 radio, they can be fired and controlled off-camera when attached to an R2 Bridge Radio Remote Receiver (sold separately), providing a remote link to earlier models.
5. Техникалык тейлөө
- Тазалоо: Use a soft, dry cloth to clean the exterior of the receiver. Avoid using harsh chemicals or abrasive materials.
- Батареяга кам көрүү: Remove batteries if the receiver will not be used for an extended period to prevent leakage and damage.
- Сактагыч: Store the receiver in a cool, dry place, away from direct sunlight and extreme temperatures.
6. Кыйынчылыктарды
- Ресивер күйбөй жатат: Check if the batteries are inserted correctly and are not depleted. Replace with fresh AA batteries if necessary.
- Жаркылдактар күйбөйт:
- Ensure the receiver is powered on and securely mounted on the camera.
- Verify that the channel (CH) and group (GR) settings on the receiver match those on your transmitter and flashes.
- Check the battery level of both the receiver and the flashes.
- If using a wired connection, ensure the sync cord is properly connected to both the receiver and the flash.
- Inconsistent Firing or TTL Issues:
- Ensure there are no obstructions between the receiver and the flashes.
- Check for potential radio interference from other 2.4 GHz devices. Try changing the channel.
- Verify that the receiver's firmware is up to date. Some users have reported issues with TTL reliability with Sony flashes, which may be addressed by firmware updates.
- Confirm that your camera and flash settings are correctly configured for TTL or HSS.
- Арткы жарык иштебейт: Check the power switch, as it may also control the backlight function.
7. Техникалык шарттар
| Өзгөчөлүк | Деталь |
|---|---|
| Модель номери | R2 (Godox X1R-S) |
| Продукциянын өлчөмдөрү | 4.9 x 4.8 x 2.8 дюйм |
| Элемент Салмагы | 8 унция |
| Батареялар талап кылынат | 2x AA батарейкалар |
| Өндүрүүчү | Flashpoint |
| Шайкеш орнотуулар | Sony Alpha hot shoe |
| Байланыш технологиясы | 2.4 GHz Wireless, Wired (2.5mm Sync Port) |
| Зымсыз жыштык | 2.4 ГГц |
| Зымсыз диапазон | 100-200 фут (болжол менен 30-60 метр) |
| Каналдар | 32 |
| Топтор | 5 (A, B, C, D, E) |
| Жогорку ылдамдыктагы синхрондоштуруу | 1/8000с чейин |
| Firmware Port | Микро USB |
8. Кепилдик жана колдоо
For warranty information, technical support, or service inquiries, please contact Flashpoint customer service or refer to the official Flashpoint webсайт. Сатып алуу квитанциясын кепилдик дооматтары үчүн сатып алуунун далили катары сактаңыз.