
1. Продукт бүтүп калдыview
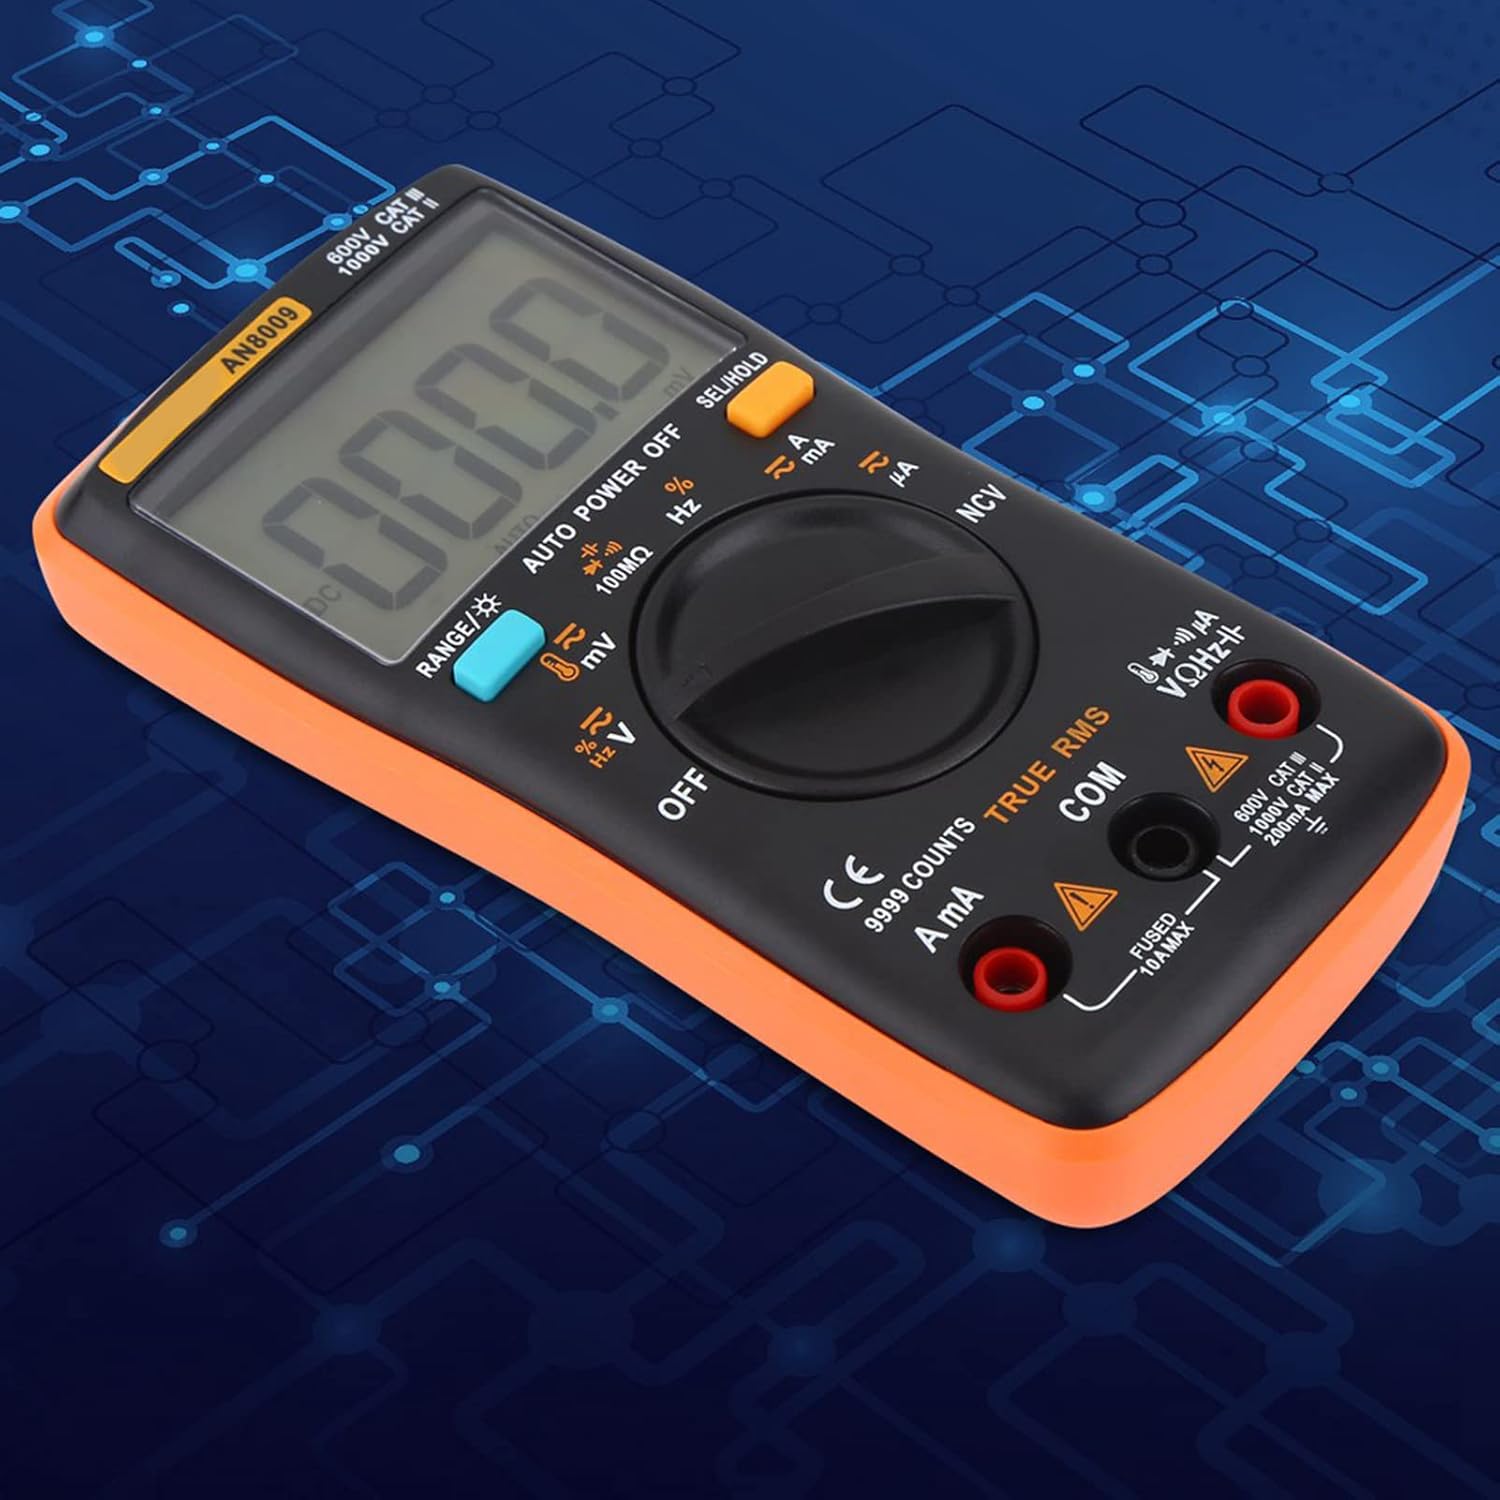
The Walfront AN8009 Autoranging Digital Multimeter is a high-precision, 9999-count, auto-range instrument designed for various electrical measurements. Its compact and ergonomic design makes it highly portable, suitable for both professional and hobbyist use. The large, backlit LCD ensures clear visibility of readings in diverse lighting conditions.
- Арткы жарыктуу LCD: Large overview backlit LCD, digits show clearly and backlight supported.
- Портативдик: Compact ergonomic design and portable. Multimeter size: 130 x 65 x 30mm / 5.12 x 2.56 x 1.18inch.
- Мультиметр комплекти: AN8009 is one of the first 9999 count, auto-range digital multimeters. It can measure AC / DC voltage, DC Current, Resistance, Continuity, Diodes, Transistor hFE and so on.

2. Пакеттин мазмуну
Upon opening your AN8009 Digital Multimeter kit, please verify that all the following components are included:
- AN8009 Digital Multimeter
- 16-in-1 Multifunctional Test Line Set
- Temperature Sensor (Thermocouple)
- User Manual
- Сактоочу баштык

Видео 2.1: Бүттүview of the AN8009 Digital Multimeter kit contents, demonstrating the various accessories included for comprehensive testing.
3. Орнотуу
Before using your AN8009 Digital Multimeter, follow these steps for initial setup:
- Батарея орнотуу: The multimeter is powered by 2 x 1.5V AAA batteries (Not Included). Locate the battery compartment on the back of the unit, open it, insert the batteries according to the polarity markings, and close the compartment securely.
- Сыноо өткөргүчтөрүн туташтыруу: Insert the red test lead into the 'VΩHz' or 'A/mA' input jack (depending on the measurement function) and the black test lead into the 'COM' (common) input jack. Ensure a firm connection.
- Аксессуарларды тиркөө: For specific measurements, attach the appropriate accessories (e.g., temperature sensor, alligator clips) to the test leads as required.
4. Иштөө нускамалары
The AN8009 Multimeter offers a wide range of measurement functions. Always ensure the correct function is selected and test leads are connected to the appropriate input jacks before taking any measurements.
4.1 Негизги операция
- Күйгүзүү/өчүрүү: Rotate the central dial to any measurement function to turn the multimeter on. Rotate to 'OFF' to power it off.
- Функция тандоо: Use the central rotary dial to select the desired measurement function (e.g., V~ for AC Voltage, V- DC Voltage, Ω каршылык үчүн).
- Аралыкты тандоо: The multimeter is auto-ranging, meaning it automatically selects the appropriate measurement range. For manual range selection, press the 'RANGE' button.
- Арткы жарык: Press the backlight button (often indicated by a light bulb icon) to illuminate the LCD.
4.2 Жалпы өлчөөлөр
Refer to the specific sections below for detailed instructions on common measurement types:
- AC/DC Voltage Өлчөө: Тийиштүү томду тандаңызtage range (V~ for AC, V- for DC). Connect the test leads in parallel to the circuit or component being measured.
- Туруктуу токтун өлчөөсү: Select the appropriate current range (A, mA, or µA). Connect the multimeter in series with the circuit. Ensure the correct input jack is used for the expected current level (10A MAX or 200mA MAX).
- Каршылык өлчөө: Select the Ω function. Connect the test leads across the component. Ensure the circuit is de-energized before measuring resistance.
- Үзгүлтүксүздүк тести: Select the continuity function (often indicated by a speaker icon). The multimeter will beep if there is a continuous path (low resistance).
- Диод сыноо: Select the diode function. Connect the red lead to the anode and the black lead to the cathode of the diode. The display will show the forward voltagд тамчы.
- Transistor hFE Test: Use the dedicated hFE socket on the multimeter for testing transistor gain.


5. Техникалык тейлөө
Proper maintenance ensures the longevity and accuracy of your AN8009 Digital Multimeter.
- Тазалоо: Мультиметрди кургак, жумшак чүпүрөк менен сүртүңүз. Абразивдүү тазалагычтарды же эриткичтерди колдонбоңуз.
- Сактагыч: Store the multimeter in its provided storage bag in a cool, dry place away from direct sunlight and extreme temperatures. Remove batteries if storing for extended periods to prevent leakage.
- Батареяны алмаштыруу: When the low battery indicator appears on the display, replace the 2 x 1.5V AAA batteries promptly to maintain accurate readings.
- Auto-Power-Off Feature: The multimeter has an auto-power-off feature to conserve battery life. To temporarily disable this feature, hold down the 'SEL/HOLD' button while powering on the meter. Note that this setting is not permanent and must be re-applied each time the meter is turned on.
6. Кыйынчылыктарды
If you encounter issues with your AN8009 Digital Multimeter, consider the following common troubleshooting steps:
- Дисплей жок/Алсыз дисплей: Check battery installation and replace batteries if necessary. Ensure the multimeter is turned on.
- Туура эмес окуулар: Verify that the correct measurement function is selected and test leads are connected to the appropriate input jacks. Ensure good contact between probes and the circuit. If issues persist, consider professional calibration.
- Continuity Test Issues: If the continuity test is inconsistent or unreliable, inspect the test leads for damage. Poor quality or damaged leads can lead to erratic readings. Consider replacing the test leads if they are worn or faulty.
- Жооп жок: If the multimeter does not respond to inputs, try turning it off and on again. If the problem persists, remove and reinsert the batteries.
7. Техникалык шарттар
| Спецификация | Нарк |
|---|---|
| Модель номери | AN8009 |
| Бренд | Walfront |
| Дисплейдин саны | 9999 саны |
| Өлчөмдөрү (L x W x Y) | 130 x 65 x 30 мм / 5.12 x 2.56 x 1.18 дюйм |
| Элемент Салмагы | 0.35 килограмм |
| Power Source | 2 x 1.5V AAA batteries (Not Included) |
| Түс | Ачык күрөң |
| Келип чыккан өлкө | Кытай |

8. Кепилдик жана колдоо
For warranty information and technical support, please refer to the documentation provided with your purchase or contact Walfront customer service directly. Additional protection plans may be available for extended coverage:
- 3 жылдык коргоо планы
- 4 жылдык коргоо планы
- Complete Protect (жарактуу өткөн жана келечектеги сатып алууларды камтыган айлык план)
For specific inquiries or assistance, please reach out to the seller, Luoyuu, through the Amazon platform.