
Youshiko YC8061-B
Youshiko YC8061-B Jumbo Radio Controlled Wall Clock
Колдонуучунун инструкциясы
1. Киришүү
Thank you for choosing the Youshiko YC8061-B Jumbo Radio Controlled Wall Clock. This clock is designed to provide precise timekeeping, automatically synchronizing with the MSF radio signal for the UK and Ireland. It features a large, clear LCD display that shows time, date, day of the week, indoor temperature, and humidity. This manual will guide you through the setup, operation, and maintenance of your new clock.
Сүрөт 1.1: Алдыңкы view of the Youshiko YC8061-B Jumbo Radio Controlled Wall Clock, displaying time, date, day, temperature, and humidity.
2. Пакеттин мазмуну
- Youshiko YC8061-B Jumbo Radio Controlled Wall Clock
- Instruction Manual
Эскертүү: 4 х AA батарейкалары иштөө үчүн талап кылынат жана пакетке кирбейт.
3. Продукт бүтүп калдыview
Familiarize yourself with the main components and controls of your clock.
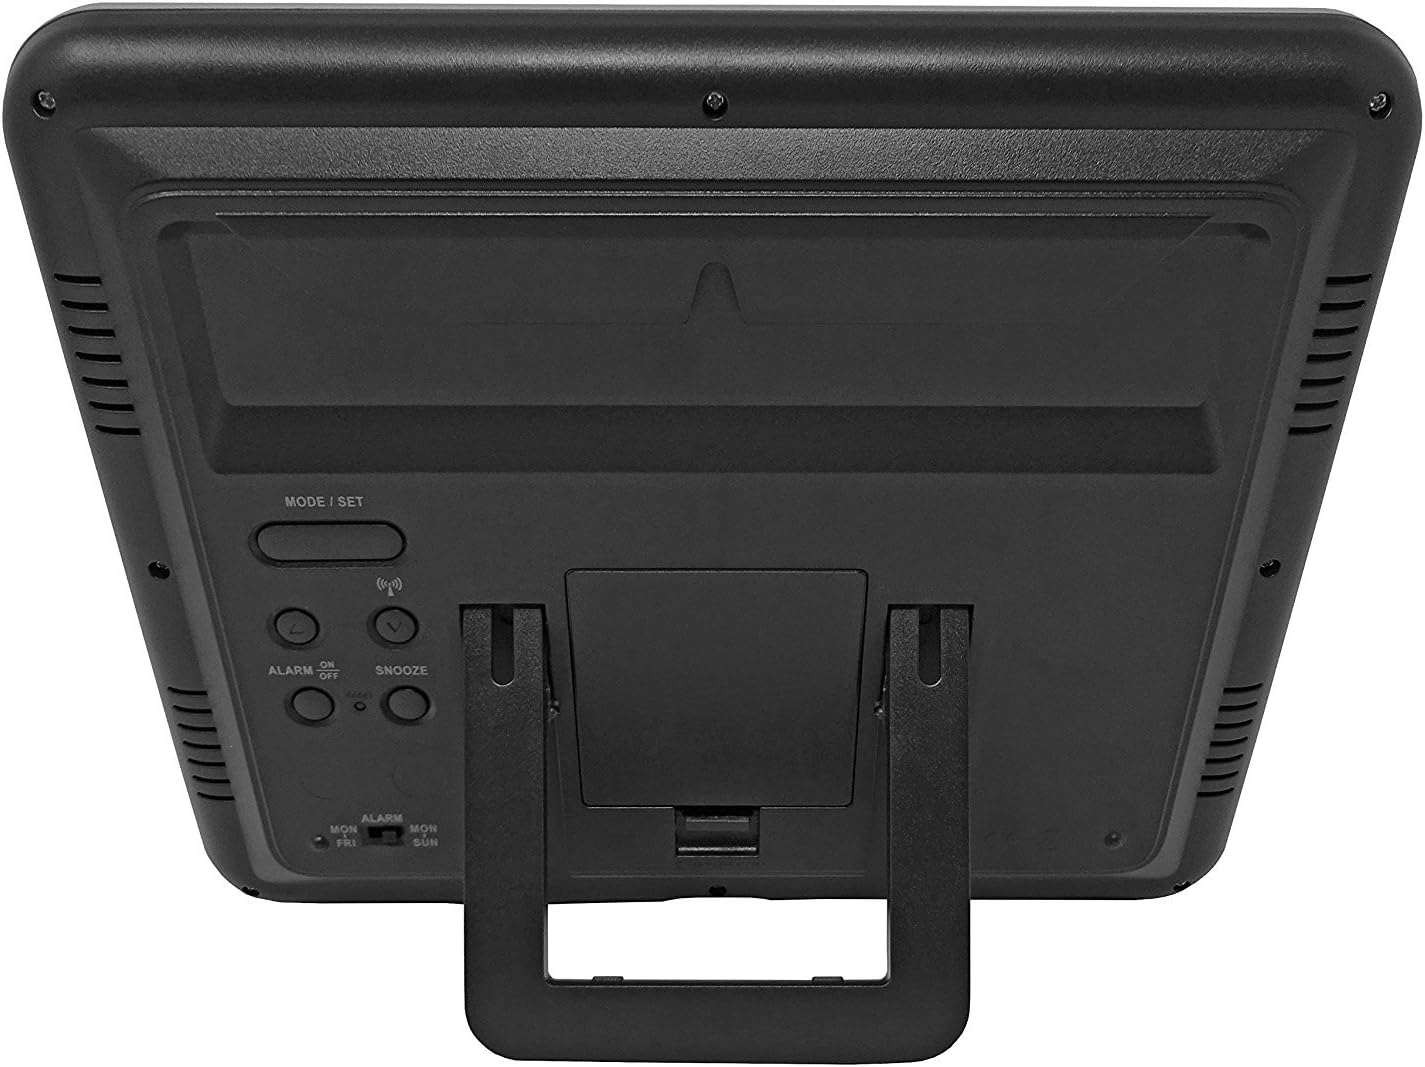
3.1-сүрөт: Артка view of the clock, highlighting the battery compartment and control buttons.
Башкаруу баскычтары:
- MODE / SET: Used to switch between display modes and enter setting mode.
- ӨЙДӨ / ТӨМӨНГҮ: Used to adjust values during setting mode.
- WAVE / RCC: Manually initiates or stops radio control signal reception.
- ALARM ON / OFF: Ойготкучту иштетет же өчүрөт.
- СНУЗЕ: Activates the snooze function when the alarm sounds.
4. Батареяны орнотуу
- Сааттын артындагы батарея бөлүкчөсүнүн капкагын табыңыз.
- Капкакты ылдый жылдырып же көтөрүү менен алып салыңыз.
- Insert 4 new AA batteries, ensuring the correct polarity (+ and -) as indicated inside the compartment.
- Батарея бөлүгүнүн капкагын ордуна коюңуз.
The clock will power on and begin searching for the radio control signal automatically.
5. Initial Setup & Time Synchronization
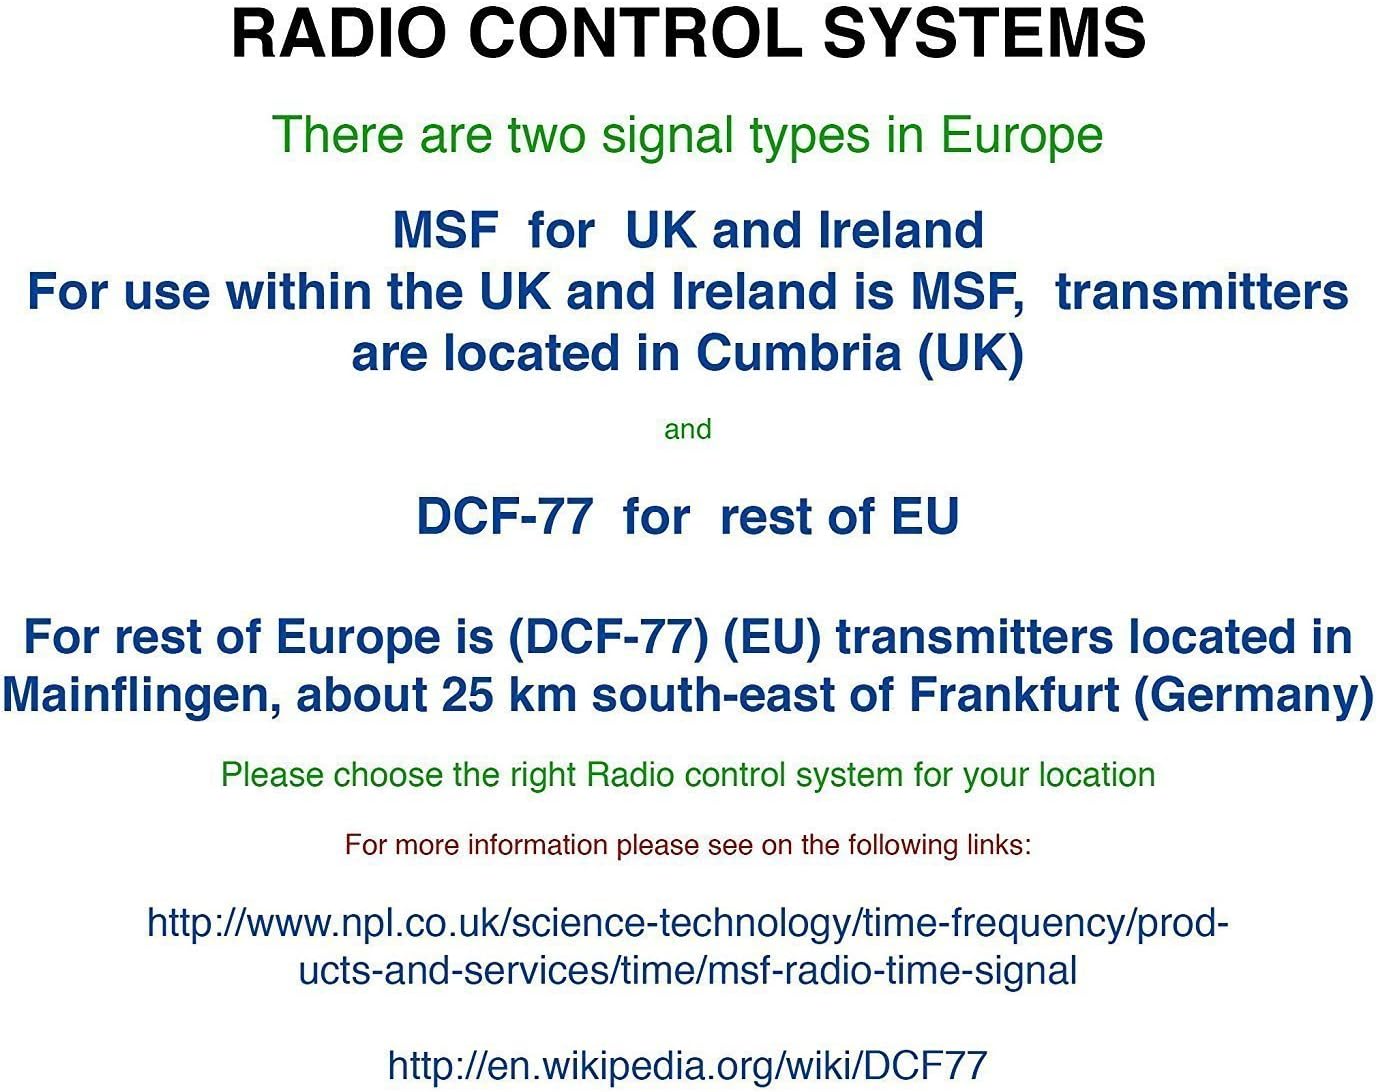
The Youshiko YC8061-B clock is designed to automatically set its time and date via the MSF radio signal broadcast from Cumbria, UK. This signal is specifically for use within the UK and Ireland.

Figure 5.1: Explanation of radio control systems (MSF for UK/Ireland, DCF-77 for rest of EU).
Автоматтык синхрондоштуруу:
- After battery installation, the clock will automatically start searching for the MSF signal. A radio wave icon will flash on the display.
- Саатты терезенин жанына, тоскоолдук жаратышы мүмкүн болгон электрондук түзүлүштөрдөн алыс коюңуз.
- The initial synchronization process may take several minutes to a few hours, depending on your location and signal strength.
- Once the signal is successfully received, the radio wave icon will appear solid on the display, and the clock will show the correct time and date.
- The clock will automatically adjust for Daylight Saving Time (DST) and perform daily checks to maintain accuracy.
Кол менен сигнал издөө:
If the clock does not synchronize automatically or if you wish to force a signal search, press and hold the WAVE / RCC button. The radio wave icon will flash, indicating it is searching for the signal.
Manual Time Setting (if radio signal is unavailable):
In areas where the radio signal cannot be received, you can manually set the time and date:
- басып, кармап туруңуз MODE / SET баскычын убакыттын цифралары жаркылдай баштаганга чейин басыңыз.
- колдонуу UP or ылдый buttons to adjust the flashing value (e.g., hour, minute).
- Басыңыз MODE / SET again to confirm the setting and move to the next adjustable item (e.g., minute, year, month, day, 12/24-hour format, temperature unit).
- Бардык орнотуулар конфигурацияланганга чейин 2 жана 3-кадамдарды кайталаңыз.
- Басыңыз MODE / SET орнотуу режиминен чыгуу үчүн акыркы жолу.
6. Иштөө нускамалары
Көрсөтүү режимдери:
The clock displays time (hours, minutes, seconds), date (day, month, year), day of the week, indoor temperature, and humidity. The time digits are large (8.3 cm) for easy readability.
Ойготкуч функциясы:
- Ойготкуч убактысын коюу үчүн басыңыз MODE / SET button repeatedly until the alarm time is displayed.
- Басып кармап туруңуз MODE / SET until the alarm hour flashes. Use UP or ылдый тууралоо.
- Басыңыз MODE / SET to confirm the hour and move to minutes. Use UP or ылдый тууралоо.
- Басыңыз MODE / SET ойготкуч жөндөөлөрүнөн чыгуу үчүн.
- Ойготкучту иштетүү же өчүрүү үчүн, баскычын басыңыз ОЙГОЛГОН КҮЙҮК / ӨЧҮРҮҮ баскычы. Иштетилгенде дисплейде ойготкуч сүрөтчөсү пайда болот.
Чырым Function:
Ойготкуч басылганда, басыңыз СОЮЗ сигналды убактылуу басуу үчүн баскыч. Ойготкуч болжол менен 5 мүнөттөн кийин кайра чыгат.
Температура бирдигин тандоо:
Температураны көрсөтүү үчүн Цельсий (°C) жана Фаренгейт (°F) ортосунда которулуу үчүн, басыңыз UP Кадимки убакытты көрсөтүү учурунда баскычын басыңыз.
7. Монтаждоо параметрлери
The Youshiko YC8061-B clock offers versatile placement options:
Дубалга орнотуу:
The clock features a keyhole slot on the back for easy wall mounting. Use a suitable screw (not included) in your desired location.

Figure 7.1: The clock displayed on a wall, showcasing its suitability for wall mounting.
Стол стенди:
An integrated foldable stand on the back allows the clock to be placed on any flat surface, such as a desk, shelf, or bedside table.

Figure 7.2: The clock positioned on a table using its integrated stand.
8. Техникалык тейлөө
Тазалоо:
Wipe the clock with a soft, dry cloth. Do not use abrasive cleaners or solvents, as these may damage the display or casing.
Батареяны алмаштыруу:
When the display dims or the clock stops functioning correctly, replace all 4 AA batteries simultaneously. Do not mix old and new batteries or different types of batteries.
9. Кыйынчылыктарды
| Көйгөй | Мүмкүн себеп | Чечим |
|---|---|---|
| Саат эч нерсени көрсөтпөйт. | Батареялар өлүп калган же туура эмес салынган. | Туура полярдуулукту камсыз кылуу менен батарейкаларды жаңысына алмаштырыңыз. |
| Radio wave icon is flashing, or time is incorrect. | Poor radio signal reception. | Move the clock to a location with better signal reception (e.g., near a window, away from electronics). Manually initiate signal search using the WAVE / RCC button. |
| Ойготкуч угулбайт. | Ойготкуч иштетилген эмес. | Press the ALARM ON / OFF button to activate the alarm (alarm icon should appear). |
| Температура/нымдуулук көрсөткүчтөрү так эмес окшойт. | Clock is placed in an area with extreme temperature fluctuations or direct sunlight. | Relocate the clock to a stable indoor environment. Allow time for readings to stabilize. |
10. Техникалык шарттар

Figure 10.1: Dimensions of the Youshiko YC8061-B Jumbo Radio Controlled Wall Clock.
| Өзгөчөлүк | Деталь |
|---|---|
| Модель номери | YC8061-B |
| Өлчөмдөрү (L x W x Y) | 24.8 x 20.6 x 2.8 см (9.76 x 8.11 x 1.1 дюйм) |
| Салмагы | 600 грамм |
| Power Source | 4 x AA батарейкалар (киргизилген эмес) |
| Дисплей түрү | Санарип LCD |
| Убакыт сигналы | MSF (UK & Ireland version) |
| Өзгөчөлүктөр | Radio-controlled, Automatic DST adjustment, Indoor Temperature Display, Indoor Humidity Display, Calendar (Day, Month, Year), Alarm with Snooze, Wall Mountable / Table Stand |
| Түс | Кара |
11. Кепилдик маалыматы
Youshiko products are manufactured to high-quality standards. This product is covered by a standard manufacturer's warranty against defects in materials and workmanship. Please retain your proof of purchase for warranty claims. Specific warranty terms and duration may vary by region. For detailed warranty information, please refer to the documentation provided at the time of purchase or contact Youshiko customer support.
12. Колдоо
Should you encounter any issues or have questions regarding your Youshiko YC8061-B Jumbo Radio Controlled Wall Clock that are not addressed in this manual, please contact Youshiko customer support. Contact details can typically be found on the product packaging or the official Youshiko webсайт.
Ask a question about this manual
Ask about setup, troubleshooting, compatibility, parts, safety, or missing instructions. Manuals+ will review the question and use this page’s manual context to help answer it.