
1. Киришүү
The GameMax Expedition is a compact Micro ATX PC gaming case designed for efficient cooling and component compatibility. This manual provides instructions for the proper installation, operation, and maintenance of your PC case.

Figure 1.1: GameMax Expedition MATX PC Gaming Case, White.
2. Коопсуздук маалыматы
- Орнотуудан же тейлөөдөн мурун ар дайым бардык компоненттерден электр кубатын ажыратыңыз.
- Компоненттерге электростатикалык разряддын (ESD) бузулушун алдын алуу үчүн антистатикалык билек боону тагыңыз.
- Be cautious of sharp edges inside the chassis.
- Майда тетиктерди жана бурамаларды балдардан алыс кармаңыз.
- Ensure proper ventilation around the case during operation.
3. Пакеттин мазмуну
Пакетте бардык буюмдар бар экенин текшериңиз:
- GameMax Expedition MATX PC Gaming Case
- Accessory box (screws, standoffs, cable ties)
- 1 x 120mm Blue LED Fan (pre-installed at rear)
- Колдонуучунун Колдонмосу (бул документ)
4. Продукциянын өзгөчөлүктөрү
- Micro Gaming Chassis: Compact design optimized for gaming components.
- I/O порттору: 1 x USB 3.0, 2 x USB 2.0, and HD Audio ports located on the top panel.
- Муздатуу: Includes 1 x 120mm Blue LED fan. Supports additional fans for enhanced airflow.
- Side Window: Full side window panel allows visibility of internal components.
- Magnetic Dust Filter: Removable dust filter on the top panel for easy cleaning and improved system longevity.
- GPU Bracket: Integrated bracket provides support for graphics cards, preventing sag and accommodating larger cards.
5. Component Overview
5.1 Тышкы Views

Figure 5.1: Front panel design with air intake and included 120mm fan illustration.

Figure 5.2: Top I/O panel featuring USB 3.0, USB 2.0, and audio ports.
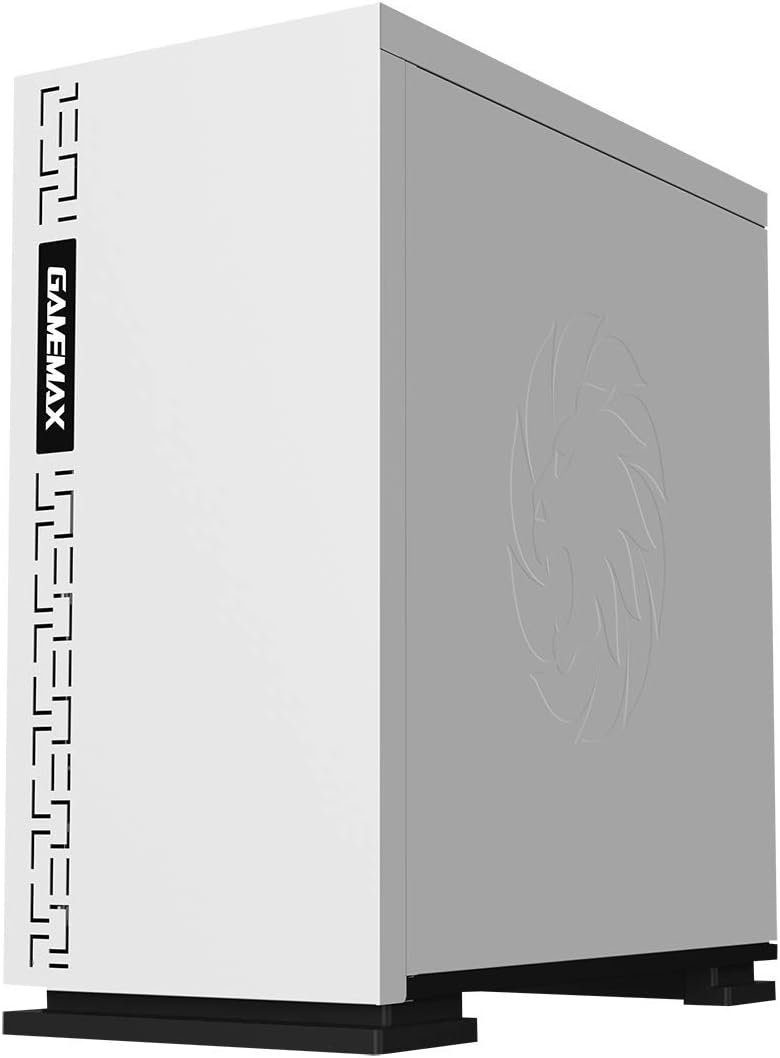
5.3-сүрөт: Жогорку view showing the magnetic dust filter for fan ventilation.
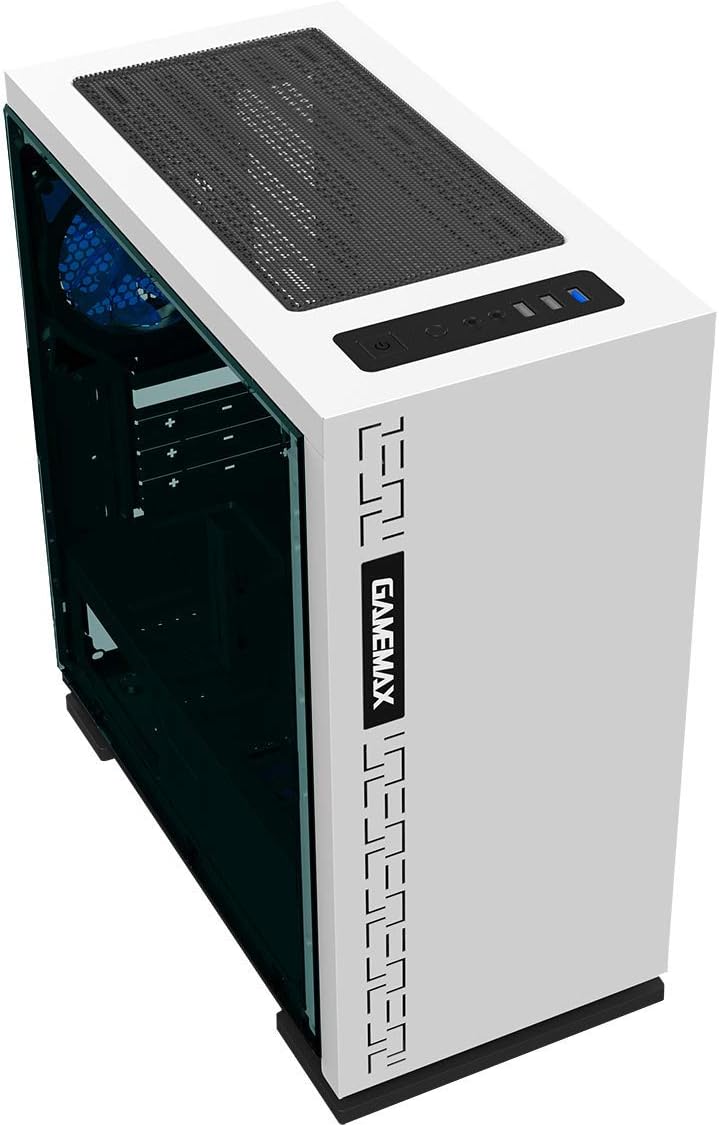
5.4-сүрөт: Арткы view displaying expansion slots and the pre-installed 120mm fan.
5.2 Ички жайгашуу

5.5-сүрөт: Ички view with the side panel removed, showing the motherboard tray and cable routing options.

Figure 5.6: Illustration of fan and radiator mounting points within the chassis.
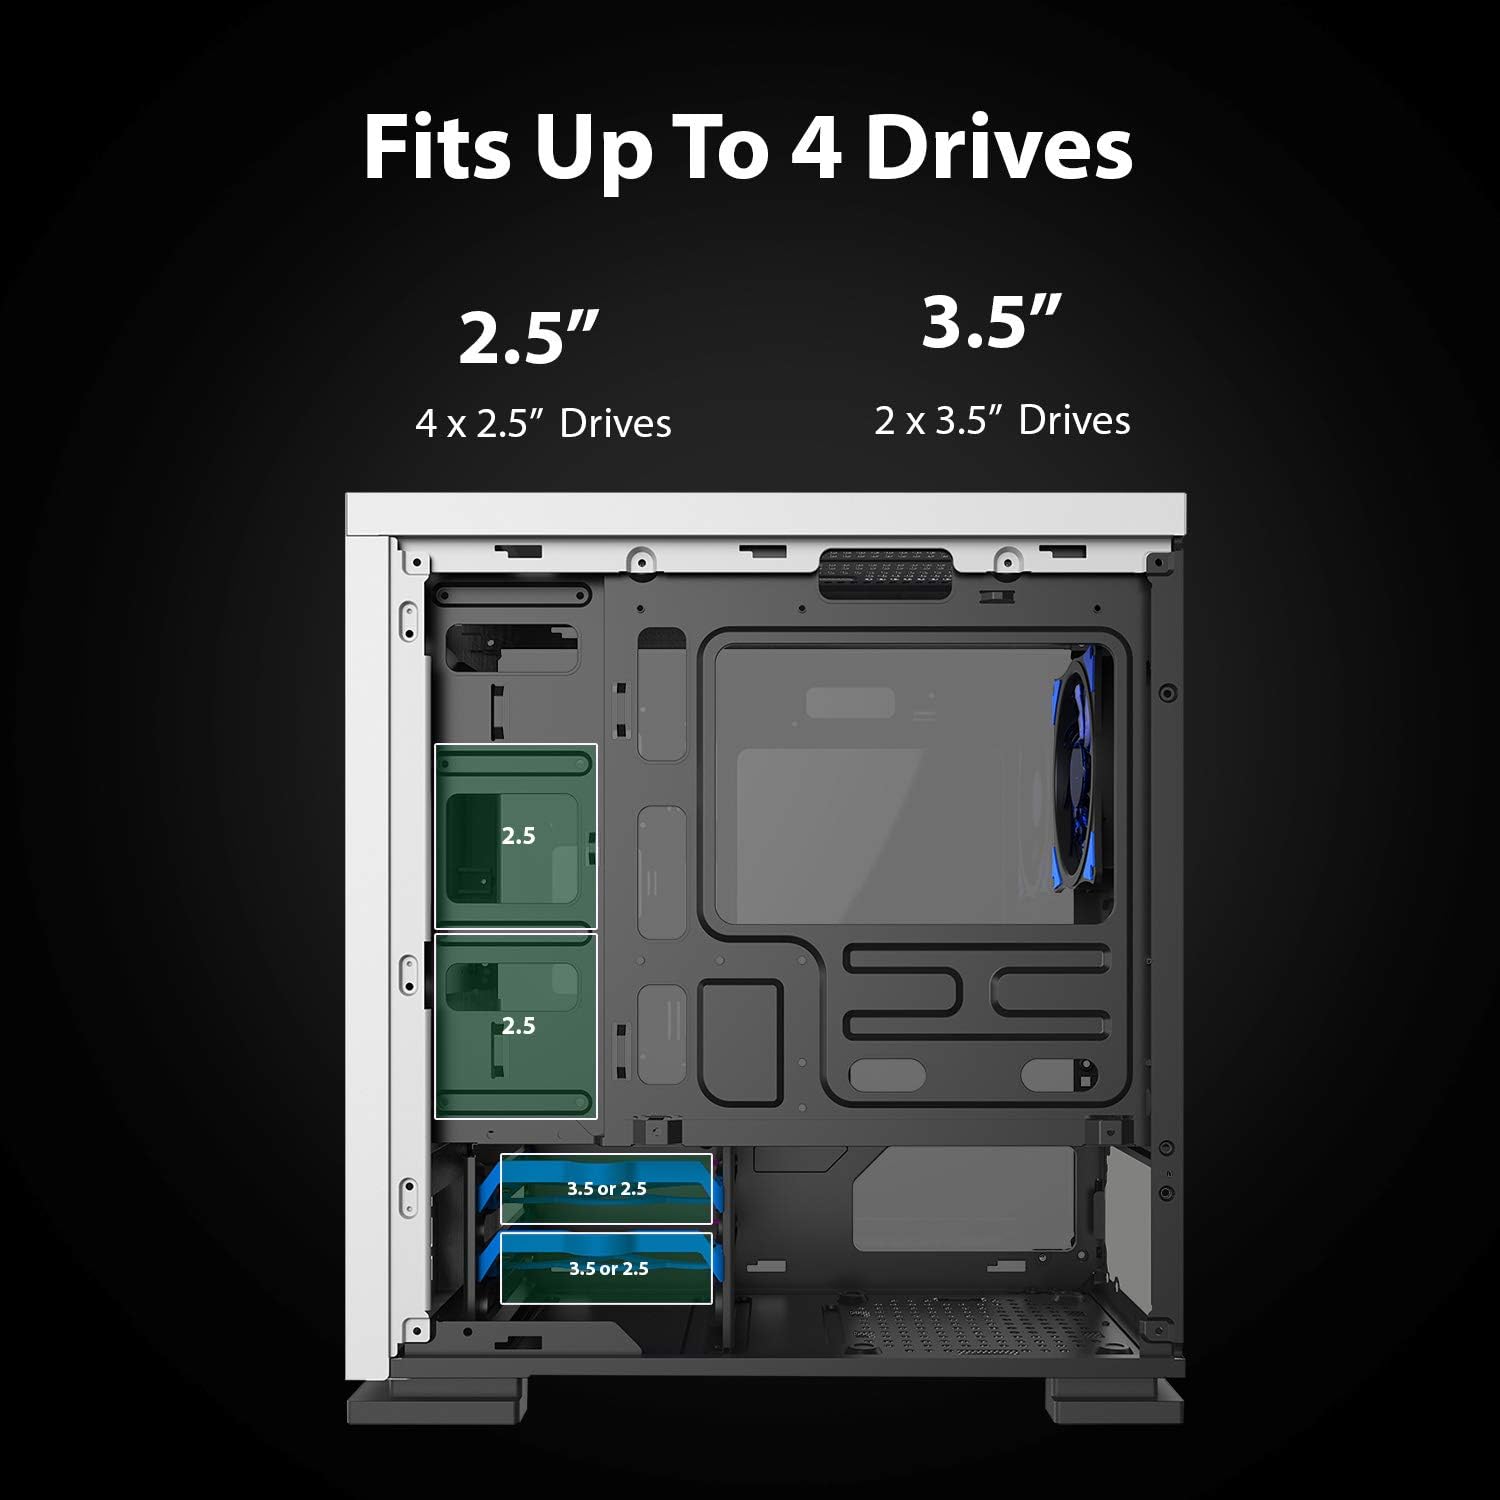
Figure 5.7: Drive bay locations supporting 2.5" and 3.5" storage devices.
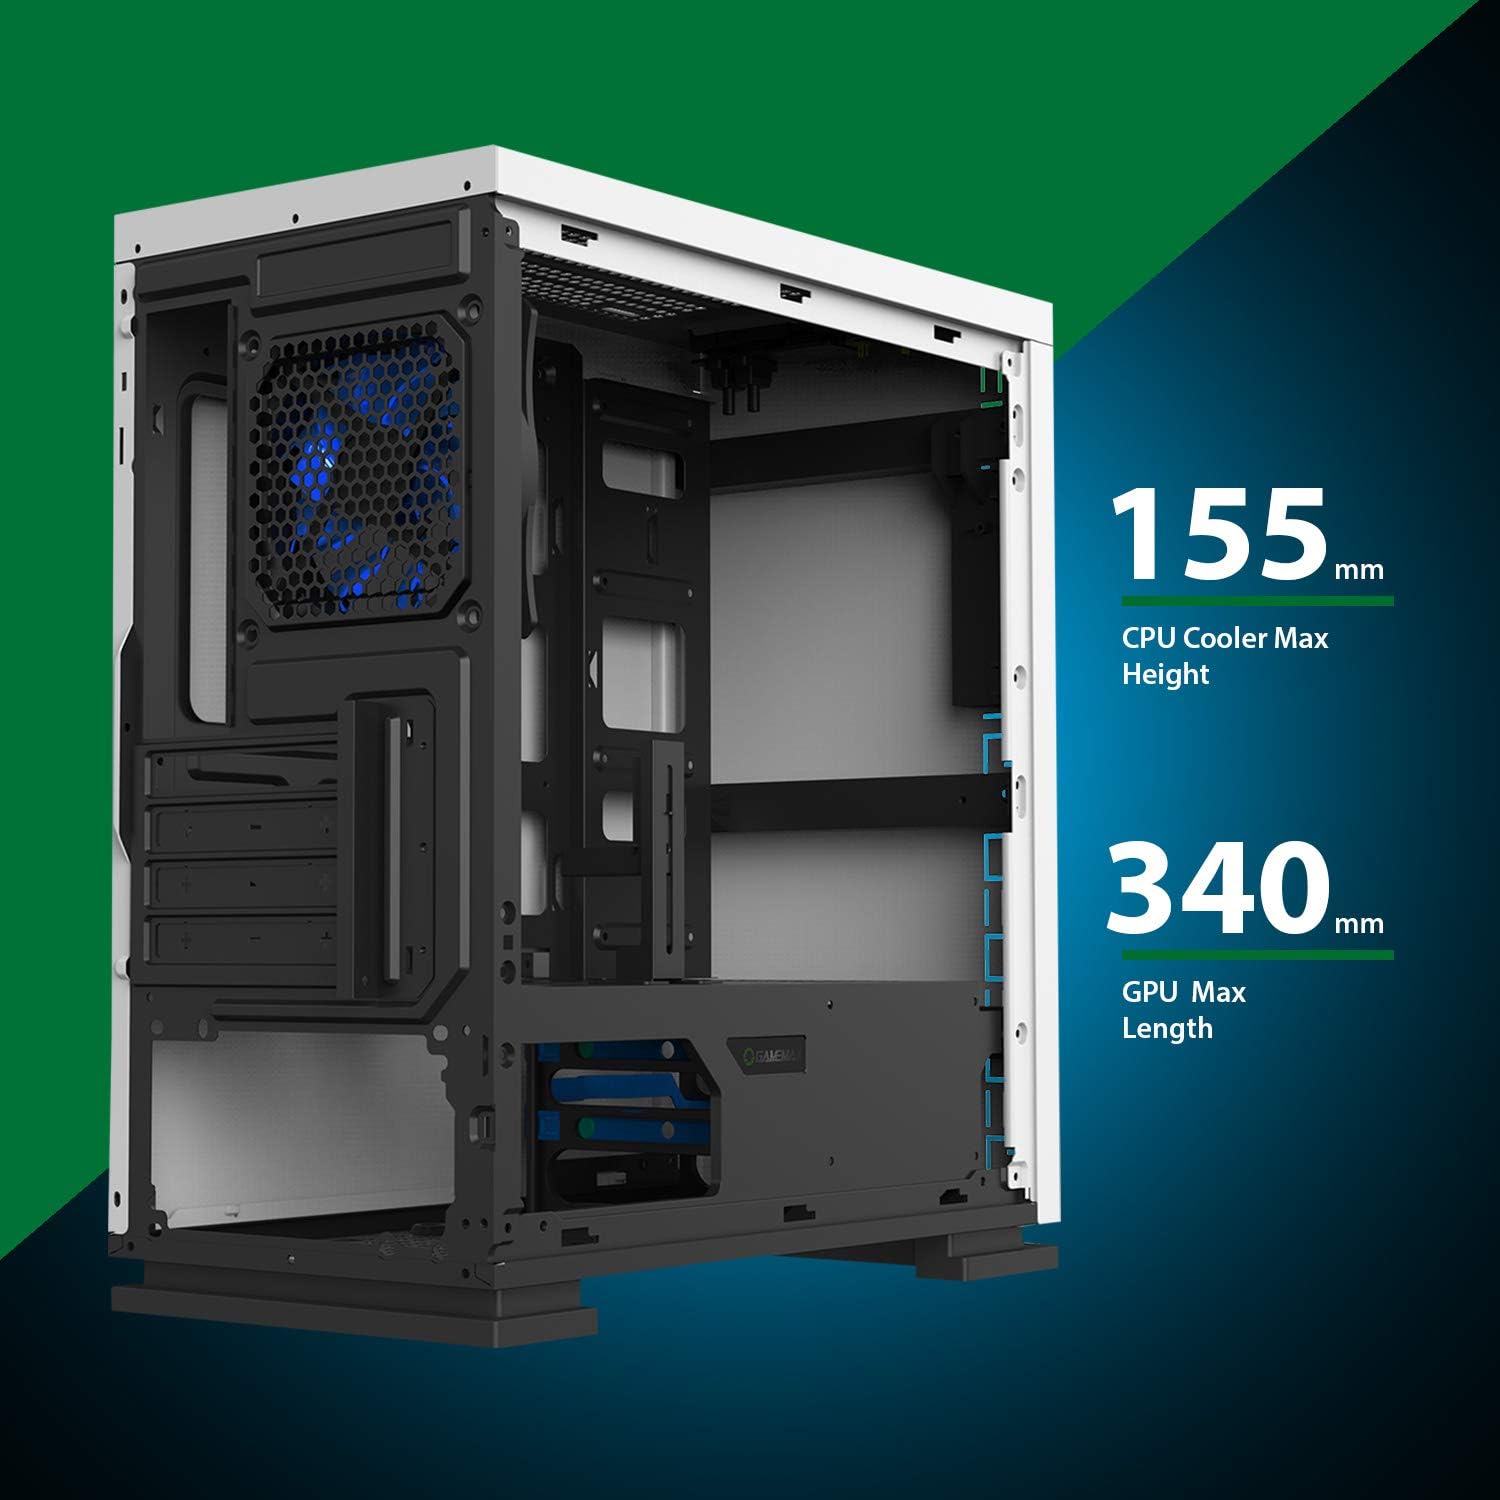
Figure 5.8: Maximum clearance for CPU coolers (155mm) and GPUs (340mm).
6. Орнотуу жана орнотуу
6.1 Даярдоо
- Unpack the chassis and remove all packaging materials.
- Арткы жагындагы бармактарды бурап, каптал панелдерди алып салыңыз.
- Gather necessary tools: Phillips head screwdriver, cable ties.
6.2 Motherboard орнотуу
- I/O калканын шассинин арткы тешигине орнотуңуз.
- Align the motherboard with the pre-installed standoffs. Ensure the standoffs match your Micro ATX motherboard's mounting holes.
- Берилген бурамалар менен энелик тактаны бекитиңиз.
6.3 Электр менен камсыздоону орнотуу
- Place the power supply unit (PSU) into the dedicated compartment at the bottom rear of the case.
- Align the PSU with the screw holes on the rear of the chassis.
- Secure the PSU with the provided screws.
6.4 Сактоочу дискти орнотуу
- 2.5" Drives: Mount 2.5" SSDs/HDDs to the dedicated mounting points on the motherboard tray or within the drive cage using the provided screws.
- 3.5" Drives: Install 3.5" HDDs into the drive cage located beneath the PSU shroud. Slide the drive into the tray and secure it.
6.5 Кеңейтүү картасын (GPU) орнотуу
- Remove the necessary expansion slot covers from the rear of the chassis.
- Insert your graphics card or other expansion card into the appropriate PCIe slot on the motherboard.
- Картаны бурамалар менен бекитиңиз.
- Utilize the adjustable GPU bracket to provide additional support for heavier graphics cards.
6.6 Fan and Cooling Installation
- The case comes with one 120mm Blue LED fan pre-installed at the rear.
- Additional 120mm fans can be installed at the top and front positions as needed.
- Ensure fans are oriented correctly for optimal airflow (intake or exhaust).
6.7 Front Panel Connector Installation
Connect the front panel cables (USB 3.0, USB 2.0, HD Audio, Power SW, Reset SW, Power LED, HDD LED) to their corresponding headers on your motherboard. Refer to your motherboard manual for exact pin layouts.
7. Иштөө
Once all components are installed and cables are connected, replace the side panels. Connect your monitor, keyboard, mouse, and power cable. Press the power button on the top panel to start your system. The pre-installed LED fan will illuminate upon power-on.
8. Техникалык тейлөө
- Чаң чыпкасын тазалоо: Regularly remove and clean the magnetic dust filter located on the top panel to maintain optimal airflow and prevent dust buildup inside the case.
- Жалпы тазалоо: жумшак колдонуу, damp cloth to clean the exterior surfaces of the case. Avoid abrasive cleaners.
- Ички чаңды тазалоо: Periodically use compressed air to clear dust from internal components and fans. Ensure the system is powered off and unplugged before performing internal cleaning.
9. Кыйынчылыктарды
- Система күйбөй жатат: Check all power connections, including the PSU to the wall outlet, PSU to motherboard, and front panel power switch cable to the motherboard.
- Айланбаган күйөрмандар: Verify fan cables are securely connected to the motherboard or fan controller.
- USB порттору иштебейт: Алдыңкы панелдеги USB кабелдери энелик платанын USB уячаларына туура туташкандыгын текшериңиз.
- Дисплей чыгышы жок: Confirm the graphics card is properly seated and connected to power, and the monitor cable is connected to the graphics card, not the motherboard's integrated graphics port (unless using integrated graphics).
10. Техникалык шарттар
| Өзгөчөлүк | Спецификация |
|---|---|
| Модель аты | GMX EXPEDITION |
| Бренд | GAMEMAX |
| Иштин түрү | Micro Tower (MATX) |
| Motherboard шайкештиги | Micro ATX |
| Түс | Expedition White |
| Материал | Поликарбонат (PC) |
| Продукциянын өлчөмдөрү (LxWxH) | 14.96 x 7.4 x 13.78 дюйм (380 x 188 x 350 мм) |
| Элемент Салмагы | 8.58 фунт (3.9 кг) |
| USB 3.0 порттору | 1 |
| USB 2.0 порттору | 2 |
| Муздатуу ыкмасы | Аба, суу |
| Камтылган Fan | 1 x 120mm Blue LED (Rear) |
| CPU муздаткычтын максималдуу бийиктиги | 155мм |
| Максималдуу GPU узундугу | 340мм |
11. Кепилдик жана колдоо
For warranty information and technical support, please visit the official GameMax webсайтына кириңиз же жергиликтүү сатуучуңузга кайрылыңыз.
Официалдуу Webсайт: gamemaxpc.com