1. Киришүү
This manual provides detailed instructions for the installation, operation, and maintenance of your Akozon Digital Programmable Timer. Please read this manual carefully before use to ensure proper function and safety.

Figure 1: Akozon Digital Programmable Timer 12V
2. Продукт бүтүп калдыview жана өзгөчөлүктөрү
The Akozon Digital Programmable Timer is a weekly programmable electronic timer designed for precise control of various electrical equipment. Its robust design and advanced features ensure reliable operation.
- Автоматтык башкаруу: Automatically turns electrical equipment on and off according to preset schedules.
- Жогорку тактык: Equipped with a high-precision chip for accurate timing.
- Апталык программалоо: Supports advanced programming for up to one week in advance.
- Бир нече программалар: Features 16 ON/OFF settings (programs) for daily or weekly scheduling.
- Камдык күч: Integrated high-performance rechargeable battery maintains time display and stores data for over 12 months during power outages.
- Туруктуу курулуш: Housing made of hard, durable plastic for extended lifespan.
- LCD дисплей: Clear LCD for easy viewing of time and program status.
- DIN темир жол орнотуу: Designed for convenient installation on a DIN rail.
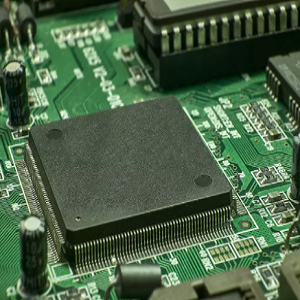
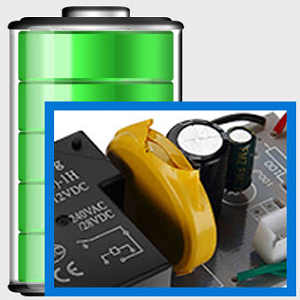
Figure 2: Internal components showing the high-precision chip and rechargeable backup battery.
3. Техникалык шарттар
| Модель номери | Akozonqegcgmk04u-01 |
| Киргизүү көлөмүtage | 12V DC/AC |
| Чыгаруу кубаттуулугу | 25(16)A, 240VAC |
| Энергияны керектөө | <1 Вт |
| Убакыт диапазону | 1 мүнөттөн 168 саатка чейин |
| Программалар | 16 ON/OFF settings (daily/weekly) |
| Убакыт катасы | <±2 seconds/day |
| Power Failure Memory | >12 months (with internal rechargeable battery) |
| Иштөө температурасы | -20°Cден 55°Cге чейин |
| Орнотуу ыкмасы | Темир менен |
| Өлчөмдөрү (болжол менен) | 36мм (W) x 86mm (H) x 65mm (D) |
| Салмагы (болжол менен) | 120г |
| Дисплей | LCD |

3-сүрөт: Продукциянын деталдуу өлчөмдөрү жана негизги мүнөздөмөлөрү.
4. Коопсуздук маалыматы
- Орнотуудан же тейлөөдөн мурун ар дайым электр кубатын ажыратыңыз.
- Электр тогуна урунуп калбашы же шайманга зыян келтирбеши үчүн орнотууну квалификациялуу электрик аткарышы керек.
- Киргизүү көлөмүн камсыз кылыңызtage matches the timer's specifications (12V DC/AC). Connecting to incorrect voltagд аппаратты бузушу мүмкүн.
- Do not expose the device to excessive moisture or extreme temperatures outside the specified operating range.
- Do not disassemble the timer; refer servicing to qualified personnel.
5. Орнотуу жана орнотуу
5.1 DIN Rail Installation
The timer is designed for easy installation on a standard 35mm DIN rail. Simply clip the timer onto the rail in your distribution box.

4-сүрөт: Мисample of the timer installed on a DIN rail within a distribution box.
5.2 Электр зымдары боюнча нускамалар
Refer to the wiring diagram below for correct connection. Ensure all connections are secure and comply with local electrical codes.
- 1 жана 2-терминалдар: Power input (12V DC/AC).
- 3, 4, 5-терминалдар: Output contacts.
- 3: Адатта жабык (NC)
- 4: Жалпы (COM)
- 5: Адатта ачык (ЖОК)

Figure 5: Detailed wiring diagram showing connections for power input and output contacts.

6-сүрөт: Мисamples of wiring methods, including direct load connection and connection via a contactor.
6. Иштөө нускамалары
6.1 Initial Setup and Unlocking
- Upon first use, connect the timer to power (12V DC/AC).
- басыңыз RESET button to clear all previous settings and initialize the timer.
- The timer display may be locked. To unlock, press the C/R button four times. The lock icon will disappear from the display. If no operation occurs for 15 seconds, the timer will automatically lock again.
6.2 Учурдагы убакытты жана күндү орнотуу
After unlocking, set the current time and day:
- басыңыз P button (Program button) once.
- басыңыз D+ button to set the current day of the week (MO, TU, WE, TH, FR, SA, SU).
- басыңыз H+ учурдагы саатты коюу үчүн баскыч.
- басыңыз M+ учурдагы мүнөттү коюу үчүн баскыч.
- басыңыз P Убакытты орнотуу режиминен чыгуу үчүн баскычын кайра басыңыз.

Сүрөт 7: Жакын пландан view of the timer's control buttons.

Figure 8: Explanation of button functions and display elements, including day, hour, minute, and reset.
6.3 Кол менен башкаруу
басыңыз MANUAL C/R button to cycle through manual control modes:
- КҮЙҮК: Чыгаруу үзгүлтүксүз күйүк.
- АВТО: Timer operates according to programmed schedules.
- ӨЧҮК: Чыгаруу үзгүлтүксүз ӨЧҮК.
Тандоо АВТО for the timer to follow your programmed settings.
7. КҮЙГҮЗҮҮ/ӨЧҮРҮҮ графигин программалоо
The timer supports up to 16 ON/OFF programs. Follow these steps to set your desired schedules:
- басыңыз P button to enter programming mode. The display will show "1 ON".
- Басыңыз D+ to select the day(s) for this program. You can choose a single day, weekdays, weekends, or all days.
- Басыңыз H+ КҮЙГҮЗҮҮ саатын коюу үчүн.
- Басыңыз M+ КҮЙГҮЗҮҮ МҮНӨТҮН коюу үчүн.
- Басыңыз P кайрадан. Дисплейде "1 OFF" көрсөтүлөт.
- Басыңыз D+ to select the day(s) for this OFF program (usually the same as ON, but can be different).
- Басыңыз H+ ӨЧҮРҮҮ саатын коюу үчүн.
- Басыңыз M+ ӨЧҮРҮҮ мүнөтүн коюу үчүн.
- Кошумча КҮЙГҮЗҮҮ/ӨЧҮРҮҮ программалары үчүн (16ге чейин) 1-8 кадамдарды кайталаңыз. P to advance to the next program number.
- Программалоо режиминен чыгуу үчүн баскычты басыңыз MANUAL C/R button. Ensure the timer is set to АВТО mode for programs to execute.
Note: If you need to cancel a program, press the C/R баскычы viewing the specific ON or OFF program. This will clear the settings for that program.
8. Тиркемелер
The Akozon Digital Programmable Timer is versatile and can be used in various applications, including:
- Controlling lamps and lighting systems (e.g., streetlights, garden lights, neon signs).
- Managing water heaters and preheaters.
- Automating agricultural facilities (e.g., irrigation systems).
- Controlling broadcasting equipment.
- Scheduling household appliances.
- Operating sprayers and bottling equipment.

9-сүрөт: Мисamples of environments where the timer can be used, such as controlling outdoor lighting and industrial equipment.
9. Техникалык тейлөө
- Таймерди таза жана чаңсыз кармаңыз. Тазалоо үчүн жумшак, кургак чүпүрөк колдонуңуз.
- Абразивдүү тазалагычтарды же эриткичтерди колдонбоңуз.
- Ашыкча ысып кетүүнүн алдын алуу үчүн аппараттын айланасында туура желдетүүнү камсыз кылыңыз.
- The internal battery is designed for long-term backup. If the timer consistently loses time or program settings after a power outage, the internal battery may need professional inspection.
10. Кыйынчылыктарды
| Көйгөй | Мүмкүн себеп | Чечим |
|---|---|---|
| Дисплей бош. | Электр менен камсыздоо же ички батарейка түгөнбөйт. | Check power connections. Allow time for the internal battery to charge (connect to power for several hours). |
| Timer does not respond to button presses. | Timer is locked. | басыңыз C/R button four times to unlock. |
| Программалар ишке ашпай жатат. | Timer is not in AUTO mode. Incorrect program settings. | Басыңыз MANUAL C/R until "AUTO" is displayed. Review жана программанын туура жөндөөлөрүн орнотуңуз. |
| Time or settings are lost after power outage. | Internal backup battery is not charging or is depleted. | Ensure the timer is connected to power for sufficient time to charge the internal battery. If the issue persists, contact customer support. |
| Output is always ON or OFF, ignoring programs. | Timer is in manual ON or OFF mode. | Басыңыз MANUAL C/R until "AUTO" is displayed. |
11. Кепилдик жана колдоо
Akozon products are manufactured to high-quality standards. For warranty information or technical support, please refer to the contact details provided with your purchase or visit the official Akozon webсайт.
Кепилдик дооматтары үчүн сатып алганыңыздын далилин сактап коюңуз.