
1. Киришүү
Thank you for choosing the Petlibro Automatic Pet Feeder. This device is designed to provide consistent and timely meals for your pet, ensuring they are fed according to a set schedule, even when you are away. Please read this manual thoroughly before use to ensure proper operation and maintenance of your feeder.
2. Коопсуздук боюнча маанилүү маалымат
Төмөнкү коопсуздук чараларын сактаңыз, зыян же буюмдун бузулушуна жол бербөө үчүн:
- Read all instructions carefully before operating the feeder.
- Колдонбогондо же чогултуу учурунда фидерди балдардан жана үй жаныбарларынан алыс кармаңыз.
- Негизги блокту сууга же башка суюктуктарга салбаңыз.
- Use only dry pet food with a diameter between 5-15mm. Do not use wet, canned, or moist food.
- Тамактандыргычтын туруктуу, тегиз бетке коюлганын текшериңиз.
- Тазалоодон же техникалык тейлөө жүргүзүүдөн мурда фидерди сууруп алыңыз.
- Фидерди өзүңүз оңдоого же өзгөртүүгө аракет кылбаңыз. Жардам алуу үчүн кардарларды колдоо бөлүмүнө кайрылыңыз.
- Батареяларды жергиликтүү эрежелерге ылайык таштаңыз.
3. Пакеттин мазмуну
Сураныч, пакеттин мазмунун текшерип, бардык буюмдар бар экенин текшериңиз:
- Petlibro Automatic Pet Feeder Main Unit
- Тамак-аш идиш
- USB-C Power Adapter and Cable
- Кургаткыч баштык (алдын ала орнотулган же өзүнчө)
- User Manual
4. Продукт бүтүп калдыview
Familiarize yourself with the different parts of your Petlibro Automatic Pet Feeder:
- Азык-түлүк танкы: Stores dry pet food.
- Капкак: Covers the food tank to keep food fresh.
- Башкаруу панели: Buttons and display for setting schedules and manual feeding.
- Азык-түлүк дүкөнү: Тамактын идишке куюлган жери.
- Тамак-аш идиш: Detachable bowl for your pet to eat from.
- Power Port (USB-C): Кубат адаптерине туташат.
- Батарея бөлүмү: Holds backup batteries (not included).
5. Орнотуу
Follow these steps to set up your Petlibro Automatic Pet Feeder:
5.1 Ассамблея
- Таңылганын ачуу: Бардык компоненттерди таңгактан кылдаттык менен алып салыңыз.
- Install Food Bowl: Place the food bowl securely at the base of the feeder.
- Install Food Tank: Align the food tank with the base and twist to lock it into place.
- Insert Desiccant Bag: If not pre-installed, open the desiccant compartment (usually under the lid) and insert the desiccant bag to keep food fresh. Replace every 15-30 days.

Image: Step-by-step assembly guide for the Petlibro Automatic Pet Feeder. It shows how to twist open the lid, take out the food bowl, put the desiccant bag into its compartment, install the food tank, put the lid back on, and finally install the food bowl.
5.2 Электр энергиясы
The feeder can be powered by a USB-C adapter or backup batteries.
- Негизги күч: Connect the USB-C power adapter to the feeder's power port and plug it into a wall outlet.
- Батареянын камдык көчүрмөсү (кошумча): Бийлик үчүнtages, install 3 D-cell batteries (not included) into the battery compartment at the bottom of the feeder. This ensures continuous operation.
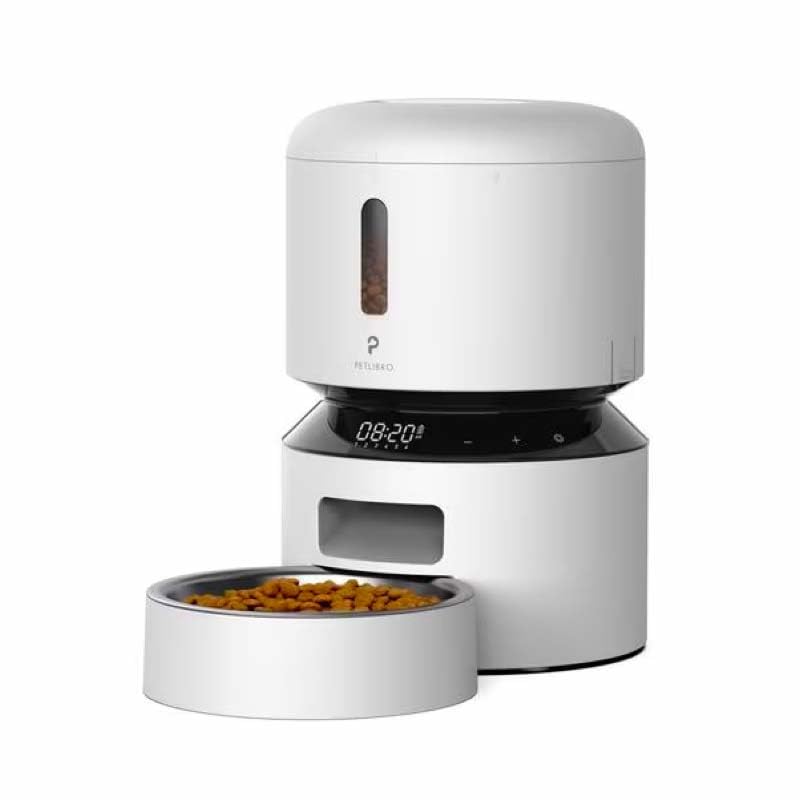
Image: Diagram illustrating the dual power supply system of the Petlibro Automatic Pet Feeder. It shows the USB-C adapter connected for primary power and the battery compartment for backup power. A note indicates that batteries are not included.
6. Иштөө нускамалары
Once assembled and powered, you can begin programming your feeder.
6.1 Азык-түлүк идиштерин толтуруу
- Азык-түлүк сактагычтын капкагын ачыңыз.
- Pour dry pet food into the tank. Ensure the food is within the recommended size (5-15mm diameter).
- Close the lid securely to maintain freshness.
6.2 Setting Meal Schedules and Portions
The feeder allows you to schedule up to 6 meals per day, with 1 to 50 portions per meal.

Image: A cat eating from the Petlibro Automatic Pet Feeder, illustrating the feeder's function. Text overlays indicate "Portion: 1-50" and "Meals: 1-6", highlighting the customizable feeding schedule.
- Учурдагы убакытты коюу: Use the control panel buttons (e.g., "SET", "UP", "DOWN") to set the current time.
- Программанын тамактануу убактысы: Press the "MEAL" button to enter meal programming mode. Select the desired meal number (e.g., Meal 1) and set the feeding time.
- Бөлүмдөрдү коюу: For each programmed meal, set the number of portions (1-50) using the "PORTION" or "UP/DOWN" buttons.
- Repeat for all meals: Program up to 6 meals as needed.
- Жөндөөлөрдү сактоо: Ensure all settings are saved according to the feeder's specific interface (usually by pressing "SET" or waiting for auto-save).
6.3 Кол менен тамактандыруу
To dispense food instantly, press the manual feed button (often labeled "FEED" or a paw icon) on the control panel. Each press typically dispenses one portion.
7. Техникалык тейлөө жана тазалоо
Үзгүлтүксүз тазалоо гигиенаны камсыз кылат жана фидериңиздин иштөө мөөнөтүн узартат.
- Ажыратыңыз: Always unplug the feeder from the power outlet before cleaning.
- Бөлүп салуу: Remove the food bowl and food tank.
- Таза компоненттери: Wash the food bowl and food tank with mild soap and water. Rinse thoroughly and dry completely before reassembling.
- Негизги блокту тазалоо: Негизги блокту жумшак менен сүртүңүз, damp кездеме. Негизги блокту сууга салбаңыз.
- Replace Desiccant: Replace the desiccant bag every 15-30 days to maintain food freshness.
- Кайра чогултуу: Ensure all parts are dry before reassembling the feeder.
8. Кыйынчылыктарды
If you encounter issues with your feeder, refer to the following common problems and solutions:
| Көйгөй | Мүмкүн себеп | Чечим |
|---|---|---|
| Бергич күйбөй жатат. | No power connection; batteries depleted or incorrectly installed. | Check power adapter connection; replace batteries or ensure correct polarity. |
| Тамак-аш берилбей жатат. | Food tank empty; food jammed; dispenser blocked; incorrect schedule settings. | Refill food tank; clear any food jams; check dispenser for blockages; verify meal schedule and portion settings. |
| Тамак-аш өтө көп/өтө аз тарайт. | Туура эмес бөлүктөрдүн жөндөөлөрү. | Adjust portion settings for each meal. |
| Дисплей иштебейт. | Электр энергиясы маселеси; дисплейдин бузулушу. | электр менен камсыздоону текшерүү; көйгөй чечилбесе, кардарларды колдоо бөлүмүнө кайрылыңыз. |
9. Техникалык шарттар
| Өзгөчөлүк | Деталь |
|---|---|
| Продукт аты | Petlibro Automatic Pet Feeder |
| Модел | 3L Автоматтык жаныбарларды азыктандыргыч |
| Кубаттуулугу | 3 литр |
| Материал | Food-grade ABS plastic |
| Электр камсыздоо | USB-C adapter (5V/1A); 3 x D-cell batteries (backup, not included) |
| Күнүнө тамактануу | 6га чейин тамак |
| Тамакка порциялар | 1-50 portions (approx. 5-10g per portion, depending on food density) |
| Сунушталган тамак-аштын өлчөмү | 5-15mm dry kibble |
| Түс | Ак |
10. Кепилдик жана колдоо
Your Petlibro Automatic Pet Feeder comes with a standard manufacturer's warranty. For detailed warranty information, please refer to the warranty card included in your package or visit the official Petlibro webсайт.
If you have any questions, require technical support, or need assistance with your product, please contact Petlibro customer service. Contact details can typically be found on the product packaging, the official website, or by searching for "Petlibro customer support" online.