
1. Киришүү
Сатып алганыңыз үчүн рахматasing the DBPOWER RD810 Portable Mini Projector. This manual provides essential information for the safe and optimal use of your projector. Please read it thoroughly before operating the device and retain it for future reference.
This projector is designed for home entertainment, offering a portable solution for displaying videos, photos, and presentations. Ensure all safety guidelines are followed to prevent damage to the device or personal injury.
2. Пакеттин мазмуну
Please verify that all components are present in your package. If any items are missing or damaged, contact DBPOWER customer support.
- DBPOWER RD810 Portable Mini Projector
- Алыстан башкаруу
- Электр кабели
- HDMI кабели
- AV Cable
- User Manual
3. Продукт бүтүп калдыview
Familiarize yourself with the various parts of your DBPOWER RD810 projector.

Сүрөт 3.1: Алдыңкы view of the DBPOWER RD810 Projector, showing the lens and ventilation.
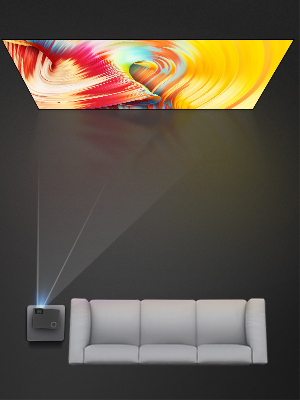
3.2-сүрөт: Каптал view of the projector, illustrating input ports such as HDMI, USB, and VGA.
Негизги компоненттер:
- Объектив: Сүрөттү экранга проекциялайт.
- Фокус шакеги: Сүрөттүн тунуктугун тууралайт.
- Keystone Correction Knob: Трапеция сымал сүрөттүн бурмаланышын оңдойт.
- Башкаруу панели: On-device buttons for basic navigation and settings.
- Киргизүү порттору: HDMI, USB, VGA for connecting various devices.
- Электр порту: Электр кабелин туташтыруу үчүн.
- Вентиляция торлору: Essential for heat dissipation. Do not block.
4. Орнотуу
4.1 Орнотуу
- Place the projector on a stable, flat surface (Tabletop Mount).
- Проектордун айланасында туура желдетүү үчүн жетиштүү орун бар экендигин текшериңиз.
- Position the projector perpendicular to the projection surface for the best image quality.
4.2 Кубат туташтыруу
- Электр кабелин проектордун электр портуна туташтырыңыз.
- Электр кабелинин экинчи учун розеткага сайыңыз.
- Проектордогу кубат индикаторунун жарыгы күйүп турушу керек.
4.3 Киргизүү түзүлүштөрүн туташтыруу
The projector supports HDMI, USB, and VGA connectivity.
- HDMI: Connect an HDMI cable from your source device (e.g., laptop, DVD player, game console) to the HDMI port on the projector.
- USB: Медиа файлдарды ойнотуу үчүн USB дискти USB портуна салыңыз files directly. Note: The USB port is primarily for media playback and charging, not for direct computer connection for display.
- VGA: Компьютериңизден VGA кабелин проектордун VGA портуна туташтырыңыз.
- Аудио чыгаруу: If desired, connect external speakers to the projector's audio output port for enhanced sound.
5. Иштөө нускамалары
5.1 Күйгүзүү/өчүрүү
- Күйгүзүү: Press the power button on the projector or the remote control. The projector lamp күйгүзүлөт.
- Өчүрүү: Press the power button again. The projector will initiate a shutdown sequence. Do not unplug the power cable until the fan has stopped and the projector has fully cooled down.
5.2 Фокусту жана Keystone жөндөөсүн
- Фокус: Rotate the focus ring located around the lens until the projected image appears sharp and clear.
- Негизги ташты оңдоо: If the image appears trapezoidal (wider at the top or bottom), adjust the keystone correction knob until the image is rectangular.
5.3 Киргизүү булагын тандоо
After connecting your input device, you need to select the correct source:
- Press the 'Source' button on the remote control or the projector's control panel.
- Use the arrow keys to navigate through the input options (HDMI, USB, VGA).
- Press 'OK' or 'Enter' to confirm your selection.
5.4 Меню Навигациясы
Use the 'Menu' button on the remote or projector to access settings. Navigate with arrow keys and confirm with 'OK' or 'Enter'. Common settings include Picture Mode, Aspect Ratio, Sound Settings, and Time Settings.
6. Техникалык тейлөө
6.1 Линзаны тазалоо
Use a soft, lint-free cloth or lens cleaning paper to gently wipe the lens. Avoid using abrasive cleaners or excessive force, which can scratch the lens surface.
6.2 Ventilation Cleaning
Regularly check and clean the ventilation grilles to prevent dust buildup, which can lead to overheating. Use a soft brush or a vacuum cleaner with a brush attachment to remove dust from the vents.
6.3 Сактоо
Проекторду узак убакыт бою колдонбогон учурда, аны салкын, кургак жана чаңсыз жерде сактаңыз. Бузулуп калбашы үчүн түпнуска таңгагын же коргоочу кутучаны колдонуңуз.
7. Кыйынчылыктарды
| Көйгөй | Мүмкүн себеп | Чечим |
|---|---|---|
| Күч жок | Power cable not connected; Power outlet faulty; Projector overheated. | Ensure power cable is securely connected; Test power outlet; Allow projector to cool down. |
| Сүрөт жок | Incorrect input source selected; Input cable loose or faulty; Source device not outputting signal. | Select correct input source; Check cable connections; Ensure source device is on and configured to output. |
| бүдөмүк сүрөт | Focus not adjusted; Keystone not adjusted; Projector too far/close to screen. | Adjust focus ring; Adjust keystone correction knob; Reposition projector. |
| Үн жок | Volume too low; Mute enabled; External speakers not connected/configured; Source device audio settings. | Increase volume; Disable mute; Connect external speakers if desired; Check audio settings on source device. |
| Пульт иштебейт | Батареялар түгөнгөн; Пульт менен проектордун ортосундагы тоскоолдук; Пульт сенсору бөгөттөлгөн. | Replace batteries; Remove obstructions; Ensure remote sensor on projector is clear. |
8. Техникалык шарттар
| Өзгөчөлүк | Спецификация |
|---|---|
| Бренд | DBPOWER |
| Модель аты | RD810 |
| Модель номери | 810X |
| Байланыш технологиясы | HDMI, USB, VGA |
| Native Display Resolution | 800 x 480 |
| Дисплейдин максималдуу чечилиши | 1920 x 1080 |
| Дисплей түрү | LCD |
| Контраст катышы | 1000:1 |
| Жарык булагы иштөө мөөнөтү | 30,000 саат |
| Ватtage | 24 ватт |
| Башкаруу ыкмасы | Пульт, баскыч менен башкаруу |
| Монтаж түрү | Столдун үстү |
| Форма фактору | Portable |
9. Кепилдик жана колдоо
DBPOWER products are designed and manufactured to the highest quality standards. For information regarding warranty coverage, technical support, or service inquiries, please refer to the warranty card included with your product or visit the official DBPOWER website. Please have your model number (RD810 / 810X) and purchase details ready when contacting support.