
1. Киришүү
Thank you for choosing the TFA Dostmann CLOCCO 60.2549.08 Radio-Controlled Alarm Clock. This device combines a minimalist wood-look design with precise radio-controlled timekeeping, an indoor temperature display, and an alarm function. This manual provides essential information for the correct setup, operation, and maintenance of your new alarm clock.
Негизги өзгөчөлүктөрү:
- Радио башкарылган убакыт: Automatic synchronization with the atomic clock for high precision, eliminating the need for manual time adjustments.
- Ички температура дисплейи: Integrated sensor accurately displays the current room temperature in Celsius.
- Minimalist Wood Look Design: Эстетикалык жактанasing design suitable for various environments, including bedrooms, living rooms, and offices.
- Өзгөрмө дисплей: Shows time, date, day of the week, or indoor temperature. The display can be set to react to sound or touch.
- Автоматтык караңгылатуу: The display brightness automatically adjusts between 7:00 PM and 6:59 AM for comfortable viewаз жарык шарттарда.
- Ойготкуч функциясы: Features a reliable alarm with a pre-settable wake-up time.
2. Орнотуу
2.1 Таңгактан чыгаруу жана ага кошулган компоненттер
Carefully remove all components from the packaging. Please ensure the following items are present:
- TFA Dostmann CLOCCO 60.2549.08 Alarm Clock
- Кубаттуу адаптер
- 1 x CR2 Battery (for settings backup)
- Instruction Manual
2.2 Электр энергиясы
The CLOCCO alarm clock operates primarily via the included power adapter. The CR2 battery serves as a backup to retain settings during power outages.
- Insert the CR2 battery into the designated battery compartment, observing the correct polarity (+/-). This battery ensures your settings are saved if the main power is interrupted.
- Connect the power adapter cable to the DC input port on the back of the alarm clock.
- Кубат адаптерин кадимки электр розеткасына сайыңыз. Дисплей күйөт.
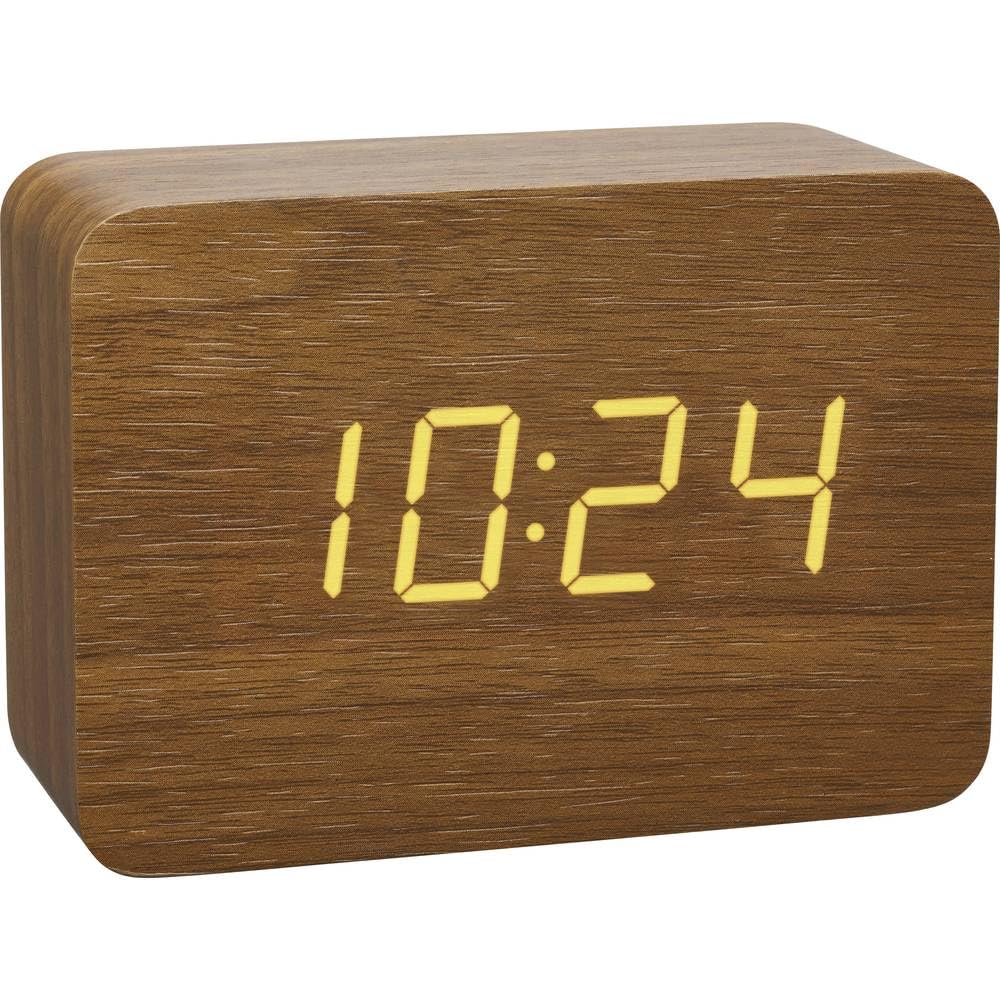
Сүрөт 1: Алдыңкы view of the CLOCCO alarm clock, showing the digital display.
2.3 Баштапкы убакытты синхрондоштуруу
Upon initial power-up, the alarm clock will automatically attempt to synchronize with the DCF77 radio signal (atomic clock in Frankfurt, Germany). This process may take several minutes to a few hours, depending on your location and environmental conditions.
- Place the alarm clock near a window, away from electronic devices that might cause interference.
- A flashing antenna symbol on the display indicates that the clock is searching for the radio signal.
- Once synchronized, the antenna symbol will become solid, and the correct time will be displayed. The clock will automatically check and adjust the time, typically between 2:00 AM and 4:00 AM daily.
- If synchronization fails, you may need to manually set the time (refer to Section 3.1).
3. Иштөө нускамалары
3.1 Display Modes and Manual Settings
The CLOCCO alarm clock offers various display modes and manual adjustment options:

Figure 2: Feature diagram showing display modes and controls.
- Дисплей режимдерин алмаштыруу: Press the "SET" button (usually located on the back or top) to cycle through display modes: Time, Date, Day of the Week, Indoor Temperature, or an automatic cycle between these.
- Manual Time/Date Setting: If radio synchronization is unavailable or undesired, press and hold the "SET" button until the time digits flash. Use the "UP" and "DOWN" buttons to adjust the hour, then press "SET" to confirm and move to minutes, then date, and so on. Press "SET" again to exit manual setting mode.
- Температура бирдиги: The temperature is displayed in Celsius (°C). There is no option to change to Fahrenheit.
3.2 Сигналды коюу
Ойготкуч убактысын коюу үчүн:
- Press the "ALARM" button (usually on the back or top) once to display the current alarm time.
- Ойготкуч сааттын цифралары өчүп калгыча "SAYGAR" баскычын басып, кармап туруңуз.
- Use the "UP" and "DOWN" buttons to adjust the desired alarm hour. Press "ALARM" to confirm.
- The minute digits will flash. Use "UP" and "DOWN" to adjust the alarm minutes. Press "ALARM" to confirm.
- To activate or deactivate the alarm, press the "ALARM" button briefly when the alarm time is displayed. An alarm icon will appear/disappear on the display.
3.3 Dimming Function and Sound Activation
- Автоматтык караңгылатуу: The display brightness automatically reduces between 7:00 PM and 6:59 AM to prevent excessive light during nighttime hours.
- Жарыктыкты кол менен жөндөө: (If available, typically via a dedicated button or holding a button) Some models allow manual adjustment of brightness levels. Refer to the specific button labels on your device.
- Sound-Activated Display: When operating on battery power (if applicable) or in a specific mode, the display can be set to turn off and only illuminate when a sound is detected (e.g., a clap) or when the clock is touched. This conserves energy and reduces light pollution. Consult your device's specific button for this feature (e.g., "DOWN" button for 5 seconds as mentioned in a review).

Figure 3: The CLOCCO alarm clock in a bedroom setting, highlighting its clear display.
4. Техникалык тейлөө
4.1 Тазалоо
Ойготкуч саатыңыздын сырткы көрүнүшүн жана иштешин сактоо үчүн:
- Бетти жумшак, кургак же бир аз сүртүңүз damp кездеме.
- Do not use abrasive cleaners, solvents, or polishing agents, as these can damage the finish and display.
- түзмөктүн тешиктерине суюктуктун кирбегенин текшериңиз.
4.2 Battery Replacement (CR2 Backup Battery)
The CR2 battery is primarily for backup. If you notice settings are not retained after a power interruption, it may be time to replace this battery.
- Locate the battery compartment on the back or bottom of the device.
- Бөлүмдүн капкагын ачыңыз.
- Remove the old CR2 battery and dispose of it according to local regulations.
- Туура полярдуулукту камсыз кылуу менен жаңы CR2 батареясын салыңыз.
- Батарея уясынын капкагын бекем жабыңыз.
5. Кыйынчылыктарды
| Көйгөй | Мүмкүн себеп | Чечим |
|---|---|---|
| Дисплей бош же күйбөйт. | No power, power adapter disconnected, or sound-activated display is active. | Ensure the power adapter is securely connected to both the clock and the outlet. If using sound activation, make a sound or touch the clock. |
| Radio-controlled time is not synchronizing. | Poor signal reception due to location, interference, or initial setup. | Move the clock closer to a window and away from other electronic devices. Allow several hours for synchronization. If issues persist, manually set the time. |
| Дисплей өтө жарык же өтө күңүрт. | Automatic dimming active, or manual brightness setting needs adjustment. | The clock automatically dims between 7 PM and 7 AM. Check if your model has manual brightness adjustment buttons. |
| Ойготкуч угулбайт. | Ойготкуч иштетилген эмес же туура эмес орнотулган. | Verify that the alarm is activated (alarm icon visible) and that the alarm time is set correctly (refer to Section 3.2). |
| Электр энергиясы өчүрүлгөндөн кийин жөндөөлөр жоголот. | CR2 резервдик батареясы түгөнүп калган же жок. | Replace the CR2 backup battery (refer to Section 4.2). |
6. Техникалык шарттар
| Бренд: | TFA Dostmann |
| Модель номери: | 60.2549.08 |
| Өлчөмдөрү (L x W x Y): | 100 x 41 x 70 мм |
| Салмагы: | 128 грамм |
| Материал: | Plastic (with wood look finish) |
| Дисплей түрү: | Digital LED |
| Кубат булагы: | Power Adapter (included), 1 x CR2 Battery (included for backup) |
| Өзгөчөлүктөр: | Radio-controlled time, Alarm, Large display, Temperature display (°C), Automatic dimming, Sound-activated display |
| Колдонуу: | Үй ичинде гана колдонуу |
| Smart Home шайкештиги: | Акылдуу үй системалары менен шайкеш келбейт |
7. Кепилдик жана колдоо
7.1 Кепилдик маалыматы
This product comes with a limited warranty. Please refer to the warranty card included in your packaging or visit the official TFA Dostmann website for detailed warranty terms and conditions. The availability of spare parts in the EU is typically 1 year from the date of purchase.
7.2 Кардарларды колдоо
Should you encounter any issues not covered in this manual or require further assistance, please contact TFA Dostmann customer support. Contact information can usually be found on the product packaging, the official webсайты же сатуучу аркылуу.
Көбүрөөк маалымат алуу үчүн расмий иш сапары менен TFA Dostmann Store.