
Introduction
This manual provides instructions for the safe operation, assembly, maintenance, and troubleshooting of your WEN 6559 6-Inch Benchtop Jointer. This tool is designed for flattening and squaring edges of wooden workpieces. Please read and understand all instructions before use to ensure safe and efficient operation.
The WEN 6559 features a 10-amp motor and a two-blade 6-1/8 inch cutterhead, capable of up to 20,000 cuts per minute. It includes an adjustable infeed table for depth control (0 to 1/8 inches), a spacious 6-1/4 x 28-1/2 inch table, and a fence that bevels up to 45 degrees.
Жалпы коопсуздук маалыматы
ЭСКЕРТҮҮ: Электр шаймандарын иштетүүдө өрт, электр шок жана жеке жаракат алуу коркунучун азайтуу үчүн ар дайым негизги коопсуздук чараларын сактаңыз.
- Read all instructions before operating the jointer.
- Көздү коргоочу, угууну коргоочу жана чаңдан коргоочу бет кап сыяктуу тиешелүү жеке коргонуу каражаттарын (ЖКК) кийиңиз.
- Иш аянты таза, жакшы жарык жана тоскоолдуктар жок болушун камсыз кылыңыз.
- Балдарды жана жанындагы адамдарды операция аймагынан алыс кармаңыз.
- Do not operate the jointer in damp же нымдуу шарттар.
- Always disconnect power before making adjustments, changing blades, or performing maintenance.
- Use push sticks and push blocks to keep hands away from the cutterhead.
- Never reach over the cutterhead while the machine is running.
- Ensure the workpiece is free of nails, screws, or other foreign objects.
- Do not force the tool; allow the jointer to work at its intended speed.
- Ар дайым туура бутту жана тең салмактуулукту сактаңыз.
- Inspect the jointer for damage before each use. Do not operate if damaged.
Пакеттин мазмуну
Төмөндө тизмеленген нерселердин баары пакетиңизге камтылганын текшериңиз:
- WEN 6-Inch Benchtop Jointer
- Push Stick
- Push Block
- Adjustable 2-1/2-inch Dust Chute
- Dust Filter Bag
- Instruction Manual
If any parts are missing or damaged, contact WEN customer service.
Компоненттер бүттүview
Familiarize yourself with the main components of the WEN 6559 Benchtop Jointer.

1-сүрөт: Фронт view of the WEN 6559 6-Inch Benchtop Jointer. Shows the infeed and outfeed tables, fence, power switch, and dust port.

2-сүрөт: The jointer with the included dust filter bag attached to the dust port, demonstrating the dust collection system.
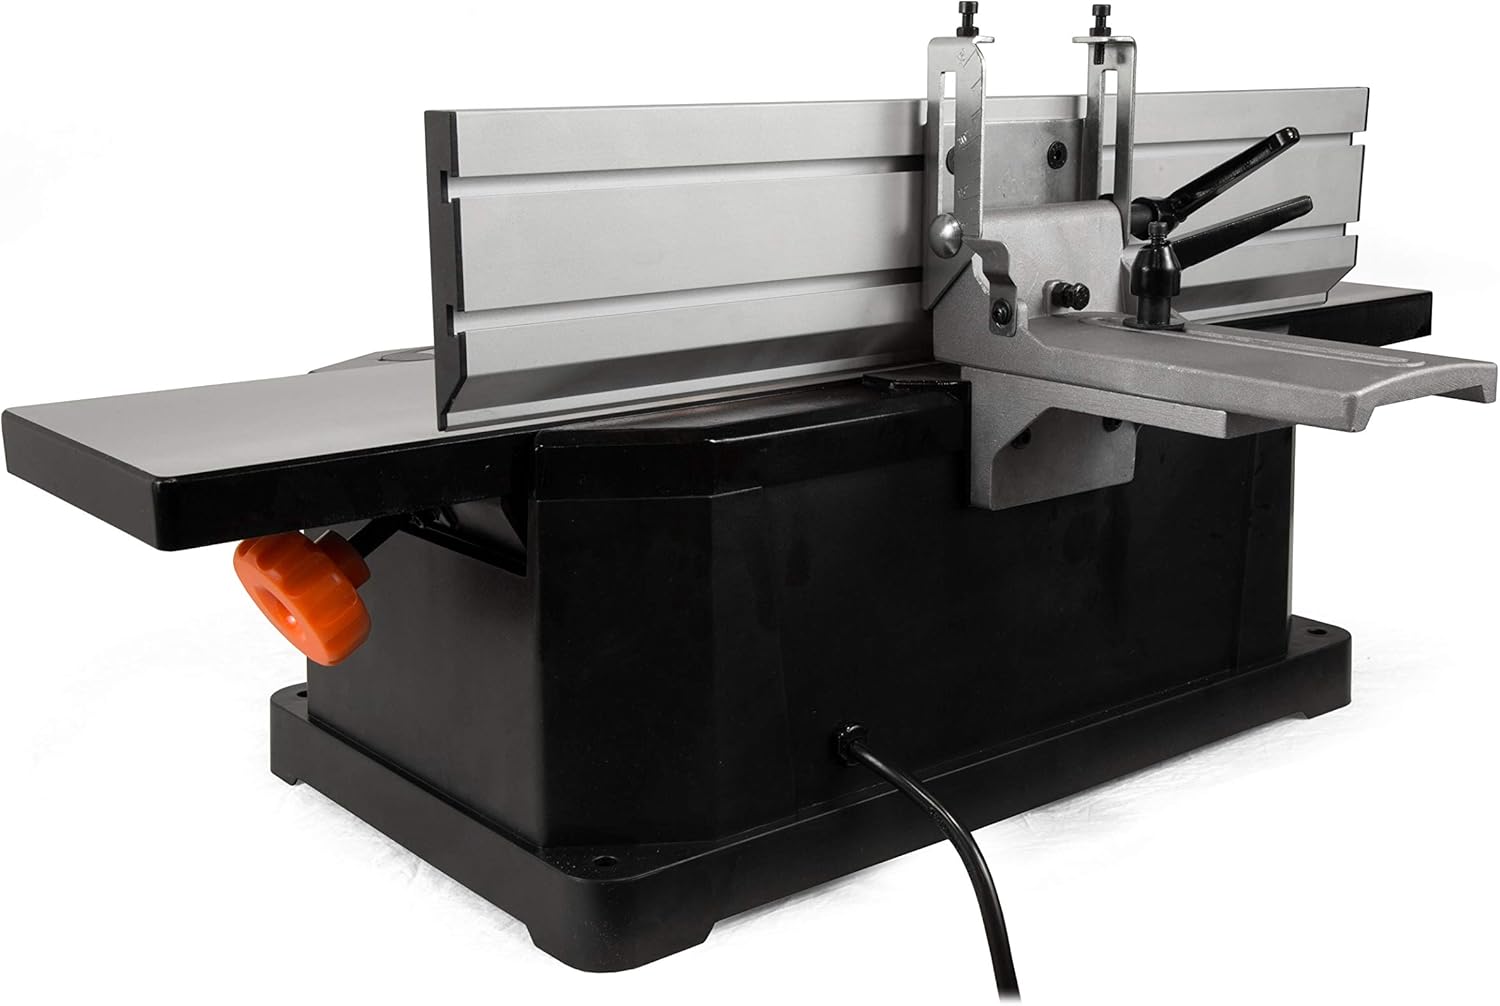
3-сүрөт: Арткы view of the jointer, highlighting the fence and its adjustment mechanisms for beveling.

4-сүрөт: Деталдаштырылган view of the fence adjustment handle and locking mechanism, used to set the fence angle.

5-сүрөт: Side view showing the jointer's fence tilted to an angle, demonstrating its beveling capability up to 45 degrees.
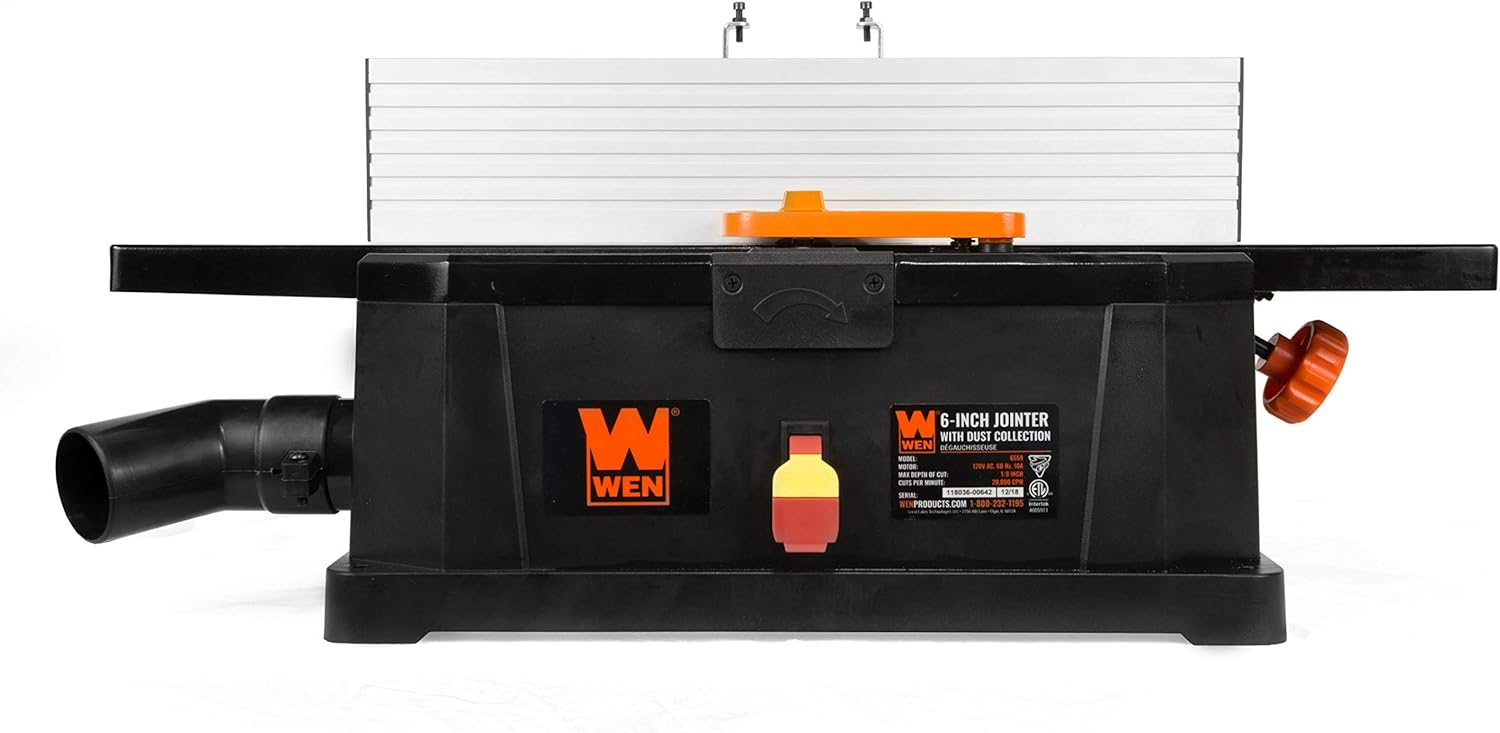
6-сүрөт: Жогорудан төмөн view of the jointer, showing the infeed and outfeed tables, the depth adjustment knob, and the cutterhead area with its guard.
Жайгашуу
Пакеттен чыгаруу жана текшерүү
- Carefully remove the jointer and all accessories from the packaging.
- Inspect the unit for any damage that may have occurred during shipping. Report any damage to WEN customer service immediately.
- Ensure all components listed in the "Package Contents" section are present.
Mounting the Jointer
For stable operation, it is recommended to mount the jointer to a workbench or stand. Use appropriate hardware (not included) to secure the base of the jointer through the mounting holes.
Attaching the Dust Collection System
- Locate the dust port on the side of the jointer.
- Attach the provided dust filter bag or connect a shop vacuum hose to the dust port. Ensure a secure connection to prevent dust leakage.
Иштөө нускамалары
Кесүү тереңдигин жөндөө
The infeed table can be adjusted to control the depth of material removed per pass.
- Муфтанын розеткадан суурулганын текшериңиз.
- Locate the depth adjustment knob (refer to Figure 6).
- Rotate the knob to raise or lower the infeed table. The onboard scale indicates the depth of cut, ranging from 0 to 1/8 inches.
- For optimal results and to prevent overloading the motor, take shallow passes, especially with harder woods.
Тосмо тууралоо
The fence can be adjusted for angle and position to support the workpiece during jointing.
- Муфтанын розеткадан суурулганын текшериңиз.
- To adjust the angle, loosen the fence locking handle (refer to Figure 4).
- Tilt the fence to the desired angle (up to 45 degrees in either direction). Use a protractor or combination square to verify the angle.
- Tighten the fence locking handle securely before operation.
- To adjust the fence position across the table, loosen the fence mounting bolts and slide the fence. Retighten bolts firmly.
Биргелешкен операция
ЭСКЕРТҮҮ: Always use push sticks and push blocks to keep hands away from the cutterhead during operation.
- Ensure the workpiece is clean and free of defects.
- Set the desired depth of cut and fence angle.
- Plug in the jointer and turn it on using the power switch. Allow the motor to reach full speed.
- Place the workpiece flat on the infeed table with one edge against the fence.
- Using a push block on top of the workpiece and a push stick against the trailing end, steadily feed the workpiece over the cutterhead. Maintain firm, even pressure against the table and fence.
- Guide the workpiece completely across the cutterhead and onto the outfeed table.
- Repeat passes as necessary until the desired flatness or squareness is achieved.
- Turn off the jointer and wait for the cutterhead to stop completely before removing any remaining wood chips or making further adjustments.
Техникалык тейлөө
Regular maintenance ensures optimal performance and extends the life of your jointer.
Тазалоо
- Always unplug the jointer before cleaning.
- After each use, clear wood chips and dust from the tables, fence, and cutterhead area using a brush or compressed air.
- Periodically clean the dust collection port and bag to maintain efficient dust extraction.
- Жарнама менен сырткы беттерди сүртүңүзamp кездеме. Катуу химиялык заттарды колдонбоңуз.
Blade Inspection and Replacement
- Inspect the blades regularly for dullness, nicks, or damage. Dull blades can lead to poor cut quality and increased motor strain.
- Blade replacement instructions are typically detailed in the full product manual. If blades need replacement, refer to the comprehensive manual or contact WEN customer service for guidance. Ensure replacement blades are compatible with the WEN 6559 model.
Проблемаларды чечүү
| Көйгөй | Мүмкүн себеп | Чечим |
|---|---|---|
| Jointer does not start | Электр энергиясы жок; өчүргүч; туура эмес өчүргүч | Check power connection; reset circuit breaker; contact service if switch is faulty. |
| Poor cut quality (rough surface, snipe) | Dull or damaged blades; incorrect blade height; improper feeding technique; uneven tables | Replace or sharpen blades; adjust blade height; ensure even pressure and steady feed rate; check table alignment. |
| Ашыкча титирөө же ызы-чуу | Loose components; unbalanced blades; motor issue | Check and tighten all fasteners; inspect blades for damage or imbalance; contact service for motor issues. |
| Dust collection ineffective | Clogged dust port/bag; loose connection; full dust bag | Clear clogs; secure connections; empty dust bag. |
For issues not listed or if solutions do not resolve the problem, contact WEN customer service.
Техникалык шарттар
| Модель номери | 6559 |
| Мотор | 10 Amp |
| Cutterhead ылдамдыгы | Мүнөтүнө 17 500 кесүү |
| Кесүүчү диаметри | 6-1/8 дюйм |
| Макс. Кесүү тереңдиги | 1/8 дюйм |
| Столдун өлчөмү | 6-1/4 x 28-1/2 дюйм |
| Fence Bevel | 45 градуска чейин (сол/оң) |
| Элемент Салмагы | 36.4 фунт |
| Пакеттин өлчөмдөрү | 32 x 14.5 x 11 дюйм |
| Power Source | AC |
Кепилдик маалымат
The WEN 6-Inch Benchtop Jointer comes backed by a two-year warranty. This warranty covers defects in material and workmanship under normal use. For specific terms and conditions, please refer to the warranty card included with your product or visit the official WEN webсайт.
Кардарларды колдоо
For technical assistance, replacement parts, or warranty claims, please contact WEN customer service. You can find contact information, including phone numbers and email addresses, on the official WEN website or in the documentation provided with your jointer.
ВЕН Webсайт: www.wenproducts.com