1. Коопсуздук маалыматы
Before using the Orion Motor Tech Level 1 EV Charger, please read and understand all safety instructions. Failure to follow these instructions may result in electric shock, fire, or serious injury.
- Электр коопсуздугу: Ensure the power outlet used is properly grounded and rated for the charger's specifications (110V-240V, 16A). Do not use extension cords or adapters unless specifically approved for EV charging.
- Экологиялык шарттар: Do not operate the charger in extreme temperatures or highly humid environments. The charger is rated IP55 for water resistance, but avoid submerging it or exposing it to heavy rain for prolonged periods.
- Кабель жана туташтыргычка кам көрүү: Always inspect the charging cable and connectors for any damage before each use. Do not use if the cable is frayed, insulation is broken, or connectors are damaged.
- Балдар жана үй жаныбарлары: Keep the charger and cable out of reach of children and pets during operation and storage.
- Өзгөчө кырдаалдар тартиби: In case of smoke, unusual odors, or any malfunction, immediately disconnect the charger from the power source and the vehicle.
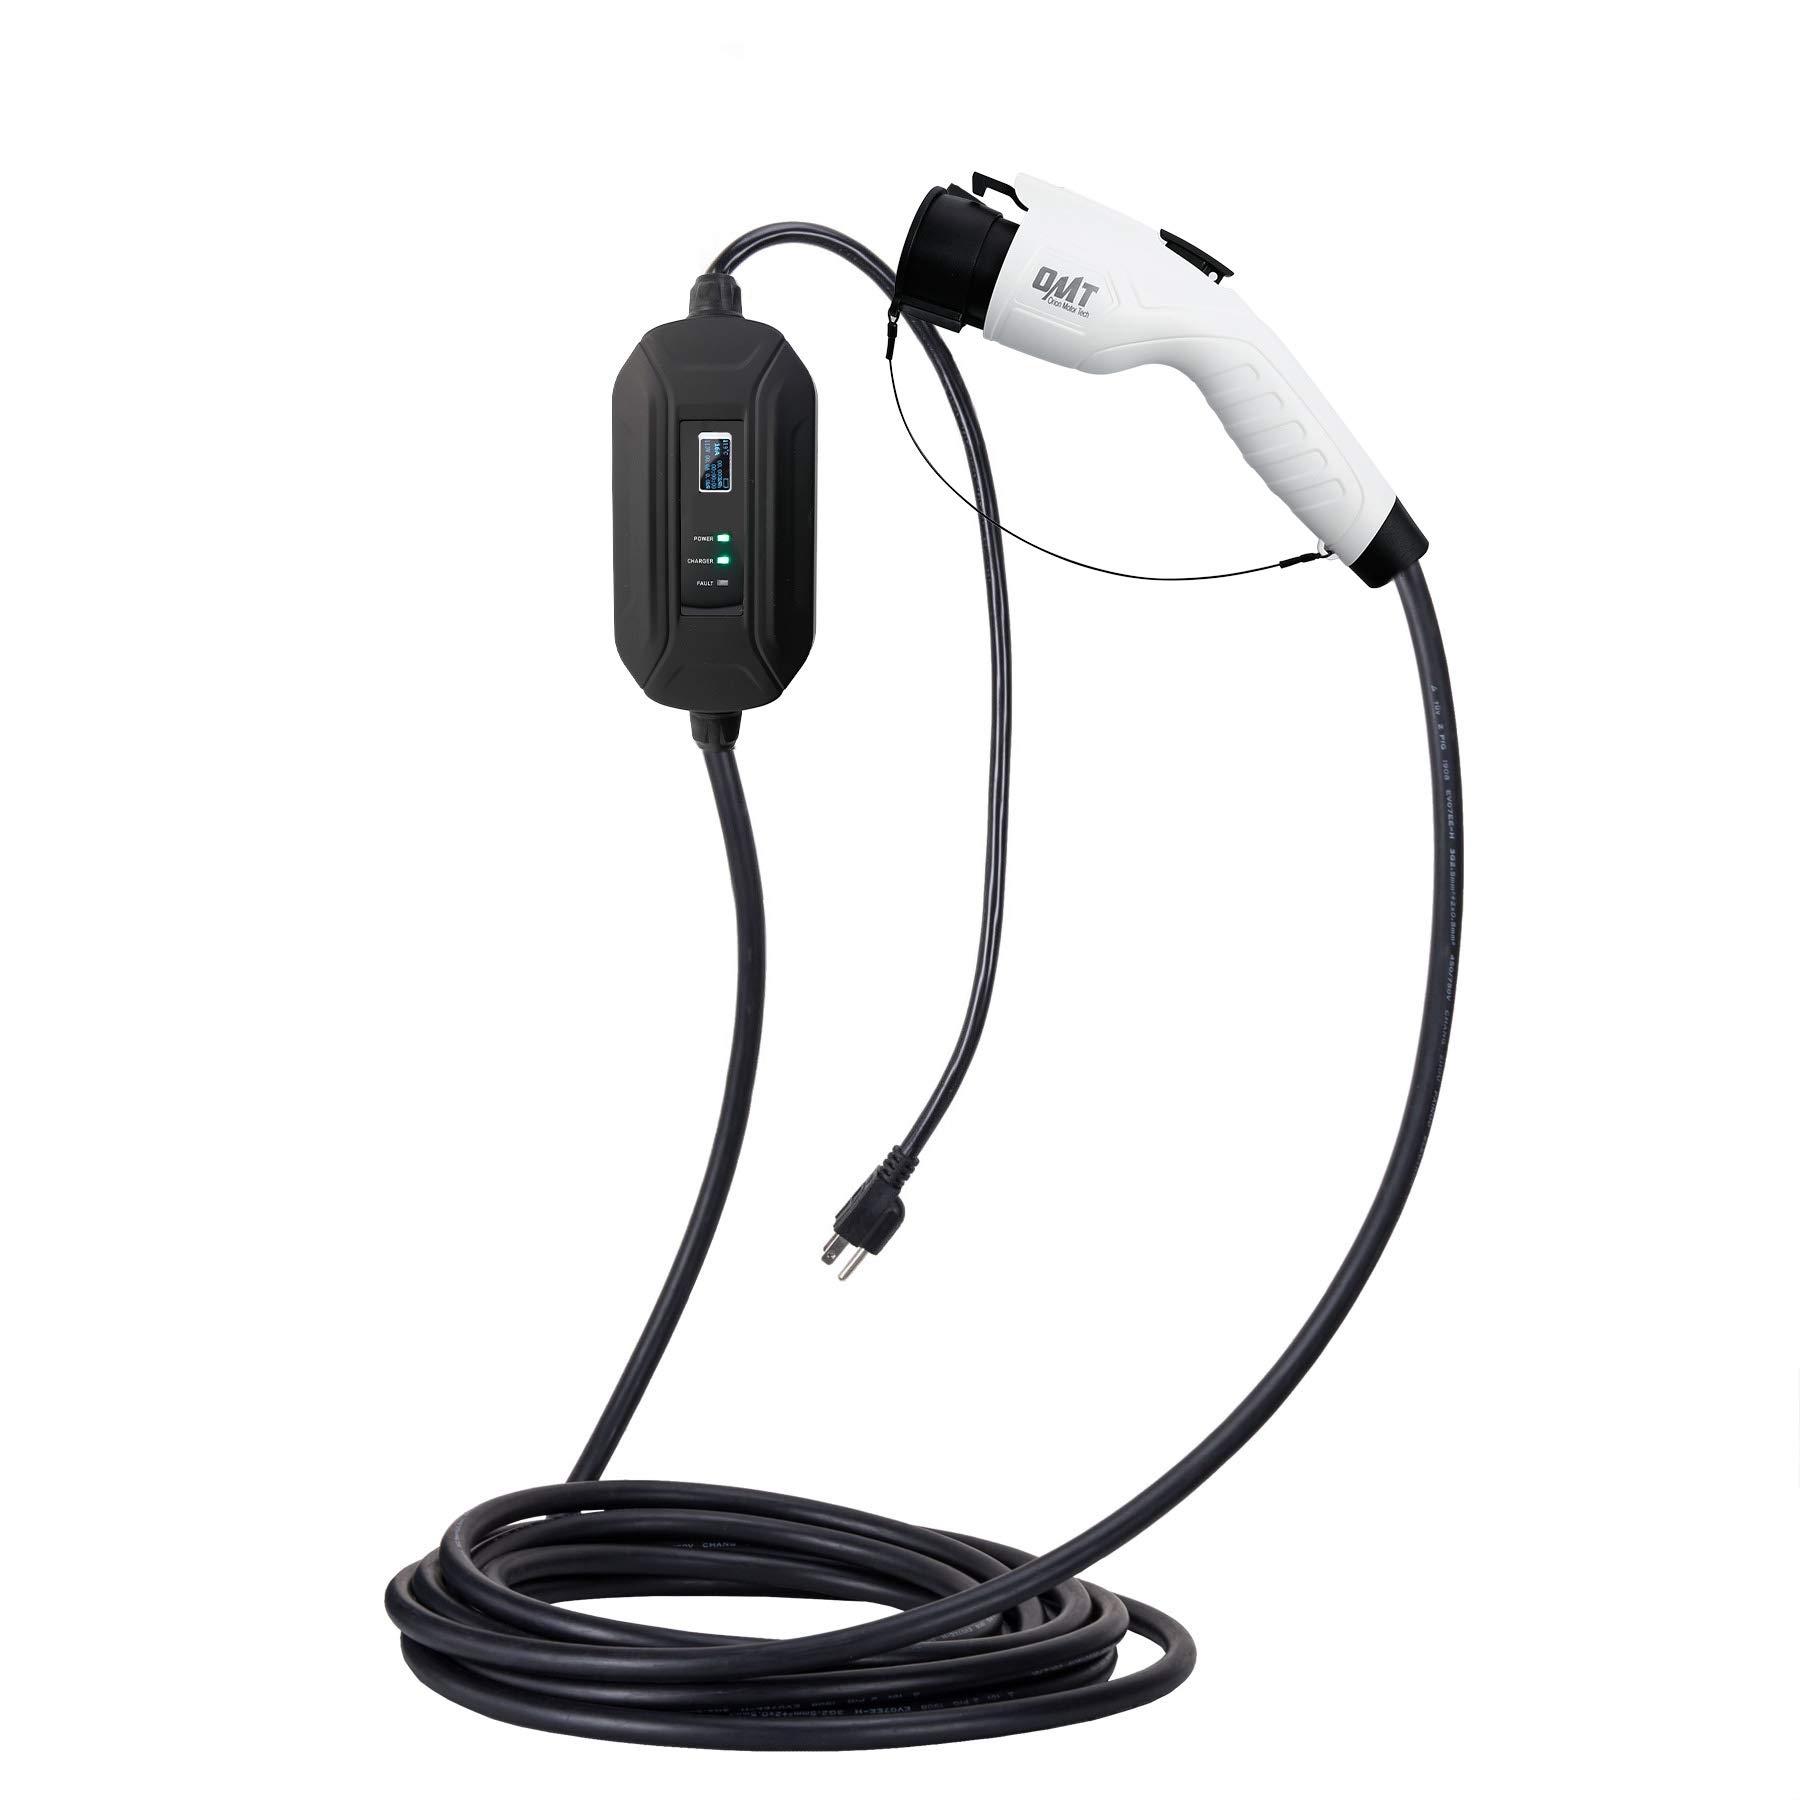
Image 1.1: The control box features multiple safety protections including lightning-proof, overvoltage, overcurrent, overheat, flame resistance, IP55 waterproof rating, and leakage protection.
2. Продукт бүтүп калдыview
The Orion Motor Tech Level 1 EV Charger is a portable electric vehicle supply equipment (EVSE) designed for convenient home charging. It provides a charging current of 16 Amps and is compatible with all electric vehicles equipped with a SAE J1772 charging port. The charger features a 30-foot cable for flexible placement and a NEMA 5-15 plug for standard household outlets.

Сүрөт 2.1: Бүттүview of the Orion Motor Tech Level 1 EV Charger, showing the control box, charging cable, and SAE J1772 vehicle connector.

Image 2.2: Key specifications of the charger, including 16A current, 110V compatibility, Level 1 charging, NEMA 5-15 plug type, SAE J1772 connector, and 30-foot cable length.

Сүрөт 2.3: Детальдуу view of the SAE J1772 connector, which is the standard for most electric vehicles in North America.
3. Техникалык шарттар
| Өзгөчөлүк | Спецификация |
|---|---|
| Бренд | Orion Motor Tech |
| Киргизүү көлөмүtage | 110-240 Вольт |
| Учурдагы рейтинг | 16 Amps |
| Power Source | Электр зымдары |
| Туташтыргыч түрү | SAE J1772 (Vehicle Side), NEMA 5-15 (Wall Side) |
| Кабелдин узундугу | 30 Фут |
| Элемент Салмагы | 5.5 фунт |
| Монтаж түрү | Wall Mount (Control Box) |
| Коопсуздук стандарты | UL таанылган |
| Суу өткөрбөйт рейтинги | IP55 |
4. Орнотуу
Follow these steps to set up your Level 1 EV Charger:
- Жайгашкан жерди тандаңыз: Select a dry, well-ventilated area near your vehicle's parking spot and a suitable electrical outlet. The control box can be wall-mounted for convenience.
- Power Outlet Requirements: The charger uses a NEMA 5-15 plug, compatible with standard 120V household outlets. For optimal performance and safety, it is highly recommended to use a dedicated 20 Amp circuit to avoid tripping breakers, as the charger draws 16 Ampтынымсыз.
- Заряддагычка сайыңыз: Insert the NEMA 5-15 plug firmly into the wall outlet. The control box display should illuminate, indicating power.
- Алгачкы текшерүү: Observe the indicator lights on the control box. The 'POWER' light should be green. If a 'FAULT' light is illuminated, refer to the Troubleshooting section.

Image 4.1: The control box display shows charging status, voltage, current, and temperature. Indicator lights for Power, Charger, and Fault provide quick visual feedback.
5. Иштөө нускамалары
To charge your electric vehicle:
- Унаага туташуу: Open your vehicle's charging port cover. Grasp the SAE J1772 connector handle firmly and insert it into the vehicle's charging inlet until it clicks into place.
- Заряддоону баштоо: Once connected, the charger will automatically begin communicating with your vehicle. The 'CHARGER' indicator light on the control box should turn green, and the display will show real-time charging information (voltage, current, power, temperature, and charging time).
- Монитор заряддоо: Periodically check the control box display and your vehicle's dashboard for charging status. Charging time will vary depending on your vehicle's battery capacity and state of charge.
- Заряддоону бүтүрүү: When charging is complete, or if you need to stop charging, first unlock your vehicle's charging port (if applicable, consult your vehicle's manual). Then, press the release button on the SAE J1772 connector handle and pull it straight out from the vehicle's inlet.
- Электр кубатынан ажыратуу: After disconnecting from the vehicle, you may unplug the charger from the wall outlet.
6. Техникалык тейлөө
Proper maintenance ensures the longevity and safe operation of your EV charger:
- Үзгүлтүксүз текшерүү: Before each use, visually inspect the charging cable, connectors, and control box for any signs of damage, wear, or corrosion. Pay close attention to the cable insulation and the pins within the connectors.
- Тазалоо: Keep the charging cable and connectors clean and free of dirt, dust, and moisture. Use a dry, clean cloth to wipe down surfaces. Do not use harsh chemicals or abrasive cleaners. Ensure connectors are dry before use.
- Сактагыч: When not in use, coil the charging cable neatly and store the charger in a dry, clean, and secure location, away from direct sunlight and extreme temperatures. Avoid kinking or bending the cable sharply.
- Зыяндан качуу: Do not drive over the charging cable or place heavy objects on it. Avoid dropping the control box or connectors.

Image 6.1: The SAE J1772 connector and a storage bag for convenient and protected storage of the charging cable.
7. Кыйынчылыктарды
If you encounter issues with your EV charger, refer to the following common problems and solutions:
| Көйгөй | Мүмкүн себеп | Чечим |
|---|---|---|
| No power to control box display | Wall outlet not supplying power; Charger not fully plugged in; Circuit breaker tripped. | Check the wall outlet with another device. Ensure the charger's plug is fully inserted. Reset the circuit breaker if it has tripped. |
| Charging does not start (CHARGER light off) | SAE J1772 connector not fully inserted into vehicle; Vehicle not ready to charge; Fault detected. | Ensure the connector is securely latched into the vehicle's port. Check your vehicle's charging settings. Refer to the control box display for any fault codes. |
| FAULT light illuminated | Ашыкча токtage, overheat, or other internal fault detected. | Immediately disconnect the charger from both the wall and the vehicle. Allow it to cool down if overheating is suspected. Re-inspect the cable and connectors for damage. If the fault persists, contact customer support. |
| Жай кубаттоо ылдамдыгы | Vehicle's onboard charger limitation; Voltage drop in household wiring. | Ensure the charger is connected to a dedicated circuit. Consult your vehicle's manual for its maximum Level 1 charging rate. |
If the problem persists after attempting these solutions, please contact Orion Motor Tech customer support.
8. Кепилдик жана колдоо
For warranty information and customer support, please refer to the documentation included with your purchase or visit the official Orion Motor Tech webсайт. Сатып алуу квитанциясын кепилдик дооматтары үчүн сатып алуунун далили катары сактаңыз.
Orion Motor Tech Customer Service:
- For technical assistance, troubleshooting, or warranty inquiries, please contact the manufacturer directly.
- When contacting support, please have your product model (Level 1 EV Charger, 16A, 30FT) and ASIN (B07VBMPQ9J) available.