
PUTORSEN GSMT-262P
PUTORSEN Dual Monitor Arm GSMT-262P Instruction Manual
Model: GSMT-262P
Introduction
Thank you for choosing the PUTORSEN Dual Monitor Arm GSMT-262P. This premium aluminum articulated gas spring arm is designed to enhance your workspace ergonomics by providing flexible positioning for two monitors. This manual provides essential information for safe installation, operation, and maintenance of your monitor arm.
Коопсуздук маалыматы
- Орнотуудан жана колдонуудан мурун бардык нускамаларды кылдат окуп чыгыңыз.
- Ensure your desk surface is strong enough to support the combined weight of the monitor arm and two monitors.
- Ар бир кол үчүн 8 кг (17.6 фунт) салмактан ашпаңыз.
- Берилген жабдууларды гана колдонуңуз. Эгерде кандайдыр бир тетиктер жок болсо же бузулуп калса, кардарларды колдоо кызматына кайрылыңыз.
- Орнотуу учурунда балдарды жана үй жаныбарларын алыс кармаңыз.
- Туура эмес орнотуу материалдык зыянга же жеке жаракатка алып келиши мүмкүн.
Пакеттин мазмуну
Сураныч, орнотууну баштоодон мурун бардык компоненттер бар экенин текшериңиз.
- Кош монитор куралы
- Desk Clamp (C-clamp)
- Grommet Mount жабдыктары
- VESA Mounting Screws (various sizes)
- Hex Keys for Adjustment
- Кабель башкаруу аксессуарлары
- Instruction Manual
Техникалык шарттар
| Модель номери | GSMT-262P |
| Материал | Premium алюминий |
| Түс | Күмүш боз |
| Экрандын өлчөмүнүн шайкештиги | 17 - 32 дюйм |
| Ар бир колдун салмагы | 3.3 - 17.6 фунт (1.5 - 8 кг) |
| VESA шайкештиги | 75x75мм, 100x100мм |
| Тилтүү диапазону | +45°тан -45°ка чейин |
| Айналма тоо | ±90° |
| Айлануу | 360° |
| Үстөлдүн калыңдыгы (C-clamp) | 10 мм - 85 мм |
| Үстөлдүн калыңдыгы (Grommet) | 10 мм - 85 мм |

Figure 1: Universal Display Compatibility. This image illustrates the compatible screen sizes (17-32 inches), VESA mounting patterns (75x75mm and 100x100mm), and the weight capacity per arm (3.3-17.6 lbs).

Figure 2: Product Dimensions. This diagram provides detailed measurements of the monitor arm, including arm length, height adjustment range, and mounting base dimensions. Please review these dimensions carefully before purchase to ensure compatibility with your setup.
Орнотуу (Орнотуу)
PUTORSEN кош монитор колу эки орнотуу ыкмасын сунуштайт: C-clamp and Grommet Hole. Choose the method best suited for your desk.
1. Орнотуу ыкмасын тандаңыз

Figure 3: Installation Flexibility. This image illustrates the two available mounting options: Grommet Hole and C-clamp, along with their respective compatible desk thickness ranges (10mm-85mm).
- C-clamp Орнотуу: Ideal for desks without a pre-drilled grommet hole. Securely attach the C-clamp to the edge of your desk. Ensure the desk thickness is between 10mm and 85mm.
- Grommet Hole Installation: Use this method if your desk has a grommet hole (or if you can drill one). Ensure the hole diameter and desk thickness are compatible (10mm-85mm).
2. Assemble the Monitor Arm Base
Follow the specific instructions provided in the package for assembling the main pole and base according to your chosen mounting method.
3. VESA пластинкаларын мониторлорго бекитиңиз
- Мониторуңузду кылдаттык менен жумшак, таза бетке ылдый караңыз.
- Attach the VESA plate to the back of your monitor using the appropriate screws from the hardware kit. Ensure a secure fit.
4. Mount Monitors to Arms
- Slide the monitor (with VESA plate attached) onto the end of each arm.
- Secure the monitor to the arm using the provided locking mechanism or screw.
Иштөө (Түзөтүүлөр)
The PUTORSEN Dual Monitor Arm allows for extensive adjustments to achieve an optimal ergonomic viewтажрыйбасы.
Монитор Позициялоо
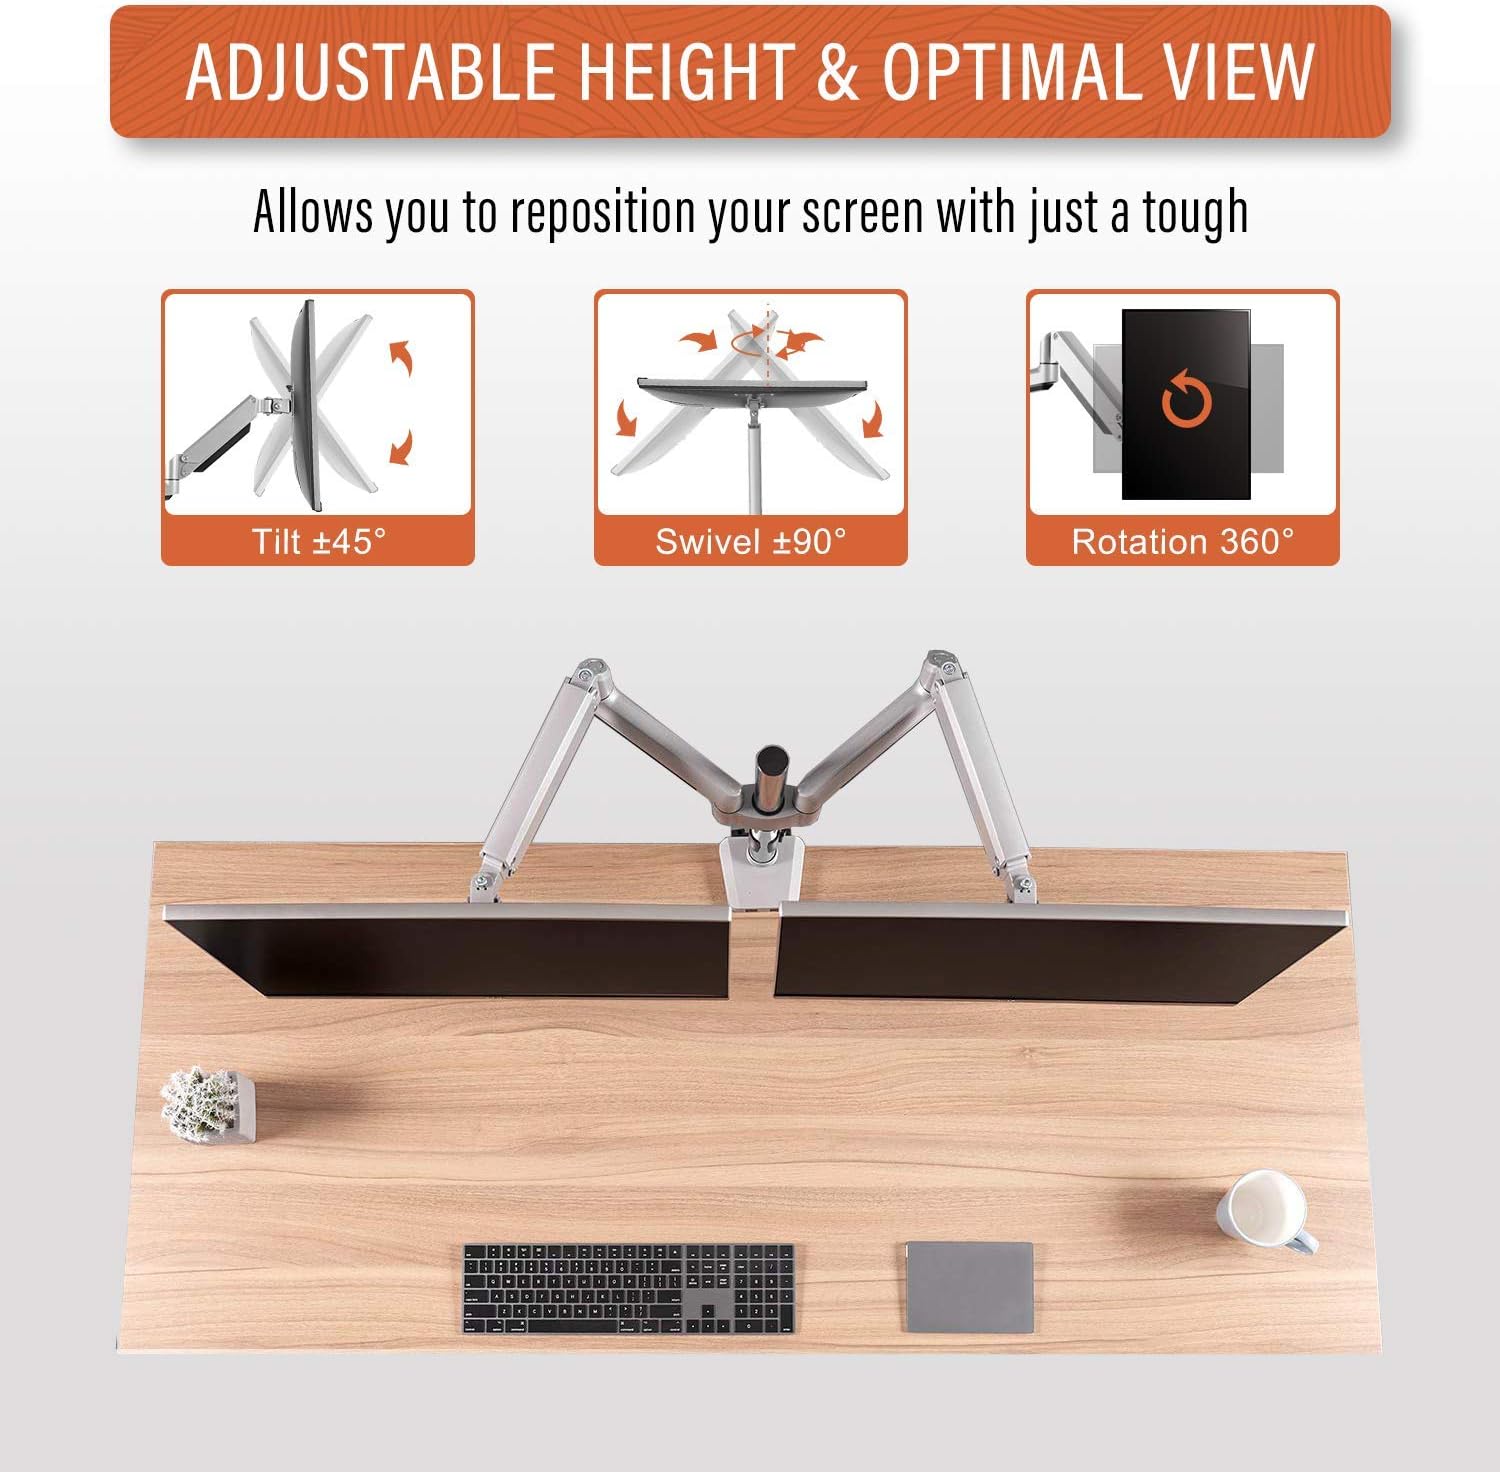
Figure 4: Adjustable Height & Optimal View. This image demonstrates the arm's flexibility, allowing for ±45° tilt, ±90° swivel, and 360° rotation to achieve your preferred viewбурч.
- Бийиктигин тууралоо: The gas spring mechanism allows for smooth vertical movement. Gently push or pull the monitor to the desired height.
- Россия: Adjust the monitor screen vertically from +45° to -45° to reduce glare and optimize viewбурчтар.
- Айлануучу: Pivot the monitor horizontally up to ±90° to share your screen or change viewбагыт.
- Айлануу: Пейзаждык жана тигинен багыттардын ортосунда которулуу үчүн мониторду 360° буруңуз.
Газ булагын чыңалууну жөндөө

Figure 5: Tension Adjustment for Up & Down Arm. This image highlights the adjustment screw for the gas spring tension. Turn clockwise to reduce tension for lighter monitors, and counter-clockwise to increase tension for heavier monitors, ensuring the arm holds its position.
If your monitor does not stay at the desired height or drifts, you may need to adjust the gas spring tension:
- Locate the tension adjustment screw on the arm (refer to Figure 5).
- Use the provided hex key to turn:
- Саат жебеси боюнча: To reduce tension for lighter monitors.
- Сааттын жебесине каршы: To increase tension for heavier monitors.
- Adjust gradually and test the arm's movement until the monitor holds its position securely.
Кабель башкаруу
Utilize the integrated cable management clips or channels on the arm to route and organize your monitor cables, maintaining a tidy workspace.
Техникалык тейлөө
- Бардык бурамалар менен байланыштарды такай текшерип, алардын бекем жана коопсуз экендигин текшериңиз.
- Монитордун колун жумшак менен тазалаңыз, damp кездеме. Абразивдүү тазалагычтардан же эриткичтерден качыңыз.
- Periodically re-adjust the gas spring tension if you change monitors or notice the arm not holding its position correctly.
Проблемаларды чечүү
- Монитор кыйшайып же каалаган бийиктикте турбай жатса:
- Чечим: Increase the gas spring tension by turning the adjustment screw counter-clockwise (refer to Figure 5).
- Monitor is too stiff to move up/down:
- Чечим: Decrease the gas spring tension by turning the adjustment screw clockwise (refer to Figure 5).
- Monitor wobbles or feels unstable:
- Чечим: Ensure all mounting screws (VESA plate, desk clamp/grommet) are securely tightened. Check that the desk surface is stable.
- Monitor does not fit VESA plate:
- Чечим: Verify your monitor's VESA pattern (75x75mm or 100x100mm) matches the arm's compatibility. Ensure you are using the correct VESA screws.
Кепилдик жана колдоо
The PUTORSEN Dual Monitor Arm GSMT-262P comes with a Өмүр бою кепилдик.
For technical support, warranty claims, or any questions regarding your product, please contact PUTORSEN customer service through the retailer where you purchased the product or visit the official PUTORSEN webбайланыш маалыматы үчүн сайт.
Ask a question about this manual
Ask about setup, troubleshooting, compatibility, parts, safety, or missing instructions. Manuals+ will review the question and use this page’s manual context to help answer it.