Introduction
This manual provides detailed instructions for the setup, operation, maintenance, and troubleshooting of your Amcrest 5Series 4K NVR 16-Channel NV5216 Network Video Recorder. Please read this manual thoroughly before using the device to ensure proper functionality and safety.

Image: Amcrest 5Series 4K NVR NV5216, showcasing its 4K UHD resolution, 16 channels, H.265 compression, 20TB HDD capacity, two-way talk, 320Mbps bandwidth, HDMI output, and plug-and-play installation.
1. Орнотуу
1.1 Пакеттин мазмуну
Пакетте бардык компоненттер бар экенин текшериңиз:
- Amcrest 5Series 4K NVR (NV5216)
- Кубаттуу адаптер
- USB чычкан
- Network Cable
- Quick Start Guide
- Mounting Screws for Hard Drive (Hard Drive Not Included)
1.2 Аппараттык камсыздоо бүттүview
Familiarize yourself with the ports and indicators on the NVR.
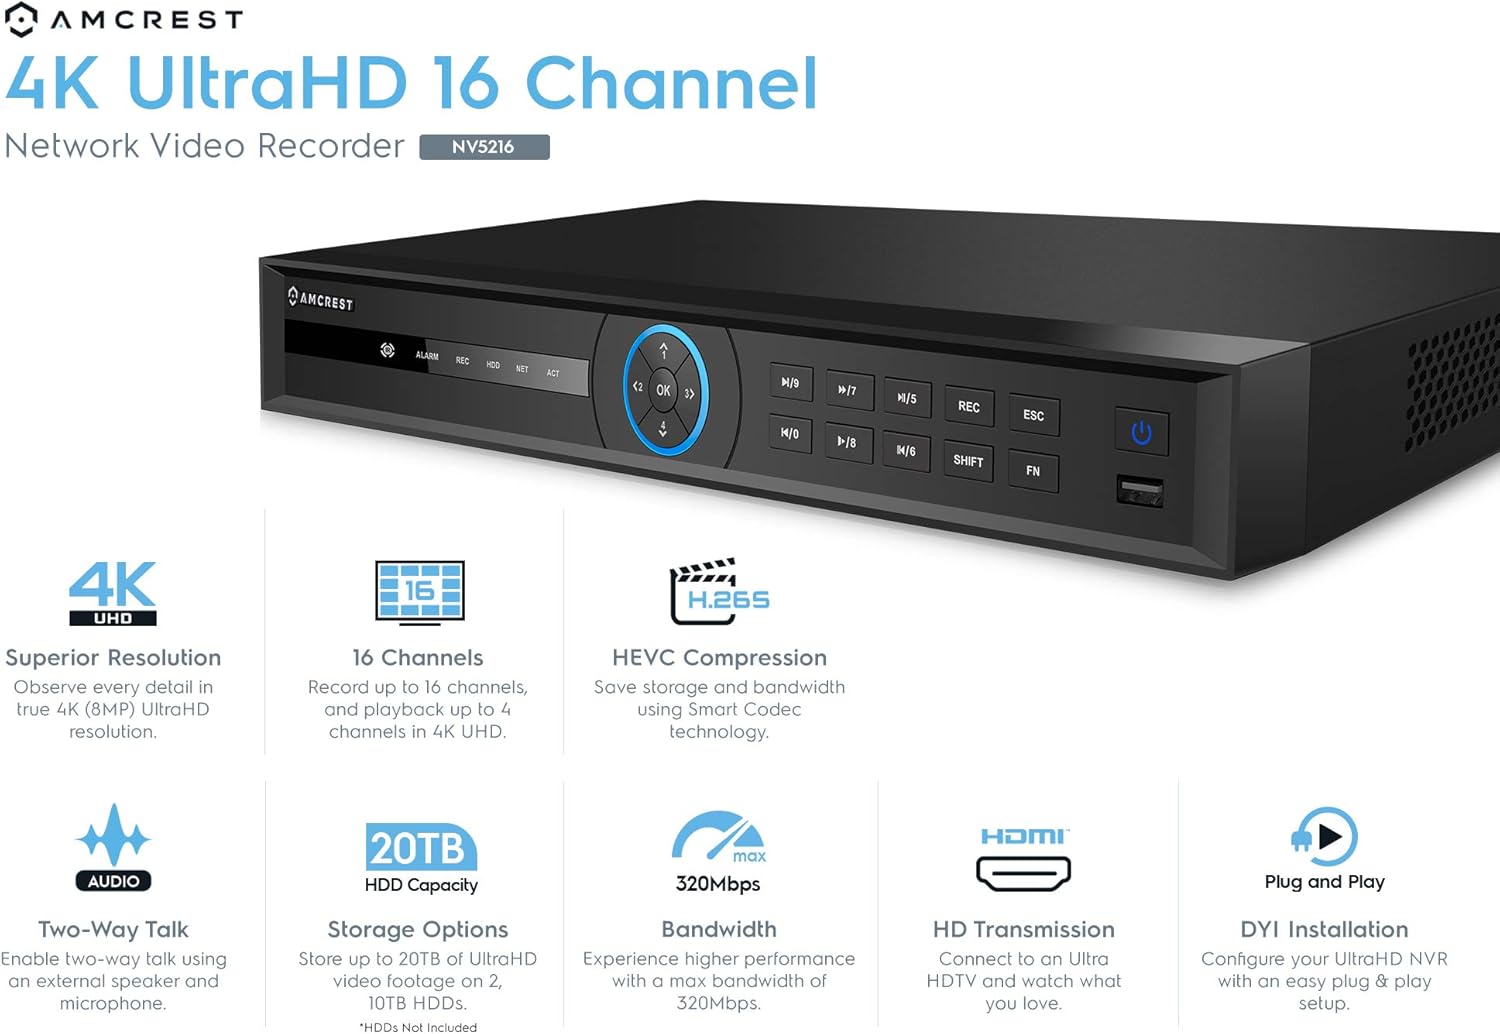
Image: Front panel of the Amcrest NV5216 NVR, showing the LED indicator, control panel buttons (OK, navigation, M/7, M/8, REC, ESC, SHIFT, FN), USB 3.0 port, and On/Off power button.
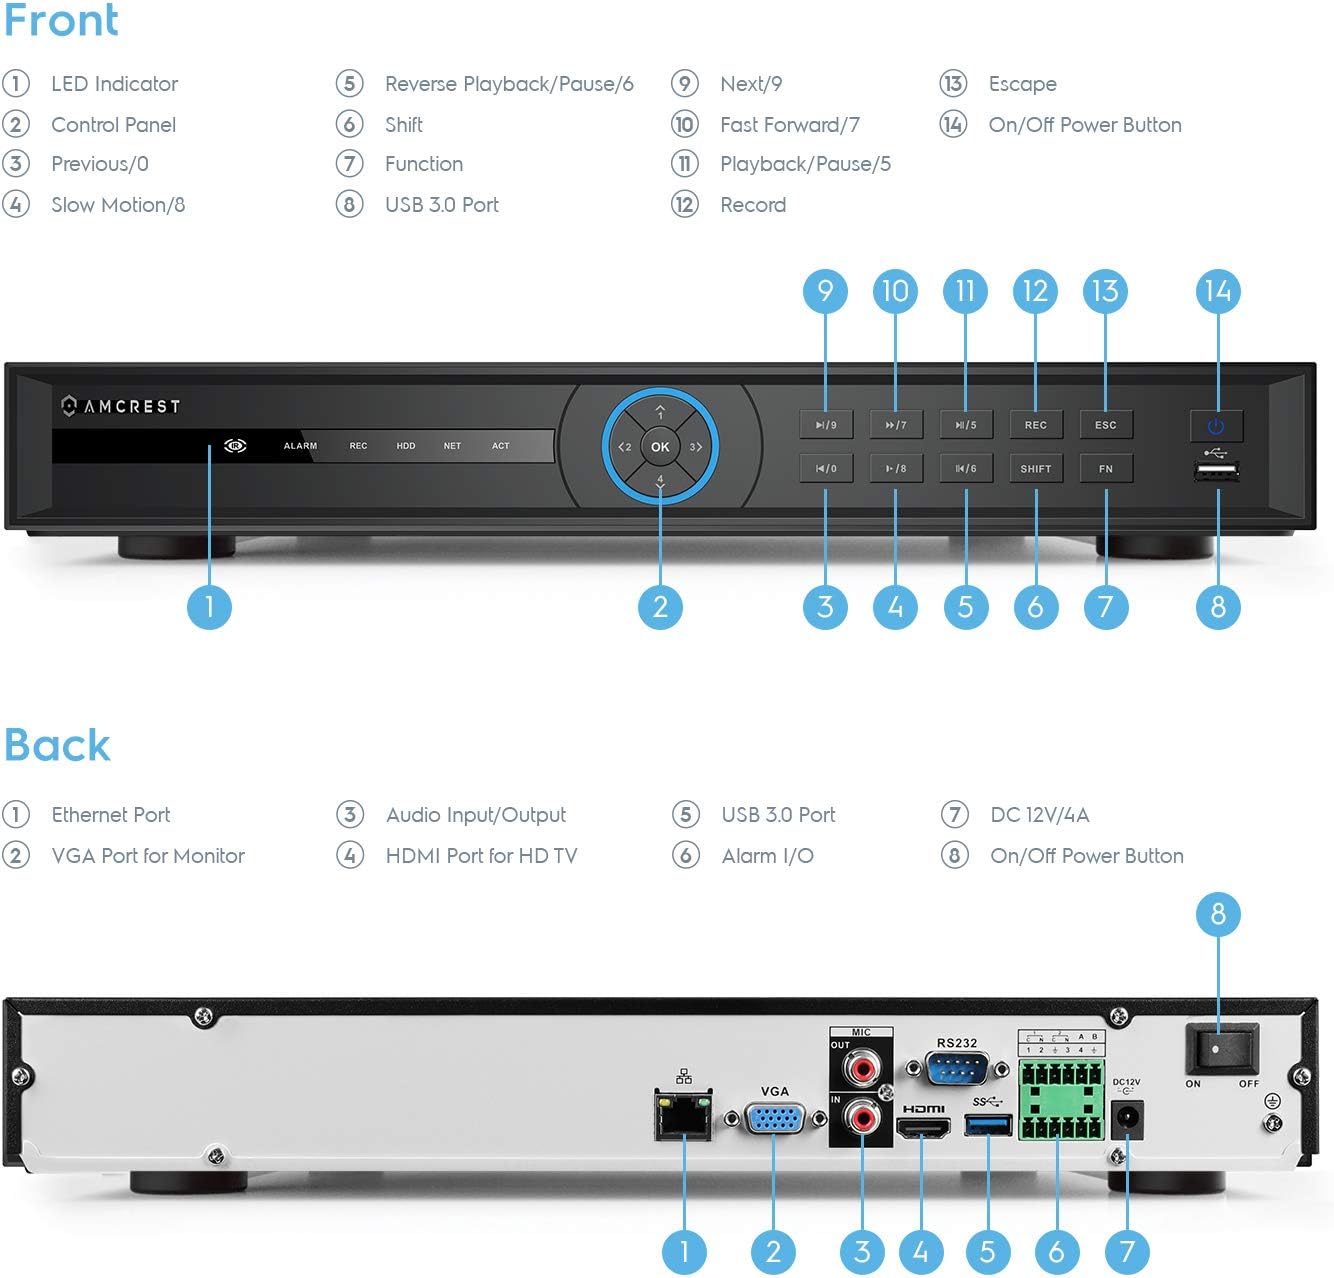
Image: Back panel of the Amcrest NV5216 NVR, illustrating the Ethernet port, VGA port for monitor, Audio Input/Output, HDMI port for HD TV, USB 3.0 port, Alarm I/O, DC 12V/4A power input, and On/Off power button.
1.3 Катуу дискти орнотуу
The NVR supports up to two 10TB hard drives (not included). Follow these steps to install a hard drive:
- NVRдин үстүнкү капкагын бурап, алып салыңыз.
- Connect the SATA data and power cables from the NVR to the hard drive.
- Берилген бурамаларды колдонуп, катуу дискти NVR корпусуна бекитиңиз.
- Үстүнкү капкакты ордуна коюп, бурама менен бекитиңиз.
1.4 Баштапкы туташуу
Connect the NVR to your network and display:
- Connect the NVR to your router using the provided Ethernet cable. This NVR requires a hard-wired connection directly to your router to operate.
- Мониторду NVRдин HDMI же VGA портуна туташтырыңыз.
- USB чычканын NVRдеги USB портуна туташтырыңыз.
- Кубат адаптерин NVRге жана розеткага туташтырыңыз.
- Press the power button to turn on the NVR.
1.5 Баштапкы орнотуу устасы
Upon first boot, the NVR will guide you through an initial setup wizard to configure basic settings such as language, date/time, network, and password. Follow the on-screen prompts.
1.6 Камераны башкаруу
The NV5216 supports Amcrest WiFi and Wired IP cameras, as well as limited compatibility with third-party IP cameras. To add cameras:
- Ensure your IP cameras are powered on and connected to the same network as the NVR.
- Access the NVR's camera management interface (usually found in the main menu under "Camera" or "Device Search").
- The NVR will scan for available cameras. Select the cameras you wish to add and follow the prompts to configure them.
2. Иштөө нускамалары
2.1 Live View
After setup, the NVR will display the live feed from connected cameras. You can view up to 4 channels at 4K resolution simultaneously. The NVR will adjust the resolution of remaining channels to 1080P at 30fps if more than 4 channels are viewбир эле учурда ed.
2.2 Жазуу конфигурациясы
NVR ар кандай жазуу режимдерин колдойт:
- Кол менен жаздыруу: Жазууну кол менен баштоо жана токтотуу.
- Пландаштырылган жаздыруу: Үзгүлтүксүз жаздыруу үчүн белгилүү бир убакыттарды коюңуз.
- Кыймылды аныктоо жазуусу: Record only when motion is detected by the camera. Configure motion detection zones and sensitivity in the camera settings.
The NVR utilizes H.265 compression technology, which optimizes storage space without compromising video quality, allowing for longer recording times.
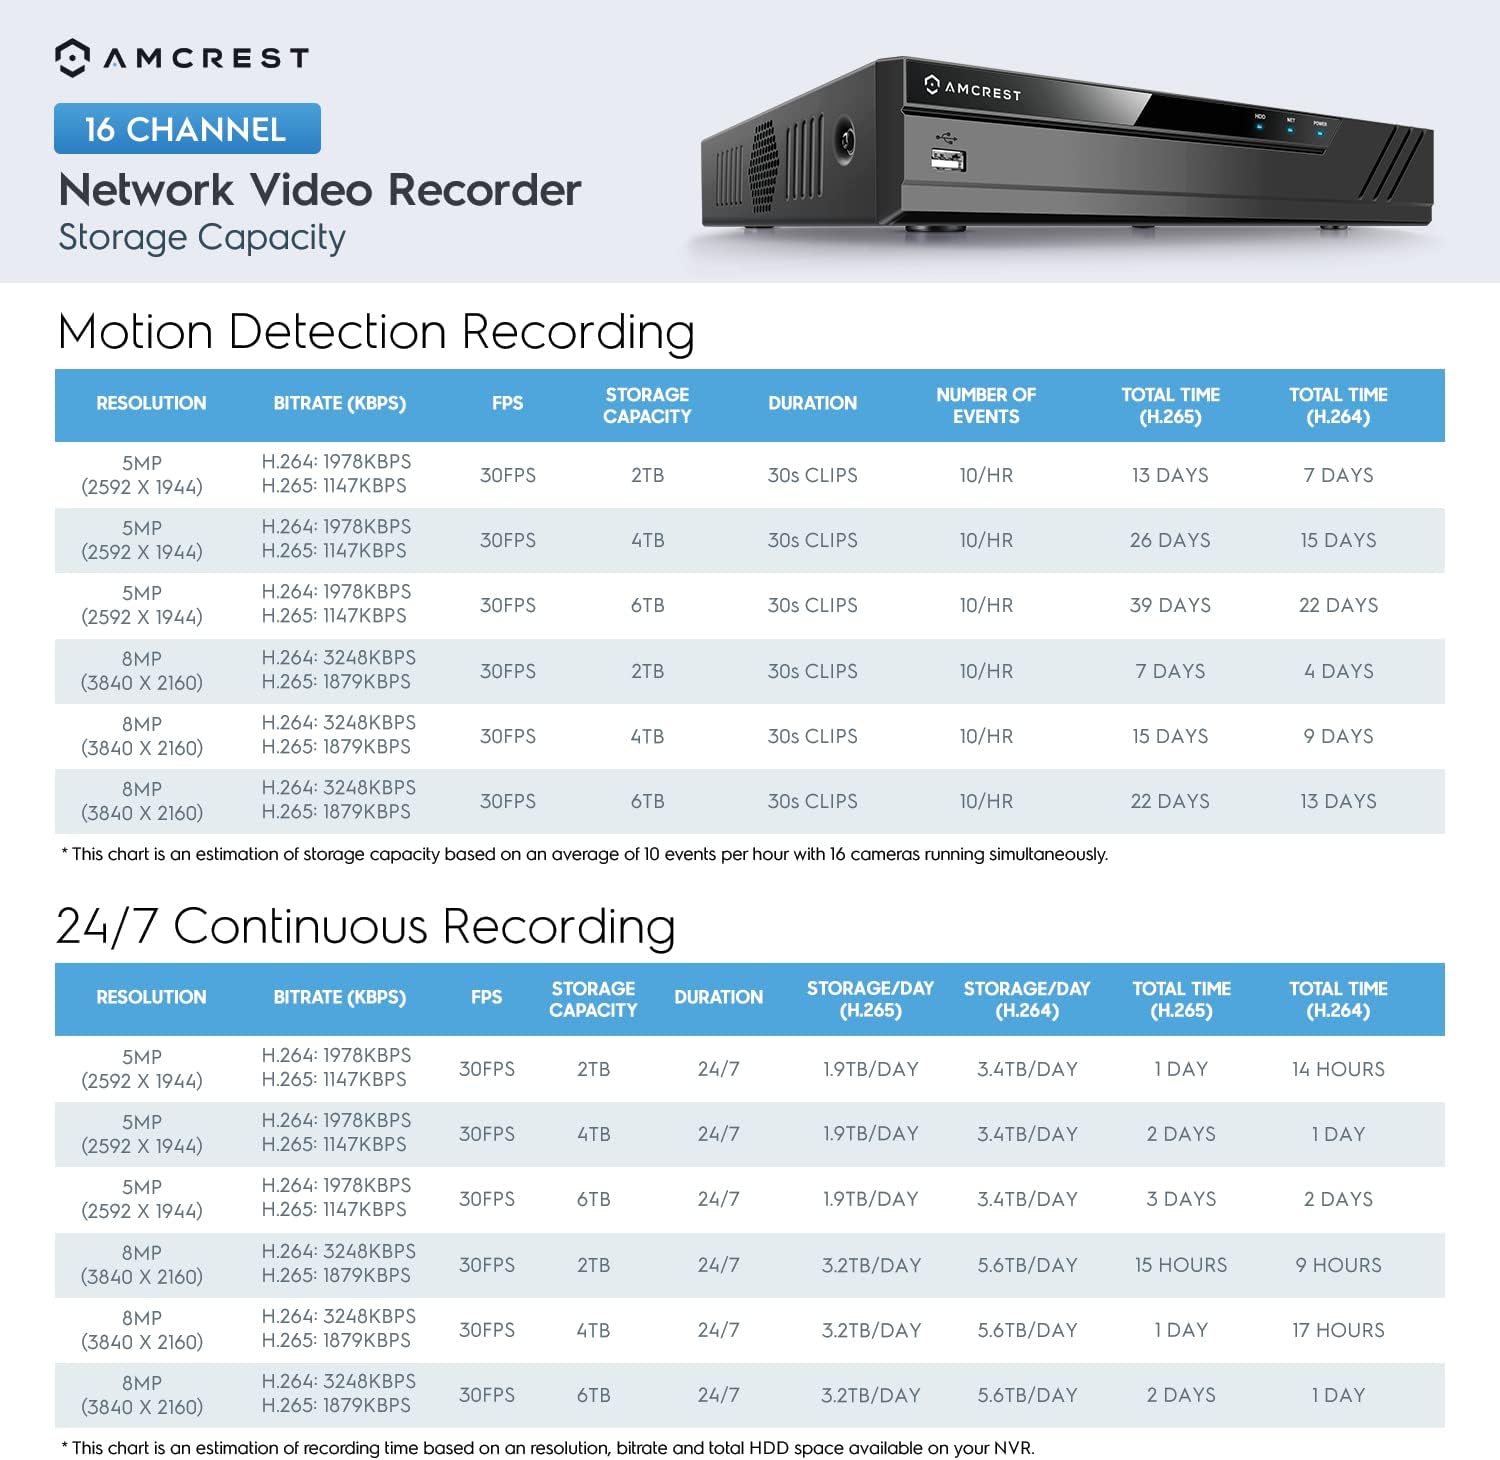
Image: A chart detailing estimated storage capacity for the Amcrest NV5216 NVR under various resolutions (5MP, 8MP) and recording types (Motion Detection, 24/7 Continuous) using H.264 and H.265 compression.
2.3 Ойнотуу
Кайраview foo жазылганtage:
- Access the "Playback" function from the NVR's main menu.
- Каалаган датаны, убакытты жана камера каналын тандаңыз.
- Foo аркылуу өтүү үчүн ойнотуу башкаруу элементтерин (ойнотуу, тындыруу, алдыга жылдыруу, артка түрүү) колдонуңузtage.
2.4 Remote Access (Amcrest View Колдонмо)
Access your NVR remotely using the Amcrest View app on your smartphone or tablet:
- "Amcrest View" app from your device's app store (available for iPhone, iPad, and Android).
- Колдонмону ачып, эгер сизде аккаунт жок болсо, аны түзүңүз.
- Scan the QR code displayed on the NVR's monitor (found in the network settings or device info) to add the NVR to your app.
- Кошулгандан кийин, сиз төмөнкүлөрдү жасай аласыз view live feeds, play back recordings, and manage settings from anywhere with an internet connection.
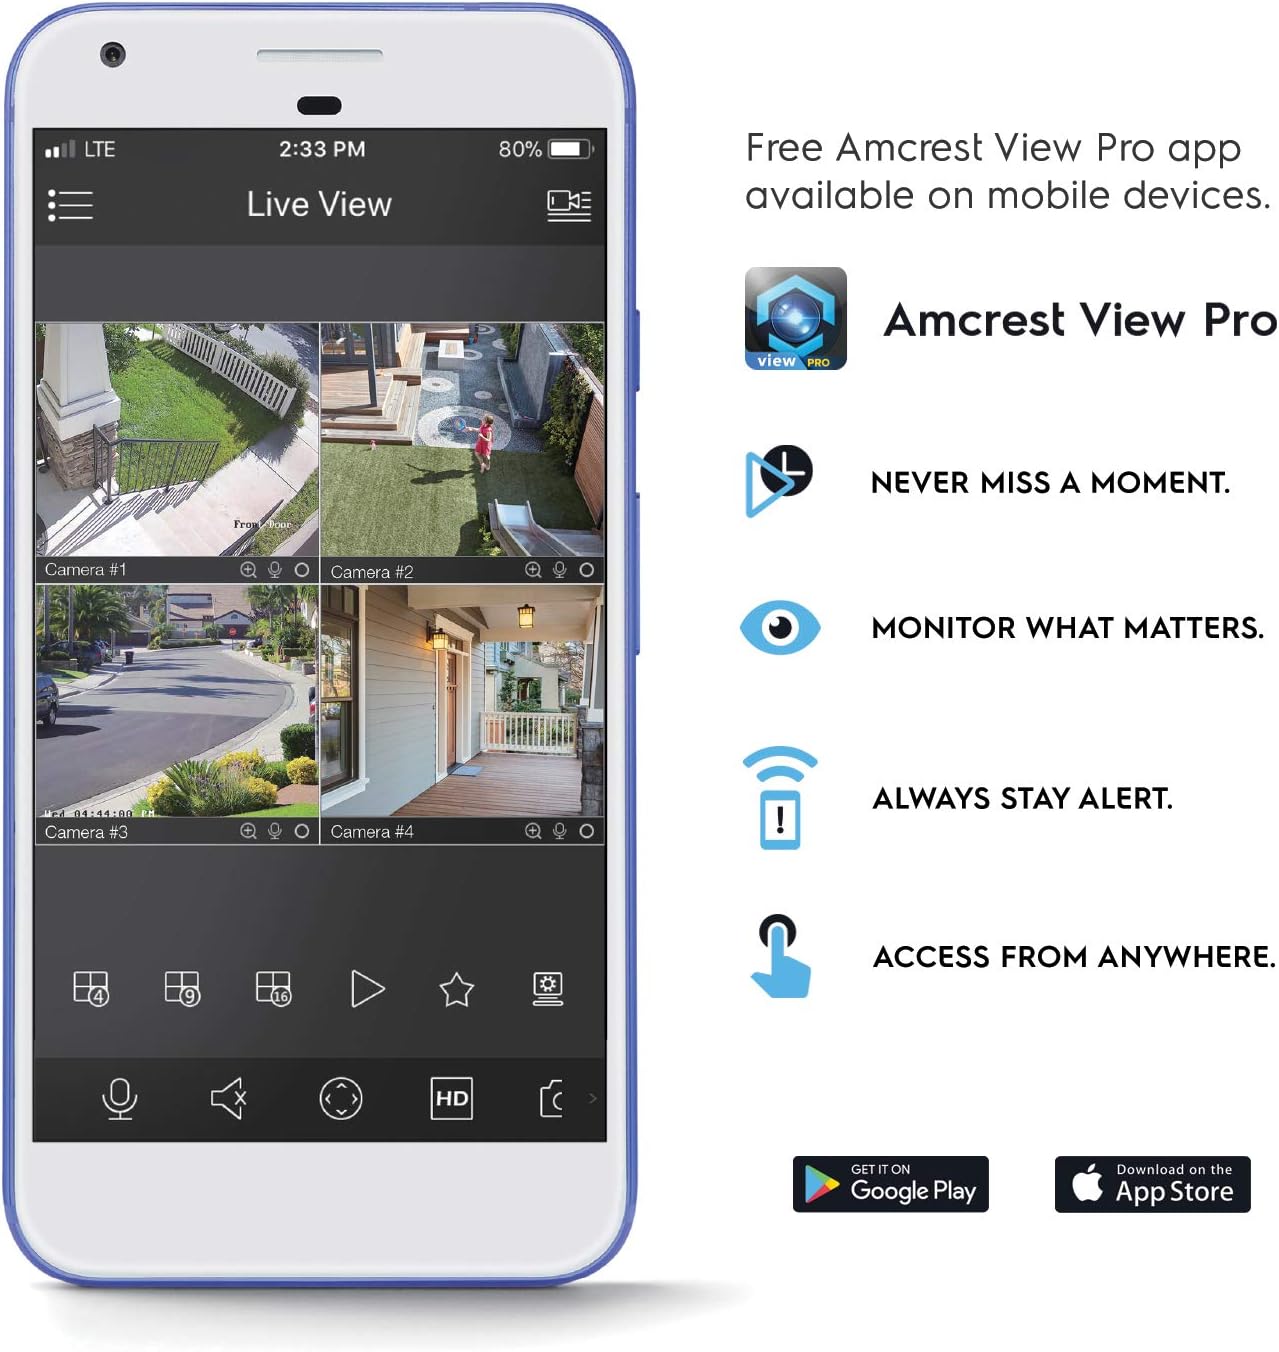
Image: A smartphone screen displaying the Amcrest View Pro app, showing a multi-camera live view interface. The app allows users to monitor, access, and stay alert from anywhere.
Video: An Amcrest overview video titled "Simple. Reliable. Secure." This video provides a general introduction to Amcrest security solutions and their benefits, including remote monitoring of loved ones and property.
3. Техникалык тейлөө
3.1 Катуу дискти башкаруу
Regularly check the status of your hard drives through the NVR's storage settings. Ensure sufficient space is available for continuous recording. You can configure the NVR to overwrite older footage automatically when the hard drive is full.
3.2 Микропрограмма жаңыртуулары
Amcrestти мезгил-мезгили менен текшерип туруңуз webмикропрограммалык камсыздоону жаңыртуу сайты. NVR'иңиздин микропрограммасын жаңыртып туруу оптималдуу иштөөнү, коопсуздукту жана жаңы функцияларга жетүүнү камсыз кылат. Микропрограммалык камсыздоону жаңыртуу топтому менен берилген көрсөтмөлөрдү кылдаттык менен аткарыңыз.
3.3 Тазалоо
To maintain the NVR's longevity, keep it in a clean, dust-free environment. Use a soft, dry cloth to clean the exterior. Do not use liquid cleaners or aerosols.
4. Кыйынчылыктарды
4.1 Видео чыгышы жок
- Check all video cable connections (HDMI/VGA) to the monitor and NVR.
- Монитордун күйгүзүлгөнүн жана туура киргизүү булагына коюлганын текшериңиз.
- Verify the NVR is powered on and its power indicator light is active.
4.2 Камералар көрсөтүлбөйт
- Камералар күйгүзүлгөнүн жана тармакка туташтырылганын текшериңиз.
- Ensure the NVR and cameras are on the same local network.
- Check camera IP addresses and network settings within the NVR's camera management interface.
- Verify camera compatibility with the NV5216.
4.3 Алыстан кирүү көйгөйлөрү
- Ensure the NVR has an active internet connection.
- Verify that the Amcrest View колдонмо акыркы версиясына жаңыртылган.
- Check network firewall settings on your router; port forwarding may be required for direct access, though the app often uses P2P for easier setup.
4.4 Жаздыруудагы көйгөйлөр
- Check if a hard drive is installed and properly initialized in the NVR's storage settings.
- Verify that recording schedules or motion detection settings are correctly configured.
- Катуу дискте жетиштүү бош орун бар экенин текшериңиз.
5. Техникалык шарттар
| Модель номери | NV5216 |
| Каналдар | 16-канал |
| Resolution Recording | 1080p/3MP/4MP/5MP/6MP/8MP (4K)/12MP |
| Live View/Ойнотуу | Up to 4CH @ 4K @ 30fps simultaneously (remaining channels 1080P @ 30fps) |
| Катуу дискти колдоо | Up to 2 x 10TB (20TB total) (Hard Drives Not Included) |
| Видеону кысуу | H.265 |
| Байланыш | Ethernet (hard-wired connection required), USB 3.0 (rear), USB 2.0 (front) |
| Video Output | Сапаттуу, VGA |
| Иштөө шарттары | +14°F ~ +131°F (-10°C ~ +55°C) |
| Өлчөмдөр | 17.09 x 14.53 x 5.55 дюйм |
| Элемент Салмагы | 6.41 фунт |
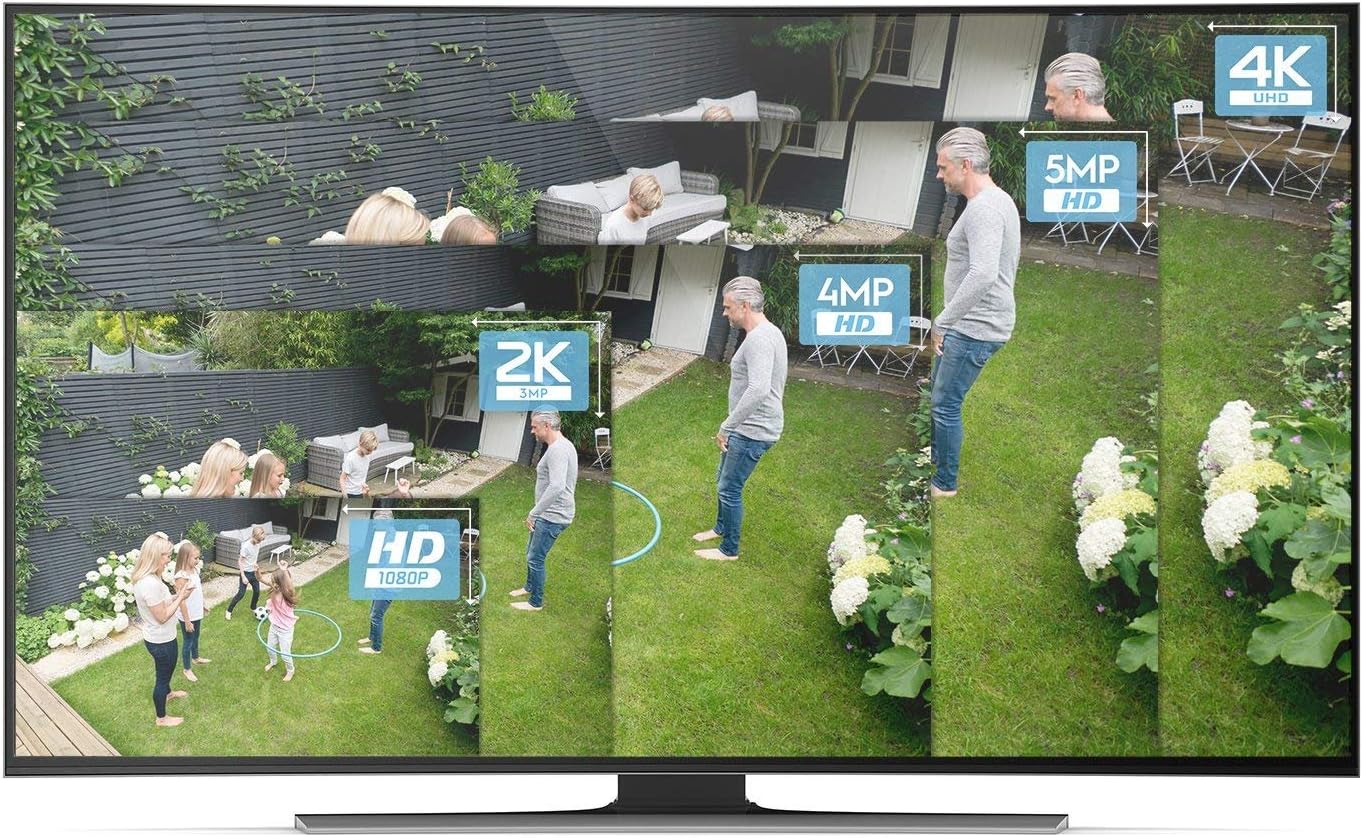
Image: A visual comparison demonstrating the clarity and detail difference between various video resolutions, including HD (1080p), 2K (3MP), 4MP, 5MP, and 4K (8MP).
6. Кепилдик жана колдоо
6.1 Продукциянын кепилдиги
The Amcrest NV5216 NVR is guaranteed for a full year from the date of purchase. This warranty is offered with US Support and US Warranty exclusively by Amcrest.
6.2 Техникалык колдоо
For technical assistance, troubleshooting, or warranty claims, please contact Amcrest Support. Refer to the official Amcrest webакыркы байланыш маалыматы жана колдоо булактары үчүн сайт.