
Introduction
This manual provides essential information for the proper setup, operation, and maintenance of your Philips 346B1C Curved Monitor. This 34-inch WQHD (3440 x 1440) display features a 100 Hz refresh rate, 5ms response time, and a curved VA panel for an immersive viewing experience. Key features include USB-C docking, MultiView functionality, FreeSync technology, LowBlue Mode, and FlickerFree technology for enhanced user comfort and productivity.

Сүрөт: алдыңкы view of the Philips 346B1C curved monitor, showcasing its ultrawide display and key features like WQHD, USB-C Docking, and MultiView.
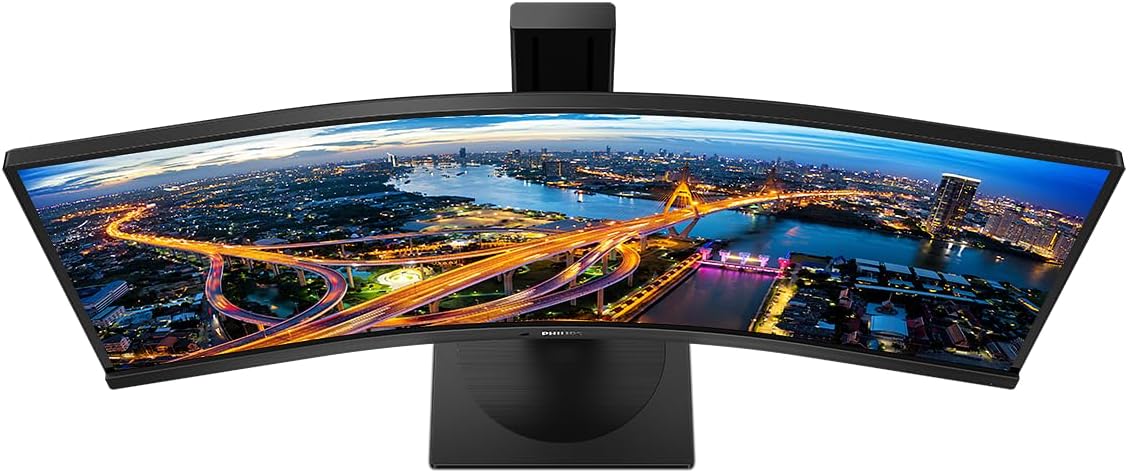
Сүрөт: жогорудан төмөнгө view of the Philips 346B1C curved monitor, emphasizing the curvature of the screen.
Кутуда эмне бар
Орнотууну улантуудан мурун бардык компоненттер бар экенин текшериңиз.
- Philips 346B1C Curved Monitor
- Монитор стенд (негизги жана моюн)
- Электр кабели
- HDMI кабели
- DisplayPort кабели
- USB-C - USB-C кабели
- USB-A to USB-B Cable (Upstream)
- Documentation (Quick Start Guide, User Manual CD)
Орнотуу нускамалары
1. Стендди чогултуу
- Чийип кетпеши үчүн мониторду жумшак, таза бетке ылдый каратып кой.
- Монитор панелине стенд мойнуна бекитиңиз. Анын ордуна бекем чыкылдаганын же камтылган болсо, бурамалар менен бекемделгенин текшериңиз.
- Attach the stand base to the stand neck. Tighten the thumb screw or screws from the bottom of the base.

Сүрөт: Арткы view of the Philips 346B1C monitor, showing the stand attachment point and VESA mounting holes.
2. Компьютериңизге туташуу
Мониторду компьютериңизге төмөнкү ыкмалардын бири менен туташтырыңыз:
- HDMI туташуу: HDMI кабелинин бир учун монитордун HDMI портуна, экинчи учун компьютериңиздин HDMI чыгышына туташтырыңыз.
- DisplayPort туташуу: Connect one end of the DisplayPort cable to the monitor's DisplayPort and the other end to your computer's DisplayPort output.
- USB-C туташуу: Connect one end of the USB-C cable to the monitor's USB-C port and the other end to your computer's USB-C port. This connection supports video, data, and power delivery (up to 90W) to your laptop.
For USB hub functionality, connect the USB-A to USB-B upstream cable from your computer to the monitor's USB-B upstream port.
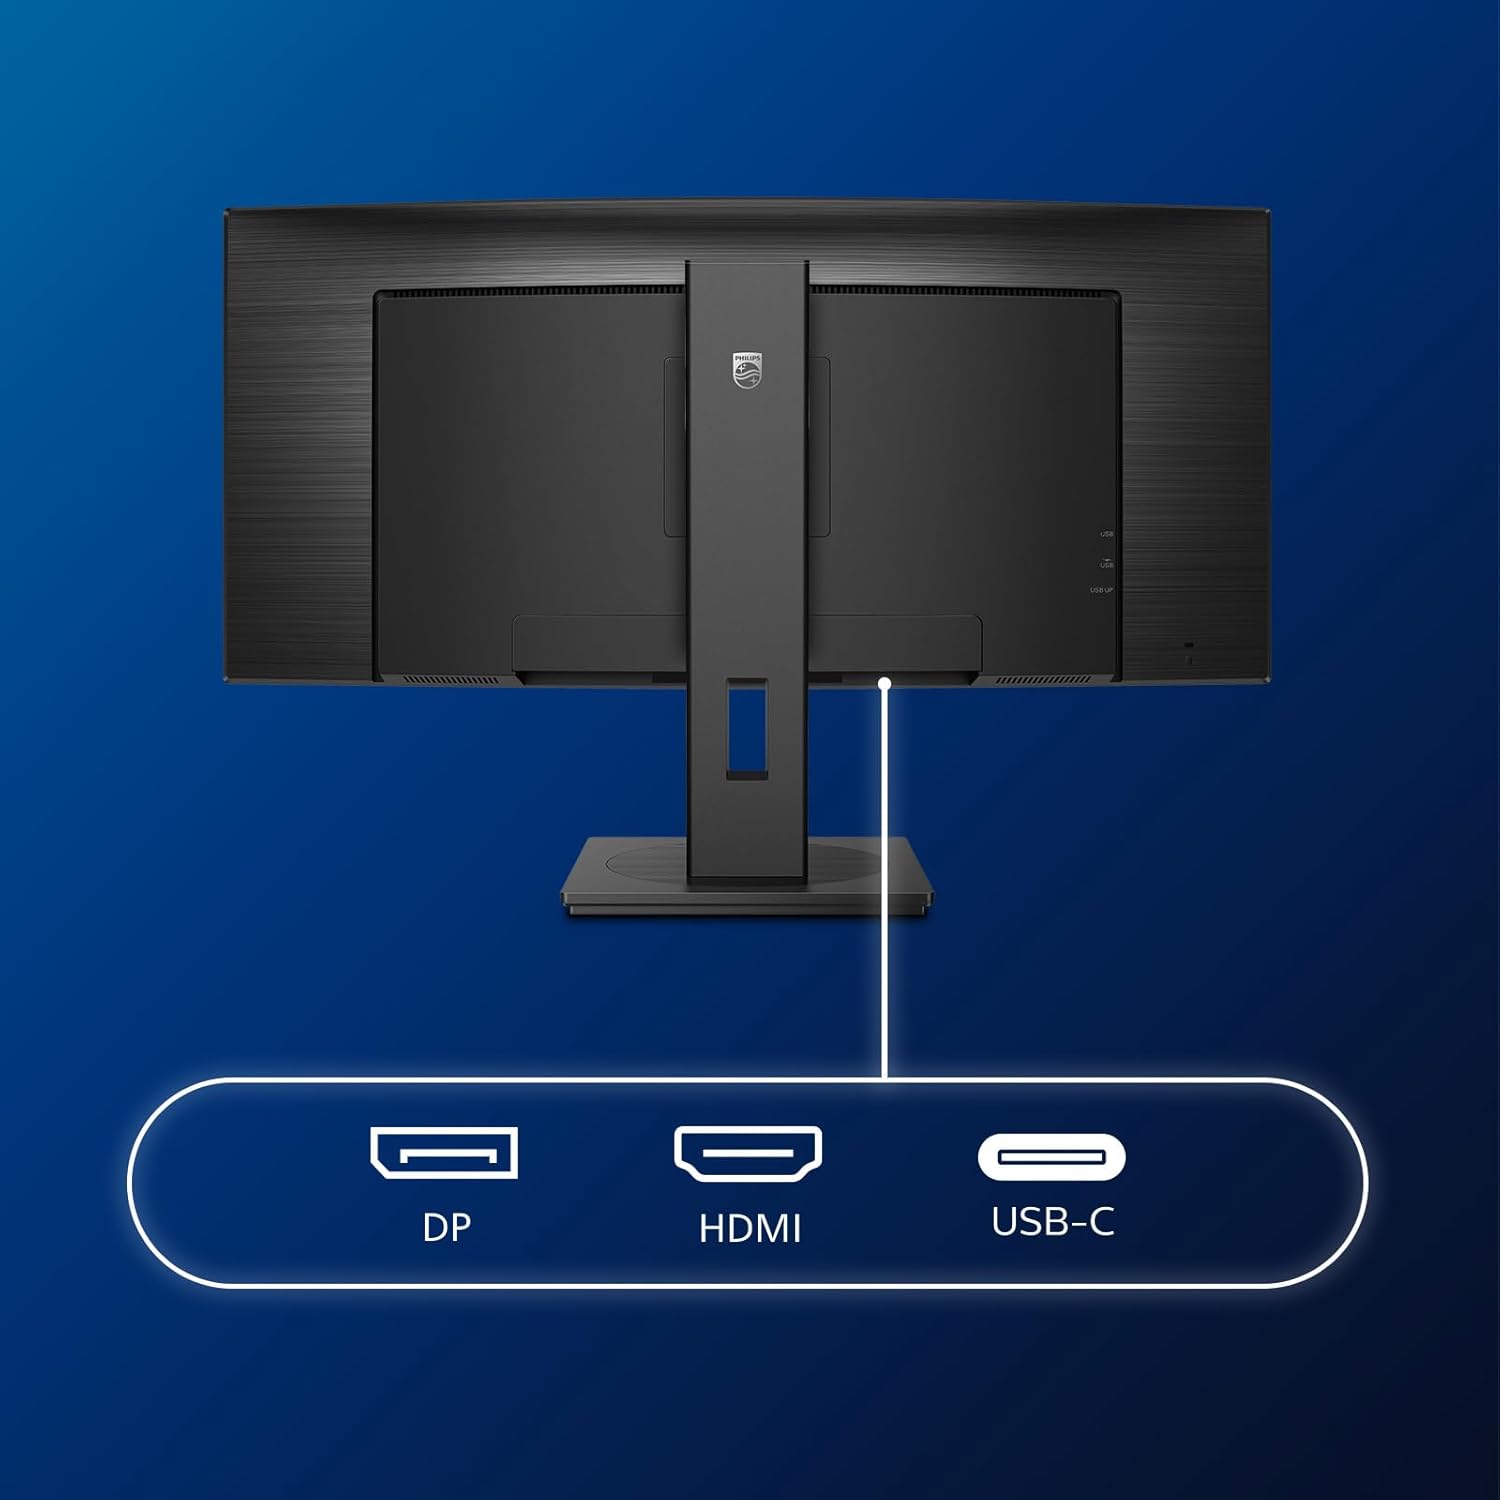
Сүрөт: деталдуу view of the monitor's input ports, including DisplayPort (DP), HDMI, and USB-C, for connecting to various devices.
3. Power Connection
Кубат кабелин монитордун кубат киресине, анан жерге туташтырылган электр розеткасына туташтырыңыз.
4. Баштапкы күйгүзүү
Press the power button located on the monitor to turn it on. The monitor should automatically detect the input signal. If not, use the On-Screen Display (OSD) menu to select the correct input source.
Иштөө нускамалары
Экрандагы дисплей (OSD) менюсу
The OSD menu allows you to adjust various monitor settings. Use the joystick control located on the back or bottom of the monitor to navigate the menu.
- Жарыктык/Контраст: Дисплейдин жалпы жарыктыгын жана контрастын тууралаңыз.
- Түс жөндөөлөрү: Түс температурасын, гаммасын жана түс мейкиндигин так жөндөө.
- Киргизүүнү тандоо: HDMI, DisplayPort жана USB-C киргизүүлөрүнүн ортосунда кол менен которулуңуз.
- Аудио: Adjust volume or mute the built-in speakers.
- Сүрөт режими: Select from preset picture modes (e.g., Standard, Gaming, Text).
МультиView Функционалдык
The MultiView feature allows you to connect and view content from two different sources simultaneously on the screen. Access this feature through the OSD menu to select Picture-by-Picture (PbP) or Picture-in-Picture (PiP) modes and configure input sources.
USB-C док
When connected via USB-C, the monitor acts as a docking station, providing video, data transfer through its integrated USB hub, and power delivery to charge your connected laptop (up to 90W).
SmartErgoBase and Adjustability
The monitor's SmartErgoBase allows for ergonomic adjustments including height, swivel, and tilt to optimize your viewсооронуч.

Image: Illustrations demonstrating the monitor's adjustable features, including height adjustment, tilt, and swivel capabilities for ergonomic positioning.
Көздүн ыңгайлуулугу
- LowBlue режими: Reduces harmful shortwave blue light emissions to prevent eye strain. Activate this mode via the OSD menu.
- FlickerFree Technology: Regulates brightness and reduces flicker for more comfortable viewing. Бул функция ар дайым активдүү.
- PowerSensor & LightSensor: These sensors automatically adjust monitor brightness based on ambient light conditions and user presence, saving energy and reducing eye strain.
Техникалык тейлөө
Мониторду тазалоо
- Тазалоодон мурун ар дайым мониторду сууруп коюңуз.
- Жумшак, түксүз кездемени жеңил колдонуңуз dampсуу же жумшак, абразивдүү эмес экран тазалагыч менен иштетиңиз.
- Do not use alcohol, solvents, or ammonia-based cleaners, as these can damage the screen surface.
- Чаңды жана тактарды кетирүү үчүн экранды акырын сүртүңүз.
- Мониторду тазалоо casing жумшак, кургак чүпүрөк менен.
Жалпы кам көрүү
- Монитор же анын кабелдерине оор нерселерди коюудан алыс болуңуз.
- Мониторду түз күндүн нуруна, ашыкча ысыкка же катуу суукка тийгизбеңиз.
- Монитордун айланасында туура желдетүүнү камсыз кылыңыз.
Проблемаларды чечүү
Эгерде сиз мониторуңузда көйгөйлөргө туш болсоңуз, төмөнкү жалпы көйгөйлөрдү чечүү кадамдарын караңыз:
| Көйгөй | Мүмкүн себеп | Чечим |
|---|---|---|
| Экранда сүрөт жок | Электр кабели ажыратылган; Видео кабели ажыратылган; Туура эмес киргизүү булагы тандалды. | Ensure power cable is securely connected; Check video cable connections (HDMI, DP, USB-C); Select correct input source via OSD menu. |
| Сүрөт бүдөмүк же бурмаланган | туура эмес чечим; Графикалык драйвер маселеси. | Set display resolution to 3440 x 1440; Update graphics card drivers. |
| Динамиктерден үн жок | Volume muted or too low; Incorrect audio output selected on computer. | Adjust monitor volume via OSD; Check computer's audio output settings. |
| USB порттору иштебейт | USB жогорку агым кабели туташкан эмес. | Ensure the USB-A to USB-B upstream cable is connected from the monitor to your computer. |
Көбүрөөк жардам алуу үчүн, колдоо бөлүмүнө кайрылыңыз же Philips кардарларды тейлөө кызматына кайрылыңыз.
Техникалык шарттар
| Өзгөчөлүк | Деталь |
|---|---|
| Бренд | Philips |
| Модель номери | 346B1C |
| Screen Size | 34 дюйм (86 см) |
| Резолюция | 3440 x 1440 (WQHD) |
| Аспект катышы | 21:9 |
| Screen Surface | Curved VA Panel |
| Жаңыртуу ылдамдыгы | 100 Гц |
| Жооп убактысы | 5 Milliseconds (GtG) |
| Контраст катышы | 3000:1 (Типтүү) |
| Жарыктык | 300 кд/м² |
| Viewбурч | 178° (H) / 178° (V) |
| Байланыш | 1x HDMI 2.0, 1x DisplayPort 1.2, 1x USB-C 3.2 Gen 1 (upstream, power up to 90W), 1x USB-B (upstream), 4x USB 3.2 (downstream), RJ45 (Ethernet) |
| Adaptive Sync | FreeSync |
| Камтылган динамиктер | 2х 5 Вт |
| Энергияны керектөө | 5 Watts (Eco mode) |
| Салмагы | 7.8 Kilograms (with stand) |
Кепилдик жана колдоо
Кепилдик маалымат
This Philips monitor comes with a 2 жылдык өндүрүүчүнүн кепилдиги. The specific terms and conditions of the warranty can be found in the detailed documentation provided with your product or on the official Philips support website. Your statutory rights as a consumer are not affected by this warranty.
Кардарларды колдоо
For technical assistance, product inquiries, or warranty claims, please visit the official Philips support website or contact their customer service department. You may need your monitor's model number (346B1C) and serial number (found on the back of the monitor) when contacting support.
Philips колдоо Webсайт: www.philips.com/support