
Introduction
This manual provides instructions for the safe operation and maintenance of your DBPOWER U818A WIFI Drone. The U818A is a remote-controlled quadcopter equipped with a 720P HD camera for real-time video transmission. It features altitude hold and headless mode, designed for ease of use, making it suitable for beginners.
Please read this manual thoroughly before operating the drone to ensure proper function and to prevent damage or injury.
Коопсуздук маалыматы
- Take a 10-minute break after each flight to allow the motors to cool down.
- Дронду ар дайым ачык, таза жерлерде, адамдардан, жаныбарлардан жана тоскоолдуктардан алыс айдаңыз.
- Аэропорттордун, электр линияларынын же чектелген аба мейкиндигинин жанында учпаңыз.
- Ensure all propellers are securely attached and undamaged before each flight.
- Манжаларды жана чачты айлануучу пропеллерлерден алыс кармаңыз.
- Катуу шамалда же жагымсыз аба ырайында иштебеңиз.
- Жаш колдонуучулар үчүн чоңдордун көзөмөлү сунушталат.
Пакеттин мазмуну
Төмөндө тизмеленген нерселердин баары пакетиңизге камтылганын текшериңиз:
- 1 x DBPOWER U818A FPV WIFI Drone with 720P HD Camera
- 1 x 2.4 ГГц алыстан башкаруу
- 2 x LiPo 3.7V 350mAh Batteries (for drone)
- 1 x USB заряддагыч
- 1 х Картаны окугуч
- 1 x 4GB Micro SD карта
- 4 х запастык пропеллер
- 1 x User Manual
- 1 x Quick Start Guide
Жайгашуу
1. Дрондун батареяларын кубаттоо
- Connect the LiPo battery to the USB charger.
- Plug the USB charger into a USB power source (e.g., computer, USB wall adapter).
- The indicator light on the charger will show charging status (refer to charger instructions for specific light patterns).
- Адатта, ар бир батарейканы заряддоо болжол менен 60-90 мүнөткө созулат.
2. Алыстан башкаруунун батареяларын орнотуу
- The remote control requires 4 x AA batteries (not included).
- Пульттун артындагы батарея бөлүкчөсүн ачыңыз.
- Туура полярдуулукту (+/-) камсыз кылуу менен батарейкаларды салыңыз.
- Батарея отсегин жабыңыз.
3. Installing Propellers (if necessary)
- Ensure propellers are correctly matched to their respective motor shafts (usually marked A and B).
- Securely attach each propeller.
4. Micro SD картаны салуу
- Locate the Micro SD card slot on the drone.
- Insert the provided 4GB Micro SD card until it clicks into place.
5. Pairing the Drone with the Remote Control
- Дронду тегиз, тегиз жерге орнотуңуз.
- Connect the drone battery. The drone's LED lights will flash.
- Алыстан башкарууну күйгүзүңүз.
- Сол джойстикти (дроссельди) аягына чейин өйдө, андан кийин аягына чейин ылдый басыңыз.
- The drone's LED lights will become solid, indicating successful pairing.
6. App Installation and Wi-Fi Connection (for FPV)
- Download the 'Flyingsee' or 'UDIRC FPV' app from your smartphone's app store (iOS or Android).
- Дронду күйгүзүңүз.
- On your smartphone, go to Wi-Fi settings and connect to the drone's Wi-Fi network (usually named 'UDIRC' followed by numbers/letters).
- колдонмону ачуу view the live camera feed and access app-based controls.
Иштөө нускамалары
Негизги учуу башкаруу
- Бир баскычтуу учуу/конуу: Автоматтык түрдө учуу же конуу үчүн пульттагы атайын баскычты басыңыз.
- Дроссель (сол жактагы джойстик): Өйдө көтөрүлүү үчүн түртүңүз, ылдый түшүү үчүн ылдый тартыңыз.
- Багыттоо башкаруусу (оң жактагы джойстик): Дронду алдыга/артка жылдыруу үчүн алдыга/артка басыңыз. Дронду солго/оңго жылдыруу үчүн солго/оңго басыңыз.
- Яв (Сол джойстикти солго/оңго бураңыз): Push left/right to rotate the drone counter-clockwise/clockwise.

Image: One-Button Take-Off/Landing feature for simplified operation.
Бийиктикте кармоо режими
The advanced barometer allows the drone to maintain a stable altitude automatically, simplifying control for beginners and enabling stable photography.

Image: Altitude Hold Mode for stable flight and photography.
Башсыз режим
In Headless Mode, the drone's orientation is relative to the pilot, not the drone's front. This means pushing the right joystick forward will always make the drone fly away from you, regardless of which way the drone is facing. This simplifies control, especially for beginners.
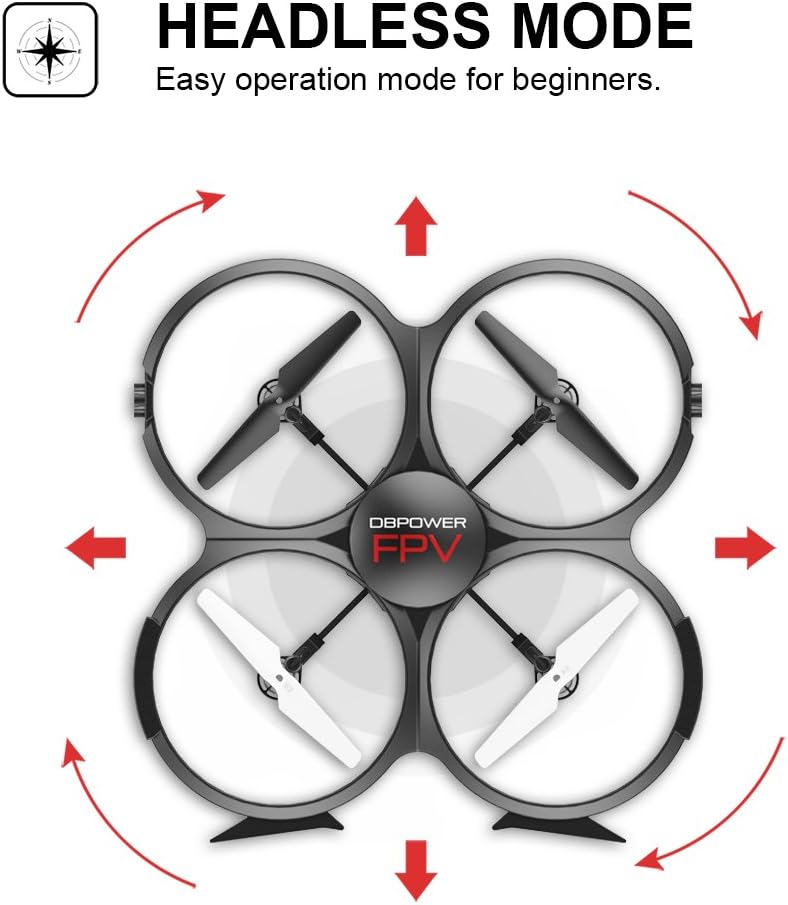
Image: Headless Mode for easier directional control.
3D Flips & Rolls
The drone supports automatic 360-degree flips. Consult the remote control diagram in the quick start guide for the specific button or joystick combination to activate this function.

Image: 3D Flip & Rolls feature for aerial maneuvers.
720P HD Camera and FPV (First Person View)
The integrated 720P HD camera captures photos and videos. Through Wi-Fi real-time transmission, you can view the live feed on your smartphone via the dedicated app. This allows for capturing aerial footage and photos directly to the Micro SD card or your phone.

Image: 720P HD WIFI Camera for capturing high-definition aerial views.
Gravity Induction Mode
When using the smartphone app, Gravity Induction Mode allows you to control the drone's forward/backward/left/right movement by tilting your mobile phone.
Төмөн кубаттуу сигнал
When the drone's battery is low, the remote control will emit an audible beep to alert you to fly the drone back and land it, preventing loss of control due to power depletion.

Image: Low Power Alarm feature on the remote control.
Башкаруу режимдери
The drone can be controlled using either the included 2.4 GHz remote control or via the dedicated smartphone application, offering flexibility in operation.
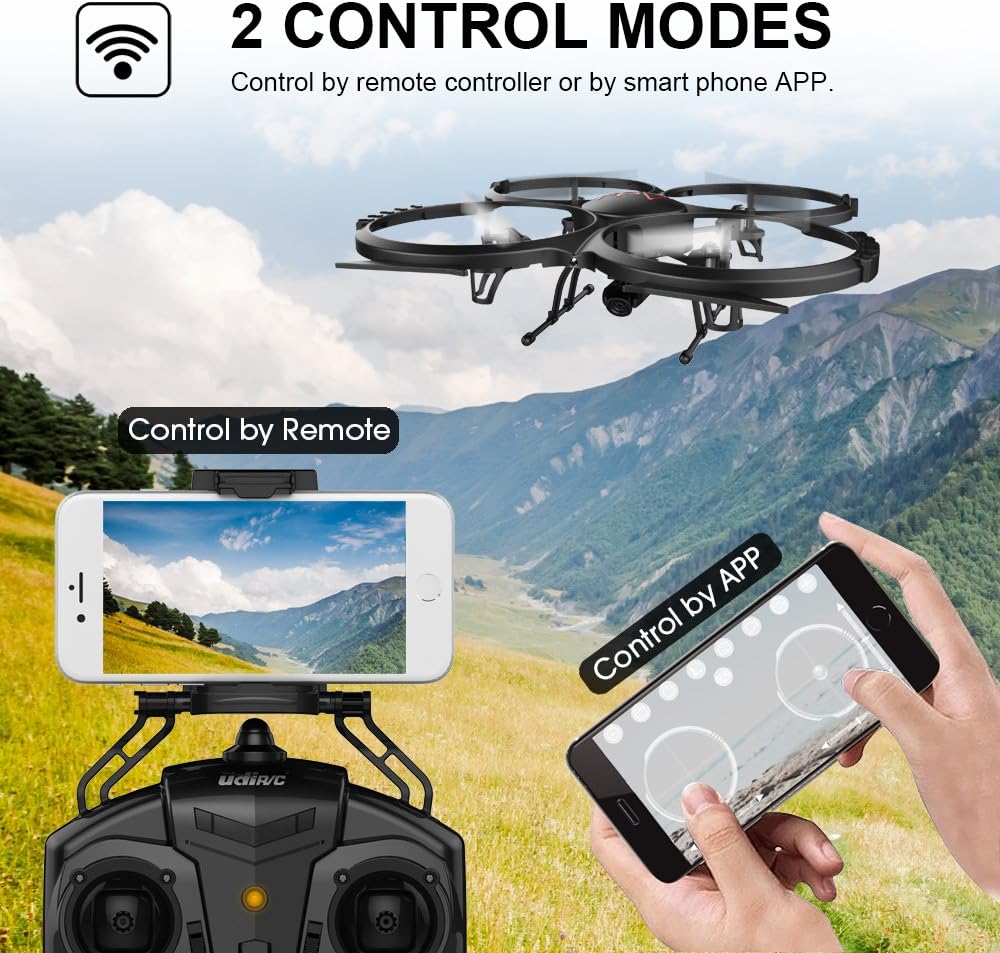
Image: Two Control Modes: Remote Control and Smartphone App.
3D View Mode (VR Headset Support)
The drone's FPV feed can be used with a compatible VR headset (not included) for an immersive 3D viewing experience during flight.

Image: 3D View Mode with optional VR headset for immersive flight.
Техникалык тейлөө
Пропеллерди алмаштыруу
- If a propeller is damaged, replace it immediately with a spare propeller from the package.
- Ensure the new propeller is correctly oriented and securely fastened.
Тазалоо
- Дрондун корпусун жана камеранын линзасын тазалоо үчүн жумшак, кургак чүпүрөктү колдонуңуз.
- Avoid using liquids or solvents that could damage electronic components.
Моторду муздатуу
- Allow motors to cool for at least 10 minutes after each flight to prolong their lifespan.
Проблемаларды чечүү
- Drone does not respond: Ensure the drone and remote control are fully charged and properly paired. Check for any obstructions to the propellers.
- Туруксуз учуу: Recalibrate the drone on a flat surface. Check if propellers are damaged or incorrectly installed. Avoid flying in windy conditions.
- FPV түрмөгү жок: Ensure your smartphone is connected to the drone's Wi-Fi network and the app is open. Check for strong Wi-Fi interference.
- Кыска учуу убактысы: Ensure batteries are fully charged. Flight time can be affected by aggressive flying, wind, and cold temperatures.
- Drone drifts: Use the trim buttons on the remote control to adjust for minor drifts.
Техникалык шарттар
| Өзгөчөлүк | Деталь |
|---|---|
| Бренд | DBPOWER |
| Модель номери | U818A WIFI |
| Видео жаздыруу чечими | 720p |
| Байланыш технологиясы | Wi-Fi |
| Skill Level | Тажрыйба талап кылынбайт |
| Видео тартуу форматы | MP4 |
| Башкаруу түрү | Алыстан башкаруу |
| Материал | Пластик |
| Батареянын курамы | Литий-ион |
| Алыстан башкаруунун батареялары | 4 x AA (киргизилген эмес) |
| Rechargeable Drone Batteries | 2 x 3.7V 350mAh LiPo (included) |
| Медиа түрү | Micro SD (4 ГБ камтылган) |
Кепилдик жана колдоо
The DBPOWER U818A WIFI Drone comes with a 1-year warranty.
For any issues or technical assistance, please contact our support team via Amazon messaging. Our technical support team will provide the best possible solution.