Raijintek 0R20B00183
RAIJINTEK NYX PRO Showcase Big-Tower колдонуучусунун колдонмосу
Model: 0R20B00183
Introduction
This manual provides comprehensive instructions for the assembly, operation, and maintenance of your RAIJINTEK NYX PRO Showcase Big-Tower chassis. Please read this manual thoroughly before beginning installation to ensure proper setup and safe usage. This chassis is designed for high-performance PC builds, offering extensive compatibility and a unique aesthetic.
Коопсуздук маалыматы
Ар дайым төмөнкү коопсуздук чараларын сактаңыз:
- Ensure all power is disconnected from components before installation or maintenance.
- Handle tempered glass panels with care to prevent breakage.
- Wear anti-static wrist straps when handling sensitive electronic components.
- Майда тетиктерди жана шаймандарды балдардан алыс кармаңыз.
- Do not attempt to modify the chassis structure.
Пакеттин мазмуну
Орнотууну улантуудан мурун, бардык компоненттердин бар экендигин текшериңиз:
- RAIJINTEK NYX PRO Showcase Big-Tower Chassis
- Кошумча кутуча (бурамалар, бекиткичтер, кабель байлагычтар ж.б.)
- Колдонуучунун Колдонмосу (бул документ)

Image: The RAIJINTEK NYX PRO Showcase Big-Tower chassis in white, showcasing its unique open-frame design and tempered glass panels.
Техникалык шарттар
| Өзгөчөлүк | Деталь |
|---|---|
| Модель аты | NYX PRO (0R20B00183) |
| Иштин түрү | Big-Tower / Showcase |
| Материал | Чыңалган айнек, болот |
| Түс | Ак (Ак) |
| Продукциянын өлчөмдөрү (L x W x Y) | 59.5 x 26.5 x 65.8 см |
| Элемент Салмагы | 14.17 кг |
| Motherboard шайкештиги | Кеңейтилген ATX, ATX, Micro-ATX, Mini-ITX |
| Муздатуу ыкмасы | Water, Air (supports various fan sizes up to 120mm) |
| Сунушталган колдонуу | Gaming PC Builds |
Орнотуу жана орнотуу
Follow these steps for proper assembly of your PC components within the NYX PRO chassis.
1. Шассини даярдоо
Carefully unbox the chassis and place it on a stable, flat surface. Identify the various access points and removable panels.
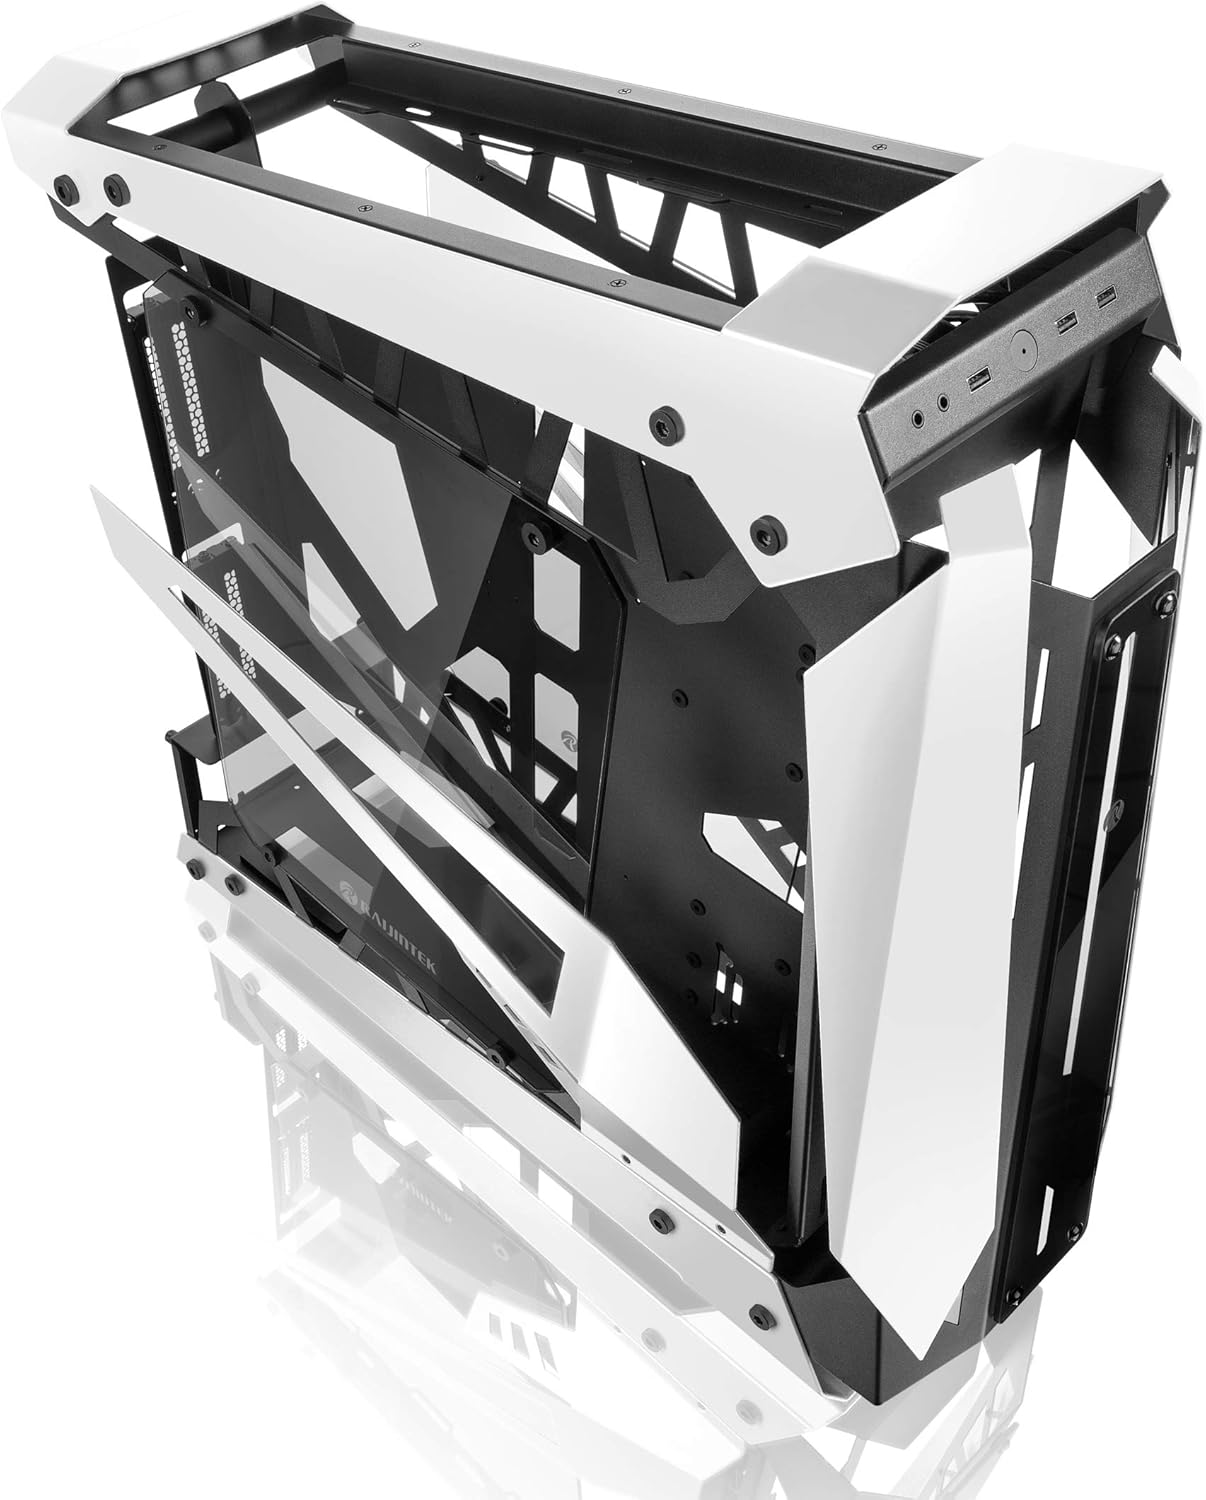
Image: The RAIJINTEK NYX PRO chassis with its top and front panels opened, revealing the internal structure and component mounting areas.
2. Motherboard орнотуу
- Install the necessary motherboard standoffs into the motherboard tray according to your motherboard's form factor (E-ATX, ATX, Micro-ATX, Mini-ITX).
- Бурамалар тешиктерин тегиздеп, энелик платаны этияттык менен тирөөчтөргө коюңуз.
- Берилген бурамалар менен энелик тактаны бекитиңиз.

Сүрөт: ички view of the RAIJINTEK NYX PRO chassis, showing the spacious interior for motherboard and component installation.
3. Электр менен камсыздоо блогун (PSU) орнотуу
Locate the PSU mounting area, typically at the rear or bottom of the chassis. Secure the PSU with screws.
4. Сактоочу дискти орнотуу
The NYX PRO supports multiple storage drives. Identify the 2.5" and 3.5" drive bays and secure your SSDs/HDDs using the provided mounting hardware.
5. Графикалык картаны (GPU) орнотуу
Insert your graphics card into the appropriate PCIe slot on the motherboard. Secure it with the retention mechanism and screws. Note the vertical GPU mounting option for showcase builds.

Image: The RAIJINTEK NYX PRO chassis showcasing installed components with RGB lighting, highlighting the open design and visibility of internal parts.
6. Муздатуу системасын орнотуу (вентиляторлор/радиаторлор)
Install case fans or liquid cooling radiators in the designated mounting points. Ensure proper airflow direction for optimal cooling.
7. Кабелдик башкаруу
Utilize the cable routing cutouts and tie-down points to manage cables neatly. This improves airflow and aesthetics.

Сүрөт: бир тарап view of the RAIJINTEK NYX PRO chassis, emphasizing its angular design and the large tempered glass side panel.
8. Front I/O Connections
Connect the front panel USB, audio, power, and reset headers to the corresponding pins on your motherboard.
Иштөө нускамалары
Once all components are installed and secured, and all cables are connected:
- Мониторуңузду, клавиатураңызды, чычканыңызды жана башка перифериялык түзүлүштөрдү энелик платаңыздагы жана графикалык картаңыздагы тиешелүү портторго туташтырыңыз.
- Электр кабелин PSUга жана розеткага туташтырыңыз.
- Кубат булагындагы кубат которгучун "ON" абалына коюңуз.
- Press the power button on the front panel of the chassis to power on your system.

Сүрөт: жакын план view of the front I/O ports on the RAIJINTEK NYX PRO chassis, including USB and audio jacks.
Техникалык тейлөө
Regular maintenance helps ensure the longevity and optimal performance of your PC and chassis.
- Чаңды тазалоо: Чаң чыпкаларын жана ички компоненттерди кысылган аба же жумшак щетка менен мезгил-мезгили менен тазалап туруңуз. Тазалоодон мурун системанын өчүрүлгөнүн жана розеткадан суурулганын текшериңиз.
- Жылууланган айнек кам көрүү: Clean tempered glass panels with a soft, lint-free cloth and a non-abrasive glass cleaner. Avoid harsh chemicals.
- Кабель башкаруу текшерүү: Occasionally check cable routing to ensure no cables are obstructing airflow or fan blades.
Проблемаларды чечүү
Көйгөйгө туш болсоңуз, көйгөйлөрдү чечүүнүн төмөнкү жалпы кадамдарын карап көрүңүз:
- Система күйбөй жатат:
- Check if the PSU switch is in the "ON" position.
- Кубат кабелинин кубат булагына жана розеткага бекем туташтырылганын текшериңиз.
- Алдыңкы панелдин кубат баскычынын башынын энелик платага туура туташтырылганын текшериңиз.
- Confirm all internal power cables (24-pin ATX, CPU, GPU) are firmly seated.
- Дисплей чыгышы жок:
- Ensure your monitor is connected to the graphics card (not the motherboard's integrated graphics, unless you are using integrated graphics).
- Графикалык картаны PCIe слотуна кайра орнотуңуз.
- Монитордун киргизүү тандоосун текшериңиз.
- Ашыкча ысып кетүү:
- Ensure all case fans are spinning and oriented correctly for airflow.
- Clean dust from fans and radiators.
- CPU муздаткычы туура орнотулганын жана CPU менен жакшы байланышта экенин текшериңиз.
Кепилдик жана колдоо
For warranty information and technical support, please refer to the official Raijintek webсайтка же кардарларды тейлөө бөлүмүнө кайрылыңыз. Кепилдик дооматтар үчүн сатып алганыңыздын далилин сактаңыз.
Official Raijintek Webсайт: www.raijintek.com
Ask a question about this manual
Ask about setup, troubleshooting, compatibility, parts, safety, or missing instructions. Manuals+ will review the question and use this page’s manual context to help answer it.