
1. Киришүү
Thank you for choosing the Juskys Victoria 20L Solar Shower. This manual provides essential information for the safe and efficient installation, operation, and maintenance of your new solar shower. Please read these instructions carefully before assembly and use, and retain them for future reference.

Image 1.1: The Juskys Victoria 20L Solar Shower in a garden environment.
2. Коопсуздук нускамалары
- Ensure the solar shower is installed on a stable, level surface to prevent tipping.
- Secure the base plate firmly to the ground using appropriate fasteners.
- Do not exceed the maximum water temperature of 60°C. Always test the water temperature before showering to avoid scalding.
- Disconnect the water supply and drain the shower completely before freezing temperatures to prevent damage.
- Keep children and pets away from the shower during operation, especially when water is hot.
- Do not modify the product in any way. Use only original replacement parts.
3. Пакеттин мазмуну
Монтаждоону баштоодон мурун бардык компоненттердин бар экендигин текшериңиз:
- Solar Shower Column (with integrated 20L water tank)
- Rain Shower Head (swivel-adjustable)
- Mixing Faucet (for temperature control)
- Foot Shower Faucet
- Негизги табак
- Монтаждоочу жабдуулар (буроолор, анкерлер)
- Garden шланг туташтыргычы
- Instruction Manual

Сүрөт 3.1: Бүттүview негизги компоненттеринин жана функцияларынын тизмеси.
4. Орнотуу жана чогултуу
Follow these steps to assemble and install your solar shower:
- Жайгашкан жерди тандоо: Select a sunny, level, and stable location in your garden. Direct sunlight is crucial for heating the water.
- Коопсуз базалык плита: Position the base plate (15.5 x 15.5 cm) and mark the drilling points. Drill holes and secure the base plate firmly to the ground using the provided mounting hardware (screws and anchors).
- Attach Shower Column: Carefully place the solar shower column onto the secured base plate and fasten it according to the assembly instructions provided with the hardware.
- Суу менен камсыздоону туташтыруу: Connect a standard garden hose to the water inlet at the bottom of the shower column. Ensure a tight connection to prevent leaks.
- Душ башын тиркөө: Screw the rain shower head onto the top of the shower column. The shower head is swivel-adjustable for optimal positioning.

Image 4.1: Detail of the stable base and mounting hardware.
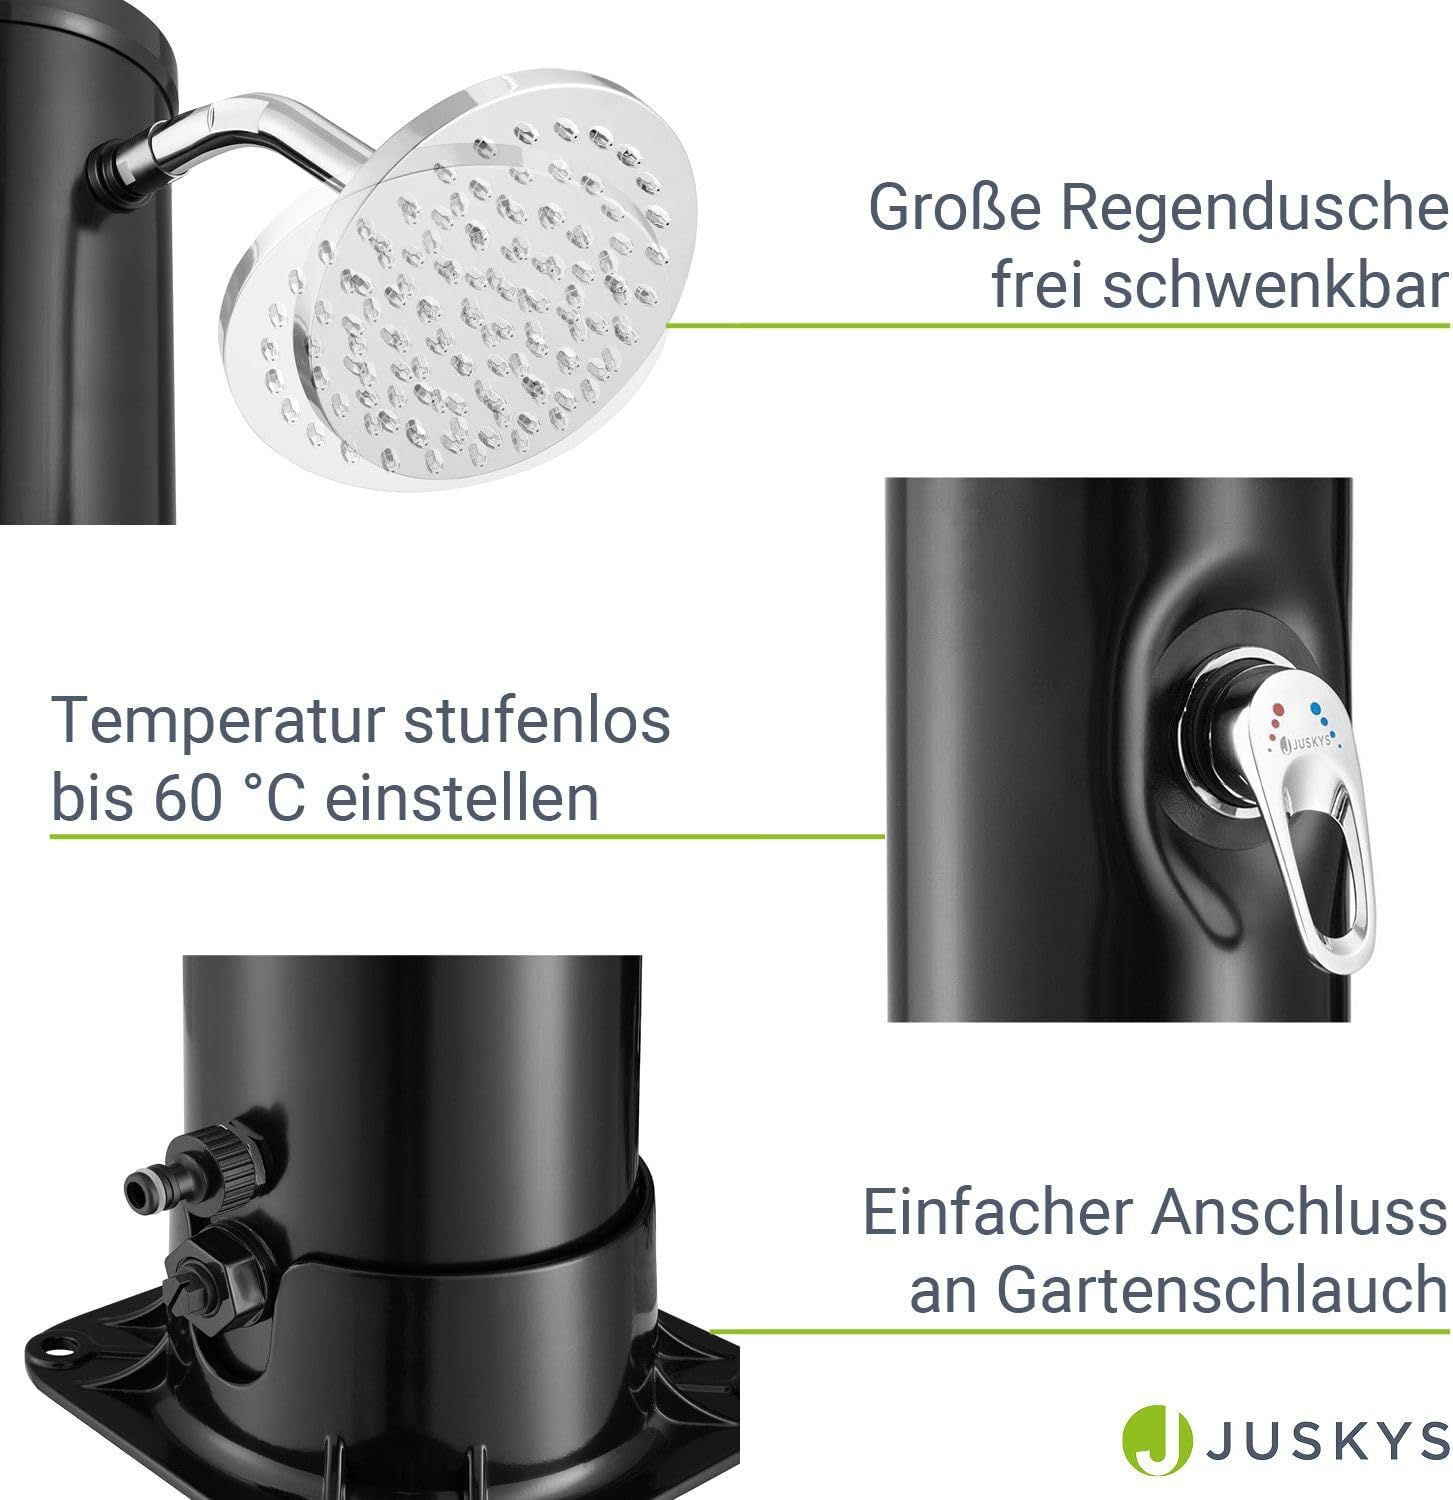
Image 4.2: Details of the shower head, temperature control, and hose connection.
5. Иштөө нускамалары
- Сууну толтуруу: Turn on the water supply from your garden hose. The 20-liter tank will fill with cold water.
- Ысык суу: Allow the shower to sit in direct sunlight. The black PVC column acts as a solar collector, heating the water inside. Depending on sunlight intensity and ambient temperature, it can take several hours for the water to reach its maximum temperature (up to 60°C).
- Температураны жөндөө: Use the mixing faucet to adjust the water temperature. Turn the handle towards the blue indicator for colder water and towards the red indicator for warmer water. Always test the water temperature with your hand before stepping under the shower.
- Use Rain Shower: Once the desired temperature is set, pull the mixing faucet handle outwards or turn it to activate the main rain shower head.
- Use Foot Shower: The integrated foot shower can be operated independently by turning its separate faucet. This is ideal for rinsing feet before entering a pool or for watering plants.

Image 5.1: Temperature mixing faucet for precise water temperature control.

Image 5.2: Integrated foot shower in operation.

Image 5.3: Rain shower head providing a refreshing spray.
6. Техникалык тейлөө
- Тазалоо: Clean the shower column and head regularly with a mild soap solution and a soft cloth. Avoid abrasive cleaners or harsh chemicals that could damage the surface.
- акиташ тазалоо: If limescale builds up on the shower head nozzles, gently rub them to dislodge deposits or use a descaling solution suitable for plastic and metal components.
- Кыштоо: Before the first frost, completely drain the solar shower. Disconnect the garden hose, open both the main shower and foot shower faucets, and allow all water to escape. Store the shower in a frost-free location if possible, or ensure it is thoroughly dry and protected from freezing temperatures. Failure to do so will void the warranty due to potential frost damage.
- Байланыштарды текшерүү: Periodically check all water connections for leaks and tighten if necessary.
7. Кыйынчылыктарды
| Көйгөй | Мүмкүн себеп | Чечим |
|---|---|---|
| No hot water or insufficient heat | Not enough direct sunlight; insufficient heating time; cloudy weather. | Relocate shower to a sunnier spot; allow more time for heating (several hours); use on sunny days. |
| Төмөн суунун басымы | Low pressure from garden hose; kink in hose; clogged shower head. | Check household water pressure; straighten hose; clean shower head nozzles. |
| Байланыштардан суу агып кетет | Loose connections; worn seals/gaskets. | Tighten all connections; check and replace seals/gaskets if damaged. |
| Foot shower not working | Foot shower faucet closed; water supply off. | Ensure foot shower faucet is open; check main water supply. |
8. Техникалык шарттар
- Бренд: Juskis
- Модель номери: 21141
- Түсү: Кара/Күмүш
- Суу резервуарынын сыйымдуулугу: 20 литр
- Суунун максималдуу температурасы: 60°Сге чейин
- Өлчөмдөрү (L x W x Y): 15.5 x 15.5 x 220 см
- Негизги плитанын өлчөмдөрү: 15.5 x 15.5 см
- Салмагы: 6.5 кг
- Материал: Robust PVC (column), Metal (base plate)
- Energy Type: Күн

Image 8.1: Detailed dimensions of the solar shower.
9. Кепилдик жана колдоо
This product comes with a standard manufacturer's warranty. Please refer to your purchase documentation for specific warranty terms and conditions. For technical support, spare parts, or warranty claims, please contact the retailer or manufacturer directly. Ensure you have your model number (21141) and proof of purchase available when contacting support.