
Introduction
This manual provides detailed instructions for the installation, operation, and maintenance of your SXFJF 2K/1080P Full HD Dual Dash Camera. This device is designed to record high-definition video of your driving, offering features such as a wide-angle lens to reduce blind spots, loop recording, G-sensor for emergency video locking, and Wide Dynamic Range (WDR) for improved night vision. Please read this manual thoroughly before using the product to ensure proper function and longevity.
Пакеттин мазмуну
Төмөндө тизмеленген нерселердин баары пакетиңизде бар экенин текшериңиз:
- 1x Dash Cam Unit
- 1x Suction Mount
- 1x Car Cigarette Lighter Power Adapter
- 1x Rear Camera with Cable (Note: Model B does not include a rear camera)
- 1x Колдонуучунун колдонмосу
- Additional mounting accessories (screws, adhesive pads, cable clips)

Image: Package contents including dash cam, cables, and mounting accessories.
Орнотуу жана орнотуу
- Микро SD картаны даярдаңыз: Before first use, insert a high-speed Micro SD card (up to 128GB, not included) into the dash cam. It is recommended to format the card within the dash cam settings for optimal performance.
- Даш камерасын орнотуу:
- Багыттоочу камера орнотула турган алдыңкы айнек аймагын тазалаңыз.
- Сорох устуоруйаны сызык камерага туттуу.
- Press the suction mount firmly against the windshield, ensuring a secure attachment. Adjust the angle of the dash cam to ensure a clear view жолдун.
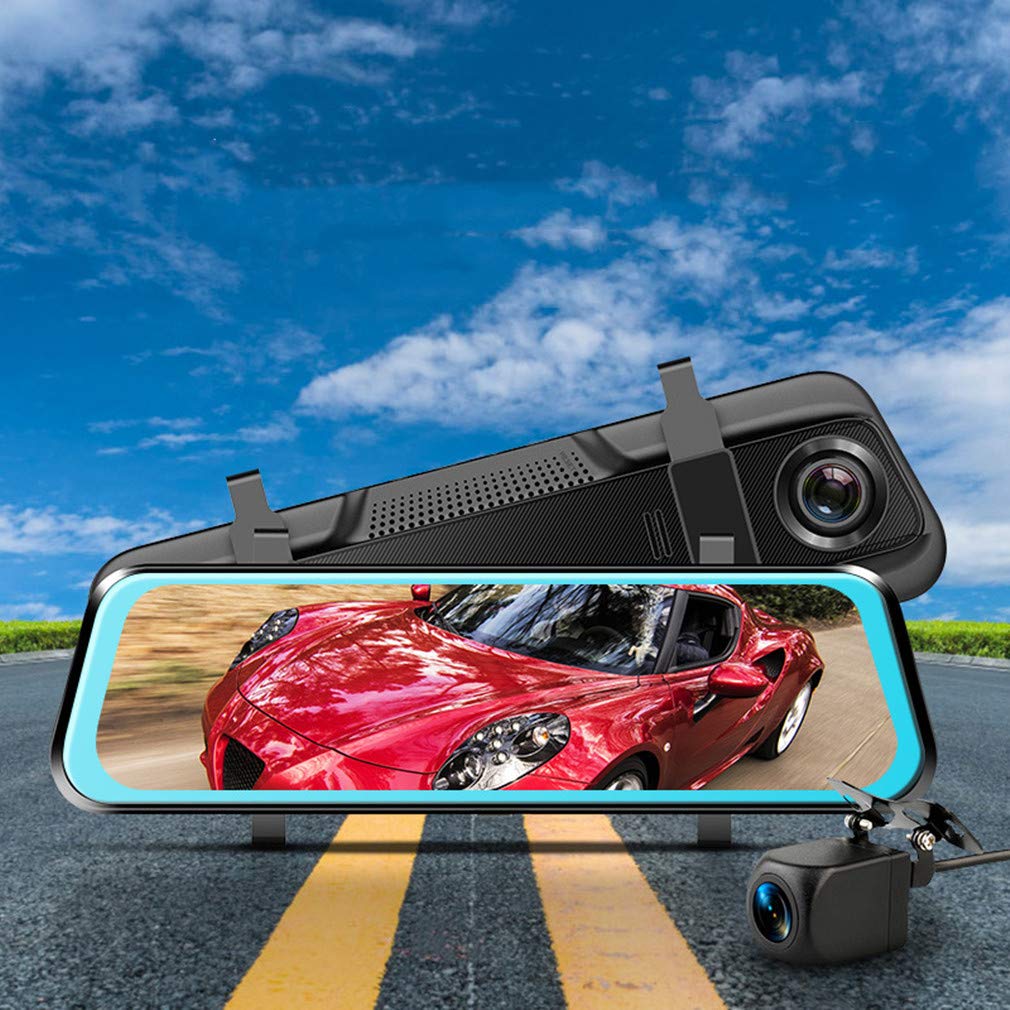
Image: Dash cam mounted on a windshield.
- Туташуу күчү:
- Connect the included car cigarette lighter power adapter to the dash cam's power input port.
- Plug the other end of the adapter into your vehicle's 12V cigarette lighter socket.
- Электр кабелин алдыңызга тоскоол болбош үчүн алдыңкы айнектин жана инструменттердин панелинин жанынан тыкан өткөрүңүз view же айдоого тоскоолдук кылуу.
- Installing the Rear Camera (if applicable):
- Mount the rear camera at the back of your vehicle, typically above the license plate or on the rear window, ensuring a clear view.
- Арткы камеранын кабелин негизги видеорегистратор блогуна туташтырыңыз.
- Route the cable carefully from the rear camera to the front dash cam, concealing it under trim panels or carpets.
Операция
Негизги функциялар
- Күйгүзүү/өчүрүү: The dash cam will automatically power on and begin recording when your vehicle's ignition is turned on. It will power off automatically when the ignition is turned off. You can also manually power it on/off using the power button.
- Жаздыруу режимдери: The dash cam supports continuous loop recording. When the memory card is full, the oldest unlocked video fileдын үстүнө жазылат.
- Сенсордук экран интерфейси: The 9.96-inch IPS touch screen allows for intuitive navigation through menus and settings. Swipe gestures can be used to switch between front and rear camera views or access playback.
- Видеону ойнотуу: Recorded videos can be reviewed directly on the dash cam's screen. Navigate to the playback menu to select and view files.
Advanced Features
- G-Sensor (Emergency Save): The built-in G-sensor detects sudden impacts or collisions. When triggered, it automatically locks the current video segment, preventing it from being overwritten by loop recording. This ensures critical footagе сакталган.
- 24 сааттык унаа токтотуучу монитор: When enabled, the dash cam can monitor your vehicle even when parked. If an impact is detected, it will automatically record a short video. This feature typically requires a hardwire kit (sold separately) to provide continuous power.
- Кең динамикалык диапазон (WDR): WDR technology enhances video quality in varying light conditions, ensuring clearer footage in both bright and dark areas, especially useful for night driving.
- Кең бурчтуу линза: The 170° wide-angle lens captures a broad view of the road, minimizing blind spots and providing comprehensive coverage.

Image: G-sensor emergency save feature in action.

Image: Wide-angle view видеорегистратор менен тартылган.
Техникалык тейлөө
- Micro SD картасы: Regularly format your Micro SD card (at least once a month) to maintain optimal recording performance and prevent data corruption. Replace the card if you experience frequent errors or recording issues.
- Тазалоо: Камера линзасын жана экранды тазалоо үчүн жумшак, кургак чүпүрөктү колдонуңуз. Абразивдүү тазалагычтарды же эриткичтерди колдонуудан алыс болуңуз.
- Температура: Avoid exposing the dash cam to extreme temperatures for extended periods, as this can affect battery life and component performance.
- Программалык камсыздоонун жаңыртуулары: Өндүрүүчүнү текшериңиз website periodically for firmware updates. Updating the firmware can improve performance and add new features.
Проблемаларды чечүү
- Dash камерасы күйбөйт.
- Ensure the power cable is securely connected to both the dash cam and the vehicle's cigarette lighter socket. Check if the vehicle's 12V socket is functioning. Try a different power source if available.
- Видеорегистратор жаздырууну токтотот же токтоп калат.
- Format the Micro SD card within the dash cam's settings. Ensure you are using a high-speed (Class 10 or U1/U3) Micro SD card from a reputable brand. The card may be full or corrupted. Replace the card if issues persist.
- Video footage бүдөмүк же түшүнүксүз.
- Clean the dash cam lens with a soft cloth. Ensure the protective film has been removed from the lens. Check if the windshield area in front of the camera is clean. Adjust the camera angle to avoid reflections.
- G-sensor is too sensitive or not sensitive enough.
- Adjust the G-sensor sensitivity setting in the dash cam's menu. Lower sensitivity for fewer false triggers, higher sensitivity for more responsive detection.
- Rear camera is not displaying or working.
- Ensure the rear camera cable is securely connected to both the rear camera and the main dash cam unit. Check for any damage to the cable. Verify that your specific model includes a rear camera (Model B does not).
Техникалык шарттар
| Бренд | SXFJF |
| Модель номери | 465-793-147 |
| Screen Size | 9.96 Inches IPS Touch Screen |
| Видео тартуунун резолюциясы | 2K / 1080P Full HD |
| Viewбурч | 170 градус |
| Frame Rate | 30 FPS |
| Сактагыч | Supports Micro SD/TF Card up to 128GB (not included) |
| Байланыш | USB |
| Башкаруу ыкмасы | тийүү |
| Power Source | Car Cigarette Lighter (12V/24V compatible) |
| Продукциянын өлчөмдөрү (D x W x Y) | 0.39" x 10.04" x 0.28" |
Кепилдик жана колдоо
Your SXFJF Dash Camera is covered by a standard manufacturer's warranty. Please refer to the warranty card included in your package for specific terms and conditions. For technical support, troubleshooting assistance, or warranty claims, please contact SXFJF customer service through the retailer where the product was purchased or visit the official SXFJF webсайт.