
1. Киришүү
This manual provides essential instructions for the safe and efficient operation, setup, and maintenance of your Juki MO-1200QVP Differential Feed Serger. Please read this manual thoroughly before using the machine to ensure proper function and to prevent damage or injury. Keep this manual in a safe place for future reference.
2. Коопсуздук нускамалары
- Always disconnect the machine from the power supply before cleaning, oiling, or performing any maintenance.
- Keep fingers away from all moving parts, especially the needles and cutting blades, during operation.
- Белгиленген электр менен жабдууну гана колдонуңузtage.
- Do not operate the machine if the power cord is damaged or if the machine is not functioning correctly.
- Машинаны балдар жетпеген жерде сактаңыз.
- Ensure adequate lighting in your work area.
3. Продукт бүтүп калдыview
Familiarize yourself with the main components and controls of your Juki MO-1200QVP serger.

3.1-сүрөт: Фронт view of the Juki MO-1200QVP Differential Feed Serger, showing the main body, tension dials, and needle area.
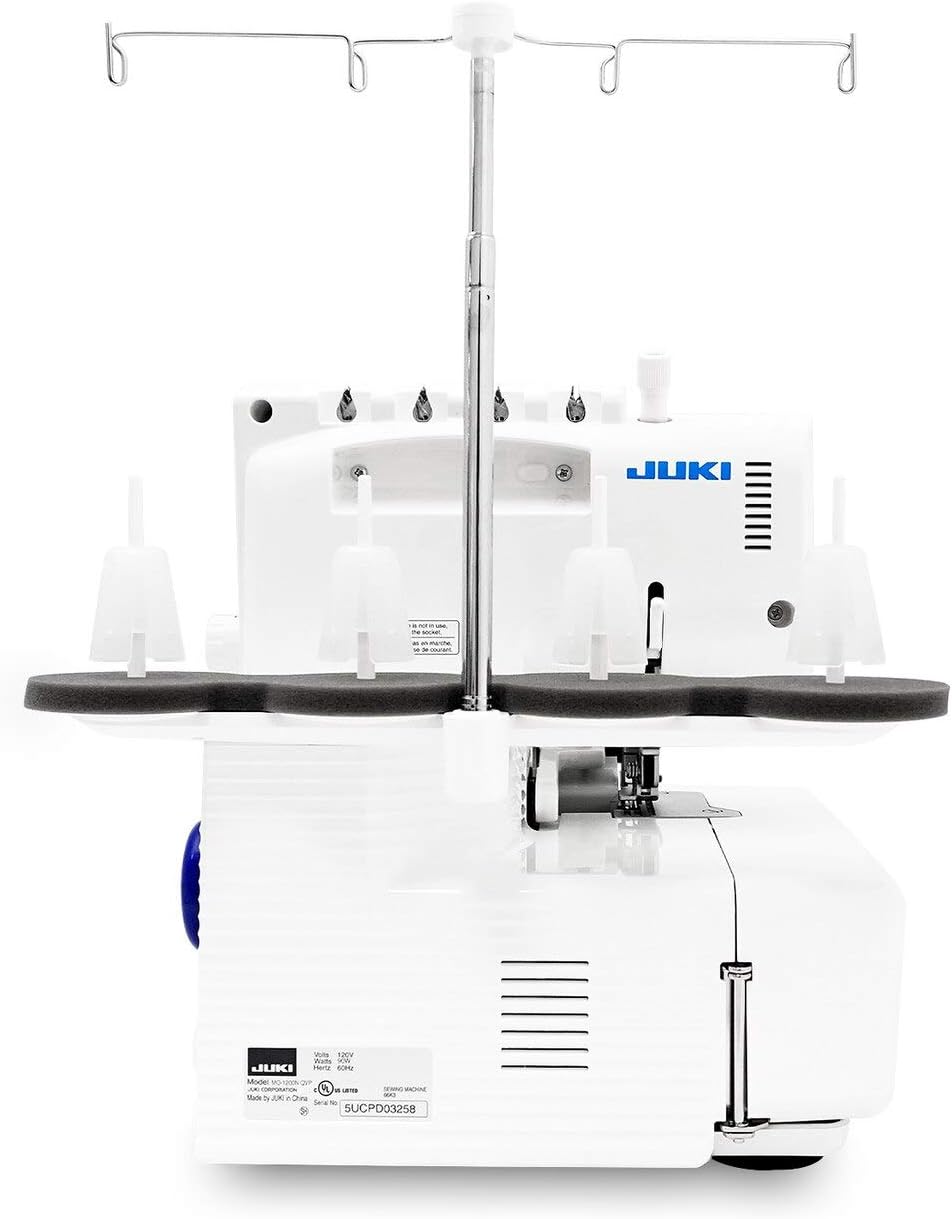
3.2-сүрөт: Арткы view of the serger, illustrating the thread spool holder and power input port.

3.3-сүрөт: Деталдаштырылган view of the color-coded tension dials, crucial for stitch formation.
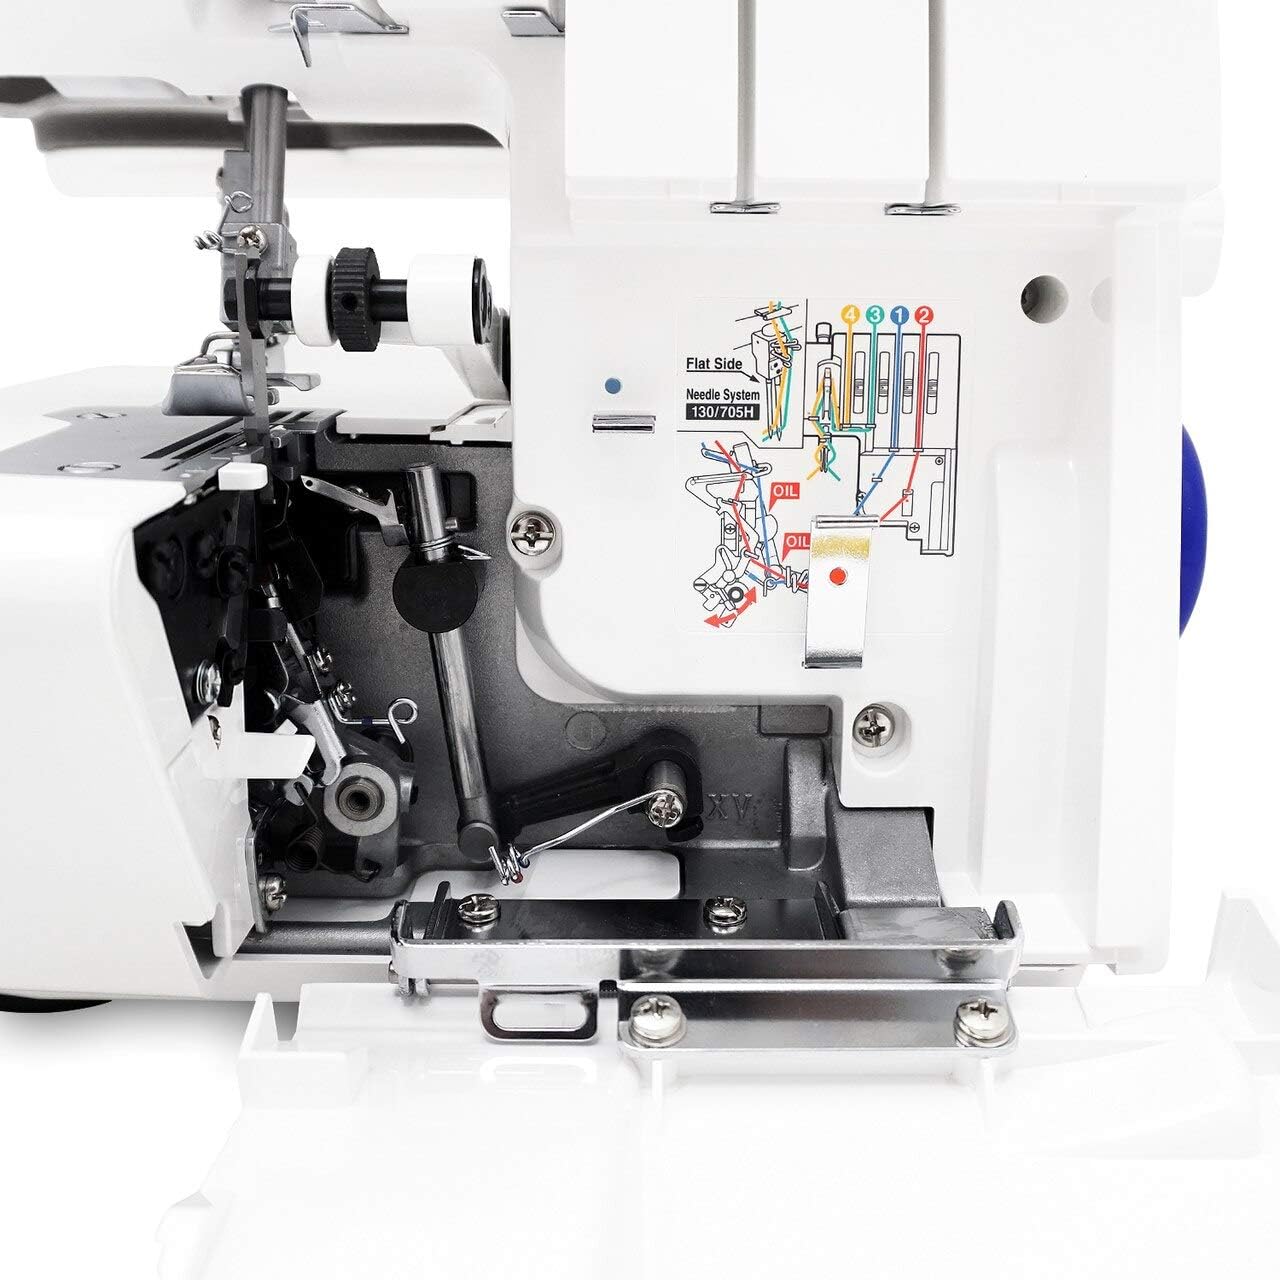
3.4-сүрөт: The looper area with the front cover open, revealing the internal threading paths and a helpful diagram.

3.5-сүрөт: Close-up of the needle bar, presser foot, and cutting blades.

3.6-сүрөт: Side view displaying the differential feed adjustment dial and stitch length control.
4. Орнотуу
4.1 Пакеттен чыгаруу
Carefully remove the serger from its packaging. Retain all packing materials for future transport or storage. Ensure all accessories listed in the packing list are present.
4.2 Кубат туташтыруу
- Машинаны стабилдүү, тегиз жерге коюңуз.
- Бутту башкаруучу сайгычты машинанын бутту башкаруучу уячасына туташтырыңыз.
- Insert the power cord into the machine's power input port (refer to Figure 3.2).
- Электр шнурын ылайыктуу электр розеткасына сайыңыз.
4.3 Thread Spool Installation
Place the thread spools onto the spool pins on the thread stand (refer to Figure 3.2). Ensure the thread unwinds smoothly from each spool.
4.4 Машинага жип салуу
Accurate threading is critical for proper serger function. Follow the color-coded threading paths indicated on the machine and in Figure 3.4. It is recommended to thread the loopers first, then the needles.
- Raise the presser foot and turn the handwheel to raise the needles to their highest position.
- Машинанын алдыңкы жана каптал капкактарын ачыңыз.
- Follow the color-coded guides for each thread, starting with the upper looper, then the lower looper, and finally the right and left needles.
- Ensure each thread passes through all tension discs and guides correctly.
- Close the covers securely after threading.
5. Иштөө нускамалары
5.1 Basic Serging
- Кубат которгучун күйгүзүңүз.
- Place the fabric under the presser foot, aligning the edge with the cutting blade.
- Басуучу бутту түшүрүңүз.
- Gently press the foot controller to begin serging. Guide the fabric smoothly.
5.2 Жиптин тартылышын жөндөө
The Juki MO-1200QVP features individual tension dials for each thread (refer to Figure 3.3). Adjust these dials to achieve a balanced stitch. A balanced stitch will have the needle threads meeting at the edge of the fabric and the looper threads interlocking smoothly.
- Increasing Чыңалуу: Turn the dial to a higher number.
- Жарлыкasing Чыңалуу: Turn the dial to a lower number.
5.3 Differential Feed Adjustment
The differential feed mechanism (refer to Figure 3.6) allows you to adjust the feeding ratio of the front and rear feed dogs. This is essential for preventing stretching on knit fabrics or gathering on fine fabrics.
- Normal Feed (N): Көпчүлүк токулган кездемелер үчүн.
- Gathering (1.5 - 2): For intentionally gathering fabric.
- Stretching Prevention (0.7 - 0.9): For preventing stretching on knit fabrics.
5.4 Stitch Length and Width
Adjust the stitch length and cutting width using the dedicated dials on the machine (refer to Figure 3.6 for stitch length). Refer to the machine's markings for recommended settings for various stitch types.
6. Техникалык тейлөө
6.1 Тазалоо
Regular cleaning is vital for optimal performance. Use a small brush and vacuum cleaner to remove lint and thread scraps from the looper area, under the needle plate, and around the feed dogs. Always disconnect power before cleaning.
6.2 Майлоо
Apply a small drop of high-quality sewing machine oil to the designated oiling points as indicated in the detailed diagram within your machine's internal cover or the full printed manual. Oiling should be done periodically based on usage.
6.3 Ийне алмаштыруу
Use only 130/705H type needles. Replace needles regularly, especially if they become bent, dull, or if you experience skipped stitches. Ensure the flat side of the needle faces the back of the machine when inserting (refer to Figure 3.5).
7. Кыйынчылыктарды
- Өткөрүлүп жиберилген тигүү: Check needle insertion, ensure it's not bent or dull. Re-thread the machine carefully.
- Жиптин үзүлүшү: Verify correct threading, check tension settings, ensure thread quality, and inspect for burrs on thread guides.
- Тегиз эмес тигиштер: Adjust differential feed settings according to fabric type. Check tension balance.
- Машина иштебей жатат: Ensure power cord is securely plugged in, power switch is on, and foot controller is connected.
Эгерде көйгөйлөр тынымсыз пайда болсо, квалификациялуу тейлөө адисине кайрылыңыз.
8. Техникалык шарттар
| Продукциянын өлчөмдөрү | 13.8 x 15.7 x 14.7 дюйм |
| Элемент Салмагы | 21 фунт |
| Элемент моделинин номери | MO-1200 |
| Бренд | Чыгып |
| Электрик | Ооба |
9. Кепилдик жана колдоо
For information regarding warranty coverage, service, or technical support, please refer to the warranty card included with your product or visit the official Juki webсайт. Сатып алганыңыздын далили катары сатып алуу дүмүрчөгүңүздү сактаңыз.