
Introduction
This manual provides detailed instructions for the setup, operation, and maintenance of your groov e Atlas Radio Alarm Clock with Wireless Charger. Please read this manual thoroughly before using the device to ensure proper function and to maximize your user experience. Keep this manual for future reference.
Пакеттин мазмуну
Пакетте бардык буюмдар бар экенин текшериңиз:
- groov e Atlas Radio Alarm Clock
- Кубаттуу адаптер
- User Manual
Продукт өзгөчөлүктөрү
- Wireless Charging (5W): Conveniently charge compatible smartphones by placing them on the top surface.
- FM радиосу: Tune into your favorite FM stations.
- LED дисплей: Clear digital time display.
- Тармактар иштейт: Reliable power supply for continuous operation.
- USB заряддоо станциясы: Additional USB port for charging other devices.
- Кош ойготкуч: Ар кандай ойгонуу убактысы үчүн эки көз карандысыз ойготкучту коюңуз.
- Дисплейдин күңүрткүсү: LED дисплейдин жарыктыгын тууралаңыз.
Жайгашуу
- Туташуу кубаты: Insert the power adapter into the 'DC IN' port on the back of the alarm clock, then plug the adapter into a wall outlet. The display will light up.
- Убакытты коюу:
- Press and hold the 'TIME SET' button located on the back of the unit.
- Use the 'TUN-' or 'TUN+' buttons on the top panel to adjust the hour.
- Press 'TIME SET' again to confirm the hour and move to minutes.
- Use 'TUN-' or 'TUN+' to adjust the minutes.
- Press 'TIME SET' once more to confirm and exit time setting.
- To switch between 12-hour and 24-hour format, press the '12/24H' button on the back.

Сүрөт: Арткы view of the groov e Atlas alarm clock, highlighting the DC IN power input and the USB charging port. The '12/24H TIME SET' and 'SLEEP' buttons are also visible.
Иштөө нускамалары
Setting Alarms (ALM1 / ALM2)
- Press the 'ALM1' or 'ALM2' button to select the alarm you wish to set. The alarm icon will flash on the display.
- Use the 'TUN-' or 'TUN+' buttons to adjust the alarm hour.
- Press the 'ALM1' or 'ALM2' button again to confirm the hour and move to minutes.
- Use 'TUN-' or 'TUN+' to adjust the alarm minutes.
- Press the 'ALM1' or 'ALM2' button a third time to confirm the alarm time. The alarm icon will remain lit, indicating the alarm is active.
- To deactivate an alarm, press the corresponding 'ALM1' or 'ALM2' button until the alarm icon disappears from the display.
FM радиосунун иштеши
- Күйгүзүү/өчүрүү: Press the 'ON/OFF' button to turn the radio on or off.
- Авто сканерлөө: Press the 'SCAN' button to automatically scan and save available FM stations.
- Кол менен жөндөө: Use the 'TUN-' or 'TUN+' buttons to manually adjust the frequency. Press and hold for faster tuning.
- Алдын ала коюлган станциялар: Use 'MEM-' or 'MEM+' to cycle through saved preset stations.
- Үндү тууралоо: Use the 'VOL-' or 'VOL+' buttons to control the radio volume.
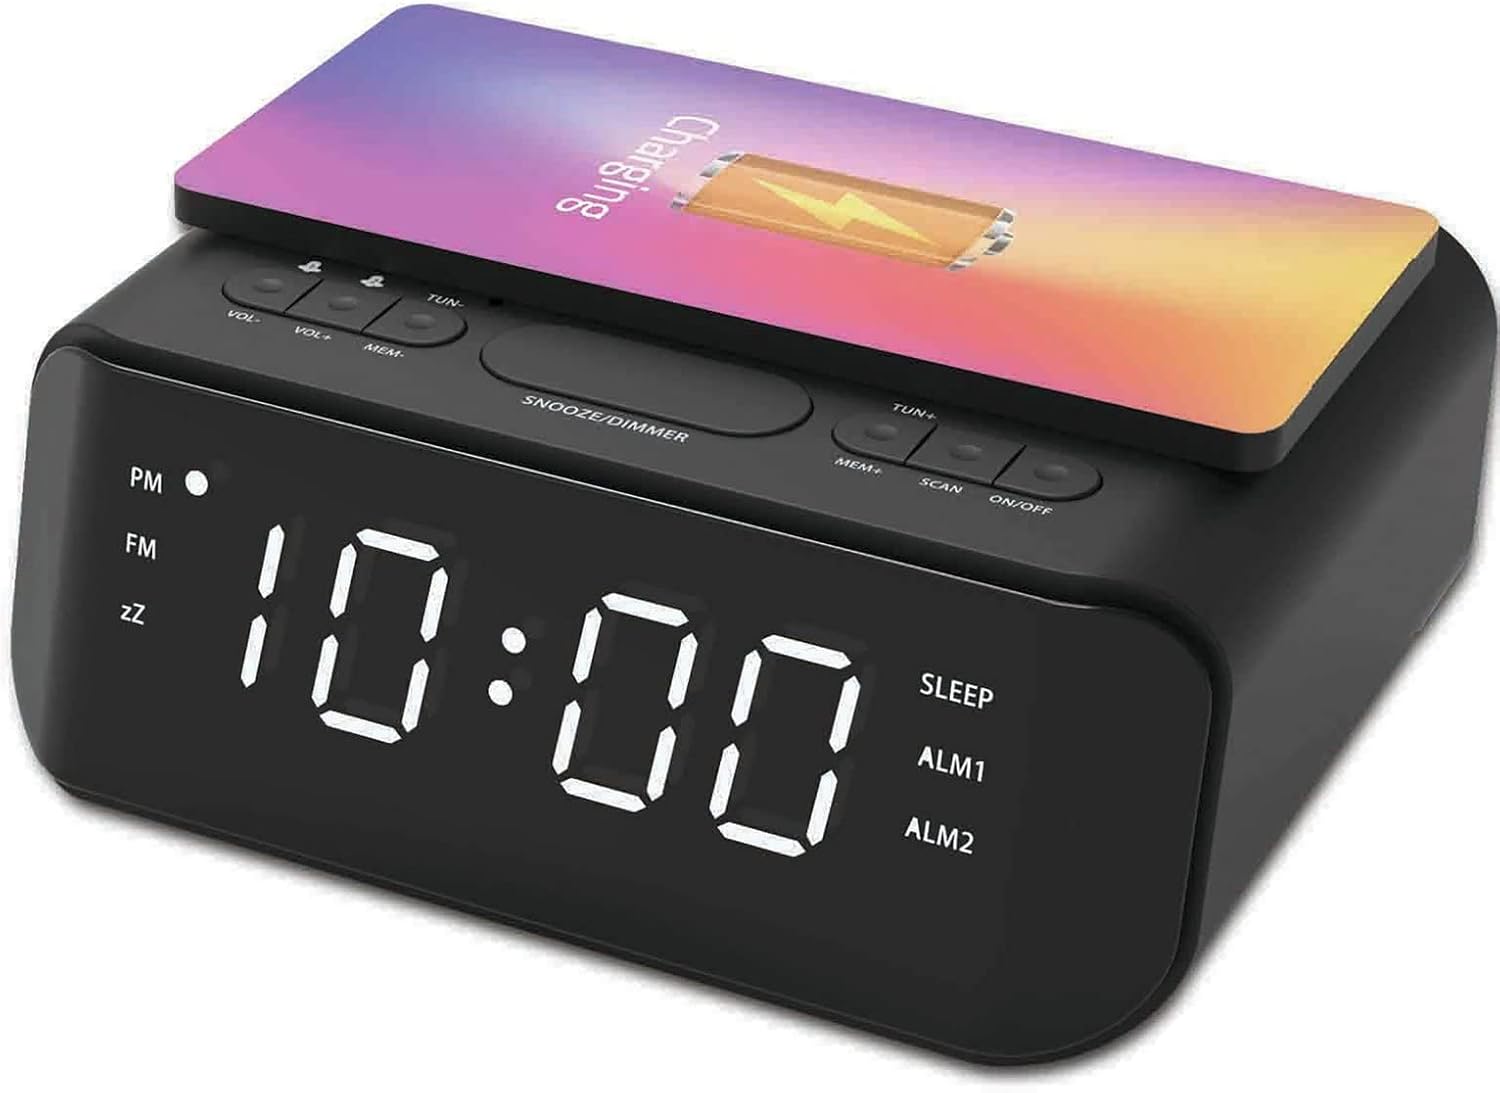
Сүрөт: Жогорку view of the groov e Atlas alarm clock, illustrating the layout of the control buttons for volume, tuning, memory, scan, and power.
Зымсыз заряддоо
- Ensure your smartphone is compatible with 5W Qi wireless charging.
- Place your compatible smartphone centrally on the wireless charging pad located on the top surface of the alarm clock.
- The phone's display should indicate that charging has begun. If not, adjust the phone's position.

Image: A smartphone placed on the groov e Atlas alarm clock's top surface, showing the charging indicator on the phone's screen, confirming wireless charging is active.
USB заряддоо
- Connect a USB charging cable (not included) to the USB port on the back of the alarm clock.
- Кабелдин экинчи учун шайманга туташтырыңыз.
- Түзмөгүңүз кубатталып баштайт.
Диммерди көрсөтүү
Press the 'SNOOZE/DIMMER' button to cycle through different brightness levels for the LED display. This allows you to adjust the display to your preferred visibility, especially in dark environments.
Техникалык тейлөө
- Тазалоо: Ойготкуч сааттын бетин тазалоо үчүн жумшак, кургак чүпүрөктү колдонуңуз. Суюк тазалоочу каражаттарды же абразивдүү материалдарды колдонбоңуз.
- Сактагыч: Узак мөөнөткө колдонулбаганда, аппаратты розеткадан сууруп, салкын, кургак жерде сактаңыз.
- Коопсуздук: Do not expose the device to water, high humidity, or extreme temperatures. Avoid dropping or subjecting the device to strong impacts.
Проблемаларды чечүү
| Көйгөй | Мүмкүн себеп | Чечим |
|---|---|---|
| Түзмөк күйбөйт. | Кубат адаптери туташкан эмес же туура эмес розетка. | Кубат адаптери аспапка жана жумушчу розеткага бекем сайылганын текшериңиз. Башка розеткадан аракет кылып көрүңүз. |
| Зымсыз кубаттоо иштебейт. | Phone not Qi-compatible or not positioned correctly. | Verify your phone supports Qi wireless charging. Reposition the phone centrally on the charging pad. Remove any thick phone cases. |
| Ойготкуч угулбайт. | Ойготкуч иштетилген эмес же үнү өтө төмөн. | Check if the alarm icon is lit on the display. Increase the alarm volume using the 'VOL+' button. |
| Радио кабыл алуу начар. | Сигналдын же антеннанын начар абалы. | Extend and adjust the position of the FM antenna wire on the back of the unit for better reception. |
Техникалык шарттар
- Модель номери: GVWC06BK
- Бренд: groov e
- Түсү: Кара
- Дисплей түрү: Digital LED
- Кубат булагы: Mains Powered (AC Adapter included)
- Зымсыз кубаттоо чыгышы: 5W
- USB кубаттоо чыгаруу: 5V/1A
- Ойготкучтун өзгөчөлүктөрү: Кош ойготкуч, Тындыруу
- Радио: FM
- Материал: Акрилонитрил бутадиен стирол (ABS)
- Форма: Төрт бурчтуу
- Монтаж түрү: Стол орнотуу
- Кыймыл түрү: Кварц
- Батареялар: Not included (requires 1 battery for backup, type not specified in data)
Кепилдик жана колдоо
Your groov e Atlas Radio Alarm Clock GVWC06BK comes with a standard manufacturer's warranty. Please refer to the warranty card included in your package for specific terms and conditions, including the warranty period and coverage details.
For technical support, troubleshooting assistance, or warranty claims, please contact groov e customer service through their official webсайтка же кепилдик картаңызда көрсөтүлгөн байланыш маалыматына кайрылыңыз.
Кепилдикке байланыштуу суроолор үчүн сатып алганыңыздын далилин сактап коюңуз.