
Introduction
Сатып алганыңыз үчүн рахматasing the Overmax Multipic 4.1 Full HD 1080p LED Projector. This manual provides essential information for the safe and efficient use of your projector. Please read it thoroughly before operation and retain it for future reference.
Коопсуздук маалыматы
Коопсуз иштөөнү камсыз кылуу жана зыян келтирбөө үчүн төмөнкү сактык чараларын сактаңыз:
- Вентиляция тешиктерин жаап албаңыз. Проектордун айланасында адекваттуу аба агымын камсыз кылыңыз.
- l болгондо проектордун линзасына түздөн-түз көз тийбесинamp күйүк.
- Проекторду туруксуз беттерге койбоңуз.
- Проекторду суудан же башка суюктуктардан алыс кармаңыз.
- Проектор менен келген кубат адаптерин гана колдонуңуз.
- Проекторду өз алдынча ачууга же оңдоого аракет кылбаңыз. Бардык тейлөө иштерин квалификациялуу адистерге тапшырыңыз.
- Чагылган бороондордо же көпкө колдонулбаганда проекторду электр розеткасынан ажыратыңыз.
Пакеттин мазмуну
Пакетиңизде бардык буюмдар бар экенин текшериңиз:
- Overmax Multipic 4.1 Projector
- Алыстан башкаруу
- Электр кабели
- HDMI кабели
- Fuse Cable
- Колдонуучунун Колдонмосу (бул документ)
Продукт бүттүview
Familiarize yourself with the projector's components and controls.
Фронт View

Сүрөт: алдыңкы view of the Overmax Multipic 4.1 projector. The main projection lens is visible on the right side, with ventilation grilles and an infrared receiver on the left.
Жогорку панелдин башкаруу элементтери
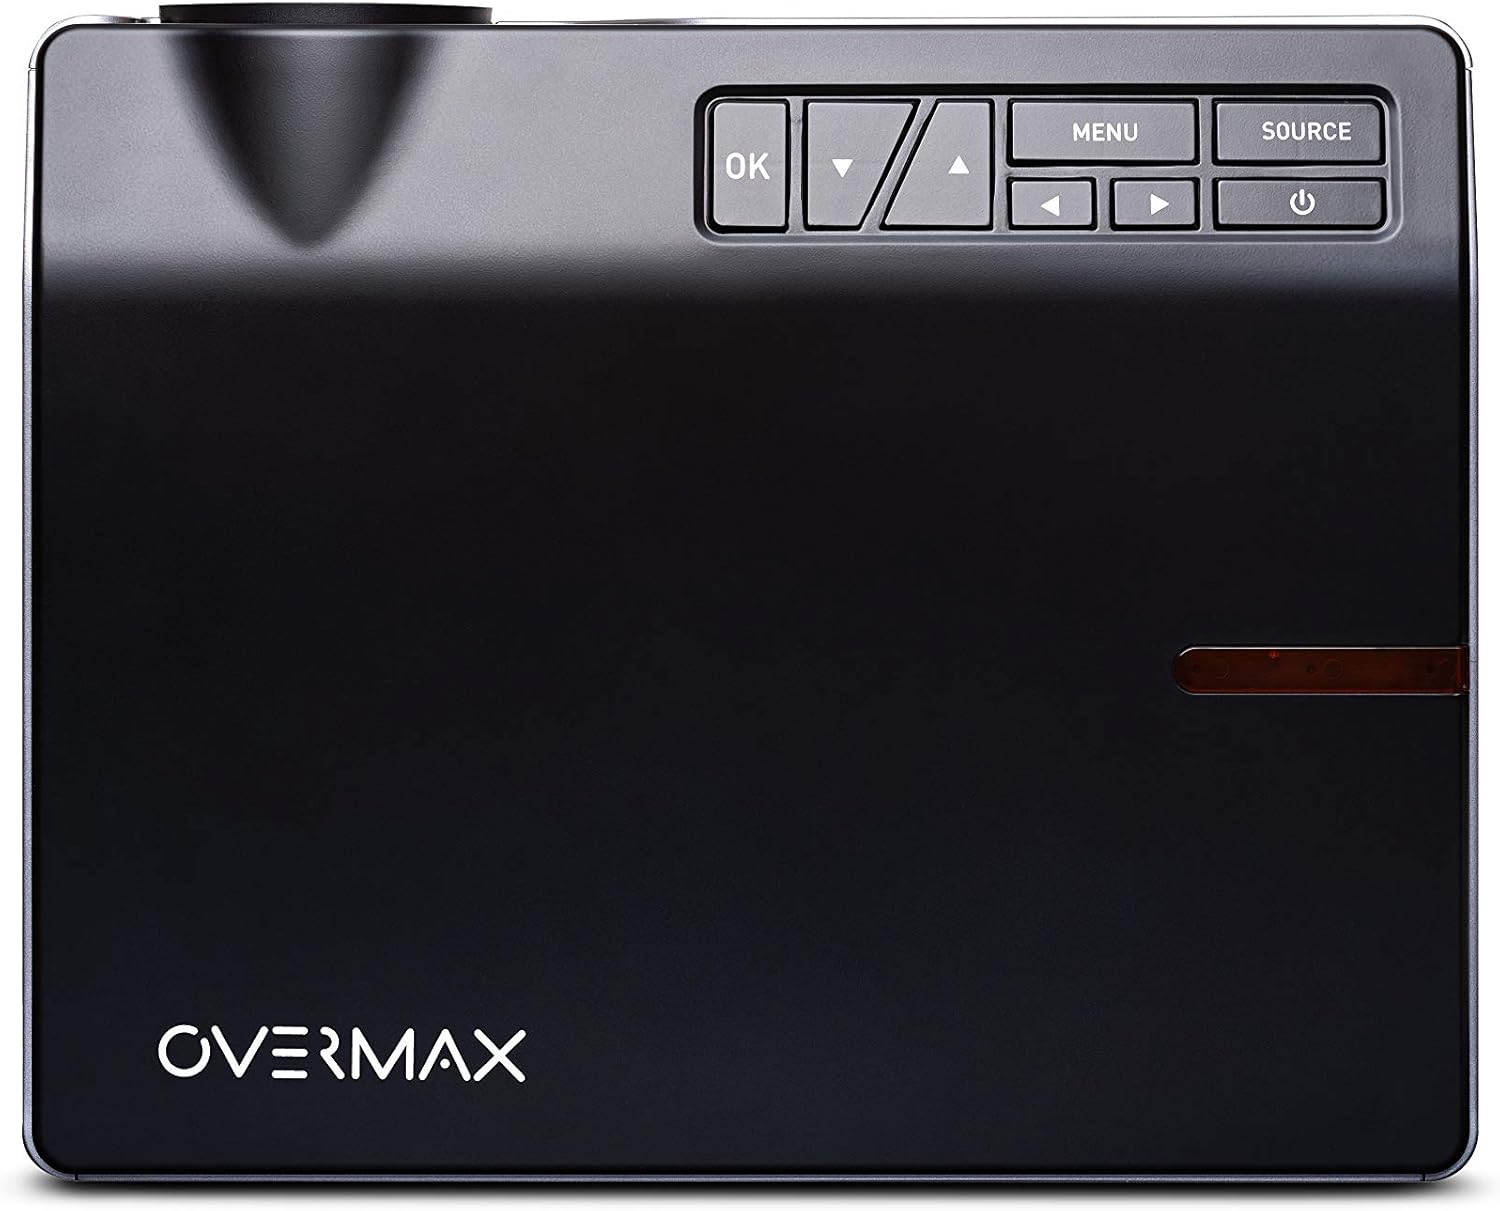
Сүрөт: Жогорку view of the Overmax Multipic 4.1 projector. The control panel is located on the top right, featuring buttons for Power, Source, Menu, OK, and directional navigation.
- Кубат баскычы: Проекторду күйгүзөт же өчүрөт.
- Булак баскычы: Selects input source (HDMI1, HDMI2, USB, VGA, AV).
- Меню баскычы: Проектордун орнотуулар менюсуна кирет.
- OK баскычы: Менюдагы тандоолорду ырастайт.
- Багыттуу жебелер: Меню параметрлери аркылуу өтүп, жөндөөлөрдү тууралайт.
Арткы панелдин порттору

Сүрөт: Арткы view of the Overmax Multipic 4.1 projector. Ports include VGA, USB, HDMI1, HDMI2, and AV input, along with the power input and main power switch.
- VGA порту: Connects to computers with a VGA output.
- USB порттору (x2): Медиа ойнотуу үчүн USB сактагыч түзмөктөрдү туташтырат.
- HDMI порттору (x2): Connects to devices like laptops, game consoles, or streaming sticks.
- AV порт: Connects to older devices using a composite video and stereo audio cable.
- Кубат киргизүү: Электр кабелин туташтырат.
- Негизги Power Switch: Controls the main power supply to the unit.
Фокус жана негизги ташты тууралоо

Сүрөт: каптал view of the Overmax Multipic 4.1 projector, showing the focus ring (larger) and keystone correction ring (smaller) located near the lens.
- Фокус шакеги: Rotate to sharpen the projected image.
- Keystone түзөтүү шакеги: Adjusts the image shape to correct trapezoidal distortion if the projector is not perfectly perpendicular to the screen.
Жайгашуу
1. Жайгаштыруу
Position the projector on a stable, flat surface or mount it to a ceiling or tripod. Ensure the projector is within a suitable distance from the projection surface to achieve the desired screen size (up to 200 inches diagonal).
- For ceiling mounting, use the four screw holes on the bottom of the projector.
- Агрегаттын айланасын туура желдетүүнү камсыз кылыңыз.
2. Power Connection
- Электр кабелин проектордун кубат киргизүү портуна туташтырыңыз.
- Электр кабелинин экинчи учун розеткага сайыңыз.
- Арткы панелдеги негизги кубат которгучун "ON" абалына коюңуз.
3. Киргизүү түзүлүштөрүн туташтыруу
Connect your desired source device (e.g., laptop, game console, USB drive) to the appropriate port on the projector.
- HDMI: Use an HDMI cable to connect to HDMI1 or HDMI2 ports.
- USB: Insert a USB flash drive into one of the USB ports for direct media playback.
- VGA: Use a VGA cable to connect to a computer's VGA output.
- OF: Use a composite AV cable to connect to devices with AV output.
4. Фокус жана негизги ташты тууралоо
- Проекторду күйгүзүңүз жана сүрөттү көрсөтүңүз.
- айлантыңыз Фокус шакеги (larger ring near the lens) until the image appears sharp and clear.
- Эгерде сүрөт трапеция формасында (үстү же асты жагы кеңирээк) көрүнсө, аны буруңуз. Keystone түзөтүү шакеги (smaller ring near the lens) to square the image.
Иштөө нускамалары
Күйгүзүү/өчүрүү
- Күйгүзүү үчүн: Проектордогу же пульттагы Кубат баскычын басыңыз. Индикатор жарыгы күйөт.
- Өчүрүү үчүн: Press the Power button again. The projector will initiate a shutdown sequence. Do not unplug the projector until the fan stops running.
Киргизүү булагын тандоо
Күйгүзгөндөн кийин, басыңыз Булак button on the projector or remote control to cycle through available input sources (HDMI1, HDMI2, USB, VGA, AV). Select the source corresponding to your connected device.
Меню Багыттоо
басыңыз Меню button to access settings such as picture mode, aspect ratio, sound settings, and system preferences. Use the directional arrows to navigate and the OK тандоолорду ырастоо үчүн баскыч.
Wi-Fi туташуусу
The Multipic 4.1 supports Wi-Fi connectivity for screen mirroring from compatible smartphones, tablets, and computers.
- Navigate to the Wi-Fi settings in the projector's menu.
- Select your Wi-Fi network and enter the password if required.
- Once connected, follow the on-screen instructions to initiate screen mirroring from your device.
Аудио чыгаруу
The projector features two built-in stereo speakers. Volume can be adjusted via the remote control or the projector's menu.
Техникалык тейлөө
Линзаны тазалоо
Оптикалык линзалар үчүн атайын иштелип чыккан жумшак, мамыксыз чүпүрөктү колдонуңуз. Абразивдүү тазалоочу каражаттарды же ашыкча күч колдонбоңуз, анткени бул линзаны чийип алышы мүмкүн.
Аба желдеткичтерин тазалоо
Regularly check and clean the air vents to prevent dust buildup, which can affect cooling and projector performance. Use a soft brush or compressed air to gently remove dust.
Lamp Жашоо
LED lamp in your projector has an estimated lifespan of up to 50,000 hours. No lamp replacement is typically required during the product's lifetime under normal usage conditions.
Проблемаларды чечүү
| Көйгөй | Мүмкүн себеп | Чечим |
|---|---|---|
| Сүрөт көрсөтүлгөн жок |
|
|
| Сүрөт бүдөмүк |
|
|
| Сүрөт трапеция түрүндө |
|
|
| Үн жок |
|
|
| Wi-Fi туташуу маселелери |
|
|
Техникалык шарттар
| Өзгөчөлүк | Деталь |
|---|---|
| Модель номери | OV-MULTIPIC 4.1 |
| Бренд | Overmax |
| Display Resolution | 1920 x 1080 (Full HD 1080p Native) |
| Жарыктык | 4000 Lumens |
| Контраст катышы | 4000:1 |
| Аспект катышы | 16:9 жана 4:3 |
| Lamp Type | LED |
| Lamp Жашоо | 50,000 саатка чейин |
| Байланыш технологиясы | HDMI (x2), USB (x2), VGA, AV, Wi-Fi |
| Камтылган динамиктер | 2 Стерео динамиктер |
| Энергияны керектөө | 170 Ватт |
| Башкаруу түрү | Алыстан башкаруу, Түзмөктөгү баскычтар |
| Монтаж түрү | Ceiling Mount, Portable |
| Шайкеш түзмөктөр | Laptop, Tablet, Game Consoles, USB drives |
Кепилдик жана колдоо
For warranty information, please refer to the warranty card included with your product or contact your retailer. Overmax provides support for its products. For technical assistance or further inquiries, please visit the official Overmax webсайтка же кардарларды тейлөө бөлүмүнө кайрылыңыз.
Эскертүү: Кепилдиктин конкреттүү шарттары жана колдоо кызматынын байланыш маалыматтары аймакка жараша өзгөрүшү мүмкүн.
Расмий продукт Videos
Учурда бул модель үчүн сатуучунун расмий видеолору жок.