
Audizio Parma
Audizio Parma Portable DAB Radio with Bluetooth Instruction Manual
Introduction
This manual provides detailed instructions for the operation and maintenance of your Audizio Parma Portable DAB Radio. Please read this manual thoroughly before use to ensure proper functionality and to maximize your listening experience.
Продукт бүттүview
Негизги өзгөчөлүктөрү
- DAB, DAB+, and FM Radio Reception
- Bluetooth for Wireless Audio Streaming
- 2-inch TFT Color Display with Dimmer
- 30 Presets for DAB and FM Radio
- Automatic Scan Function
- Clock with Date, Dual Alarm, and Sleep Timer
- Наушник уясы
- Line Out for External Audio Systems
- USB (5V) or Battery Powered (4x AAA, not included)
Башкаруу каражаттары жана байланыштар
Familiarize yourself with the controls and connections of your Audizio Parma radio.

Сүрөт 1: Алдыңкы View of Audizio Parma Radio. This image displays the front of the radio, featuring the speaker grille on the left and the color display on the right. Below the display are control buttons for 'SOURCE', '-TU+', 'PRESET', 'MENU', 'INFO', and the power button. The display shows "Welcome to Digital Radio".

Image 2: Side Panel Controls and Connections. This image shows the right side of the radio. From top to bottom, it includes a 'SELECT/ENTER SNOOZE' rotary knob, 'VOL-' and 'VOL+' indicators, a headphone jack, an 'AUX IN' port, and a '5V 1A' USB power input port.
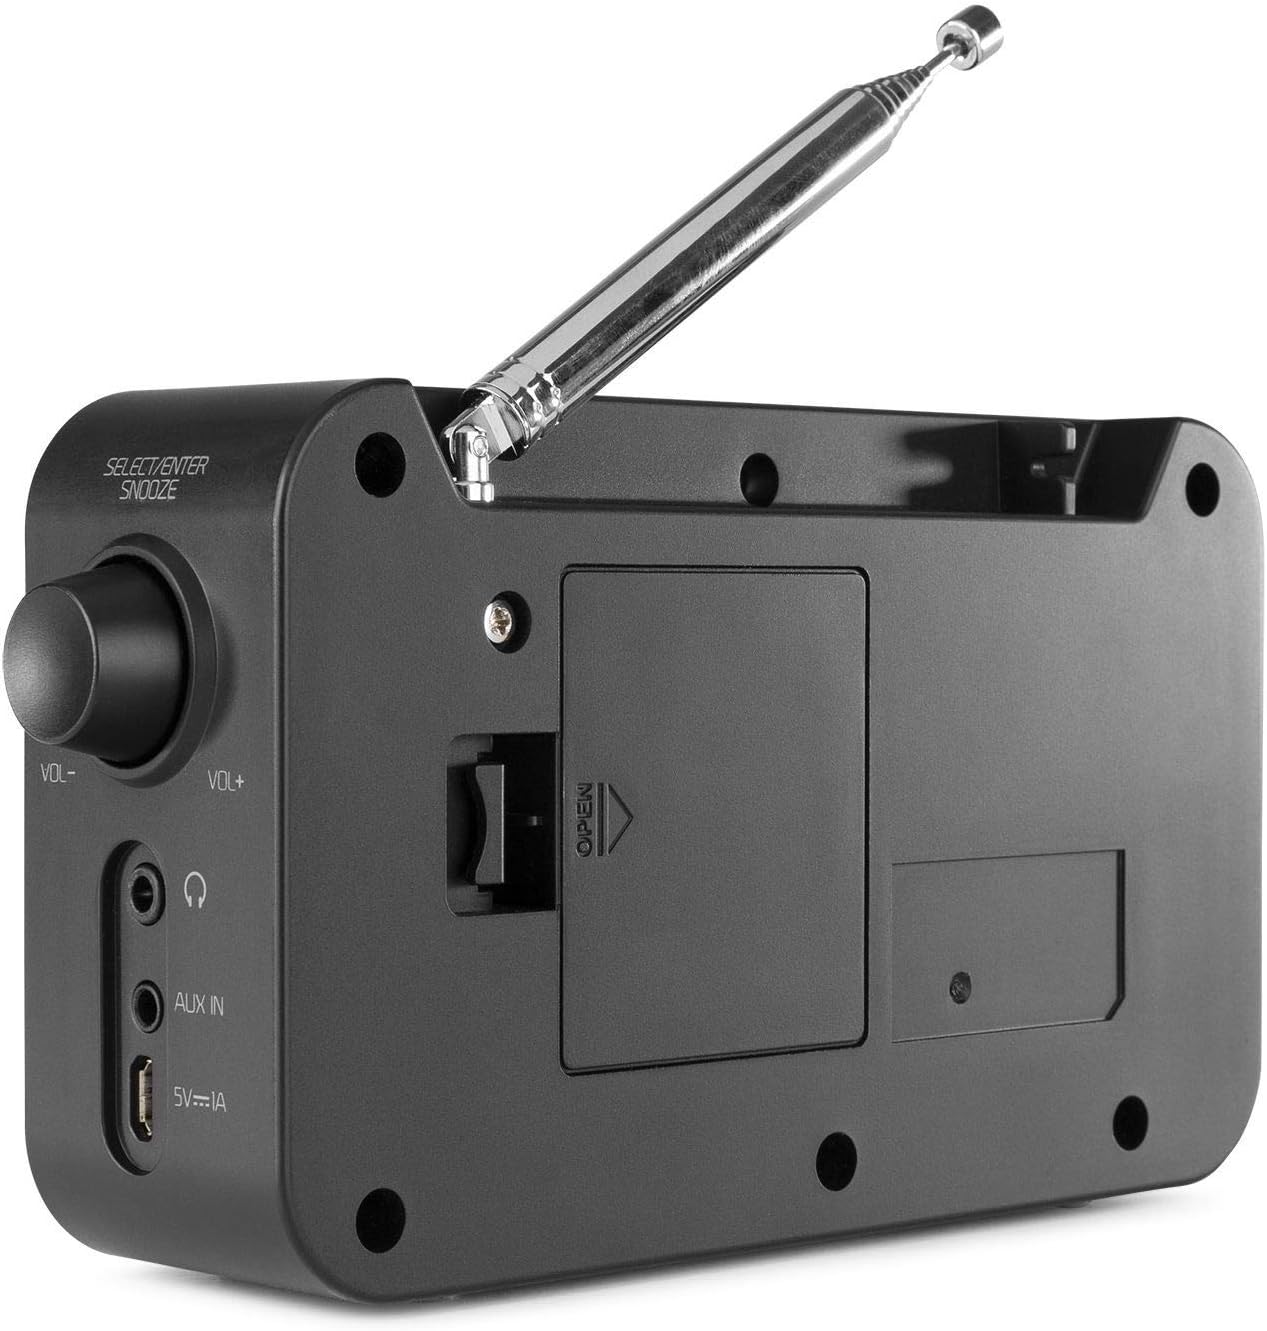
Сүрөт 3: Арткы View of Audizio Parma Radio. This image shows the back of the radio, highlighting the extendable telescopic antenna at the top and the battery compartment cover with an "OPEN" indicator in the center.
Жайгашуу
Радиону иштетүү
The Audizio Parma radio can be powered in two ways:
- USB Power: Connect the supplied USB cable to the 5V 1A USB port on the side of the radio and to a compatible USB power adapter (not included) or a powered USB port.
- Батарея кубаттуулугу: For portable use, insert 4x AAA batteries (not included) into the battery compartment located on the rear of the radio. Ensure correct polarity.
Антеннаны тууралоо
Extend the telescopic antenna fully for optimal DAB/DAB+ and FM radio reception.
Баштапкы күйгүзүү
басыңыз Күч button to turn on the radio. The display will illuminate.
Иштөө нускамалары
Selecting a Mode (Source)
басыңыз БУЛАК button repeatedly to cycle through available modes: DAB, FM, Bluetooth.
DAB/DAB+ радио режими
- Тандоо DAB колдонуу режими БУЛАК баскычы.
- Upon first use, the radio will automatically perform a full scan for available DAB/DAB+ stations. This may take a few minutes.
- Скандоо аяктагандан кийин, радио биринчи жеткиликтүү станцияга туураланат.
- To navigate between stations, use the -TU+ баскычтар.
- үчүн view station information (e.g., program type, signal strength), press the INFO баскычын кайра-кайра.
- Кол менен сканерлөө: If reception is poor or you move to a new location, you can initiate a manual full scan via the МЕНЮ опциялар.

Image 4: DAB Full Scan in Progress. The radio is shown on a kitchen counter, with its display indicating "Full scan" and "Scanning".

Image 5: DAB Station Information Display. The radio's screen shows "DAB" at the top, "Veronica" as the station name, and "Billy Ocean - When the going gets tough" as the current track information.
FM радио режими
- Тандоо FM колдонуу режими БУЛАК баскычы.
- Автоматтык сканерлөө: басып, кармап туруңуз -TU+ buttons to automatically scan for the next available FM station.
- Кол менен жөндөө: баскычын кыскача басыңыз -TU+ buttons to fine-tune the frequency step by step.
- үчүн view station information (e.g., RDS data), press the INFO баскычын кайра-кайра.
Алдын ала орнотууларды сактоо жана кайра чакырып алуу
The radio supports 30 presets for both DAB and FM modes.
- Алдын ала орнотууну сактоо үчүн:
- Каалаган станцияга коюңуз.
- басып, кармап туруңуз АЛДЫН АЛА button until "Preset Store" appears on the display.
- колдонуу -TU+ каалаган алдын ала коюлган санды тандоо үчүн баскычтар (1-30).
- басыңыз ТАНДОО/КИРҮҮ knob to confirm and save the station.
- Алдын ала орнотууну кайра чакырып алуу үчүн:
- баскычын кыскача басыңыз АЛДЫН АЛА баскычы.
- колдонуу -TU+ каалаган алдын ала коюлган номерди тандоо үчүн баскычтар.
- басыңыз ТАНДОО/КИРҮҮ knob to tune to the saved station.
Bluetooth режими
- Тандоо Bluetooth колдонуу режими БУЛАК button. The display will show "Bluetooth Pairing" or similar.
- Bluetooth иштетилген түзмөгүңүздө (смартфон, планшет ж.б.) Bluetooth'ду иштетиңиз жана жеткиликтүү түзмөктөрдү издеңиз.
- Select "Audizio Parma" from the list of devices.
- Жупташтырылгандан кийин, түзмөгүңүздөн радиого зымсыз аудио агылта аласыз.
- Үнүн колдонуп, үнүн жөндөңүз VOL- жана VOL+ controls on the radio or your connected device.
Ойготкуч саат функциясы
The Audizio Parma features a dual alarm function.
- басыңыз МЕНЮ баскычы.
- Navigate to "Alarm" using the -TU+ баскычтарын басып, басыңыз ТАНДОО/КИРҮҮ.
- Select "Alarm 1 Setup" or "Alarm 2 Setup".
- Follow the on-screen prompts to set the alarm time, duration, source (Buzzer, DAB, FM), and frequency (Daily, Once, Weekdays, Weekends).
- Басыңыз ТАНДОО/КИРҮҮ ар бир жөндөөнү ырастоо үчүн.
- To snooze an active alarm, press the СОЮЗ button (located on the ТАНДОО/КИРҮҮ баскыч).
- Ойготкучту өчүрүү үчүн, баскычын басыңыз Күч баскычы.
Уйку таймери функциясы
Уйку таймери радиону белгиленген убакыттан кийин автоматтык түрдө өчүрүүгө мүмкүндүк берет.
- басыңыз МЕНЮ баскычы.
- Navigate to "Sleep" using the -TU+ баскычтарын басып, басыңыз ТАНДОО/КИРҮҮ.
- колдонуу -TU+ buttons to select the desired sleep duration (e.g., 15, 30, 45, 60, 90 minutes, or Off).
- Басыңыз ТАНДОО/КИРҮҮ to confirm. The radio will turn off automatically after the selected time.
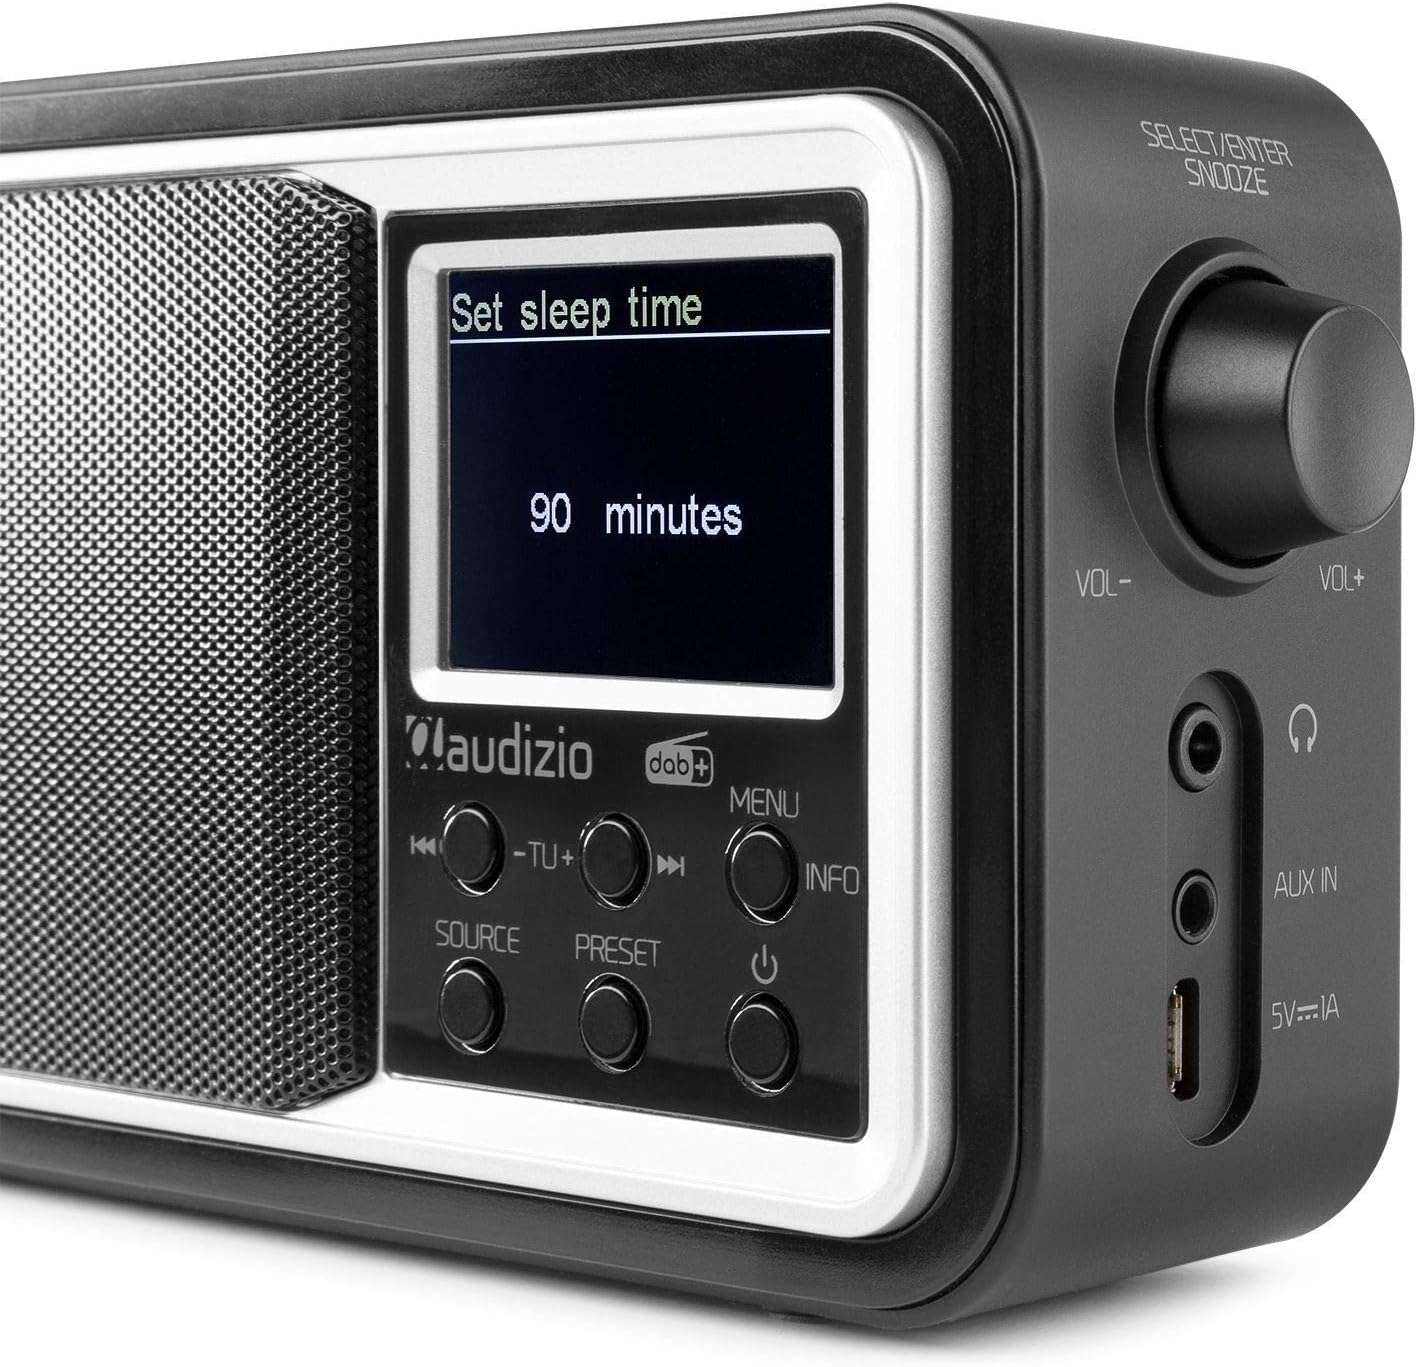
Image 6: Sleep Timer Setting. The radio's display shows "Set sleep time" with "90 minutes" highlighted, indicating the selected duration for the sleep timer.
Headphone and Line Out Connections
- Гарнитура уячасы: Connect standard 3.5mm headphones to the headphone jack for private listening. The internal speaker will be muted.
- Чыгуу: Use the 3.5mm Line Out jack to connect the radio to an external audio system or ampөмүрлүү.
Техникалык тейлөө
- Тазалоо: Радиону жумшак, кургак чүпүрөк менен сүртүңүз. Абразивдүү тазалагычтарды же эриткичтерди колдонбоңуз.
- Батареяны алмаштыруу: If using batteries, replace all four AAA batteries when the low battery indicator appears or when performance degrades.
- Антеннага кам көрүү: Handle the telescopic antenna carefully to prevent bending or damage.
- Сактагыч: Радиону узак убакытка сактасаңыз, агып кетпеш үчүн батарейкаларды алып салыңыз.
Проблемаларды чечүү
| Көйгөй | Мүмкүн себеп | Чечим |
|---|---|---|
| Кубат жок / Радио күйбөйт. | No USB power or flat batteries. | Check USB connection and power adapter. Replace batteries if using battery power. |
| DAB/FM кабыл алуусу начар. | Антенна узартылган эмес, сигнал алсыз же тоскоолдук бар. | Fully extend the telescopic antenna. Try repositioning the radio. Perform a full scan for stations. |
| Bluetooth түзмөгү жупташа албайт. | Радио Bluetooth режиминде эмес, түзмөк өтө алыс же башка түзмөк менен жупташып турат. | Ensure radio is in Bluetooth mode. Move device closer. Disconnect from other Bluetooth devices. |
| Динамиктен үн жок. | Volume too low, headphones connected, or Line Out connected. | Increase volume. Disconnect headphones or Line Out cable. |
Техникалык шарттар
| Өзгөчөлүк | Спецификация |
|---|---|
| Бренд | Аудизио |
| Модель номери | Парма |
| Түс | Кара |
| Радио топтору колдоого алынат | DAB, DAB+, FM |
| Байланыш технологиясы | Bluetooth, USB |
| Дисплей | 2 дюймдук TFT түстүү дисплей |
| Динамик чыгаруу күчү | 15 Ватт |
| Power Source | USB 5V (adapter not included), 4x AAA Batteries (not included) |
| Наушник уясы | 3.5мм |
| Line Out | 3.5мм |
| Өлчөмдөрү (L x W x Y) | 155 x 45 x 115 мм |
| Салмагы | 0.4 кг |
Кепилдик жана колдоо
For warranty information and technical support, please refer to the documentation provided with your purchase or visit the official Audizio website. Information regarding spare parts availability and software updates is not available in this manual.
Ask a question about this manual
Ask about setup, troubleshooting, compatibility, parts, safety, or missing instructions. Manuals+ will review the question and use this page’s manual context to help answer it.