
1. Продукт бүтүп калдыview
The KUIDAMOS DSO FNIRSI PRO is a portable digital oscilloscope designed for various measurement tasks. It features a 2.4-inch LCD display, a real-time sampling rate of up to 20MS/s, and an analog bandwidth of 5MHz. This device is equipped with a built-in 1200mAh rechargeable lithium battery, offering approximately 3 hours of continuous operation. It supports waveform storage and management, making it suitable for both maintenance and research and development applications.
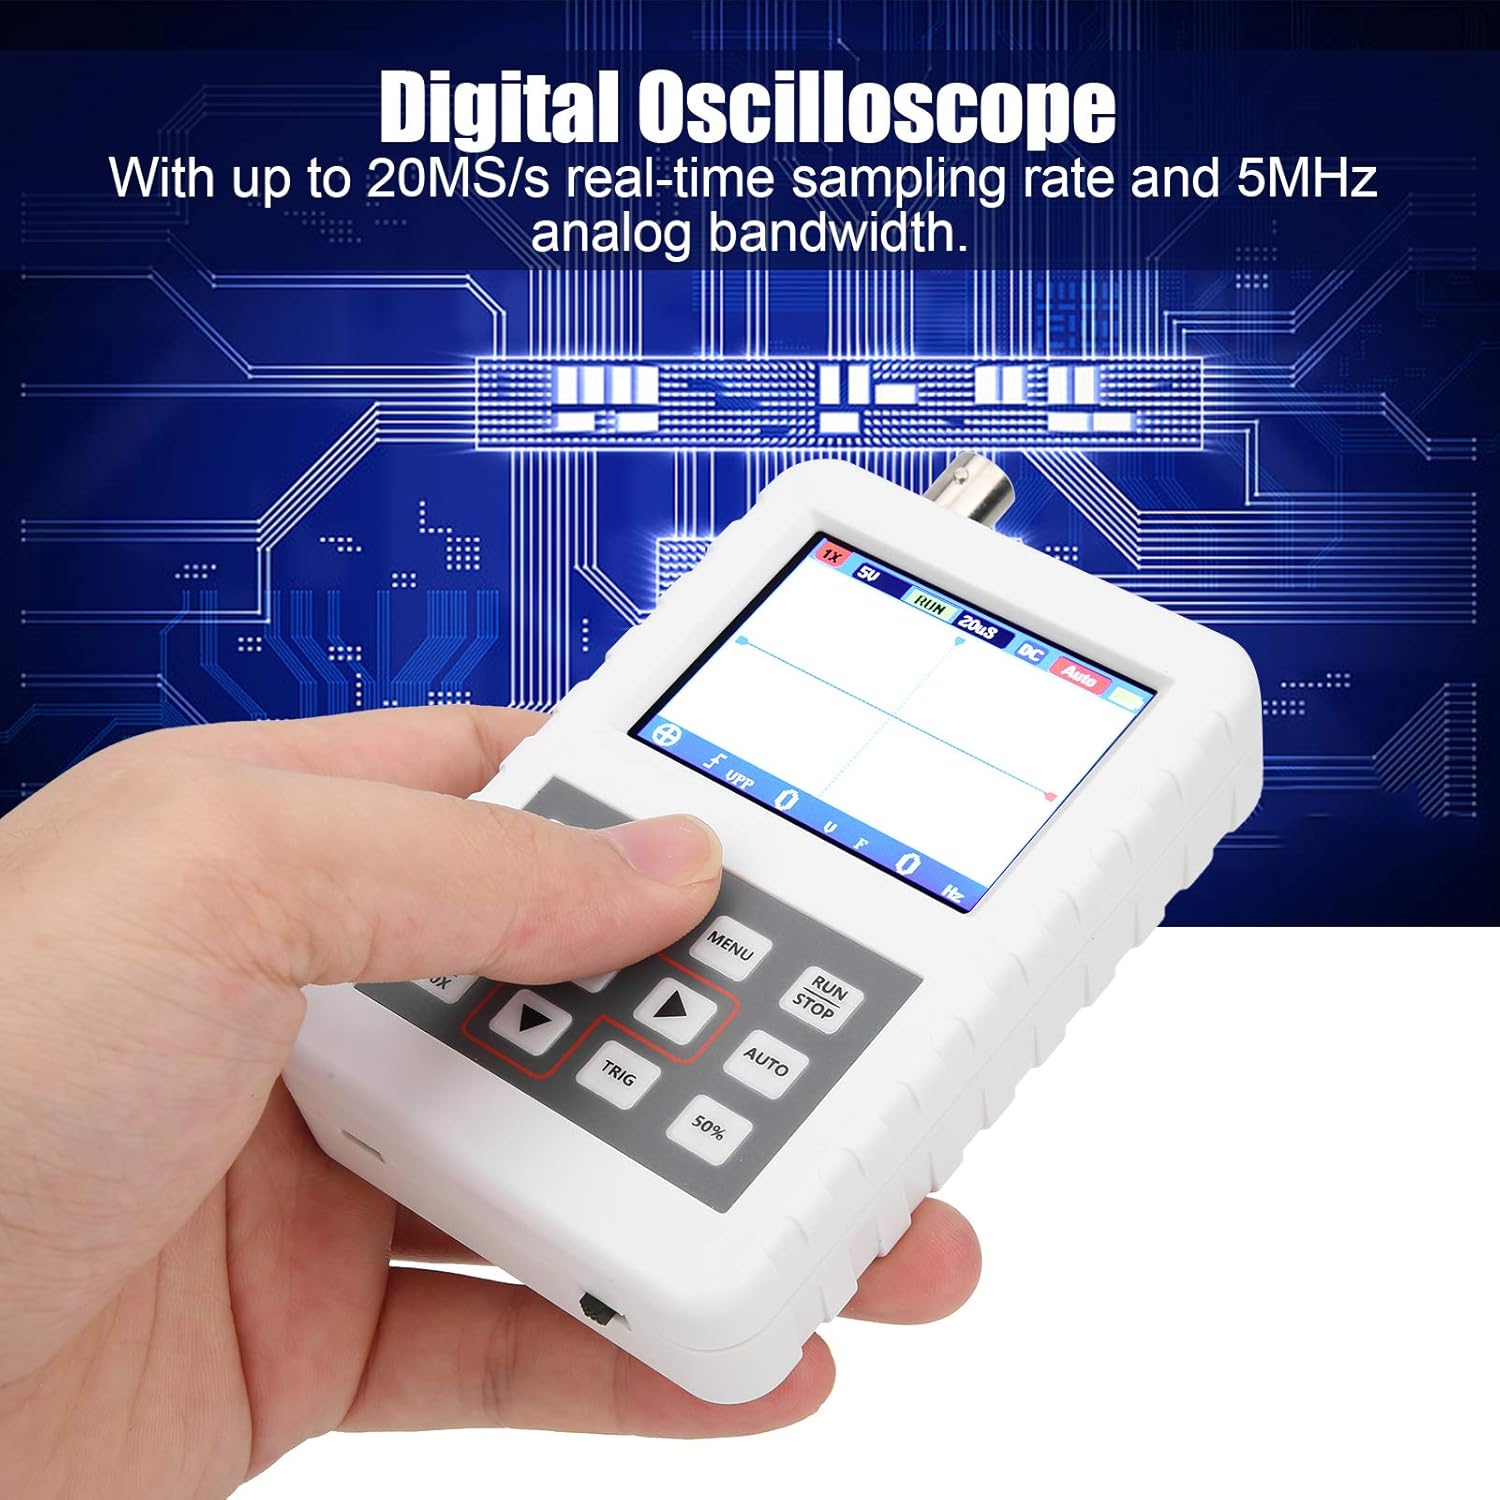
Image 1.1: The DSO FNIRSI PRO Digital Oscilloscope, highlighting its 20MS/s sampling rate and 5MHz analog bandwidth.

Image 1.2: The oscilloscope's 2.4-inch HD LCD screen with 320 x 240 resolution for clear waveform display.

Сүрөт 1.3: Алдыңкы жана арткы views of the DSO FNIRSI PRO, illustrating its physical layout.
2. Пакеттин мазмуну
Төмөндө тизмеленген нерселердин баары пакетиңизге камтылганын текшериңиз:
- 1 x DSO FNIRSI PRO Digital Oscilloscope
- 1 x Matching Probe
- 1 x USB Data Line
- 1 х Колдонуучунун колдонмосу (бул документ)
3. Баштапкы орнотуу
3.1 Аппаратты заряддоо
Before first use, fully charge the oscilloscope. Connect the provided USB data line to the device's charging port and to a 5V/1A, 2A, 3A, or 4A USB power adapter. The built-in 1200mAh lithium battery can be charged continuously for approximately 3 hours.
3.2 Зондду туташтыруу
Connect the matching probe to the BNC connector on the top of the oscilloscope. Ensure a secure connection by twisting the probe connector clockwise until it locks into place.
3.3 Күйгүзүү/өчүрүү
To power on the device, press and hold the power button (usually located on the side or bottom) for a few seconds until the screen illuminates. To power off, press and hold the power button again until the device shuts down.
4. Иштөө нускамалары
4.1 Башкаруу элементтери жана интерфейс
The oscilloscope features a user-friendly interface with several buttons for navigation and function control.

Image 4.1: Operating the DSO FNIRSI PRO, showing the placement of control buttons.
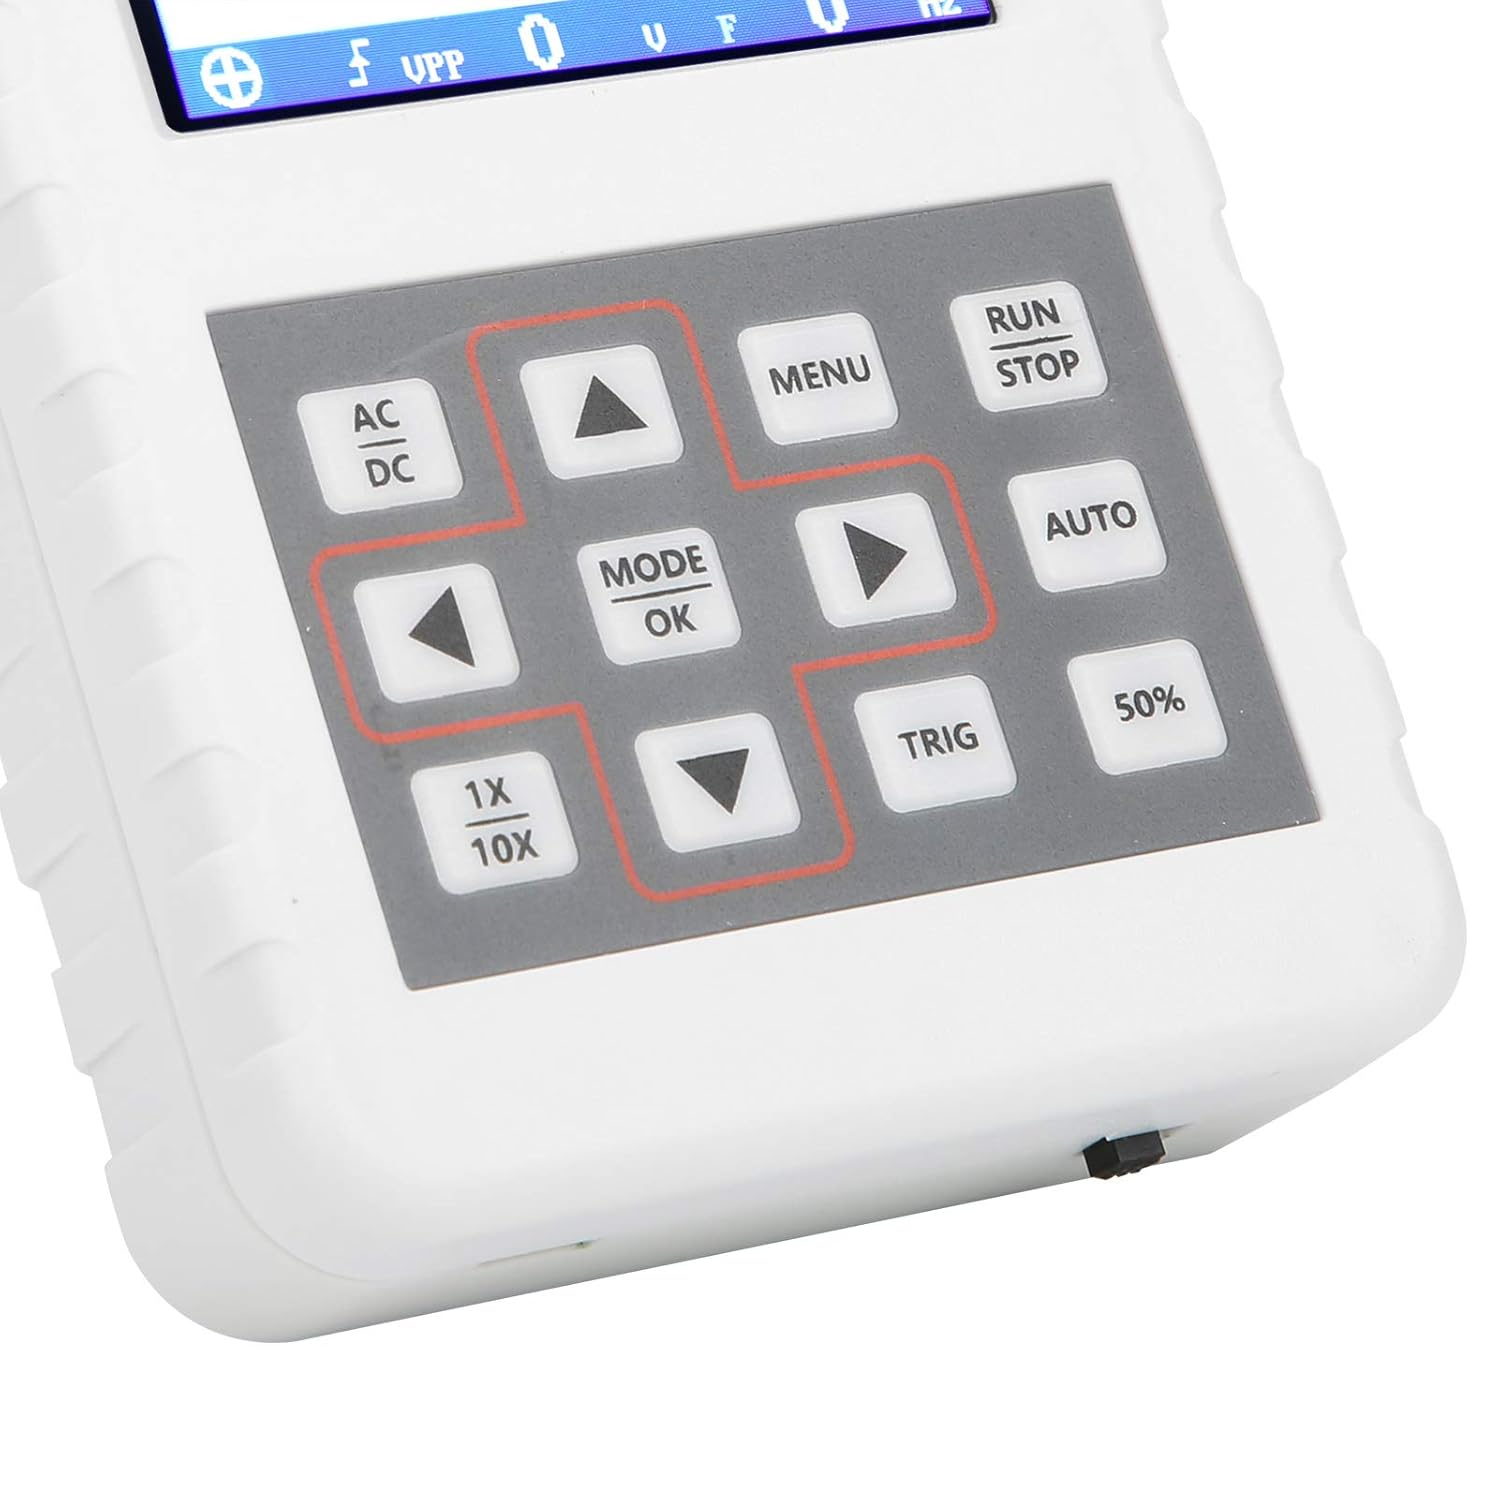
Сүрөт 4.2: Детальдуу view of the oscilloscope's control panel.
- МЕНЮ: Орнотуулар жана функциялар үчүн негизги менюга кирет.
- RUN/STOP: Starts or pauses waveform acquisition.
- АВТО: Automatically adjusts settings for optimal waveform display.
- TRIG: Триггер деңгээлин тууралайт.
- 50%: Sets the trigger level to 50% of the waveform ampжарыктык.
- AC/DC: Toggles between AC and DC coupling modes.
- 1X/10X: Sets the oscilloscope's input attenuation to match the probe's setting.
- MODE/OK: Confirms selections or changes modes.
- Жебе баскычтары (Өйдө, Төмөн, Солго, Оңго): Менюларды чабыттоо жана параметрлерди тууралоо.
4.2 Probe Attenuation Settings
It is critical to match the probe's attenuation setting with the oscilloscope's input setting to ensure accurate measurements.
- үчүн 1X measurement (0-40V): Set both the physical switch on the probe and the 1X/10X button on the oscilloscope to the 1X позиция.
- үчүн 10X measurement (40-800V): Set both the physical switch on the probe and the 1X/10X button on the oscilloscope to the 10X позиция.
4.3 Measurement Modes and Triggering
The oscilloscope supports various trigger modes to stabilize waveform display:
- Бойдок: Captures a single waveform event and then stops.
- Кадимки: Captures a waveform only when a trigger condition is met.
- Авто: Continuously acquires waveforms, even without a trigger, but will trigger if a signal is present.
колдонуу ТРИГ button and arrow keys to adjust the trigger level, which determines the voltage point at which the oscilloscope begins to acquire data.
4.4 Waveform Storage and Management
The device includes 16MB of built-in storage, capable of storing up to 500 waveform images. Use the file manager function to browse, view, and manage saved waveforms. This includes viewing detailed information, flipping through images, and deleting unwanted files.

Сүрөт 4.3: Мисamples of sine wave measurements at various frequencies.

Сүрөт 4.4: Мисamples of square, triangular, and sawtooth wave measurements.
5. Кароо жана тейлөө
5.1 Тазалоо
Түзмөктү жумшак, кургак чүпүрөк менен сүртүңүз. Абразивдүү тазалоочу каражаттарды же эриткичтерди колдонбоңуз, анткени алар түзмөккө зыян келтириши мүмкүн.asing or screen. Ensure the device is powered off and disconnected from any power source before cleaning.
5.2 Батареяга кам көрүү
Батареянын иштөө мөөнөтүн узартуу үчүн, бат-баттан батарейканы толук зарядсыздандырбаңыз. Аппаратты узак мөөнөткө сактасаңыз, аны болжол менен 50% кубаттап, бир нече ай сайын кайра заряддаңыз.
5.3 Сактоо
Store the oscilloscope in a cool, dry place, away from direct sunlight, extreme temperatures, and high humidity. Keep it protected from dust and physical impact.
6. Кыйынчылыктарды
- Issue: Abnormal measured data.
Чечим: Check the probe's attenuation switch (1X or 10X) and ensure it matches the setting on the oscilloscope (using the 1X/10X button). If the probe is set to 10X and the oscilloscope is set to 1X, the device will not be damaged, but the data displayed will be incorrect. - Issue: Device does not power on.
Чечим: Ensure the battery is sufficiently charged. Connect the device to a power source using the USB data line and allow it to charge for at least 30 minutes before attempting to power it on again. - Issue: Screen is blank or frozen.
Чечим: Try performing a soft reset by pressing and holding the power button for an extended period (e.g., 10-15 seconds) until the device powers off, then power it back on. If the issue persists, ensure the battery is charged.
7. Техникалык шарттар
| Өзгөчөлүк | Спецификация |
|---|---|
| Продукт модели | DSO FNIRSI PRO |
| Продукт материалы | ABS |
| Каналдардын саны | 1 |
| Screen Size | Болжол менен 6.1см / 2.4in |
| Screen Resolution | 320 x 240 |
| Дисплей түрү | LCD экран |
| Аналогдук өткөрүү жөндөмдүүлүгү | 5 МГц |
| Максималдуу С.ampling Rate | 20MSps |
| Trigger Mode | Жалгыз/Кадимки/Авто |
| Толкун формасын сактоо | 16MB (up to 500 waveform pictures) |
| Камтылган батарея | Литий батареясы 1200 мАч |
| Күтүү убактысы | 3 саат |
| Заряддоо киргизүү | 5V/1A/2A/3A/4A |
| Өндүрүүчү | KUIDAMOS |
| Келип чыккан өлкө | АКШ |
| Элемент бөлүгүнүн номери | KUIDAMOStgaix9hwck |
8. Кепилдик жана Кардарларды колдоо
For warranty information, technical support, or service inquiries, please refer to the documentation provided with your purchase or contact the seller directly. Keep your purchase receipt as proof of purchase for any warranty claims.