
Ferm WSM 1009
Ferm WSM 1009 Electric Wall Chaser User Manual
Model: WSM 1009
1. Киришүү
Thank you for choosing the Ferm WSM 1009 Electric Wall Chaser. This manual provides essential information for the safe and efficient operation, maintenance, and troubleshooting of your new tool. Please read this manual thoroughly before first use and keep it for future reference.
1.1. Максаттуу колдонуу
The Ferm WSM 1009 Electric Wall Chaser is designed for cutting grooves in concrete, brick, and similar masonry materials for electrical wiring, plumbing pipes, air conditioning cables, camera cables, and other installation purposes. It is suitable for both professional and DIY applications.
1.2. Жалпы коопсуздук нускамалары
Always observe general safety precautions when operating power tools. This includes wearing appropriate personal protective equipment (PPE) such as safety glasses, hearing protection, and dust masks. Ensure the work area is well-lit and free from obstructions. Disconnect the tool from the power supply before making any adjustments or changing accessories.
2. Продукт бүтүп калдыview жана компоненттер
Familiarize yourself with the main components of your Ferm WSM 1009 Electric Wall Chaser.
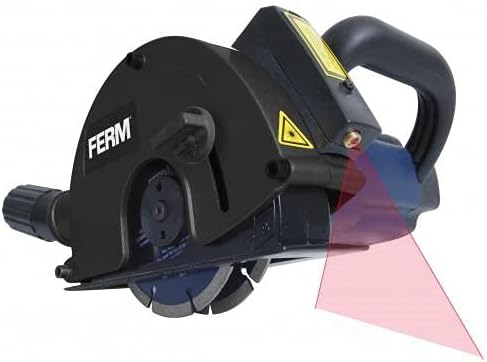
Сүрөт 2.1: Алдыңкы view of the Ferm WSM 1009 Electric Wall Chaser, showing the main body, handle, and the red laser guide lines projected forward for precise cutting.

2.2-сүрөт: Каптал view of the wall chaser, highlighting the ergonomic handle and the dust extraction port at the rear. The laser guide is visible on top.
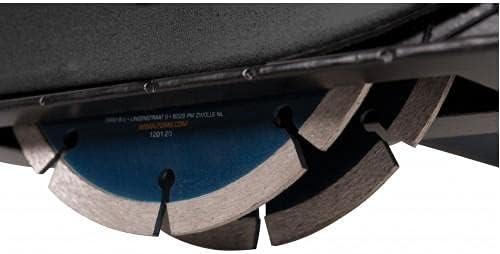
2.3-сүрөт: Детальдуу view of the dual diamond cutting blades, showing their robust construction and how they are mounted for creating parallel grooves.
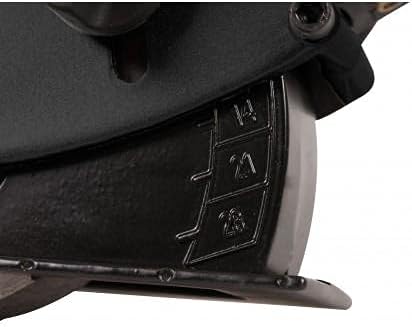
Figure 2.4: Close-up of the depth adjustment mechanism, clearly showing the numerical markings (14, 21, 28) for setting the desired cutting depth in millimeters.
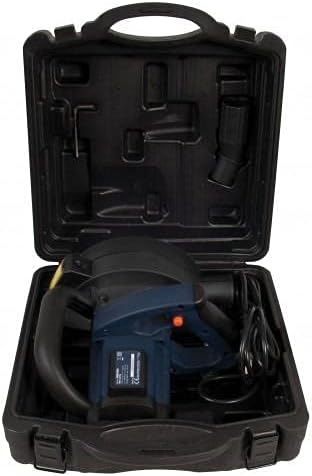
Figure 2.5: The Ferm WSM 1009 Electric Wall Chaser neatly packed inside its durable carrying case, along with accessories like the dust extraction adapter.
Негизги компоненттер:
- Негизги орган
- Ergonomic Handle with Soft Grip
- Power Switch
- Тереңдикти жөнгө салуу баскычы
- Cutting Blades (Diamond Discs)
- Laser Guide System
- Чаң чыгаруу порту
- Негизги табак
- Power Cable (3m length)
- Ташуу кутусу
3. Техникалык шарттар
| Спецификация | Нарк |
|---|---|
| Модель номери | WSM 1009 |
| Power Input | 1700 Ватт |
| Жүк жок ылдамдык | 4000 об/мин |
| Диск диаметри | 5 inch (approx. 125 mm) |
| Макс. Кесүү тереңдиги | 28 мм |
| Кесүү туурасы | 14-29 мм |
| Power Source | Электр зымдары |
| Кабелдин узундугу | 3 метр |
| Продукт Салмагы | 7.73 килограмм |
| Пакеттин өлчөмдөрү | 36.6 x 35.4 x 21.8 см |
4. Орнотуу жана даярдоо
4.1. таңгактан чыгаруу
Carefully remove the wall chaser and all accessories from the carrying case. Check for any damage that may have occurred during transit. Keep the packaging for future storage or transport.
4.2. Blade Installation/Adjustment
Ensure the tool is unplugged before handling the blades. The WSM 1009 uses two diamond cutting blades. Refer to the tool's markings for correct blade rotation direction. Adjust the spacing between the blades to achieve the desired cutting width (14-29 mm) using the provided spacers and wrench.
4.3. Setting Cutting Depth
The cutting depth can be adjusted up to 28 mm. Use the depth adjustment knob to set the desired depth. The scale on the tool indicates common depth settings (e.g., 14mm, 21mm, 28mm). Ensure the setting is securely locked before operation.
4.4. Чаң соргучту туташтыруу
For a healthy and safe working environment, connect a suitable dust extraction system to the dust extraction port of the wall chaser. This will significantly reduce airborne dust during operation.
4.5. Laser Guide Batteries
The laser guide requires batteries (included). Install them according to the polarity markings in the battery compartment. The laser guide assists in achieving ultimate precision during cutting.
5. Иштөө нускамалары
5.1. Баштоодон мурун
- Always wear appropriate PPE (safety glasses, hearing protection, dust mask).
- Электр кабелинин бузулганын текшериңиз.
- Ensure the work surface is stable and the material to be cut is securely fixed.
- Mark the cutting line clearly on the material.
5.2. Куралды ишке киргизүү
Connect the power cable to a suitable power outlet. Hold the tool firmly with both hands using the ergonomic handle. Press the power switch to start the motor. Allow the blades to reach full speed before engaging with the material.
5.3. Кесүү
Position the base plate of the wall chaser flat against the material. Align the laser guide with your marked cutting line. Slowly and steadily push the tool forward along the line. Do not apply excessive force; let the tool's speed and power do the work. Maintain a consistent feed rate for optimal results.
5.4. Куралды токтотуу
Release the power switch to stop the motor. Wait for the blades to come to a complete stop before setting the tool down or performing any adjustments.
6. Техникалык тейлөө жана сактоо
6.1. Тазалоо
After each use, disconnect the tool from the power supply. Use a brush or compressed air to remove dust and debris from the tool, especially around the motor vents and blade area. Do not use water or solvents.
6.2. Бычакты алмаштыруу
Worn or damaged blades should be replaced immediately. Refer to the blade installation section for proper replacement procedures. Always use genuine Ferm replacement blades or equivalent quality diamond discs.
6.3. Сактоо
Store the wall chaser in its original carrying case in a dry, secure place, out of reach of children. Protect it from direct sunlight and extreme temperatures.
7. Кыйынчылыктарды
| Көйгөй | Мүмкүн себеп | Чечим |
|---|---|---|
| Курал башталбайт | No power supply; Damaged power cable; Faulty switch | Check power connection; Inspect cable for damage; Contact service center |
| Ашыкча термелүү | Loose blades; Damaged blades; Unbalanced blades | Tighten blade nuts; Replace damaged blades; Ensure blades are correctly installed |
| Начар кесүү көрсөткүчү | Worn blades; Incorrect cutting depth; Overloading the tool | Replace blades; Adjust cutting depth; Reduce feed rate |
| Лазердик жол көрсөткүч иштебей жатат | Dead batteries; Misaligned laser | Replace batteries; Consult service manual for laser alignment (if applicable) |
8. Кепилдик маалыматы
Ferm products are manufactured to high quality standards and are guaranteed against defects in materials and workmanship for a period specified by your local retailer or distributor from the date of purchase. This warranty does not cover damage caused by misuse, abuse, normal wear and tear, or unauthorized repairs. Please retain your proof of purchase for warranty claims.
9. Кардарларды колдоо кызматы
For technical assistance, spare parts, or warranty claims, please contact your local Ferm dealer or authorized service center. You can also visit the official Ferm webкөбүрөөк маалымат жана колдоо булактары үчүн сайт.
Please note: Contact details may vary by region. Refer to your purchase documentation for specific local support information.
Ask a question about this manual
Ask about setup, troubleshooting, compatibility, parts, safety, or missing instructions. Manuals+ will review the question and use this page’s manual context to help answer it.