
Saooer BLUE 20A
Saooer 20A Solar Charge Controller User Manual
Model: BLUE 20A
Introduction
This manual provides essential information for the safe and efficient operation of your Saooer 20A Solar Charge Controller. This intelligent regulator is designed to manage the working of solar panels and batteries in a solar system, featuring dual USB ports for mobile device charging. It is compatible with 12V and 24V systems and includes multiple protection functions to ensure system efficiency and prolong battery lifespan.

Сүрөт 1: Алдыңкы view of the Saooer 20A Solar Charge Controller.
Коопсуздук нускамалары
- Ensure all connections are correct before powering on the controller. Incorrect wiring can damage the device or connected components.
- The controller is designed for indoor use or in a protected environment. Avoid exposure to direct sunlight, high temperatures, or moisture.
- Контроллерди өз алдынча бөлүктөргө бөлүүгө же оңдоого аракет кылбаңыз. Тейлөө үчүн квалификациялуу адистерге кайрылыңыз.
- Балдар жетпеген жерде сактаңыз.
- This controller is only suitable for lead-acid batteries: OPEN, AGM, GEL. Do not use with other battery types like Lithium-ion or LiFePO4, as this may cause damage or safety hazards.
- Always connect the battery first, then the solar panel, and finally the load. When disconnecting, reverse the order: disconnect the load, then the solar panel, and finally the battery.
Продукт өзгөчөлүктөрү
- Automatic System Voltage Идентификация: Automatically detects 12V/24V system voltage.
- PWM Charging: Efficient Pulse Width Modulation charging mode.
- Кош USB порттары: Provides 5V/2A output for charging mobile devices.
- LCD дисплей: Clear display of status and data, allowing for convenient mode switching and parameter configuration.
- Бир нече коргоо функциялары: Includes short-circuit protection, open-circuit protection, reverse protection, and over-load protection.
- Жөнгө салынуучу Параметрлер: User-adjustable charge and discharge parameters.
- Температураны компенсациялоо: Automatic temperature compensation for optimal charging.
Орнотуу жана орнотуу
Follow these steps carefully to install your solar charge controller. Incorrect installation can lead to damage or malfunction.
- Зымдарды даярдоо: Ensure all wires are properly stripped and have appropriate connectors if necessary. Use wires of sufficient gauge for your system's current.
- Батареяны туташтыруу: Connect the battery to the charge regulator first. Observe correct polarity (+ to + and - to -). The controller will automatically recognize the battery voltage (12V же 24V).
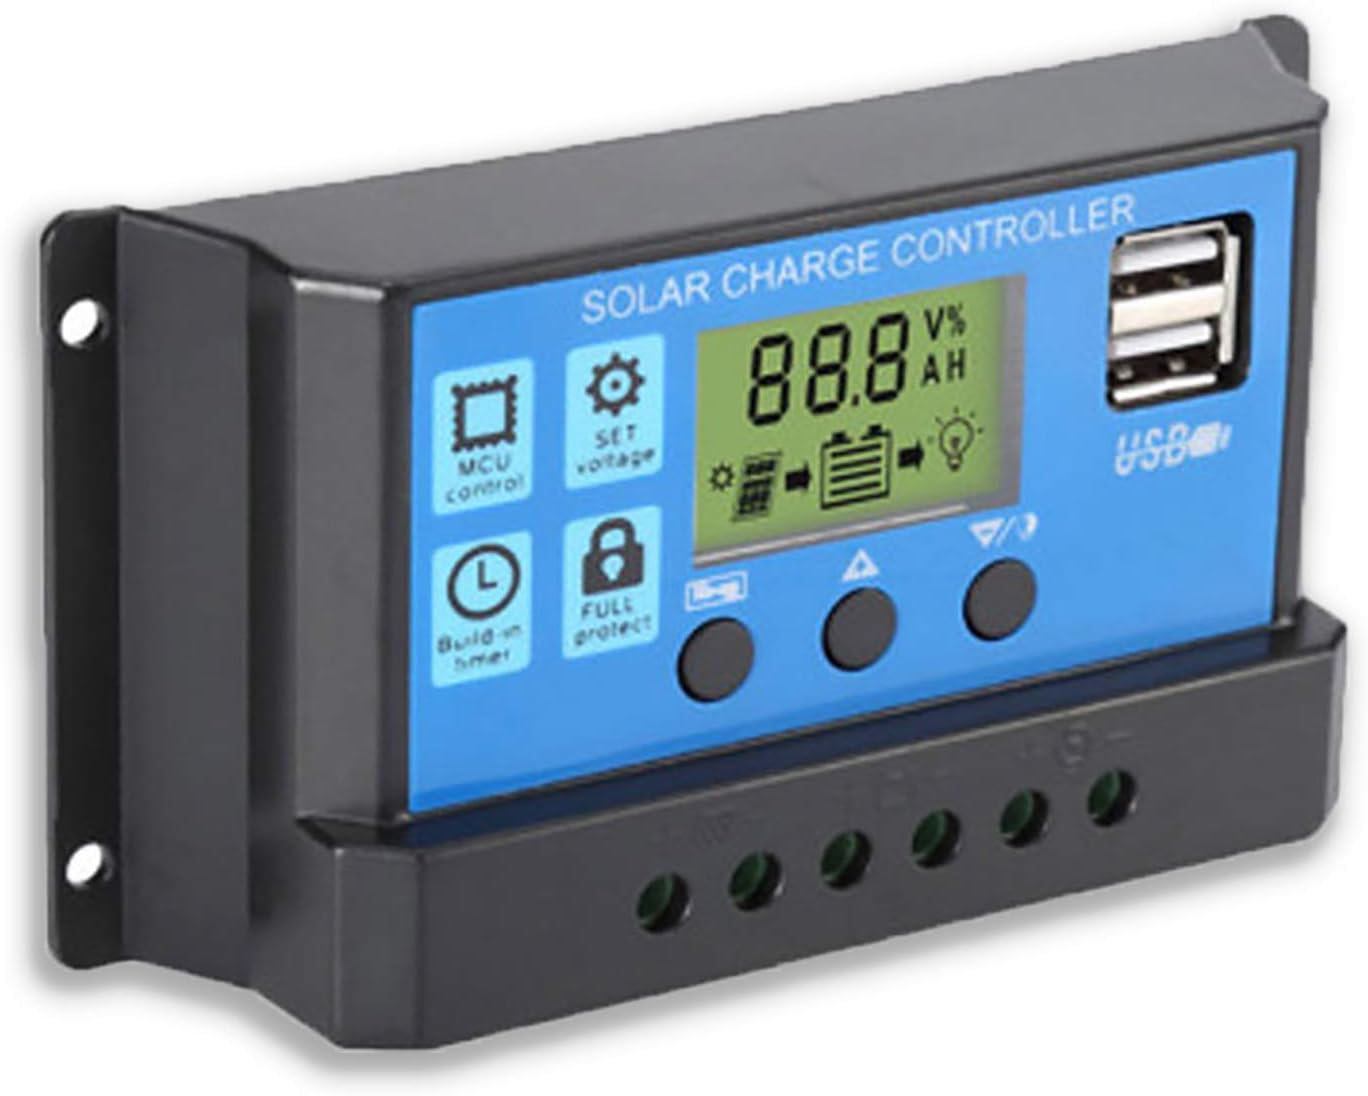
2-сүрөт: Каптал view showing the connection terminals for battery, solar panel, and load.
- Күн панелин туташтыруу: Connect the solar panel to the solar charge controller. Ensure correct polarity.
- Жүктү туташтыруу: Connect the consumer or load to the charge controller regulator. Ensure correct polarity.
Маанилүү эскертүү: Always connect the battery first, then the solar panel, and finally the load. When disconnecting the controller, please remove the solar panel, then the load, and finally the battery. This sequence helps the controller recognize the battery voltage correctly and prevents damage.
Иштөө нускамалары
LCD дисплей жана баскычтар

3-сүрөт: Бурчтуу view showing the LCD display and control buttons.
The controller features an LCD display and three buttons for operation:
- Меню баскычы: Used to cycle through display modes and enter parameter setting mode.
- Өйдө баскычы: Маанилерди жогорулатуу же менюларда өйдө багыттоо үчүн колдонулат.
- Төмөн баскычы: Маанилерди азайтуу же менюларда ылдый багыттоо үчүн колдонулат.
Дисплей режимдери
Press the Menu button to cycle through the following display modes:
- Батарея Voltage (V)
- Solar Panel Voltage (V)
- Жүктөө агымы (A)
- Battery Temperature (°C)
- Заряддоо ток (A)
- Разряддык ток (A)
- Load Working Mode (24H, 0-23H, 0H)
Параметр орнотуулары
To enter parameter setting mode, press and hold the Menu button for 5 seconds. Use the Up and Down buttons to adjust values, and the Menu button to confirm and move to the next parameter. Press and hold Menu again to exit setting mode.
| Параметр | Description | Default (12V) | Range (12V) |
|---|---|---|---|
| B01/B02/B03 | Battery Type Selection (B01=Lead-acid, B02=Lithium Ion, B03=LiFePO4) | B01 | Жок |
| Charge Off Voltage | Тtage at which charging stops | 14.4V | 13.0В - 15.0В |
| Discharge Reconnect Voltage | Тtage at which load reconnects after low voltage ажыратуу | 12.6V | 11.0В - 13.5В |
| Discharge Stop Voltage | Тtage at which load disconnects to protect battery | 10.7V | 9.0В - 11.5В |
| Load Working Time | Timer for load output (24H, 0-23H, 0H) | 24H | Жок |
Note: For 24V systems, multiply the 12V values by two.
Техникалык тейлөө
- Үзгүлтүксүз текшерүү: Мезгил-мезгили менен бардык зымдарды туташтыргычтын бекемдигин жана коррозиясын текшерип туруңуз.
- Тазалык: Keep the controller clean and free from dust. Use a dry cloth for cleaning.
- Вентиляция: Ашыкча ысып кетүүнүн алдын алуу үчүн контроллердин айланасында жетиштүү желдетүүнү камсыз кылыңыз.
- Батареянын ден соолугу: Монитор батареянын көлөмүtage and health regularly. Replace batteries as needed.
Проблемаларды чечүү
| Көйгөй | Мүмкүн себеп | Чечим |
|---|---|---|
| Контроллер күйбөй жатат / LCD дисплей бош | Батарея туташкан эмес же поляризациясы тескери; Батареянын көлөмүtage өтө төмөн. | Check battery connections and polarity. Ensure battery has sufficient charge. |
| Solar panel not charging battery | Solar panel not connected or reverse polarity; Insufficient sunlight; Damaged solar panel. | Check solar panel connections and polarity. Ensure panel is in direct sunlight. Test solar panel output. |
| Жүк иштебейт | Load not connected or reverse polarity; Battery voltage too low (low voltage disconnect); Overload protection activated. | Check load connections and polarity. Charge battery. Reduce load or check for short circuit. |
| USB порттору заряддалбай жатат | Батарея көлөмүtage too low; Device not compatible; Faulty USB cable. | Ensure battery is charged. Try a different device or cable. |
| Controller gets hot | Ашыкча жүктөө; Начар желдетүү. | Reduce load. Ensure controller has adequate airflow and is not in an enclosed space. |
Техникалык шарттар
| Өзгөчөлүк | Деталь |
|---|---|
| Модел | КӨК 20А |
| System Voltage | 12V / 24V Auto |
| Максималдуу заряд/разряд ток | 20A |
| USB чыгышы | Dual USB, 5V/2A (Max) |
| Батарея түрү шайкештиги | Lead-acid (OPEN, AGM, GEL) |
| Продукциянын өлчөмдөрү | 5.12 x 2.76 x 1.5 дюйм (133 мм x 70 мм x 38 мм болжол менен) |
| Элемент Салмагы | 5 унция |
| Дисплей | LCD |
| Иштөө температурасы | -35°Cден +60°Cге чейин |

Figure 4: Product dimensions of the solar charge controller.
Кепилдик жана колдоо
For warranty information or technical support, please contact the manufacturer, Saooer, through their official channels. Refer to your purchase documentation for specific warranty terms and contact details.
Өндүрүүчү: Saooer
ASIN: B095764VB7
UPC: 605832982977
кире аласыз Saooer Store on Amazon көбүрөөк маалымат алуу үчүн же колдоо бөлүмүнө кайрылыңыз.
Ask a question about this manual
Ask about setup, troubleshooting, compatibility, parts, safety, or missing instructions. Manuals+ will review the question and use this page’s manual context to help answer it.